Build an HTML5 Xandr creative in Google Web Designer
This page explains how to use Google Web Designer to build HTML5 creatives that will properly track clicks in Xandr.
Open Google Web Designer.
Click CREATE NEW FILE. The Create New Blank File pop-up displays.
Click HTML from the Others menu.
Enter a Name and Title for the creative.
Select a Location and Animation Mode.
Click OK. The Create New Blank File pop-up closes.
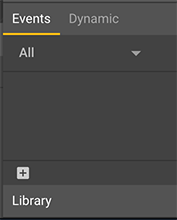
Click the + button in the lower left of Google Web Designer under the Events tab to add a new event.

A pop-up displays.
Select a target.

This will be the element of the ad that will be clickable.
Select an event.
Select one of the available options that display for the event.

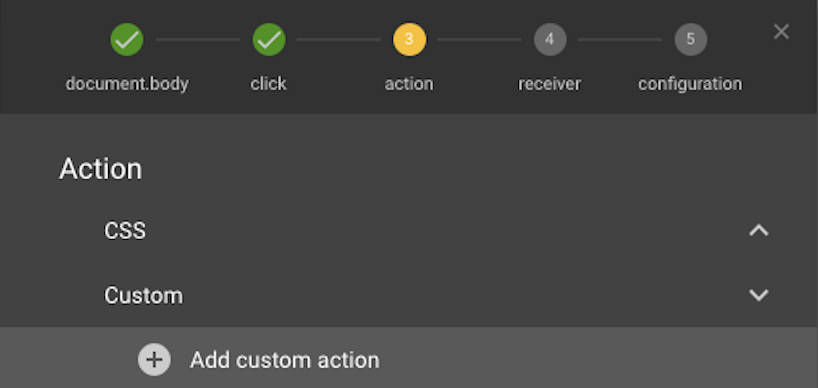
Select Custom under the action menu.
Select Add custom action.

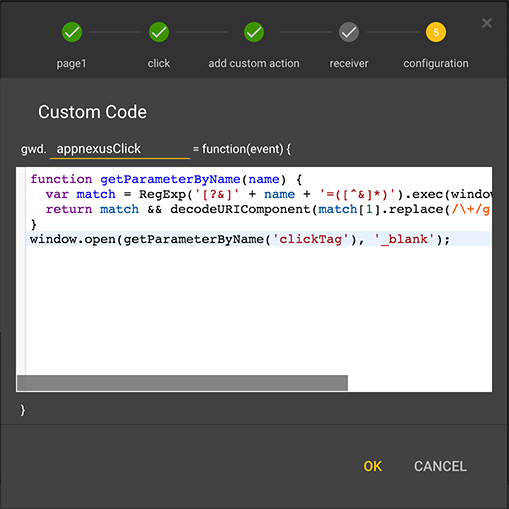
Type a unique name in the text field that displays next to "gwd." (e.g., XandrClick).
Paste the code below into the text box provided (this is your
clickTagcode).function getParameterByName(name) { var match = RegExp('[?&]' + name + '=([^&]*)').exec(window.location.search); return match && decodeURIComponent(match[1].replace(/\+/g, ' ')); } window.open(getParameterByName('clickTag'), '_blank');
Note
Since Google Web Designer has a known issue related to key commands, you must paste the code using your computer's menu bar paste option.
Click OK.
Test the creative by performing the following if necessary:
Click Preview in the upper-right of Google Web Designer to open the creative in your browser.

Add "
?clickTag=https://yoururlhere.com" in the address bar at the end of the landing page URL that you want to test.Refresh the page and click on the creative.
A new window with the landing page that you entered should open in your browser. When the creative is served, Xandr sets a value of
clickTagto Xandr' click tracker along with a redirect to the landing page URL provided in Microsoft Monetize.