Sync Rule Walk Through: Outbound System Scoping Filter User Synchronization Rule
Welcome to Part 2 of the “Sync Rule Walk Through” series. In Part 1 we talked about an inbound user synchronization rule from AD into MIM. Now that we have users in the portal, the next logical step is getting them back out. As with the inbound sync rule example, this one will be connecting to AD and, please remember, there are subtle differences between connected data sources. Also worth noting is there are two types of outbound sync rules: traditional (based on a sync policy with a set, workflow and MPR) and system scoping filter based. In this scenario, we will be focusing on the latter.
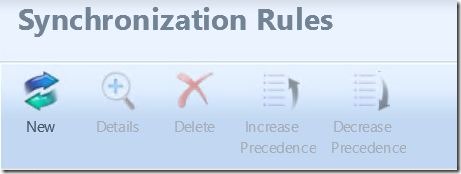
As before, click on “Administration” in the bottom left-hand corner. This will open the “Administration” screen. Here, select “Synchronization Rules”. When the “Synchronization Rules” screen opens, at the top, select “New”:
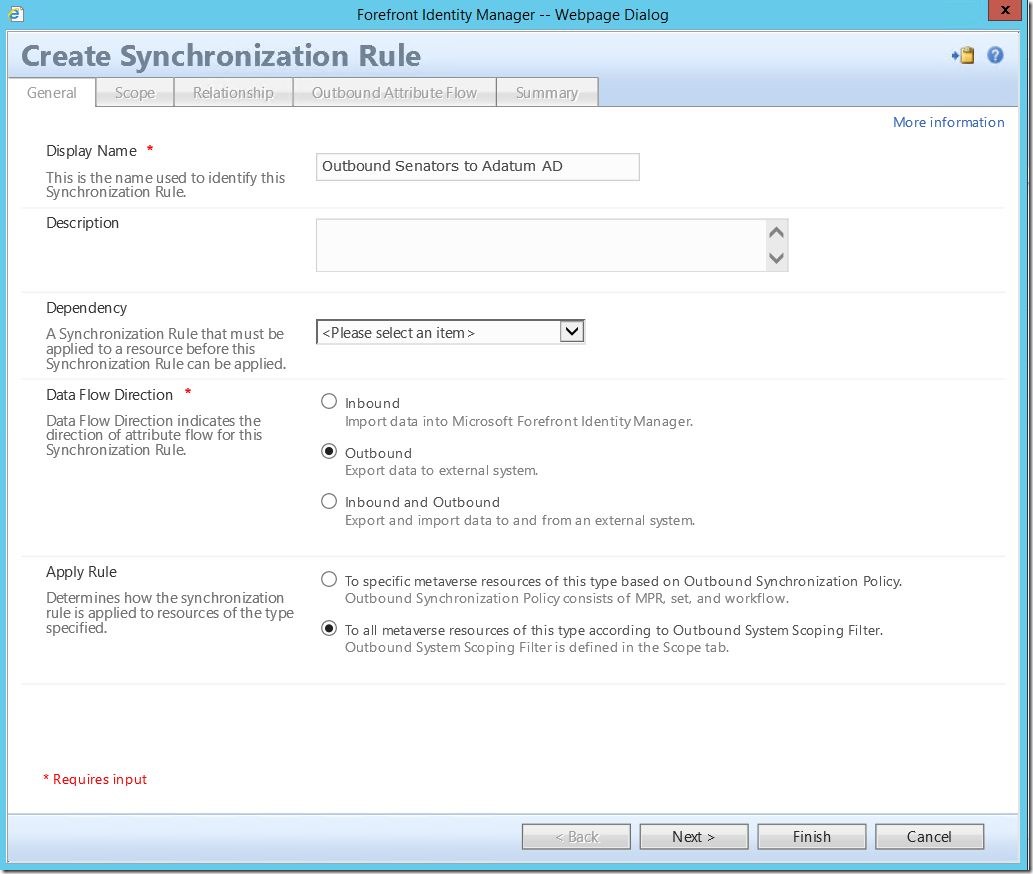
As before, enter a Display Name and, optionally, a Description. For Data Flow Direction, this time select “Outbound”. Now, we must choose how to apply; “to specific metaverse resources of this type based on Outbound Synchronization Policy” or “To all metaverse resources of this type according to Outbound System Scoping Filter”. For a discussion on the primary differences between these two, please see here. Click “Next” to continue.
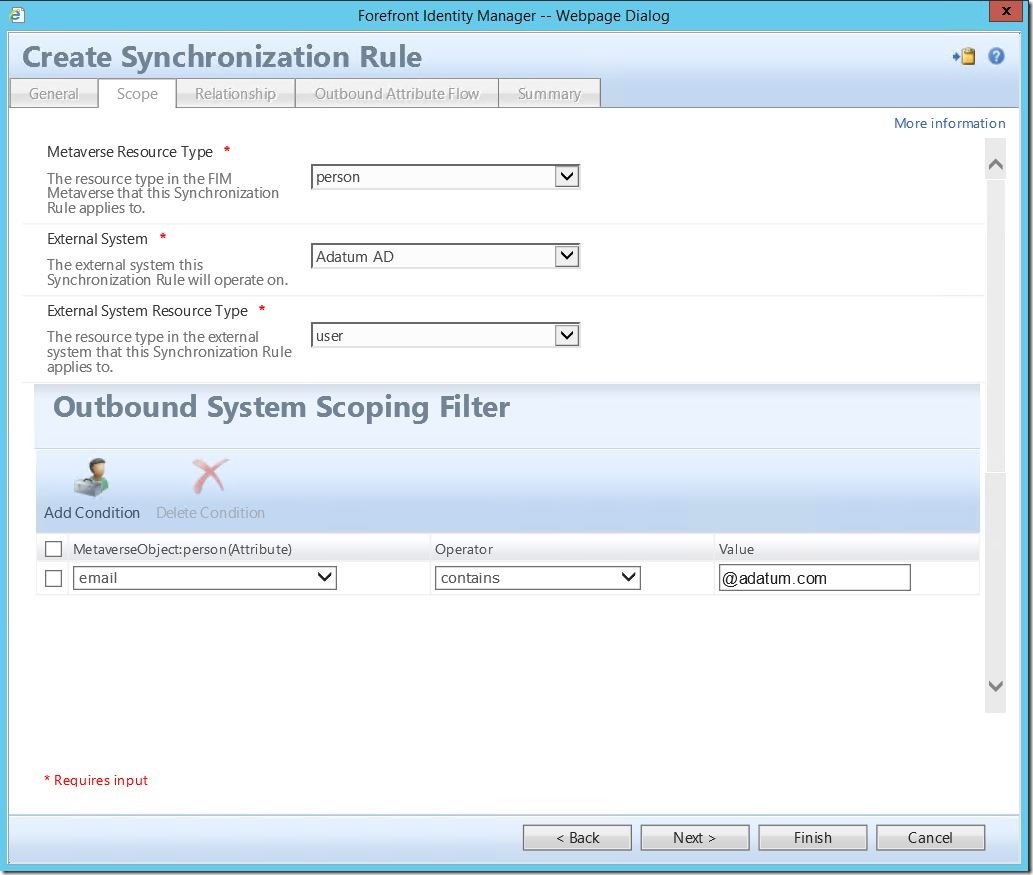
As with the ISR, we must defined the scope. In similar fashion, for Metaverse Resource Type, select “person”. For External System select your AD, and for External System Resource Type select “user”. Now, however, we must define an Outbound System Scoping Filter. This scoping filter will determine to which user objects this rule applies and, as such, which will get synced out to AD.
Here, I am using the filter “email contains @adatum.com”. The logic for this is such: during my new hire onboarding process, there are several stages where approval is required. A new employee may be hired, but prior to having their account created in AD or their mailbox created, they must complete new hire training for HR. Once that has been completed, the final box gets checked and an email adderss is created for them in the portal. Seeing as, in my environment, email address creating in MIM is the final step, I now know this user is ready to be created in AD (and anywhere else they may exist). Again, please note this will be specific to your environment. I don’t know your business or your data and can’t tell you what to use here.
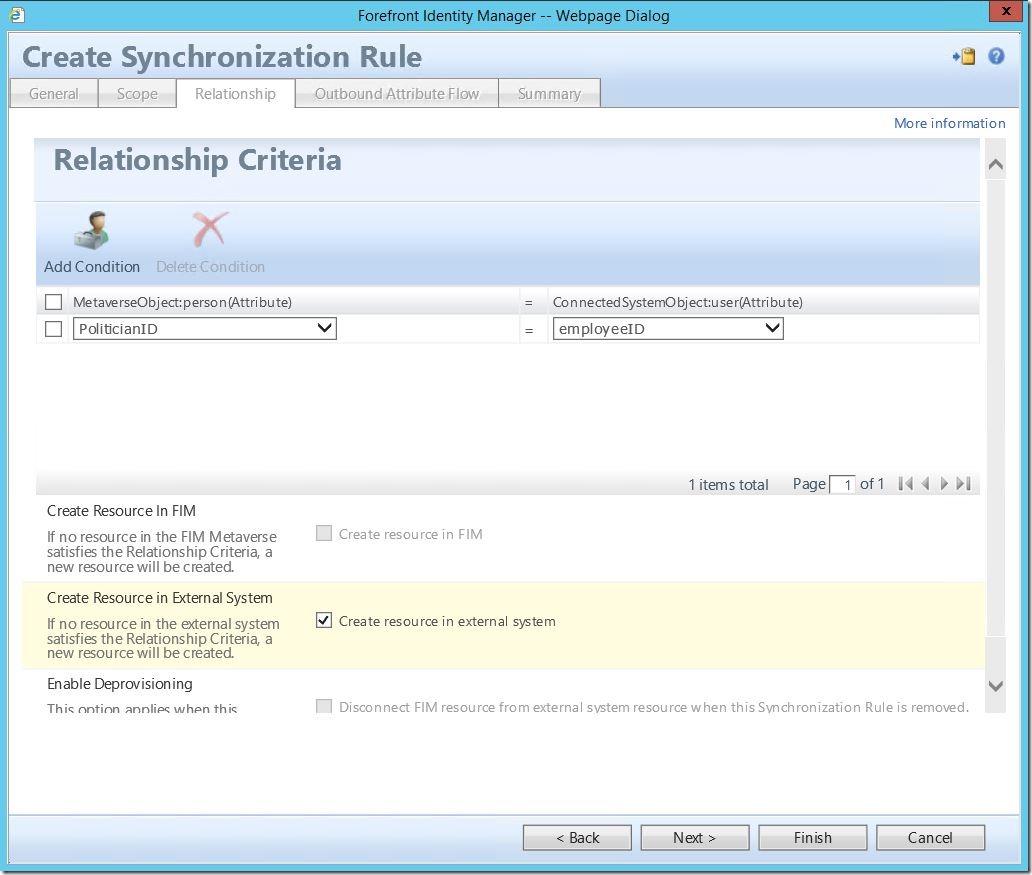
As before, we must now define the Relationship Criteria. Also as before, in this example I will be using the (custom) attribute “PoliticianID” in MIM mapped to “employeeID” in AD. Also, where we checked Create resource in FIM before, we must now check Create resource in external system. Failing to do so will result in a user not being provisioned to AD. Again, you didn’t tell it to create the object, so it didn’t (no error generated).
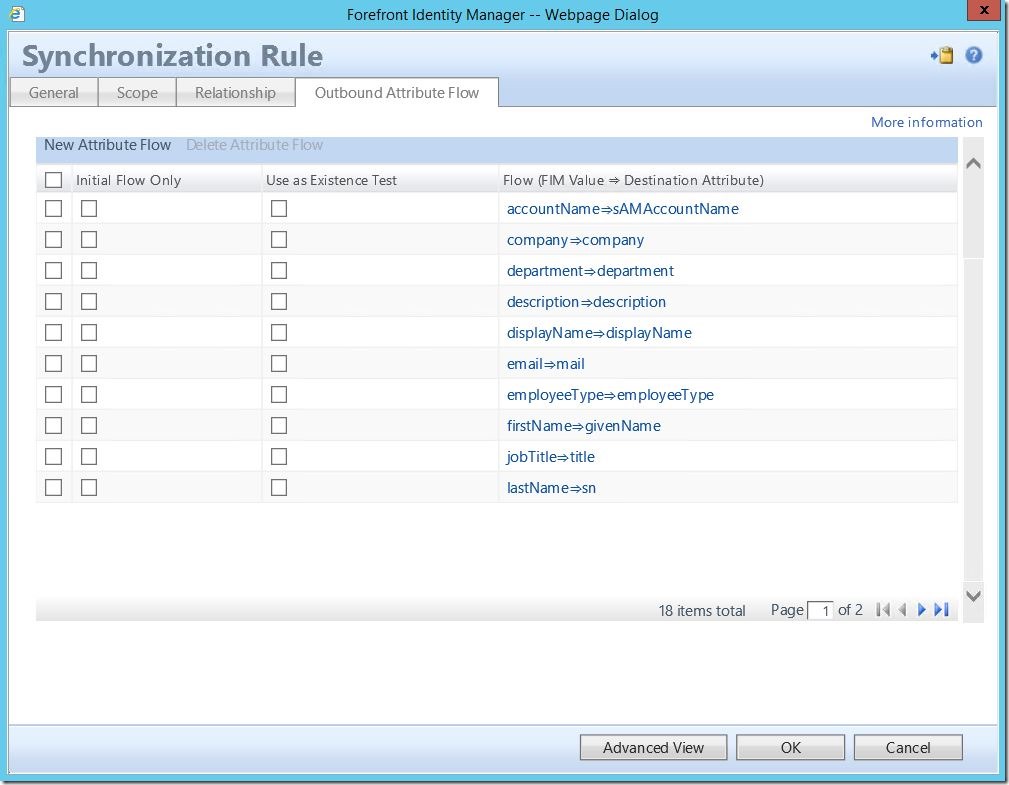
As with the ISR, attribute flows must be defined. Also, as with the ISR, please be aware of the differences in attributes between MIM and your connected data source (i.e., firstName –> givenName).
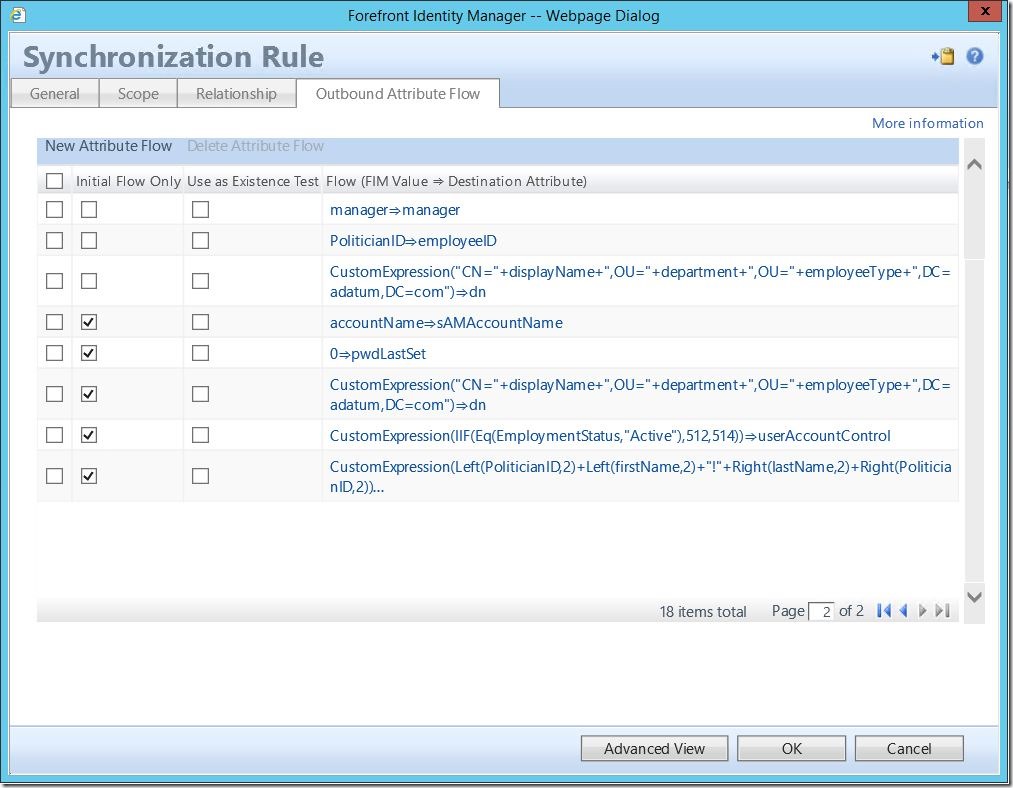
Here is a significant difference between inbound and outbound sync rules: initial flows. There are certain attributes that we should flow initially. For example, I like to flow an integer value of 0 to “pwdLastSet”. This will force my newly provisioned user to change their password the first time they login to AD. Likewise, I use a custom expression to set an initial value for “unicodePWD”. This is their default password the first time they log in to AD. The other significant point to note here is the necessity to build the dn for a newly provisioned user. This can be either a static path or, as shown below, dynamically built by a series of attributes. While I may cover this more in-depth at a later date, for the time being I will not. Again, please remember these are just example flows from my environment and are not meant to be taken as the word of law.
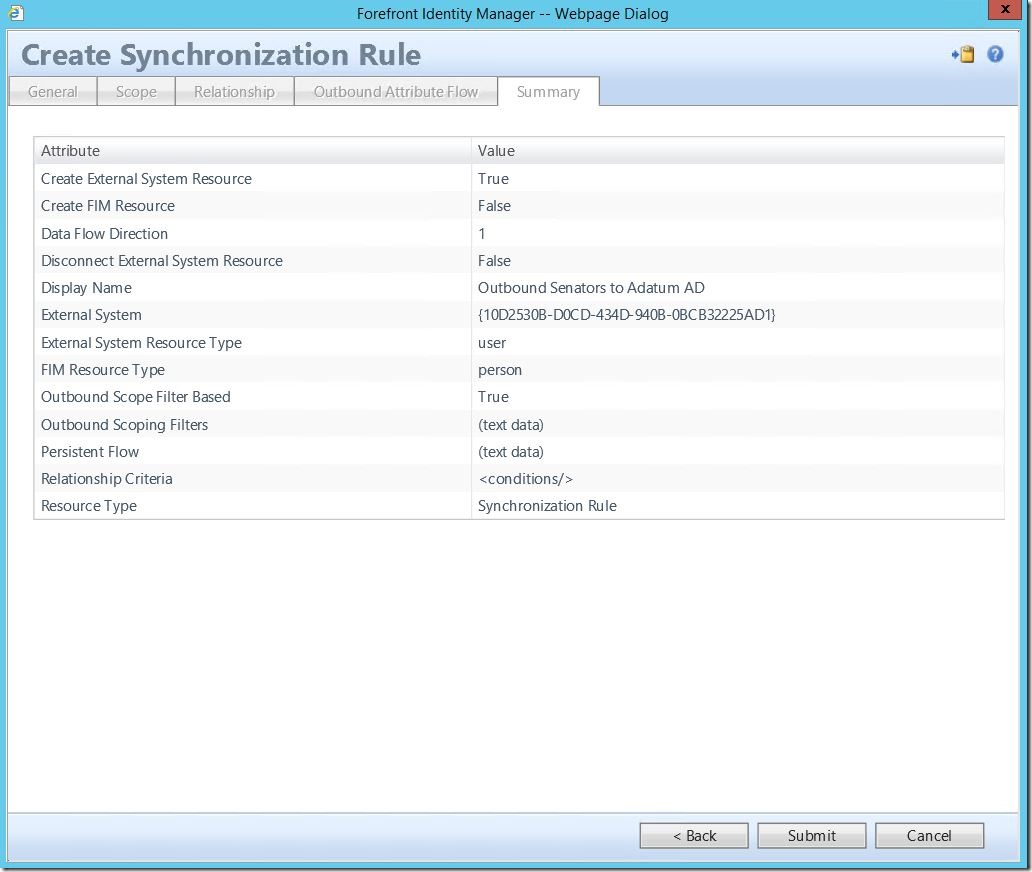
Once you have reviewed everything on the “Summary” tab, click “Submit” to create your outbound system scoping filter based OSR.
Questions? Comments? Love FIM/MIM so much you can’t even stand it?
EMAIL US!
>WE WANT TO HEAR FROM YOU<
