Build an Office Add-in with a basic first-run experience
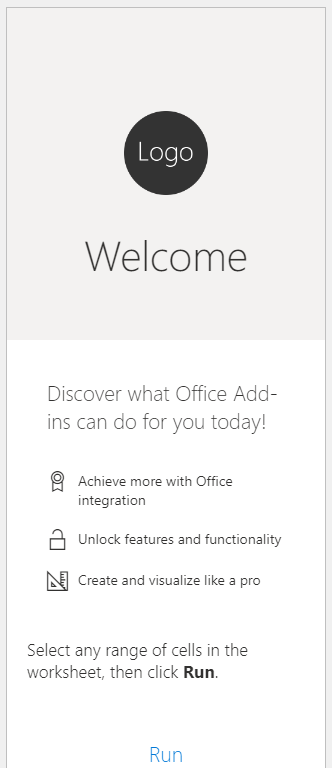
In this article, you'll walk through the process of updating a task pane add-in to include a first-run experience using the value placemat pattern. When the user runs the add-in, the add-in determines whether or not to show the first-run experience by checking local storage for a flag.
This tutorial provides instructions and screenshots for Excel but you can use a similar pattern to implement a first-run experience in other Office applications where Office Web Add-ins are supported.
Tip
If you want a completed version of this tutorial, visit the Office Add-ins samples repo on GitHub.
Prerequisites
Select the Yo Office quick start for the Office application you'd like to use.
Follow the instructions in your selected quick start. After you complete its "Try it out" section, return here to continue.
Implement the first-run experience
Update the HTML file
Be clear about the area of the UI that will be part of the first-run experience. In this tutorial, you'll create a <div> element with the id named "first-run-experience" that represents what users see only the first time they run your add-in.
Open the taskpane.html. Replace the
<main>element with the following markup, then save the file. Some notes about this markup:- The "first-run-experience"
<div>is inserted in the<main>element. It surrounds the list of Office Add-ins features. By default, this<div>isn't displayed. - The first
<p>element provides the user with instructions for using the add-in.
<main id="app-body" class="ms-welcome__main" style="display: none;"> <div id="first-run-experience" style="display: none;"> <h2 class="ms-font-xl"> Discover what Office Add-ins can do for you today! </h2> <ul class="ms-List ms-welcome__features"> <li class="ms-ListItem"> <i class="ms-Icon ms-Icon--Ribbon ms-font-xl"></i> <span class="ms-font-m">Achieve more with Office integration</span> </li> <li class="ms-ListItem"> <i class="ms-Icon ms-Icon--Unlock ms-font-xl"></i> <span class="ms-font-m">Unlock features and functionality</span> </li> <li class="ms-ListItem"> <i class="ms-Icon ms-Icon--Design ms-font-xl"></i> <span class="ms-font-m">Create and visualize like a pro</span> </li> </ul> </div> <p class="ms-font-l">Select any range of cells in the worksheet, then click <b>Run</b>.</p> <div role="button" id="run" class="ms-welcome__action ms-Button ms-Button--hero ms-font-xl"> <span class="ms-Button-label">Run</span> </div> <p><label id="item-subject"></label></p> </main>- The "first-run-experience"
If you selected an Office application besides Excel, update the first
<p>element with more appropriate instructions.
Update the JavaScript file
Update the JavaScript file to display the first-run experience if this is the first time the user is running the add-in.
Open the taskpane.js file. Replace the
Office.onReadystatement with the following code, then save the file. Some notes about this code:- It checks local storage for a key called "showedFRE". If the key doesn't exist, then show the first-run experience.
- It adds a new function called
showFirstRunExperiencethat displays the "first-run-experience"<div>added to the HTML. This function also adds the "showedFRE" item to local storage.
Office.onReady((info) => {
  if (info.host === Office.HostType.Excel) {
    document.getElementById("sideload-msg").style.display = "none";
    document.getElementById("app-body").style.display = "flex";

    // showedFRE is created and set to "true" when you call showFirstRunExperience().
    if (!localStorage.getItem("showedFRE")) {
      showFirstRunExperience();
    }

    document.getElementById("run").onclick = run;
  }
});

async function showFirstRunExperience() {
  document.getElementById("first-run-experience").style.display = "flex";
  localStorage.setItem("showedFRE", true);
}
If you selected an Office application besides Excel, update the condition of the first
ifstatement to check for your chosen Office.HostType.
Update the CSS file
Update the CSS file to ensure that the add-in UI is styled appropriately given the addition of the "first-run-experience" <div>.
Open the taskpane.css file. Replace the line
.ms-welcome__main {with the following code, then save the file..ms-welcome__main, .ms-welcome__main > div {
Try it out
Ensure that the web server is running and the add-in has been sideloaded, then open the task pane. For details, see the instructions in the quick start you used.
Verify that the task pane includes the list of features.

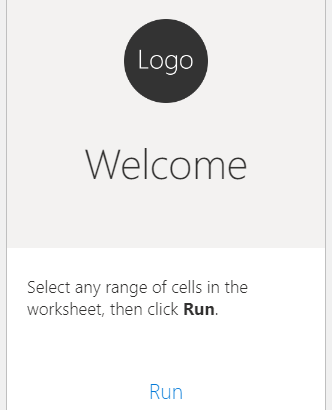
Close the task pane then reopen it. Verify that the task pane no longer displays the list of features.

Next steps
Congratulations, you've successfully created an Office task pane add-in with a first-run experience!
Make it production ready
Using this tutorial, you implemented a basic first-run experience. For the first-run experience to be ready for users, you should consider the following:
- Update the features listed in the value placemat to match what your add-in actually does.
- Implement a different pattern (for example, video placemat or carousel) that better showcases the benefits of your add-in.
- Use a more secure and robust option for tracking first-run state. For example, use storage partitioning if available, or implement a Single Sign-on (SSO) authentication solution. For more about available settings options, see Persist add-in state and settings. For more about available authentication options, see Overview of authentication and authorization.
If you're planning to make your add-in available in the AppSource marketplace, you'll need to have a robust and useful first-run experience. For more information, see Best practices for developing Office Add-ins.
Code samples
- Completed first-run experience tutorial: The result of completing this tutorial with Excel.