Configure upstream sources
TFS 2018
With upstream sources, you can use a single feed to store the packages you generate and the packages you consume from public registries such as npmjs.com, NuGet.org, Maven Central, and PyPI.org. Once you've enabled an upstream source, every time you install a package from the public registry, Azure Artifacts will save a copy of that package in your feed.
Create a new feed and enable upstream sources
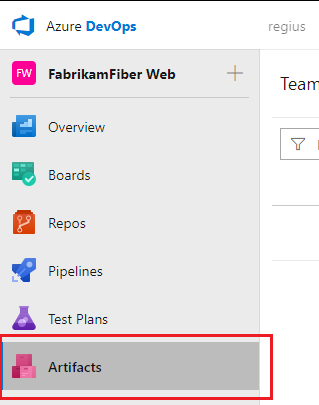
From within your project, select Artifacts.

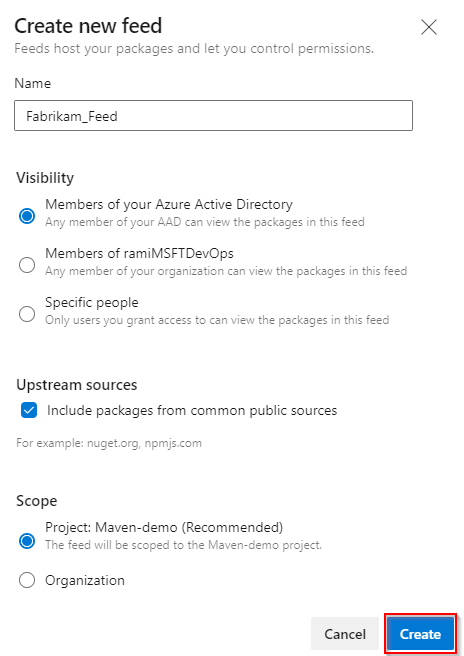
Select Create Feed.

Give your feed a Name and choose its visibility, and scope settings. Make sure you check the Include packages from common public sources checkbox to enable upstream sources.

Select Create when you are done.
Important
Maven snapshots are not supported in upstream sources.
Enable upstream sources in an existing feed
Note
Custom public upstream sources are only supported with npm registries.
Select the
 button to access your feed's settings.
Select Upstream sources.
Select Add upstream source.
Select Public source, and then select the Public source. (Example Maven Central (https://repo.maven.apache.org/maven2/) for Maven central)
Select Add when you are done.
Note
Azure Artifacts support Maven Central, Google Maven Repository, Gradle Plugins, and JitPack as upstream sources for Maven.
Add a feed in your organization as an upstream source
Select the
 button to access your feed's settings.
Select Upstream sources.
Select Add Upstream.
Select Azure Artifacts feed in this organization.
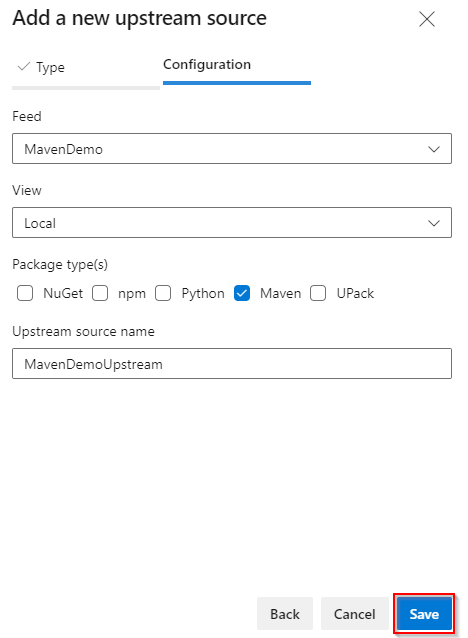
Select the feed you would like to add from the dropdown menu.
Select the package types you want to use, select the View and name your upstream source.
Select Save when you are done.

Add a feed in a different organization as an upstream source
Select the
 button to access your feed's settings.
Select Upstream sources.
Select Add Upstream.
Select Azure Artifacts feed in another organization.
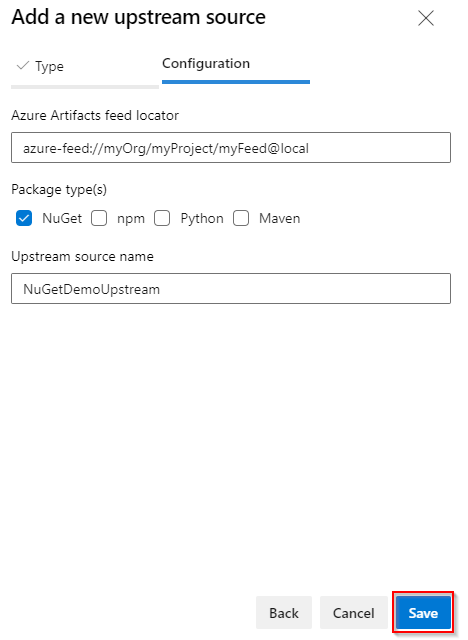
Enter your Azure DevOps Services feed locator. Example: azure-feed://myOrg/myProject/myFeed@local.
Select the Package type(s) you want to use and enter an Upstream source name.
Select Save when you are done.

Example: install NuGet packages from upstream sources with Visual Studio
Using Visual Studio, we can now install packages from the upstream sources we configured:
- Navigate to NuGet.org, find the package you want to install, and then copy the
Install-Packagecommand. - In Visual Studio, select Tools > NuGet Package Manager > Package Manager Console.
- Paste the install command into the Package Manager Console and press ENTER to run it.
Example: install npm packages from upstream sources using the CLI
Run the following command in an elevated command prompt window to install your npm package from upstream.
npm install --save <package>
Note
You must be a Collaborator, a Contributor, or an Owner to install new packages from upstream. A copy of each upstream package is saved to the feed on first use. Packages already saved from upstream sources can be used by feed Readers.