Deploy continuously to Azure
| TFS 2015 | Previous version

Important
Release Management features have been integrated into Azure Pipelines and Team Foundation Server (TFS). For more information, see Build and Release in Azure Pipelines.
The newer web-based version is the recommended alternative to the server and client version described in this topic. If you do not already have Release Management installed, we encourage you to use the web-based version in TFS 2015 Update 2 and above or Azure Pipelines instead of the version described here. If you are already using an earlier server and client version, you should be aware that no new features will be added to these versions.
With Visual Studio 2015 and Azure Pipelines you can easily set up continuous deployment to Azure VMs.
To automate your deployments, deploy the same way to multiple environments, and run deployment and validation scripts, follow these steps. For less complex scenarios, such as deploying to Azure websites or cloud services, follow steps to set up continuous deployment from TFVC or Git instead.
Before you start, you'll need:
- An Azure DevOps organization.
- A project.
- Azure VMs. If you need to create them, here's how.
- An Azure storage account. Create one here.
- Release Management for Visual Studio extension. To install in Visual Studio, go to Tools, Extensions and Updates, and search for Release Management for Visual Studio.
- A deployment script. Find out how to set up and check-in this script here.
Create a release definition
Set up stages for each step you need in the release pipeline of your app, along with the environments. You can add stages and environments, too.
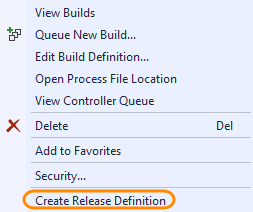
In Visual Studio Team Explorer, right-click a build definition and choose Create Release Definition.
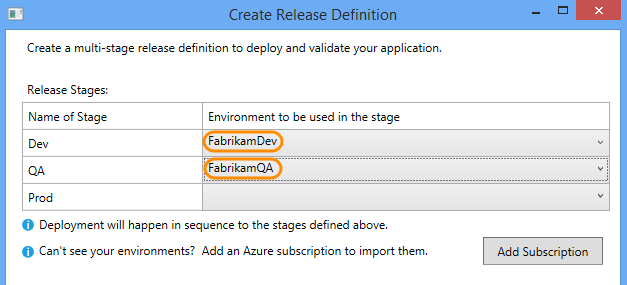
Set each stage and its environment. To skip a stage, do not set its environment. Dev, QA and Prod stages are created for you automatically.
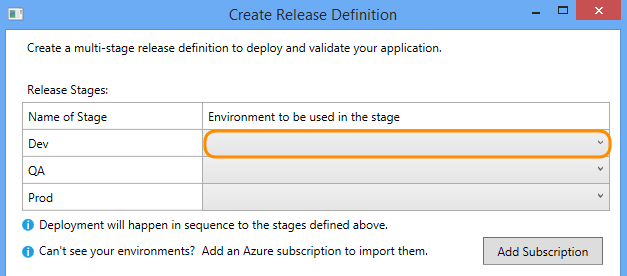
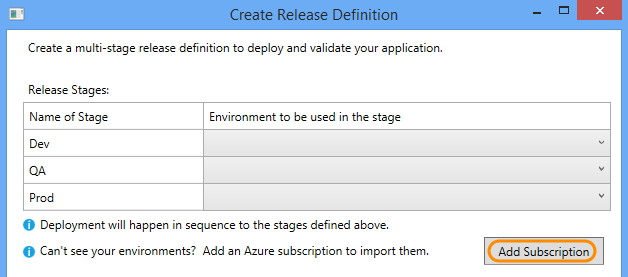
If you don't see any environments:
- Add an Azure subscription.
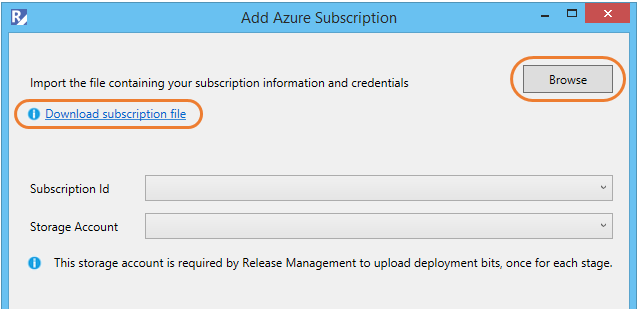
- Provide Azure subscription details. If you have an Azure subscription file (.publishsettings file) on your computer, you can browse to that file. If you do not have a local copy of this file, you can download a subscription file. Once you select the file, the tool will detect all the Azure subscriptions available to you and show them in the Subscription ID dropdown list. For the subscription selected, you need to provide a storage account to Release Management tool where the deployment bits can be uploaded during actual deployment.
You can update to the latest VSIX by selecting Tools and then Extensions and Updates and searching for Release Management.
Then set your environments.
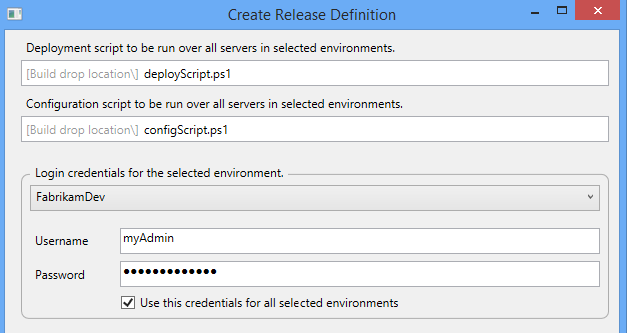
Provide the path name and file name of the deployment script that you want to run. Same for the configuration script, if your deployment script needs it. For each environment, provide the credentials for an account that has access to run the script. You can use the same credentials for all environments if you want.
After you create the release definition, launch the Release Management client (you'll be asked to install it if you don't have it already).

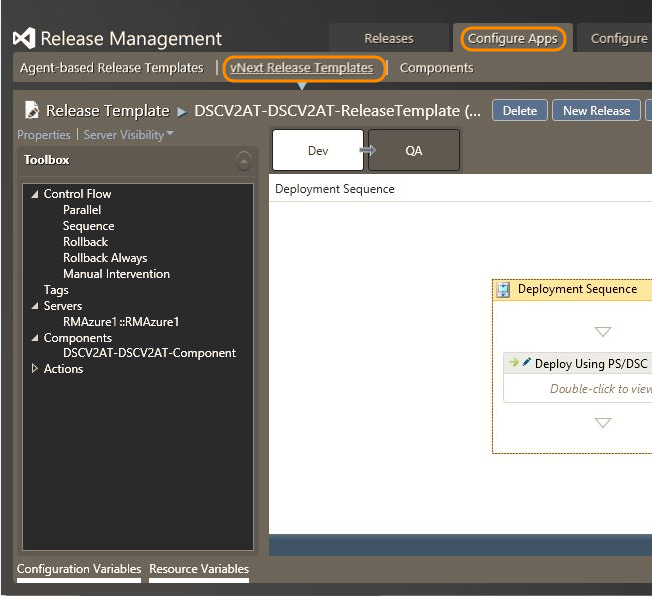
You can see your release definition in the Release Management client. If you don't see it automatically, go to Configure Apps, vNext Release Templates.

Each new build will trigger a release. You can also manually trigger a new release.
Q: How can I view and customize the deployment actions for each stage of my release?
A: In the Release Management client, go to Configure Apps, vNext Release Templates and open your release template. Learn more here.
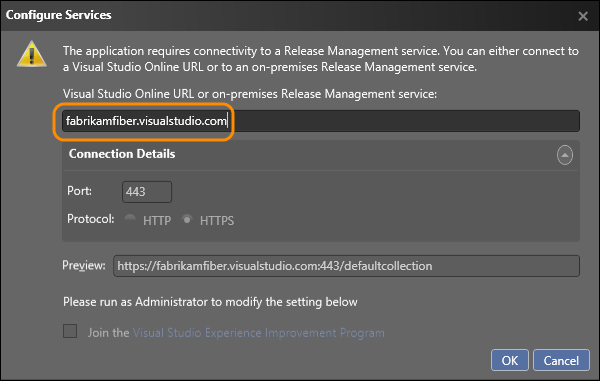
Q: How can I use a different Azure Pipelines account for my releases?
A: In the Release Management client, go to Administration, Settings, and edit the URL.
Related topics
- Overview of Release Management
- Install Release Management
- Manage your release
- Release without deployment agents
- Release with deployment agents
- Trigger a release from a build
Help and support
Visit the Developer Community.
