Rilevamento e rilevamento di più punti di tocco
I passaggi seguenti illustrano come tenere traccia di più punti di tocco usando Windows Touch.
- Creare un'applicazione e abilitare Windows Touch.
- Aggiungere un gestore per WM_TOUCH e track point.
- Disegnare i punti.
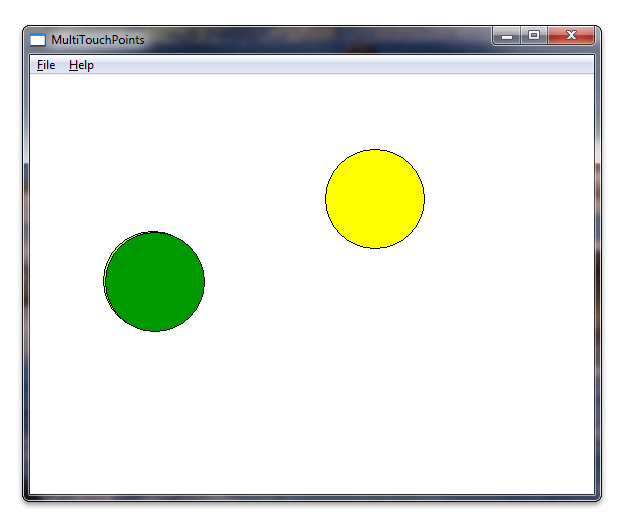
Dopo aver eseguito l'applicazione, eseguirà il rendering dei cerchi sotto ogni tocco. La schermata seguente mostra l'aspetto dell'applicazione durante l'esecuzione.

Creare un'applicazione e abilitare Windows Touch
Iniziare con un'applicazione Microsoft Win32 usando la procedura guidata di Microsoft Visual Studio. Dopo aver completato la procedura guidata, aggiungere il supporto per i messaggi Tocco di Windows impostando la versione di Windows in targetver.h e includendo windows.h e windowsx.h nell'applicazione. Il codice seguente illustra come impostare la versione di Windows in targetver.h.
#ifndef WINVER                  // Specifies that the minimum required platform is Windows 7.
#define WINVER 0x0601           // Change this to the appropriate value to target other versions of Windows.
#endif

#ifndef _WIN32_WINNT            // Specifies that the minimum required platform is Windows 7.
#define _WIN32_WINNT 0x0601     // Change this to the appropriate value to target other versions of Windows.
#endif

#ifndef _WIN32_WINDOWS          // Specifies that the minimum required platform is Windows 98.
#define _WIN32_WINDOWS 0x0410 // Change this to the appropriate value to target Windows Me or later.
#endif

#ifndef _WIN32_IE                       // Specifies that the minimum required platform is Internet Explorer 7.0.
#define _WIN32_IE 0x0700        // Change this to the appropriate value to target other versions of IE.
#endif
Nel codice seguente viene illustrato come aggiungere le direttive di inclusione. È anche possibile creare alcune variabili globali che verranno usate in un secondo momento.
#include <windows.h>    // included for Windows Touch
#include <windowsx.h>   // included for point conversion

#define MAXPOINTS 10

// You will use this array to track touch points
int points[MAXPOINTS][2];

// You will use this array to switch the color / track ids
int idLookup[MAXPOINTS];


// You can make the touch points larger
// by changing this radius value
static int radius      = 50;

// There should be at least as many colors
// as there can be touch points so that you
// can have different colors for each point
COLORREF colors[] = { RGB(153,255,51),
                      RGB(153,0,0),
                      RGB(0,153,0),
                      RGB(255,255,0),
                      RGB(255,51,204),
                      RGB(0,0,0),
                      RGB(0,153,0),
                      RGB(153, 255, 255),
                      RGB(153,153,255),
                      RGB(0,51,153)
                    };
Aggiungere un gestore per WM_TOUCH e track point
In primo luogo, dichiarare alcune variabili usate dal gestore WM_TOUCH in WndProc.
int wmId, wmEvent, i, x, y;

UINT cInputs;
PTOUCHINPUT pInputs;
POINT ptInput;
A questo punto, inizializzare le variabili usate per archiviare i punti di tocco e registrare la finestra per l'input tocco dal metodo InitInstance .
BOOL InitInstance(HINSTANCE hInstance, int nCmdShow)
{
   HWND hWnd;

   hInst = hInstance; // Store instance handle in our global variable

   hWnd = CreateWindow(szWindowClass, szTitle, WS_OVERLAPPEDWINDOW,
      CW_USEDEFAULT, 0, CW_USEDEFAULT, 0, NULL, NULL, hInstance, NULL);

   if (!hWnd) {
      return FALSE;
   }

   // register the window for touch instead of gestures
   RegisterTouchWindow(hWnd, 0);

   // the following code initializes the points
   for (int i=0; i< MAXPOINTS; i++){
     points[i][0] = -1;
     points[i][1] = -1;
     idLookup[i]  = -1;
   }

   ShowWindow(hWnd, nCmdShow);
   UpdateWindow(hWnd);

   return TRUE;
}
Gestire quindi il messaggio WM_TOUCH dal metodo WndProc. Il codice seguente illustra un'implementazione del gestore per WM_TOUCH.
case WM_TOUCH:
  cInputs = LOWORD(wParam);
  pInputs = new TOUCHINPUT[cInputs];
  if (pInputs){
    if (GetTouchInputInfo((HTOUCHINPUT)lParam, cInputs, pInputs, sizeof(TOUCHINPUT))){
      for (int i=0; i < static_cast<INT>(cInputs); i++){
        TOUCHINPUT ti = pInputs[i];
        index = GetContactIndex(ti.dwID);
        if (ti.dwID != 0 && index < MAXPOINTS){
          // Do something with your touch input handle
          ptInput.x = TOUCH_COORD_TO_PIXEL(ti.x);
          ptInput.y = TOUCH_COORD_TO_PIXEL(ti.y);
          ScreenToClient(hWnd, &ptInput);

          if (ti.dwFlags & TOUCHEVENTF_UP){
            points[index][0] = -1;
            points[index][1] = -1;

            // Remove the old contact index to make it available for the new incremented dwID.
            // On some touch devices, the dwID value is continuously incremented.
            RemoveContactIndex(index);
          }else{
            points[index][0] = ptInput.x;
            points[index][1] = ptInput.y;
          }
        }
      }

      InvalidateRect(hWnd, NULL, FALSE);
    }
    // If you handled the message and don't want anything else done with it, you can close it
    CloseTouchInputHandle((HTOUCHINPUT)lParam);
    delete [] pInputs;
  }else{
    // Handle the error here
  }
Nota
Per usare la funzione ScreenToClient , è necessario disporre del supporto DPI elevato nell'applicazione. Per altre informazioni sul supporto di valori DPI elevati, vedere DPI elevato.
Ora quando un utente tocca lo schermo, le posizioni che sta toccando verranno archiviate nella matrice di punti. Il membro dwID della struttura TOUCHINPUT archivia un identificatore dipendente dall'hardware.
Per risolvere il problema del membro dwID dipendente dall'hardware, il gestore del case WM_TOUCH usa una funzione, GetContactIndex, che esegue il mapping del membro dwID della struttura TOUCHINPUT a un punto disegnato sullo schermo. Il codice seguente illustra un'implementazione di questa funzione.
// This function is used to return an index given an ID
int GetContactIndex(int dwID){
  for (int i = 0; i < MAXPOINTS; i++) {
      if (idLookup[i] == dwID) {
          return i;
      }
  }

  for (int i = 0; i < MAXPOINTS; i++) {
      if (idLookup[i] == -1) {
          idLookup[i] = dwID;
          return i;
      }
  }
  // Out of contacts
  return -1;
}

// Mark the specified index as initialized for new use
BOOL RemoveContactIndex(int index) {
    if (index >= 0 && index < MAXPOINTS) {
        idLookup[index] = -1;
        return true;
    }

    return false;
}
Importante
Windows 11 e versioni successive
Alcune interazioni tramite tocco a tre e quattro dita non funzioneranno più nelle app di Windows per impostazione predefinita.
Per impostazione predefinita, le interazioni tramite tocco a tre e quattro dita vengono ora utilizzate dal sistema per operazioni quali il cambio o la riduzione al minimo delle finestre e la modifica dei desktop virtuali. Poiché queste interazioni sono ora gestite a livello di sistema, la funzionalità dell'app potrebbe essere influenzata da questa modifica.
Per supportare interazioni di tre o quattro dita all'interno di un'applicazione, è stata introdotta una nuova impostazione utente che specifica se il sistema gestisce queste interazioni:
Bluetooth e dispositivi > Toccano > "Movimenti tocco a tre e quattro dita"
Se impostato su "Attivato" (impostazione predefinita), il sistema gestirà tutte e tre le interazioni con quattro dita (le app non saranno in grado di supportarle).
Se impostato su "Off", le interazioni a tre e quattro dita possono essere supportate dalle app (non verranno gestite dal sistema).
Se l'applicazione deve supportare queste interazioni, è consigliabile informare gli utenti di questa impostazione e fornire un collegamento che avvia l'app Impostazioni alla pagina pertinente (ms-settings:devices-touch). Per altri dettagli, vedere Metodo Launcher.LaunchUriAsync.
Disegnare i punti
Dichiarare le variabili seguenti per la routine di disegno.
    // For double buffering
    static HDC memDC       = 0;
    static HBITMAP hMemBmp = 0;
    HBITMAP hOldBmp        = 0;

    // For drawing / fills
    PAINTSTRUCT ps;
    HDC hdc;
    HBRUSH hBrush;

    // For tracking dwId to points
    int index;
Il memDC del contesto di visualizzazione della memoria viene usato per archiviare un contesto grafico temporaneo scambiato con il contesto di visualizzazione di cui è stato eseguito il rendering, hdc, per eliminare lo sfarfallio. Implementare la routine di disegno, che accetta i punti archiviati e disegna un cerchio nei punti. Il codice seguente illustra come implementare il gestore WM_PAINT.
  case WM_PAINT:
    hdc = BeginPaint(hWnd, &ps);
    RECT client;
    GetClientRect(hWnd, &client);

    // start double buffering
    if (!memDC){
      memDC = CreateCompatibleDC(hdc);
    }
    hMemBmp = CreateCompatibleBitmap(hdc, client.right, client.bottom);
    hOldBmp = (HBITMAP)SelectObject(memDC, hMemBmp);

    hBrush = CreateSolidBrush(RGB(255, 255, 255));
    FillRect(memDC, &client, hBrush);
    DeleteObject(hBrush);

    //Draw Touched Points
    for (i=0; i < MAXPOINTS; i++){
      hBrush = CreateSolidBrush(colors[i]);
      SelectObject( memDC, hBrush);

      x = points[i][0];
      y = points[i][1];
      if  (x >0 && y>0){
        Ellipse(memDC, x - radius, y - radius, x+ radius, y + radius);
      }

      DeleteObject(hBrush);
    }

    BitBlt(hdc, 0,0, client.right, client.bottom, memDC, 0,0, SRCCOPY);
    EndPaint(hWnd, &ps);

    SelectObject(memDC, hOldBmp);
    DeleteObject(hMemBmp);

    break;
Quando si esegue l'applicazione, l'aspetto dovrebbe essere simile all'illustrazione all'inizio di questa sezione.
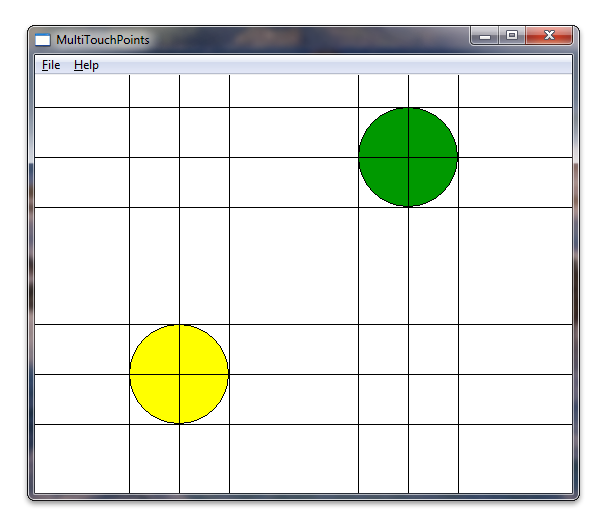
Per divertimento, puoi disegnare alcune linee aggiuntive intorno ai punti di tocco. La schermata seguente mostra come l'applicazione potrebbe apparire con alcune linee aggiuntive disegnate intorno ai cerchi.
