Step-By-Step: Azure Virtual Network Peering
Hello Folks,
It feels like I’ve been covering this topic over and over. Well, I have…
- Step-By-Step: Multi-Site Azure VPN Revisited
- Step-By-Step: Multi-Site Azure VPN in the Resource Manager Model
However, the engineering team has been doing a tremendous job at enhancing the capabilities of virtual networking in Azure. Today we’ll look at vnet peering.
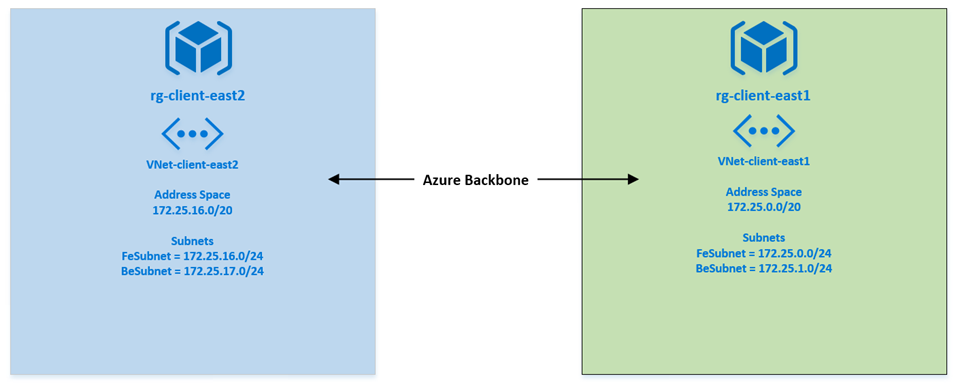
VNet peering is a way to connects two virtual networks in the same region (that is key) through the Azure backbone network. Peered vnets appear as one for all connectivity purposes but virtual machines in these virtual networks can communicate with each other directly by using private IP addresses and the traffic between peered vnets is routed through the Azure infrastructure.
Here are some of the benefits of using VNet peering:
- A low-latency, high-bandwidth connection between resources in different virtual networks.
- The ability to use resources such as network appliances and VPN gateways as transit points in a peered VNet.
- The ability to connect a virtual network that uses the Azure Resource Manager model to a virtual network that uses the classic deployment model and enable full connectivity between resources in these virtual networks.
before we start please ensure that you comply the the following requirements:
- Your Vnets HAVE to be in the same region.
- The IP addresses in your vnets must not overlap
- keep in mind that these are NOT transitive routes
Step 1: Register the Vnet Peering provider
First of all we need to login our Azure Subscription
 #Connect to your account
Login-AzureRmAccount
VNet Peering is in public preview, to be able to use it you must register using the below.
 #Register Microsoft.Network provider

Register-AzureRmProviderFeature -FeatureName AllowVnetPeering -ProviderNamespace Microsoft.Network

Register-AzureRmResourceProvider -ProviderNamespace Microsoft.Network
Step 2: Peer the Vnets
now that the provider is registered we can peer our networks. we will use the following pre-created vnets
First we need to read the vnet objects and store that in variables. those objects will be used to create the peering.
 # read vnets objects
$vnet1 = Get-AzureRmVirtualNetwork -ResourceGroupName rg-client-east1 -Name vnet-client-east1
$vnet2 = Get-AzureRmVirtualNetwork -ResourceGroupName rg-client-east2 -Name vnet-client-east2
Second, we will create links between our vnets. One in each direction.
 #creating the links between vnets. One per direction (Vnet1 --> Vnet2, Vnet2 --> Vnet1)
Add-AzureRmVirtualNetworkPeering -name LinkToVNet2 -VirtualNetwork $vnet1 -RemoteVirtualNetworkId $vnet2.id
Add-AzureRmVirtualNetworkPeering -name LinkToVNet1 -VirtualNetwork $vnet2 -RemoteVirtualNetworkId $vnet1.id
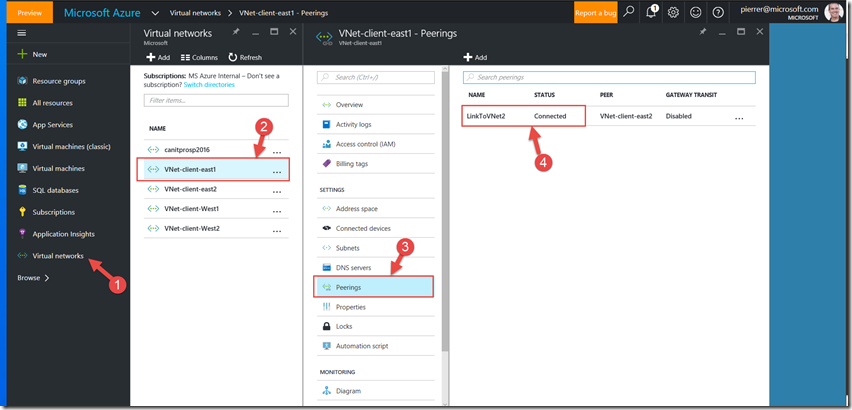
after each command verify in the output that the provisioning was successful.
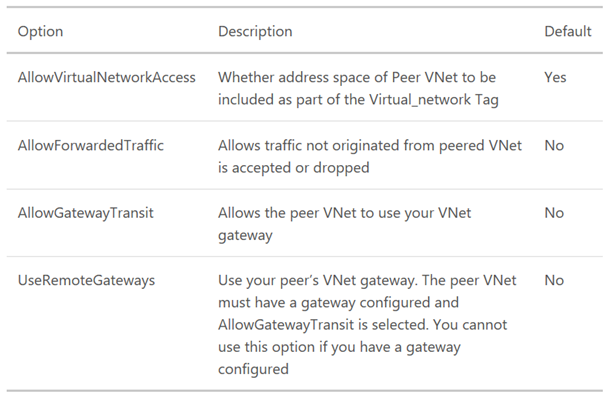
You’ll notice above that some of the functionality is turned off or set to false/null. there are some configurable settings for the PowerShell command.and we will take a look at them in an upcoming post.
Now that our command is complete our networks are now connected without the need for VPN Gateways
Cheers!
Pierre Roman
@pierreroman
Comments
- Anonymous
August 10, 2016
Awesome article Pierre! I've been waiting for this feature for a long time. Thanks for sharing. - Anonymous
August 11, 2016
Does this work for VNet's in the same region but in different subscriptions>?- Anonymous
August 30, 2016
Peering can be established between virtual networks in two different subscriptions as long a privileged user of both subscriptions authorizes the peering.
- Anonymous


