単純な言語パターン マッチングを使用して意図を認識する方法
Azure AI サービスの Speech SDK は、単純な言語パターン マッチングによる意図認識を提供する組み込み機能です。 意図とは、ウィンドウを閉じる、チェック ボックスをオンにする、テキストを挿入するなど、ユーザーが行いたいと思っている何らかの操作です。
このガイドでは、Speech SDK を使用して、デバイスのマイクを通したユーザーの発話から意図を抽出する C++ コンソール アプリケーションを開発します。 学習内容は次のとおりです。
- Speech SDK NuGet パッケージを参照する Visual Studio プロジェクトを作成する
- 音声構成を作成して意図認識エンジンを取得する
- Speech SDK API を使用して意図とパターンを追加する
- マイクから音声を認識する
- 非同期のイベント ドリブンの継続的な認識を使用する
パターン マッチングを使う場合
次の場合にパターン マッチングを使用します。
- ユーザーが言ったことの厳密なマッチングにのみ関心がある。 これらのパターンでは、会話言語理解 (CLU) より積極的にマッチングされます。
- CLU モデルにアクセスできないが、それでも意図が必要である。
詳細については、「パターン マッチングの概要」を参照してください。
前提条件
このガイドを開始する前に、次の項目を用意する必要があります。
- Azure AI サービス リソースまたは Unified Speech リソース
- Visual Studio 2019 (任意のエディション)。
音声と単純なパターン
単純なパターンは Speech SDK の機能であり、Azure AI サービス リソースまたは Unified Speech リソースが必要です。
パターンは、その中のどこかにエンティティが含まれるフレーズです。 エンティティは、単語を中かっこで囲むことによって定義されます。 この例では、ID "floorName" のエンティティを定義していて、大文字と小文字は区別されます。
Take me to the {floorName}
その他のすべての特殊文字と句読点は無視されます。
意図は、IntentRecognizer->AddIntent() API の呼び出しを使用して追加されます。
プロジェクトの作成
Visual Studio 2019 で新しい C# コンソール アプリケーション プロジェクトを作成し、Speech SDK をインストールします。
定型コードを使用して開始する
Program.cs を開き、このプロジェクトのスケルトンとして機能するコードを追加しましょう。
using System;
using System.Threading.Tasks;
using Microsoft.CognitiveServices.Speech;
using Microsoft.CognitiveServices.Speech.Intent;

namespace helloworld
{
    class Program
    {
        static void Main(string[] args)
        {
            IntentPatternMatchingWithMicrophoneAsync().Wait();
        }

        private static async Task IntentPatternMatchingWithMicrophoneAsync()
        {
            var config = SpeechConfig.FromSubscription("YOUR_SUBSCRIPTION_KEY", "YOUR_SUBSCRIPTION_REGION");
        }
    }
}
Speech 構成を作成する
IntentRecognizer オブジェクトを初期化する前に、Azure AI サービスの予測リソース用のキーとリージョンを使用する構成を作成する必要があります。
"YOUR_SUBSCRIPTION_KEY"を、Azure AI サービスの実際の予測キーに置き換えます。"YOUR_SUBSCRIPTION_REGION"を Azure AI サービスの実際のリソース リージョンに置き換えます。
このサンプルでは、FromSubscription() メソッドを使用して SpeechConfig をビルドします。 使用可能なメソッドの完全な一覧については、SpeechConfig クラスに関する記事を参照してください。
IntentRecognizer を初期化する
次に、IntentRecognizer を作成します。 Speech 構成のすぐ下にこのコードを挿入します。
using (var intentRecognizer = new IntentRecognizer(config))
{

}
意図を追加する
AddIntent() を呼び出すことにより、いくつかのパターンを IntentRecognizer と関連付ける必要があります。
階の変更に関する 2 つの意図を同じ ID で追加し、ドアの開閉に関するもう 1 つの意図を別の ID で追加します。
このコードを using ブロック内に挿入します。
intentRecognizer.AddIntent("Take me to floor {floorName}.", "ChangeFloors");
intentRecognizer.AddIntent("Go to floor {floorName}.", "ChangeFloors");
intentRecognizer.AddIntent("{action} the door.", "OpenCloseDoor");
Note
宣言できるエンティティの数に制限はありませんが、それらは緩くマッチングされます。 "{action} door" のようなフレーズを追加した場合、"door" という単語の前にテキストがあるときは常に一致します。 意図は、エンティティの数に基づいて評価されます。 2 つのパターンが一致する場合は、定義されているエンティティが多いパターンが返されます。
意図を認識する
IntentRecognizer オブジェクトから、RecognizeOnceAsync() メソッドを呼び出します。 このメソッドは、Speech サービスに対して、1 つのフレーズで音声を認識し、フレーズが識別されたら音声の認識を停止するよう要求します。 簡素化のため、結果が返されて完了するまで待機します。
このコードを意図の下に挿入します。
Console.WriteLine("Say something...");

var result = await intentRecognizer.RecognizeOnceAsync();
認識結果 (またはエラー) を表示する
Speech サービスによって認識結果が返されたら、結果を出力します。
次のコードを var result = await recognizer.RecognizeOnceAsync(); の下に挿入します。
string floorName;
switch (result.Reason)
{
    case ResultReason.RecognizedSpeech:
        Console.WriteLine($"RECOGNIZED: Text= {result.Text}");
        Console.WriteLine($"    Intent not recognized.");
        break;
    case ResultReason.RecognizedIntent:
        Console.WriteLine($"RECOGNIZED: Text= {result.Text}");
        Console.WriteLine($"       Intent Id= {result.IntentId}.");
        var entities = result.Entities;
        if (entities.TryGetValue("floorName", out floorName))
        {
            Console.WriteLine($"       FloorName= {floorName}");
        }

        if (entities.TryGetValue("action", out floorName))
        {
            Console.WriteLine($"       Action= {floorName}");
        }

        break;
    case ResultReason.NoMatch:
    {
        Console.WriteLine($"NOMATCH: Speech could not be recognized.");
        var noMatch = NoMatchDetails.FromResult(result);
        switch (noMatch.Reason)
        {
            case NoMatchReason.NotRecognized:
                Console.WriteLine($"NOMATCH: Speech was detected, but not recognized.");
                break;
            case NoMatchReason.InitialSilenceTimeout:
                Console.WriteLine($"NOMATCH: The start of the audio stream contains only silence, and the service timed out waiting for speech.");
                break;
            case NoMatchReason.InitialBabbleTimeout:
                Console.WriteLine($"NOMATCH: The start of the audio stream contains only noise, and the service timed out waiting for speech.");
                break;
            case NoMatchReason.KeywordNotRecognized:
                Console.WriteLine($"NOMATCH: Keyword not recognized");
                break;
        }
        break;
    }
    case ResultReason.Canceled:
    {
        var cancellation = CancellationDetails.FromResult(result);
        Console.WriteLine($"CANCELED: Reason={cancellation.Reason}");

        if (cancellation.Reason == CancellationReason.Error)
        {
            Console.WriteLine($"CANCELED: ErrorCode={cancellation.ErrorCode}");
            Console.WriteLine($"CANCELED: ErrorDetails={cancellation.ErrorDetails}");
            Console.WriteLine($"CANCELED: Did you set the speech resource key and region values?");
        }
        break;
    }
    default:
        break;
}
コードを確認する
この時点で、コードは次のようになります。
using System;
using System.Threading.Tasks;
using Microsoft.CognitiveServices.Speech;
using Microsoft.CognitiveServices.Speech.Intent;

namespace helloworld
{
    class Program
    {
        static void Main(string[] args)
        {
            IntentPatternMatchingWithMicrophoneAsync().Wait();
        }

        private static async Task IntentPatternMatchingWithMicrophoneAsync()
        {
            var config = SpeechConfig.FromSubscription("YOUR_SUBSCRIPTION_KEY", "YOUR_SUBSCRIPTION_REGION");
            using (var intentRecognizer = new IntentRecognizer(config))
            {
                intentRecognizer.AddIntent("Take me to floor {floorName}.", "ChangeFloors");
                intentRecognizer.AddIntent("Go to floor {floorName}.", "ChangeFloors");
                intentRecognizer.AddIntent("{action} the door.", "OpenCloseDoor");

                Console.WriteLine("Say something...");

                var result = await intentRecognizer.RecognizeOnceAsync();

                string floorName;
                switch (result.Reason)
                {
                    case ResultReason.RecognizedSpeech:
                        Console.WriteLine($"RECOGNIZED: Text= {result.Text}");
                        Console.WriteLine($"    Intent not recognized.");
                        break;
                    case ResultReason.RecognizedIntent:
                        Console.WriteLine($"RECOGNIZED: Text= {result.Text}");
                        Console.WriteLine($"       Intent Id= {result.IntentId}.");
                        var entities = result.Entities;
                        if (entities.TryGetValue("floorName", out floorName))
                        {
                            Console.WriteLine($"       FloorName= {floorName}");
                        }

                        if (entities.TryGetValue("action", out floorName))
                        {
                            Console.WriteLine($"       Action= {floorName}");
                        }

                        break;
                    case ResultReason.NoMatch:
                    {
                        Console.WriteLine($"NOMATCH: Speech could not be recognized.");
                        var noMatch = NoMatchDetails.FromResult(result);
                        switch (noMatch.Reason)
                        {
                            case NoMatchReason.NotRecognized:
                                Console.WriteLine($"NOMATCH: Speech was detected, but not recognized.");
                                break;
                            case NoMatchReason.InitialSilenceTimeout:
                                Console.WriteLine($"NOMATCH: The start of the audio stream contains only silence, and the service timed out waiting for speech.");
                                break;
                            case NoMatchReason.InitialBabbleTimeout:
                                Console.WriteLine($"NOMATCH: The start of the audio stream contains only noise, and the service timed out waiting for speech.");
                                break;
                            case NoMatchReason.KeywordNotRecognized:
                                Console.WriteLine($"NOMATCH: Keyword not recognized");
                                break;
                        }
                        break;
                    }
                    case ResultReason.Canceled:
                    {
                        var cancellation = CancellationDetails.FromResult(result);
                        Console.WriteLine($"CANCELED: Reason={cancellation.Reason}");

                        if (cancellation.Reason == CancellationReason.Error)
                        {
                            Console.WriteLine($"CANCELED: ErrorCode={cancellation.ErrorCode}");
                            Console.WriteLine($"CANCELED: ErrorDetails={cancellation.ErrorDetails}");
                            Console.WriteLine($"CANCELED: Did you set the speech resource key and region values?");
                        }
                        break;
                    }
                    default:
                        break;
                }
            }
        }
    }
}
アプリをビルドして実行する
これで、アプリをビルドし、Speech サービスを使用して音声認識をテストする準備ができました。
- コードをコンパイルする - Visual Studio のメニュー バーで、 [ビルド]>[ソリューションのビルド] の順に選択します。
- アプリを起動する - メニュー バーから [デバッグ]>[デバッグの開始] の順に選択するか、F5 キーを押します。
- 認識を開始する - ユーザーに何か話すように要求します。 既定の言語は English (英語) です。 音声が Speech Service に送信され、テキストとして文字起こしされて、コンソールに表示されます。
たとえば、"Take me to floor 7" (7 階に行く) と言った場合、次の出力が表示されます。
Say something ...
RECOGNIZED: Text= Take me to floor 7.
  Intent Id= ChangeFloors
  FloorName= 7
プロジェクトの作成
Visual Studio 2019 で新しい C++ コンソール アプリケーション プロジェクトを作成し、Speech SDK をインストールします。
定型コードを使用して開始する
helloworld.cpp を開き、このプロジェクトのスケルトンとして機能するコードを追加しましょう。
    #include <iostream>
    #include <speechapi_cxx.h>

    using namespace Microsoft::CognitiveServices::Speech;
    using namespace Microsoft::CognitiveServices::Speech::Intent;

    int main()
    {
        std::cout << "Hello World!\n";

        auto config = SpeechConfig::FromSubscription("YOUR_SUBSCRIPTION_KEY", "YOUR_SUBSCRIPTION_REGION");
    }
Speech 構成を作成する
IntentRecognizer オブジェクトを初期化する前に、Azure AI サービスの予測リソース用のキーとリージョンを使用する構成を作成する必要があります。
"YOUR_SUBSCRIPTION_KEY"を、Azure AI サービスの実際の予測キーに置き換えます。"YOUR_SUBSCRIPTION_REGION"を Azure AI サービスの実際のリソース リージョンに置き換えます。
このサンプルでは、FromSubscription() メソッドを使用して SpeechConfig をビルドします。 使用可能なメソッドの完全な一覧については、SpeechConfig クラスに関する記事を参照してください。
IntentRecognizer を初期化する
次に、IntentRecognizer を作成します。 Speech 構成のすぐ下にこのコードを挿入します。
auto intentRecognizer = IntentRecognizer::FromConfig(config);
意図を追加する
AddIntent() を呼び出すことにより、いくつかのパターンを IntentRecognizer と関連付ける必要があります。
階の変更に関する 2 つの意図を同じ ID で追加し、ドアの開閉に関するもう 1 つの意図を別の ID で追加します。
    intentRecognizer->AddIntent("Take me to floor {floorName}.", "ChangeFloors");
    intentRecognizer->AddIntent("Go to floor {floorName}.", "ChangeFloors");
    intentRecognizer->AddIntent("{action} the door.", "OpenCloseDoor");
Note
宣言できるエンティティの数に制限はありませんが、それらは緩くマッチングされます。 "{action} door" のようなフレーズを追加した場合、"door" という単語の前にテキストがあるときは常に一致します。 意図は、エンティティの数に基づいて評価されます。 2 つのパターンが一致する場合は、定義されているエンティティが多いパターンが返されます。
意図を認識する
IntentRecognizer オブジェクトから、RecognizeOnceAsync() メソッドを呼び出します。 このメソッドは、Speech サービスに対して、1 つのフレーズで音声を認識し、フレーズが識別されたら音声の認識を停止するよう要求します。 簡素化のため、結果が返されて完了するまで待機します。
このコードを意図の下に挿入します。
    std::cout << "Say something ..." << std::endl;
    auto result = intentRecognizer->RecognizeOnceAsync().get();
認識結果 (またはエラー) を表示する
Speech サービスによって認識結果が返されたら、結果を出力します。
次のコードを auto result = intentRecognizer->RecognizeOnceAsync().get(); の下に挿入します。
switch (result->Reason)
{
case ResultReason::RecognizedSpeech:
        std::cout << "RECOGNIZED: Text = " << result->Text.c_str() << std::endl;
        std::cout << "NO INTENT RECOGNIZED!" << std::endl;
        break;
case ResultReason::RecognizedIntent:
    std::cout << "RECOGNIZED: Text = " << result->Text.c_str() << std::endl;
    std::cout << "  Intent Id = " << result->IntentId.c_str() << std::endl;
    auto entities = result->GetEntities();
    if (entities.find("floorName") != entities.end())
    {
        std::cout << "  Floor name: = " << entities["floorName"].c_str() << std::endl;
    }

    if (entities.find("action") != entities.end())
    {
        std::cout << "  Action: = " << entities["action"].c_str() << std::endl;
    }

    break;
case ResultReason::NoMatch:
{
    auto noMatch = NoMatchDetails::FromResult(result);
    switch (noMatch->Reason)
    {
    case NoMatchReason::NotRecognized:
        std::cout << "NOMATCH: Speech was detected, but not recognized." << std::endl;
        break;
    case NoMatchReason::InitialSilenceTimeout:
        std::cout << "NOMATCH: The start of the audio stream contains only silence, and the service timed out waiting for speech." << std::endl;
        break;
    case NoMatchReason::InitialBabbleTimeout:
        std::cout << "NOMATCH: The start of the audio stream contains only noise, and the service timed out waiting for speech." << std::endl;
        break;
    case NoMatchReason::KeywordNotRecognized:
        std::cout << "NOMATCH: Keyword not recognized" << std::endl;
        break;
    }
    break;
}
case ResultReason::Canceled:
{
    auto cancellation = CancellationDetails::FromResult(result);

    if (!cancellation->ErrorDetails.empty())
    {
        std::cout << "CANCELED: ErrorDetails=" << cancellation->ErrorDetails.c_str() << std::endl;
        std::cout << "CANCELED: Did you set the speech resource key and region values?" << std::endl;
    }
}
default:
    break;
}
コードを確認する
この時点で、コードは次のようになります。
#include <iostream>
#include <speechapi_cxx.h>

using namespace Microsoft::CognitiveServices::Speech;
using namespace Microsoft::CognitiveServices::Speech::Intent;

int main()
{
    auto config = SpeechConfig::FromSubscription("YOUR_SUBSCRIPTION_KEY", "YOUR_SUBSCRIPTION_REGION");
    auto intentRecognizer = IntentRecognizer::FromConfig(config);

    intentRecognizer->AddIntent("Take me to floor {floorName}.", "ChangeFloors");
    intentRecognizer->AddIntent("Go to floor {floorName}.", "ChangeFloors");
    intentRecognizer->AddIntent("{action} the door.", "OpenCloseDoor");

    std::cout << "Say something ..." << std::endl;

    auto result = intentRecognizer->RecognizeOnceAsync().get();

    switch (result->Reason)
    {
    case ResultReason::RecognizedSpeech:
        std::cout << "RECOGNIZED: Text = " << result->Text.c_str() << std::endl;
        std::cout << "NO INTENT RECOGNIZED!" << std::endl;
        break;
    case ResultReason::RecognizedIntent:
        std::cout << "RECOGNIZED: Text = " << result->Text.c_str() << std::endl;
        std::cout << "  Intent Id = " << result->IntentId.c_str() << std::endl;
        auto entities = result->GetEntities();
        if (entities.find("floorName") != entities.end())
        {
            std::cout << "  Floor name: = " << entities["floorName"].c_str() << std::endl;
        }

        if (entities.find("action") != entities.end())
        {
            std::cout << "  Action: = " << entities["action"].c_str() << std::endl;
        }

        break;
    case ResultReason::NoMatch:
    {
        auto noMatch = NoMatchDetails::FromResult(result);
        switch (noMatch->Reason)
        {
        case NoMatchReason::NotRecognized:
            std::cout << "NOMATCH: Speech was detected, but not recognized." << std::endl;
            break;
        case NoMatchReason::InitialSilenceTimeout:
            std::cout << "NOMATCH: The start of the audio stream contains only silence, and the service timed out waiting for speech." << std::endl;
            break;
        case NoMatchReason::InitialBabbleTimeout:
            std::cout << "NOMATCH: The start of the audio stream contains only noise, and the service timed out waiting for speech." << std::endl;
            break;
        case NoMatchReason::KeywordNotRecognized:
            std::cout << "NOMATCH: Keyword not recognized." << std::endl;
            break;
        }
        break;
    }
    case ResultReason::Canceled:
    {
        auto cancellation = CancellationDetails::FromResult(result);

        if (!cancellation->ErrorDetails.empty())
        {
            std::cout << "CANCELED: ErrorDetails=" << cancellation->ErrorDetails.c_str() << std::endl;
            std::cout << "CANCELED: Did you set the speech resource key and region values?" << std::endl;
        }
    }
    default:
        break;
    }
}
アプリをビルドして実行する
これで、アプリをビルドし、Speech サービスを使用して音声認識をテストする準備ができました。
- コードをコンパイルする - Visual Studio のメニュー バーで、 [ビルド]>[ソリューションのビルド] の順に選択します。
- アプリを起動する - メニュー バーから [デバッグ]>[デバッグの開始] の順に選択するか、F5 キーを押します。
- 認識を開始する - ユーザーに何か話すように要求します。 既定の言語は English (英語) です。 音声が Speech Service に送信され、テキストとして文字起こしされて、コンソールに表示されます。
たとえば、"Take me to floor 7" (7 階に行く) と言った場合、次の出力が表示されます。
Say something ...
RECOGNIZED: Text = Take me to floor 7.
  Intent Id = ChangeFloors
  Floor name: = 7
リファレンス ドキュメント | GitHub 上のその他のサンプル
このクイックスタートでは、Speech SDK for Java をインストールします。
プラットフォームの要件
ターゲット環境を選択してください。
Speech SDK for Java は、Windows、Linux、macOS との互換性があります。
Windows では、64 ビット ターゲット アーキテクチャを使う必要があります。 Windows 10 以降が必要です。
お使いのプラットフォームに対応した Visual Studio 2015、2017、2019、2022 の Microsoft Visual C++ 再頒布可能パッケージをインストールします。 このパッケージを初めてインストールする場合、再起動が必要になる可能性があります。
Speech SDK for Java は、ARM64 上の Windows をサポートしていません。
Azul Zulu OpenJDK などの Java Development Kit をインストールします。 Microsoft Build of OpenJDK またはお好みの JDK も機能する必要があります。
Speech SDK for Java をインストールする
一部の手順では、1.24.2 などの特定の SDK バージョンを使用します。 最新バージョンを確認するには、GitHub リポジトリを検索します。
ターゲット環境を選択してください。
このガイドでは、Java Runtime で Java 用の Speech SDK をインストールする方法について説明します。
サポートされるオペレーティング システム
以下のオペレーティング システム用の Speech SDK for Java パッケージを入手できます。
- Windows: 64 ビットのみ。
- Mac: macOS X バージョン 10.14 以降。
- Linux: サポートされている Linux ディストリビューションとターゲット アーキテクチャの一覧を参照してください。
Apache Maven を使用して Speech SDK for Java をインストールするには、次の手順に従います。
Apache Maven をインストールします。
新しいプロジェクトの配置場所のコマンド プロンプトを開き、新しい pom.xml ファイルを作成します。
次の XML の内容を pom.xml にコピーします。
<project xmlns="http://maven.apache.org/POM/4.0.0" xmlns:xsi="http://www.w3.org/2001/XMLSchema-instance" xsi:schemaLocation="http://maven.apache.org/POM/4.0.0 http://maven.apache.org/xsd/maven-4.0.0.xsd">
    <modelVersion>4.0.0</modelVersion>
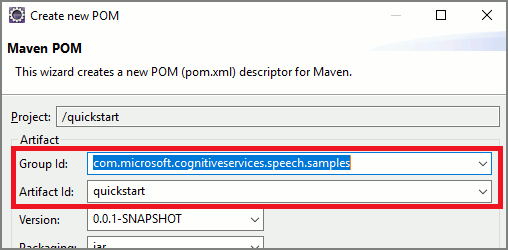
    <groupId>com.microsoft.cognitiveservices.speech.samples</groupId>
    <artifactId>quickstart-eclipse</artifactId>
    <version>1.0.0-SNAPSHOT</version>
    <build>
        <sourceDirectory>src</sourceDirectory>
        <plugins>
        <plugin>
            <artifactId>maven-compiler-plugin</artifactId>
            <version>3.7.0</version>
            <configuration>
            <source>1.8</source>
            <target>1.8</target>
            </configuration>
        </plugin>
        </plugins>
    </build>
    <dependencies>
        <dependency>
        <groupId>com.microsoft.cognitiveservices.speech</groupId>
        <artifactId>client-sdk</artifactId>
        <version>1.42.0</version>
        </dependency>
    </dependencies>
</project>
次の Maven コマンドを実行して、Speech SDK と依存関係をインストールします。
mvn clean dependency:copy-dependencies
定型コードを使用して開始する
src ディレクトリから
Main.javaを開きます。ファイルの内容を、次のコードに置き換えます。
package quickstart;
import java.util.Dictionary;
import java.util.concurrent.ExecutionException;

import com.microsoft.cognitiveservices.speech.*;
import com.microsoft.cognitiveservices.speech.intent.*;

public class Program {
    public static void main(String[] args) throws InterruptedException, ExecutionException {
        IntentPatternMatchingWithMicrophone();
    }

    public static void IntentPatternMatchingWithMicrophone() throws InterruptedException, ExecutionException {
        SpeechConfig config = SpeechConfig.fromSubscription("YOUR_SUBSCRIPTION_KEY", "YOUR_SUBSCRIPTION_REGION");
    }
}
Speech 構成を作成する
IntentRecognizer オブジェクトを初期化する前に、Azure AI サービスの予測リソース用のキーとリージョンを使用する構成を作成する必要があります。
"YOUR_SUBSCRIPTION_KEY"を、Azure AI サービスの実際の予測キーに置き換えます。"YOUR_SUBSCRIPTION_REGION"を Azure AI サービスの実際のリソース リージョンに置き換えます。
このサンプルでは、FromSubscription() メソッドを使用して SpeechConfig をビルドします。 使用可能なメソッドの完全な一覧については、SpeechConfig クラスに関する記事を参照してください。
IntentRecognizer を初期化する
次に、IntentRecognizer を作成します。 Speech 構成のすぐ下にこのコードを挿入します。
try (IntentRecognizer intentRecognizer = new IntentRecognizer(config)) {

}
意図を追加する
addIntent() を呼び出すことにより、いくつかのパターンを IntentRecognizer と関連付ける必要があります。
階の変更に関する 2 つの意図を同じ ID で追加し、ドアの開閉に関するもう 1 つの意図を別の ID で追加します。
このコードを try ブロック内に挿入します。
intentRecognizer.addIntent("Take me to floor {floorName}.", "ChangeFloors");
intentRecognizer.addIntent("Go to floor {floorName}.", "ChangeFloors");
intentRecognizer.addIntent("{action} the door.", "OpenCloseDoor");
Note
宣言できるエンティティの数に制限はありませんが、それらは緩くマッチングされます。 "{action} door" のようなフレーズを追加した場合、"door" という単語の前にテキストがあるときは常に一致します。 意図は、エンティティの数に基づいて評価されます。 2 つのパターンが一致する場合は、定義されているエンティティが多いパターンが返されます。
意図を認識する
IntentRecognizer オブジェクトから、recognizeOnceAsync() メソッドを呼び出します。 このメソッドは、Speech サービスに対して、1 つのフレーズで音声を認識し、フレーズが識別されたら音声の認識を停止するよう要求します。 簡素化のため、結果が返されて完了するまで待機します。
このコードを意図の下に挿入します。
System.out.println("Say something...");

IntentRecognitionResult result = intentRecognizer.recognizeOnceAsync().get();
認識結果 (またはエラー) を表示する
Speech サービスによって認識結果が返されたら、結果を出力します。
次のコードを IntentRecognitionResult result = recognizer.recognizeOnceAsync().get(); の下に挿入します。
if (result.getReason() == ResultReason.RecognizedSpeech) {
    System.out.println("RECOGNIZED: Text= " + result.getText());
    System.out.println(String.format("%17s", "Intent not recognized."));
}
else if (result.getReason() == ResultReason.RecognizedIntent) {
    System.out.println("RECOGNIZED: Text= " + result.getText());
    System.out.println(String.format("%17s %s", "Intent Id=", result.getIntentId() + "."));
    Dictionary<String, String> entities = result.getEntities();

    if (entities.get("floorName") != null) {
        System.out.println(String.format("%17s %s", "FloorName=", entities.get("floorName")));
    }
    if (entities.get("action") != null) {
        System.out.println(String.format("%17s %s", "Action=", entities.get("action")));
    }
}
else if (result.getReason() == ResultReason.NoMatch) {
    System.out.println("NOMATCH: Speech could not be recognized.");
}
else if (result.getReason() == ResultReason.Canceled) {
    CancellationDetails cancellation = CancellationDetails.fromResult(result);
    System.out.println("CANCELED: Reason=" + cancellation.getReason());

    if (cancellation.getReason() == CancellationReason.Error)
    {
        System.out.println("CANCELED: ErrorCode=" + cancellation.getErrorCode());
        System.out.println("CANCELED: ErrorDetails=" + cancellation.getErrorDetails());
        System.out.println("CANCELED: Did you update the subscription info?");
    }
}
コードを確認する
この時点で、コードは次のようになります。
package quickstart;
import java.util.Dictionary;
import java.util.concurrent.ExecutionException;

import com.microsoft.cognitiveservices.speech.*;
import com.microsoft.cognitiveservices.speech.intent.*;

public class Main {
    public static void main(String[] args) throws InterruptedException, ExecutionException {
        IntentPatternMatchingWithMicrophone();
    }

    public static void IntentPatternMatchingWithMicrophone() throws InterruptedException, ExecutionException {
        SpeechConfig config = SpeechConfig.fromSubscription("YOUR_SUBSCRIPTION_KEY", "YOUR_SUBSCRIPTION_REGION");

        try (IntentRecognizer intentRecognizer = new IntentRecognizer(config)) {
            intentRecognizer.addIntent("Take me to floor {floorName}.", "ChangeFloors");
            intentRecognizer.addIntent("Go to floor {floorName}.", "ChangeFloors");
            intentRecognizer.addIntent("{action} the door.", "OpenCloseDoor");

            System.out.println("Say something...");

            IntentRecognitionResult result = intentRecognizer.recognizeOnceAsync().get();
            if (result.getReason() == ResultReason.RecognizedSpeech) {
            System.out.println("RECOGNIZED: Text= " + result.getText());
            System.out.println(String.format("%17s", "Intent not recognized."));
            }
            else if (result.getReason() == ResultReason.RecognizedIntent) {
                System.out.println("RECOGNIZED: Text= " + result.getText());
                System.out.println(String.format("%17s %s", "Intent Id=", result.getIntentId() + "."));
                Dictionary<String, String> entities = result.getEntities();

                if (entities.get("floorName") != null) {
                    System.out.println(String.format("%17s %s", "FloorName=", entities.get("floorName")));
                }
                if (entities.get("action") != null) {
                    System.out.println(String.format("%17s %s", "Action=", entities.get("action")));
                }
            }
            else if (result.getReason() == ResultReason.NoMatch) {
                System.out.println("NOMATCH: Speech could not be recognized.");
            }
            else if (result.getReason() == ResultReason.Canceled) {
                CancellationDetails cancellation = CancellationDetails.fromResult(result);
                System.out.println("CANCELED: Reason=" + cancellation.getReason());

                if (cancellation.getReason() == CancellationReason.Error)
                {
                    System.out.println("CANCELED: ErrorCode=" + cancellation.getErrorCode());
                    System.out.println("CANCELED: ErrorDetails=" + cancellation.getErrorDetails());
                    System.out.println("CANCELED: Did you update the subscription info?");
                }
            }
        }
    }
}
アプリをビルドして実行する
これで、アプリをビルドし、音声サービスと埋め込みパターン マッチャーを使って意図認識をテストする準備ができました。
Eclipse で実行ボタンを選択するか、Ctrl + F11 キーを押してから、"Say something..." (何か話してください...) プロンプトの出力を確認します。 それが表示されたら、何か話して、出力を確認します。
たとえば、"Take me to floor 7" (7 階に行く) と言った場合、次の出力が表示されます。
Say something ...
RECOGNIZED: Text= Take me to floor 7.
  Intent Id= ChangeFloors
  FloorName= 7
次の手順
カスタム エンティティを使用してパターン マッチングを向上させる
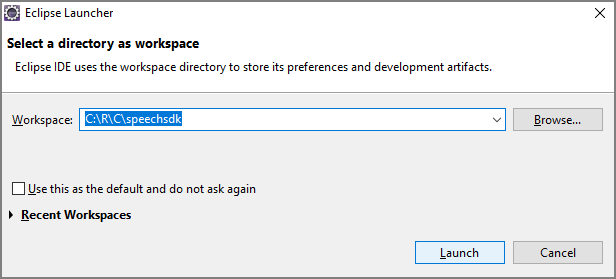
![Java プロジェクトが強調表示されている [新しいプロジェクト] ダイアログ ボックスのスクリーンショット。](media/sdk/qs-java-jre-02-select-wizard.png)
![Java プロジェクトを作成するための選択を示す、[新規 Java プロジェクト] ウィザードのスクリーンショット。](media/sdk/qs-java-jre-03-create-java-project.png)
