Azure サービスでマネージド ID を使用して Azure Cosmos DB for NoSQL に接続する方法
適用対象: NoSQL
次の場所を含むデプロイ ガイドのシーケンスの図: 概要、概念、準備、ロールベースのアクセス制御、ネットワーク、リファレンス。 現在は、"準備" の場所が強調表示されています。
この記事では、Azure Cosmos DB for NoSQL に接続されたデプロイ済みアプリケーションで使用する予定のマネージド ID を作成するために必要な手順について説明します。
マネージド ID は、アプリケーションが Microsoft Entra 認証をサポートするサービスに接続する際に使用できる Microsoft Entra ID 内の多様な ID リソースの一種です。 マネージド ID は、キーなどの従来のリソース所有の認証情報の代わりに使用できます。 Azure では、マネージド ID を使用すると、大量の認証コードを記述しなくても、アプリケーションが Azure サービスに対して認証を行うための Microsoft Entra トークンを取得できます。
Microsoft Entra を使用して、次のような Azure サービス (ただし、これらに限定されません) に対して認証を行うことができます。
- Azure SQL
- Azure AI
- Azure Cosmos DB
- Azure Storage
- Azure Event Hubs
- Azure Container Registry
マネージド ID を使用して、次のような他の Azure サービス (ただし、これらに限定されません) から Azure サービスに対して認証を行うプリンシパルを表すことができます。
- Azure Kubernetes Service
- Azure Container Apps
- Azure Virtual Machines
- Azure Functions
- Azure App Service
- Azure Spring Apps
- Azure Service Fabric
マネージド ID を使用すると、さまざまな Azure サービスが相互に接続可能な複数の安全なシナリオを実現できます。 次に例をいくつか示します。
- Azure Spring Apps で Azure SQL アカウントに接続してクエリを実行するアプリケーションのシステム割り当てマネージド ID を作成する
- Azure Kubernetes Service と Azure Functions の両方で単一のユーザー割り当てマネージド ID を使用して Azure AI アカウントに要求を発行する
- Azure Cosmos DB アカウントのマネージド ID を使用して Azure Key Vault にキーを格納する
詳細については、「Azure リソース用マネージド ID」を参照してください。
前提条件
- アクティブなサブスクリプションが含まれる Azure アカウント。 無料でアカウントを作成できます。
Azure Cloud Shell で Bash 環境を使用します。 詳細については、「Azure Cloud Shell の Bash のクイックスタート」を参照してください。
CLI リファレンス コマンドをローカルで実行する場合、Azure CLI をインストールします。 Windows または macOS で実行している場合は、Docker コンテナーで Azure CLI を実行することを検討してください。 詳細については、「Docker コンテナーで Azure CLI を実行する方法」を参照してください。
ローカル インストールを使用する場合は、az login コマンドを使用して Azure CLI にサインインします。 認証プロセスを完了するには、ターミナルに表示される手順に従います。 その他のサインイン オプションについては、Azure CLI でのサインインに関するページを参照してください。
初回使用時にインストールを求められたら、Azure CLI 拡張機能をインストールします。 拡張機能の詳細については、Azure CLI で拡張機能を使用する方法に関するページを参照してください。
az version を実行し、インストールされているバージョンおよび依存ライブラリを検索します。 最新バージョンにアップグレードするには、az upgrade を実行します。
- Azure PowerShell をローカルで使用する場合は、次のようにします。
- Az PowerShell モジュールの最新バージョンをインストールします。
- Connect-AzAccount コマンドレットを使用して、Azure アカウントに接続します。
- Azure Cloud Shell を使用する場合は、次のようにします。
- 詳細については、Azure Cloud Shell の概要に関するページを参照してください。
システム割り当てマネージド ID を使用して Azure サービスを作成する
システム割り当てマネージド ID を使用して新しい Azure サービスを作成する。 このセクションでは、Azure Container Instances リソースを作成します。
az container createを使用して新しいコンテナー インスタンスを作成します。assign-identityパラメーターを使用して、システム割り当てマネージド ID を使用するようにアカウントを設定します。az container create \ --resource-group "<name-of-existing-resource-group>" \ --name "<name-of-new-container>" \ --image mcr.microsoft.com/dotnet/samples:aspnetapp-chiseled \ --cpu 1 \ --memory 2 \ --assign-identityaz container showと JMESPath クエリを使用して、システム割り当てマネージド ID の詳細を取得します。az container show \ --resource-group "<name-of-existing-resource-group>" \ --name "<name-of-existing-container>" \ --query "identity"このコマンドからの出力を確認します。 ID とテナントの一意識別子を含める必要があります。
{
  "principalId": "aaaaaaaa-bbbb-cccc-1111-222222222222",
  "tenantId": "aaaabbbb-0000-cccc-1111-dddd2222eeee",
  "type": "SystemAssigned",
  "userAssignedIdentities": null
}
新しい Bicep ファイルを作成して、新しいコンテナー インスタンスを定義します。 ファイルに container-instance.bicep という名前を付けます。 コンテナー インスタンスの次のプロパティを設定します。
Value nameinstanceNameという名前のパラメーターを使用するlocationリソース グループの場所を設定する identity.typeSystemAssignedproperties.osTypeLinuxproperties.containers[0].nameaspnet-sampleproperties.containers[0].properties.imagemcr.microsoft.com/dotnet/samples:aspnetapp-chiseledproperties.containers[0].properties.resources.requests.cpu1properties.containers[0].properties.resources.requests.memoryInGB2metadata description = 'Create Azure Container Instance resource with system-assigned managed identity.' @description('Name of the Azure Container Instances resource.') param instanceName string resource instance 'Microsoft.ContainerInstance/containerGroups@2023-05-01' = { name: instanceName location: resourceGroup().location identity: { type: 'SystemAssigned' } properties: { osType: 'Linux' containers: [ { name: 'aspnet-sample' properties: { image: 'mcr.microsoft.com/dotnet/samples:aspnetapp-chiseled' resources: { requests: { cpu: 1 memoryInGB: 2 } } } } ] } } output systemAssignedIdentity object = instance.identitycontainer-instance.
bicepparamという名前の新しい Bicep パラメーター ファイルを作成します。 このパラメーター ファイルで、instanceNameパラメーターを使用してコンテナー インスタンスの一意の名前を作成します。using './container-instance.bicep' param instanceName = '<name-of-new-container-instance>'az deployment group createを使用して Bicep テンプレートをデプロイします。 Bicep テンプレート、パラメーター ファイル、および Azure リソース グループの名前を指定します。az deployment group create \ --resource-group "<name-of-existing-resource-group>" \ --parameters "container-instance.bicepparam" \ --template-file "container-instance.bicep"デプロイからの出力を確認します。 出力には、
properties.outputs.systemAssignedIdentity.valueプロパティ内のコンテナー インスタンスの ID オブジェクトが含まれています。{ "principalId": "aaaaaaaa-bbbb-cccc-1111-222222222222", "tenantId": "aaaabbbb-0000-cccc-1111-dddd2222eeee", "type": "SystemAssigned" }
Azure portal (https://portal.azure.com) にサインインします。
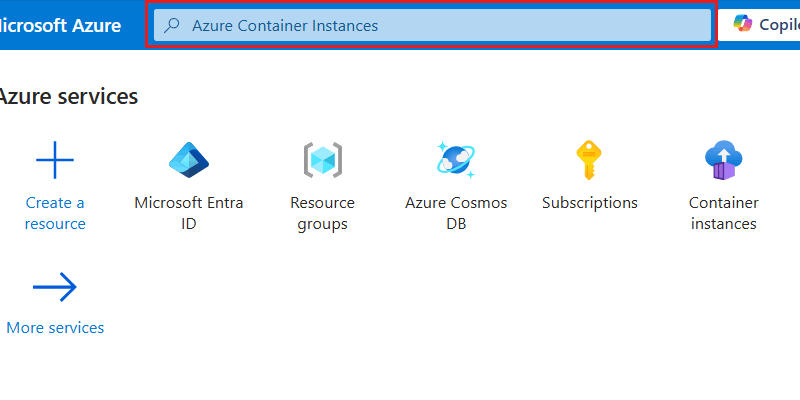
グローバル検索バーに「Azure Container Instances」と入力します。
[サービス] で [Container Instances] を選択します。
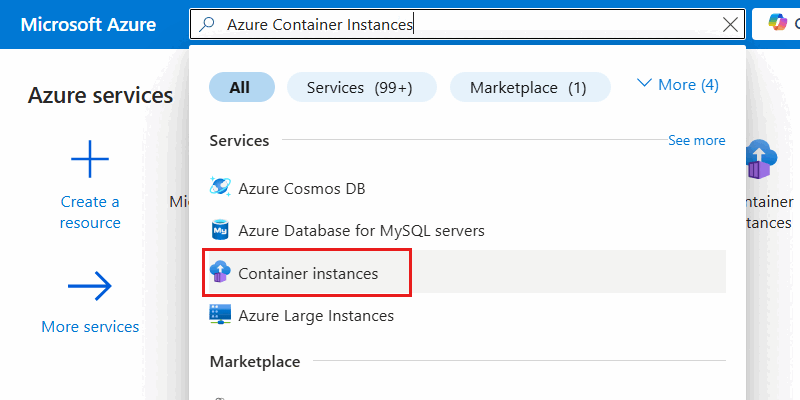
[Container Instances] ウィンドウで、[作成] を選択します。
![Azure Container Instances のウィンドウ内にある [作成] オプションのスクリーンショット。](../../includes/media/managed-identities/create-container-instance.png)
[基本情報] ウィンドウで、次のオプションを構成し、[レビュー + 作成] を選択します。
Value サブスクリプション お使いの "Azure サブスクリプション" を選択します リソース グループ 新しいリソース グループを作成する、あるいは既存のリソース グループを選択します コンテナー名 グローバルに一意の名前を指定します リージョン サブスクリプションでサポートされている Azure リージョンを選択します ![Azure Container Instances リソース作成の [基本] ウィンドウのスクリーンショット。](../../includes/media/managed-identities/basics-pane-container-instance.png)
ヒント
指令されていないオプションは既定値のままでかまいません。
[レビュー + 作成] ウィンドウで、アカウントの検証が正常に完了するまで待ってから、[作成] を選択します。
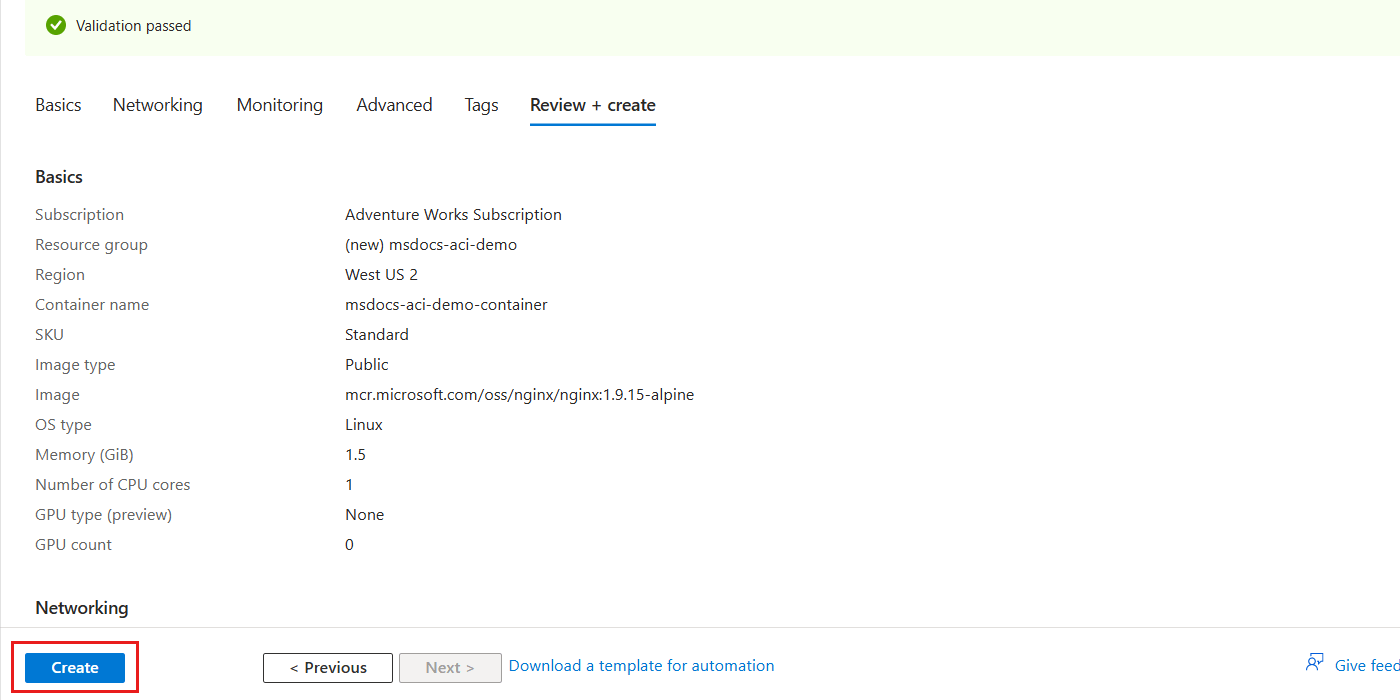
Portal は自動的に [展開] ウィンドウに移動します。 デプロイが完了するまで待ちます。
デプロイが完了したら、[リソースに移動] を選択して、新しい Azure Container Instances リソースに移動します。
![[リソースに移動] オプションが強調表示されている、完全にデプロイされた Azure Container Instances リソースを示すスクリーンショット。](../../includes/media/managed-identities/deployment-finalized-container-instance.png)
新しいコンテナー インスタンスのウィンドウ内で、サービス メニューの [設定] セクション内にある [ID] を選択します。
![コンテナー インスタンスのサービス メニューにある [ID] オプションのスクリーンショット。](../../includes/media/managed-identities/settings-identity-option-container-instance.png)
[ID] ウィンドウで、[状態] オプションを [オン] に設定して、システム割り当てマネージド ID を有効にします。 次に、[保存] を選択し、変更をコミットするためのプロンプトを解決します。
![システム割り当てマネージド ID の [状態] を [オン] に設定しているスクリーンショット。](../../includes/media/managed-identities/enable-system-assigned-managed-identity.png)
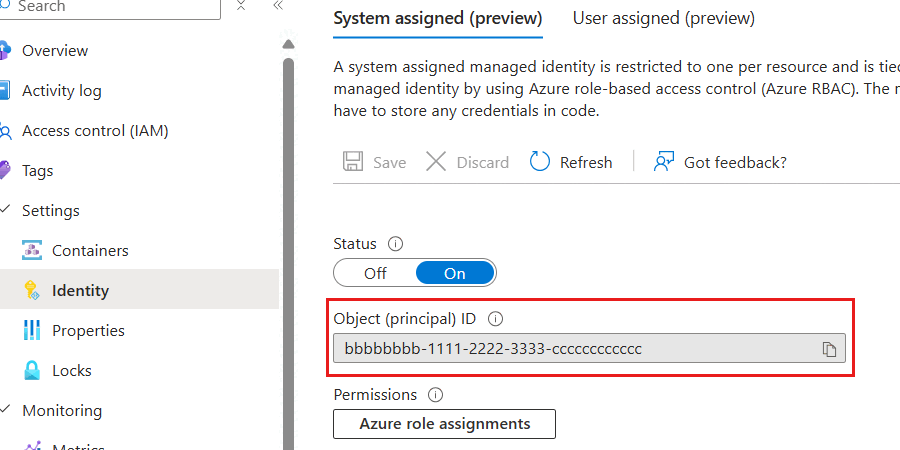
システム割り当てマネージド ID の準備ができたら、"オブジェクト (プリンシパル) ID" プロパティの値を確認します。 このプロパティの値が、ID の一意識別子です。
ヒント
この例のスクリーンショットでは、システム割り当てマネージド ID の一意識別子は
bbbbbbbb-1111-2222-3333-ccccccccccccです。
New-AzContainerInstanceObjectを使用してコンテナーを表すオブジェクトを作成し、$containerという名前の変数に格納します。 次に、そのコンテナー オブジェクトを使用して、New-AzContainerGroupで新しいコンテナー インスタンスを作成します。IdentityTypeパラメーターをSystemAssignedに設定して、システム割り当てマネージド ID を使用するようにアカウントを設定します。$parameters = @{ Name = "aspnet-sample" Image = "mcr.microsoft.com/dotnet/samples:aspnetapp-chiseled" RequestCpu = 1 RequestMemoryInGb = 2 } $container = New-AzContainerInstanceObject @parameters $parameters = @{ ResourceGroupName = "<name-of-existing-resource-group>" Name = "<name-of-new-container>" Container = $container OsType = "Linux" Location = "<azure-region>" IdentityType = "SystemAssigned" } New-AzContainerGroup @parametersGet-AzContainerGroupを使用し、Format-ListでIdentityプロパティのみを選択してシステム割り当てマネージド ID の詳細を取得します。$parameters = @{ ResourceGroupName = "<name-of-existing-resource-group>" Name = "<name-of-existing-container>" } Get-AzContainerGroup @parameters | Format-List Identityこのコマンドからの出力を確認します。 ID とテナントの一意識別子を含める必要があります。
Identity : {
             "principalId": "aaaaaaaa-bbbb-cccc-1111-222222222222",
             "tenantId": "aaaabbbb-0000-cccc-1111-dddd2222eeee",
             "type": "SystemAssigned"
           }
ユーザー割り当てマネージド ID を作成する
移植可能な方法で 1 つ以上の Azure サービスで使用できるユーザー割り当てマネージド ID を作成します。
az identity createを使用して、Azure リソース グループに新しいユーザー割り当てマネージド ID を作成します。az identity create \ --resource-group "<name-of-existing-resource-group>" \ --name "<name-of-new-managed-identity>"az identity listを使用して、リソース グループ内のユーザー割り当てマネージド ID の一覧を取得します。az identity list \ --resource-group "<name-of-existing-resource-group>"このコマンドからの出力を確認します。 この完全修飾リソース識別子を使用してユーザー割り当てマネージド ID を Azure リソースに割り当てるため、
idフィールドの値を記録します。{ "clientId": "11112222-bbbb-3333-cccc-4444dddd5555", "id": "/subscriptions/aaaa0a0a-bb1b-cc2c-dd3d-eeeeee4e4e4e/resourcegroups/msdocs-identity-example/providers/Microsoft.ManagedIdentity/userAssignedIdentities/msdocs-identity-example-user-assigned", "location": "<azure-location>", "name": "msdocs-identity-example-user-assigned", "principalId": "cccccccc-dddd-eeee-3333-444444444444", "resourceGroup": "msdocs-identity-example", "systemData": null, "tags": {}, "tenantId": "aaaabbbb-0000-cccc-1111-dddd2222eeee", "type": "Microsoft.ManagedIdentity/userAssignedIdentities" }Note
この例では、
idの値は/subscriptions/aaaa0a0a-bb1b-cc2c-dd3d-eeeeee4e4e4e/resourcegroups/msdocs-identity-example/providers/Microsoft.ManagedIdentity/userAssignedIdentities/msdocs-identity-example-user-assignedになります。 この例では架空のデータを使用します。実際の識別子はこの例とは異なります。
Bicep ファイルを作成して、ユーザー割り当てマネージド ID を定義し、ファイルに user-assigned-managed-identity.bicep という名前を付けます。 次の最小限のプロパティを設定します。
Value nameidentityNameという名前のオプション パラメーターを使用して、一意の既定値を生成するlocationリソース グループの場所を設定する metadata description = 'Create a user-assigned managed identity.' param identityName string = uniqueString(subscription().id, resourceGroup().id) resource identity 'Microsoft.ManagedIdentity/userAssignedIdentities@2023-01-31' = { name: identityName location: resourceGroup().location } output id string = identity.id output name string = identity.nameaz deployment group createを使用して Bicep テンプレートをデプロイします。 Bicep テンプレートと Azure リソース グループの名前を指定します。az deployment group create \ --resource-group "<name-of-existing-resource-group>" \ --template-file "user-assigned-managed-identity.bicep"デプロイからの出力を確認します。 出力には、
properties.outputs.name.valueプロパティ内のマネージド ID の一意識別子が含まれています。 このガイドの後半で新しい Azure リソースを作成するときに使用する必要があるため、この値を記録します。{ "type": "String", "value": "msdocs-identity-example-user-assigned" }Note
この例では、
name.valueはmsdocs-identity-example-user-assignedとなります。 この例では架空のデータを使用します。実際の識別子はこの例とは異なります。
グローバル検索バーに「マネージド ID」と入力します。
[サービス] で [マネージド ID] を選択します。
![検索メニューで [マネージド ID] オプションが選択されているスクリーンショット。](../../includes/media/managed-identities/search-results-managed-identities.png)
[Container Instances] ウィンドウで、[作成] を選択します。
![[マネージド ID] のウィンドウ内の [作成] オプションを示すスクリーンショット。](../../includes/media/managed-identities/create-managed-identity.png)
[基本情報] ウィンドウで、次のオプションを構成し、[レビュー + 作成] を選択します。
Value サブスクリプション お使いの "Azure サブスクリプション" を選択します リソース グループ 新しいリソース グループを作成する、あるいは既存のリソース グループを選択します リージョン サブスクリプションでサポートされている Azure リージョンを選択します 名前 グローバルに一意の名前を指定します ![マネージド ID リソース作成の [基本] ウィンドウのスクリーンショット。](../../includes/media/managed-identities/basics-pane-managed-identity.png)
[レビュー + 作成] ウィンドウで、アカウントの検証が正常に完了するまで待ってから、[作成] を選択します。
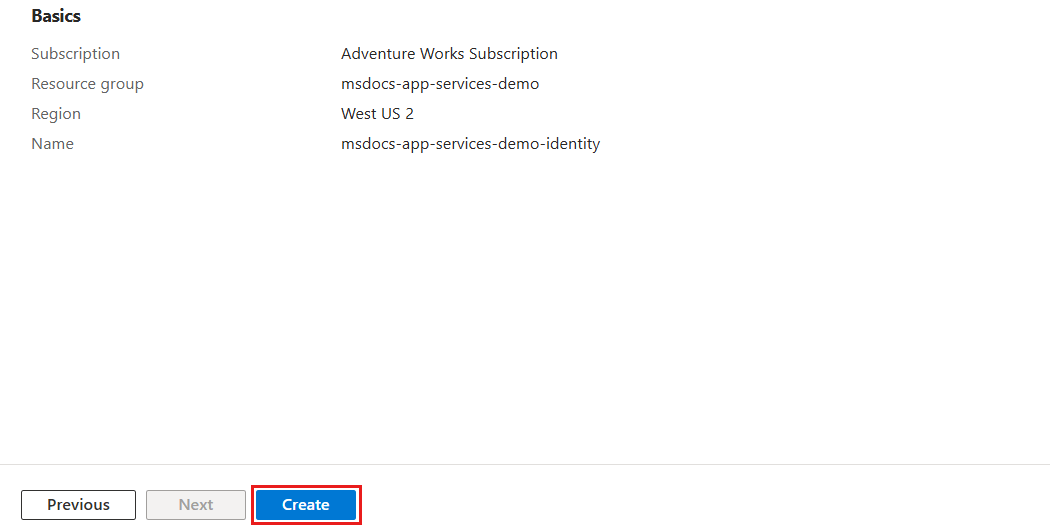
Portal は自動的に [展開] ウィンドウに移動します。 デプロイが完了するまで待ちます。
マネージド ID のデプロイが完了するまで待ちます。
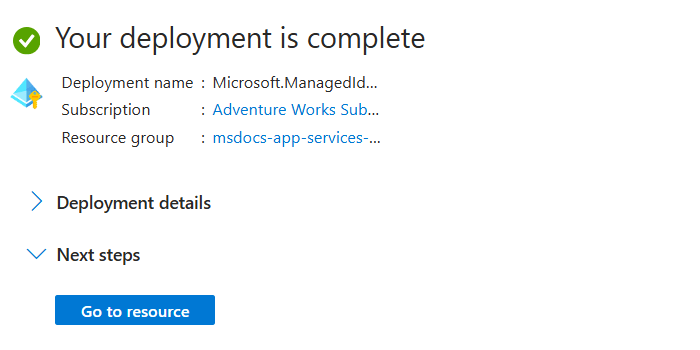
Azure リソース グループで
New-AzUserAssignedIdentityを使用して新しいユーザー割り当てマネージド ID を作成します。$parameters = @{ ResourceGroupName = "<name-of-existing-resource-group>" Name = "<name-of-new-managed-identity>" Location = "<azure-region>" } New-AzUserAssignedIdentity @parametersGet-AzUserAssignedIdentityを使用して、リソース グループ内のユーザー割り当てマネージド ID の一覧を取得します。$parameters = @{ ResourceGroupName = "<name-of-existing-resource-group>" } Get-AzUserAssignedIdentity @parameters | Format-List Name, Idこのコマンドからの出力を確認します。 この完全修飾リソース識別子を使用してユーザー割り当てマネージド ID を Azure リソースに割り当てるため、
Idフィールドの値を記録します。Name : msdocs-identity-example-user-assigned Id : /subscriptions/aaaa0a0a-bb1b-cc2c-dd3d-eeeeee4e4e4e/resourcegroups/msdocs-identity-example/providers/Microsoft.ManagedIdentity/userAssignedIdentities/msdocs-identity-example-user-assignedNote
この例では、
Idの値は/subscriptions/aaaa0a0a-bb1b-cc2c-dd3d-eeeeee4e4e4e/resourcegroups/msdocs-identity-example/providers/Microsoft.ManagedIdentity/userAssignedIdentities/msdocs-identity-example-user-assignedになります。 この例では架空のデータを使用します。実際の識別子はこの例とは異なります。
ユーザー割り当てマネージド ID を使用して Azure サービスを作成する
以前に作成したユーザー割り当てマネージド ID を新しい Azure ホスティング サービスに割り当てます。 このセクションでは、Azure App Service Web アプリ リソースを作成します。
az appservice plan createを使用して新しい App Service プランを作成します。az appservice plan create \ --resource-group "<name-of-existing-resource-group>" \ --name "<name-of-new-plan>"az webapp createを使用して、ユーザー割り当てマネージド ID を新しい Web アプリに割り当てます。ssign-identityパラメーターの値として、このガイドで前に記録したidフィールドを使用します。az webapp create \ --resource-group "<name-of-existing-resource-group>" \ --name "<name-of-existing-web-app>" \ --plan "<name-of-existing-plan>" \ --assign-identity "<resource-id-recorded-earlier>"az webapp showと JMESPath クエリを使用して、このアカウントに割り当てられているすべての ID の詳細を取得します。az webapp show \ --resource-group "<name-of-existing-resource-group>" \ --name "<name-of-existing-account>" \ --query "identity"このコマンドからの出力を確認します。 これには、ユーザー割り当てマネージド ID の両方が含まれている必要があります。
{
  "principalId": null,
  "tenantId": null,
  "type": "UserAssigned",
  "userAssignedIdentities": {
    "/subscriptions/aaaa0a0a-bb1b-cc2c-dd3d-eeeeee4e4e4e/resourcegroups/msdocs-identity-example/providers/Microsoft.ManagedIdentity/userAssignedIdentities/msdocs-identity-example-user-assigned": {
      "clientId": "11112222-bbbb-3333-cccc-4444dddd5555",
      "principalId": "cccccccc-dddd-eeee-3333-444444444444"
    }
  }
}
app-service-web-app.bicep という名前の別の Bicep ファイルを作成し、Azure App Service プランと Web アプリを定義します。 これらのリソースに対して次のプロパティを設定します。
リソース Value name既存のマネージド ID identityNameという名前のパラメーターを使用するnameApp Service プラン planNameという名前のパラメーターを使用するlocationApp Service プラン リソース グループの場所を設定する nameWeb アプリ webAppNameという名前のパラメーターを使用するlocationWeb アプリ リソース グループの場所を設定する identity.typeUserAssignedidentity.userAssignedIdentities.{identity.id}{}properties.serverFarmIdplan.idmetadata description = 'Creates an Azure App Service plan and web app with a user-assigned managed identity.' @description('The name of the app service plan.') param planName string @description('The name of the web app.') param webAppName string @description('The name of the user-assigned managed identity.') param identityName string resource identity 'Microsoft.ManagedIdentity/userAssignedIdentities@2023-01-31' existing = { name: identityName } resource plan 'Microsoft.Web/serverfarms@2023-12-01' = { name: planName location: resourceGroup().location } resource webApp 'Microsoft.Web/sites@2023-12-01' = { name: webAppName location: resourceGroup().location identity: { type: 'UserAssigned' userAssignedIdentities: { '${identity.id}': {} } } properties: { serverFarmId: plan.id } } output userAssignedIdentity object = webApp.identityapp-service-web-app.
bicepparamという名前の Bicep パラメーター ファイルを作成します。 このパラメーター ファイルで、planNameパラメーターとwebAppNameパラメーターをそれぞれ使用して Web アプリとプランの一意の名前を作成します。 次に、identityNameパラメーターの値として、ユーザー割り当てマネージド ID の名前を指定します。using './app-service-web-app.bicep' param planName = '<name-of-new-app-service-plan>' param webAppName = '<name-of-new-web-app>' param identityName = '<name-of-existing-managed-identity>'az deployment group createを使用して Bicep テンプレートをデプロイします。 Bicep テンプレート、パラメーター ファイル、および Azure リソース グループの名前を指定します。az deployment group create \ --resource-group "<name-of-existing-resource-group>" \ --parameters "app-service-web-app.bicepparam" \ --template-file "app-service-web-app.bicep"デプロイからの出力を確認します。 出力には、
properties.outputs.userAssignedIdentity.valueプロパティ内のコンテナー インスタンスの ID オブジェクトが含まれています。{ "type": "UserAssigned", "userAssignedIdentities": { "/subscriptions/aaaa0a0a-bb1b-cc2c-dd3d-eeeeee4e4e4e/resourcegroups/msdocs-identity-example/providers/Microsoft.ManagedIdentity/userAssignedIdentities/msdocs-identity-example-user-assigned": { "clientId": "11112222-bbbb-3333-cccc-4444dddd5555", "principalId": "cccccccc-dddd-eeee-3333-444444444444" } } }
グローバル検索バーに「Web アプリ」と入力します。
[サービス] で [App Services] を選択します。
![検索メニューで [App Services] オプションを選択しているスクリーンショット。](../../includes/media/managed-identities/search-results-app-services.png)
[App Services] ウィンドウで [作成] を選択し、[Web アプリ] を選択します。
![Azure App Service のウィンドウ内の [作成] オプションを示すスクリーンショット。](../../includes/media/managed-identities/create-app-service-web-app.png)
[基本情報] ウィンドウで、次のオプションを構成し、[レビュー + 作成] を選択します。
Value サブスクリプション お使いの "Azure サブスクリプション" を選択します リソース グループ 新しいリソース グループを作成する、あるいは既存のリソース グループを選択します 名前 グローバルに一意の名前を指定します プラン 新しいプランを作成するか、既存のプランを選択する ![Web アプリ リソース作成の [基本] ウィンドウのスクリーンショット。](../../includes/media/managed-identities/basics-pane-web-app.png)
[レビュー + 作成] ウィンドウで、アカウントの検証が正常に完了するまで待ってから、[作成] を選択します。
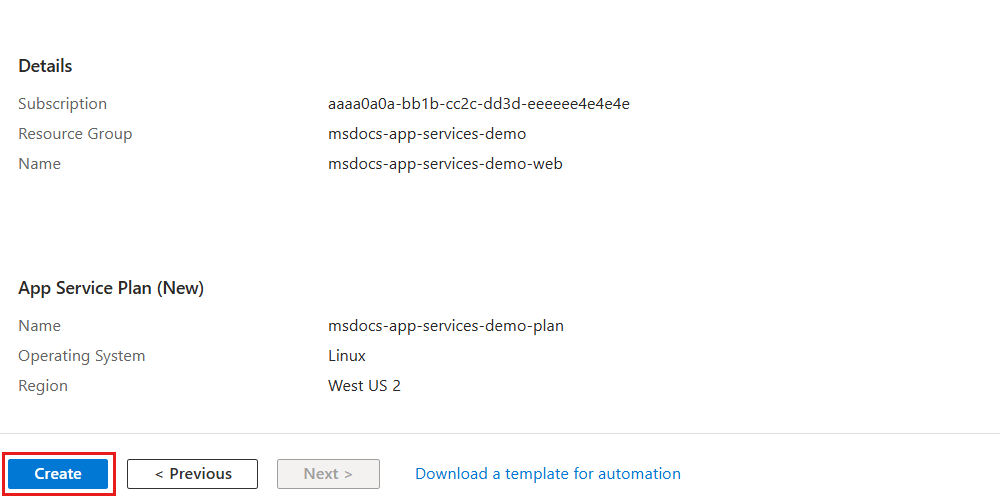
Portal は自動的に [展開] ウィンドウに移動します。 デプロイが完了するまで待ちます。
デプロイが完了したら、[リソースに移動] を選択して、新しい Azure Container Instances リソースに移動します。
![[リソースに移動] オプションが強調表示されている、完全にデプロイされた Azure App Service Web アプリ リソースを示すスクリーンショット。](../../includes/media/managed-identities/deployment-finalized-web-app.png)
新しいコンテナー インスタンスのウィンドウ内で、サービス メニューの [設定] セクション内にある [ID] を選択します。
![Web アプリのサービス メニューにある [ID] オプションのスクリーンショット。](../../includes/media/managed-identities/settings-identity-option-web-app.png)
[ID] ウィンドウで、[ユーザー割り当て] オプションを選択します。
![Web アプリの [ID] ウィンドウにある [ユーザー割り当て] オプションのスクリーンショット。](../../includes/media/managed-identities/user-assigned-managed-identity-option.png)
[追加] を選択してダイアログを開き、既存のユーザー割り当てマネージド ID を割り当てます。 ダイアログで既存のユーザー割り当てマネージド ID を選択し、[追加] を選択します。
![Web アプリの [ID] ウィンドウにある [追加] オプションと [ユーザー割り当てマネージド ID の追加] ダイアログのスクリーンショット。](../../includes/media/managed-identities/existing-user-assigned-managed-identity.png)
最後に、Web アプリに関連付けられているユーザー割り当てマネージド ID の一覧を確認します。 これには、ID の名前、リソース グループ名、サブスクリプション識別子が含まれている必要があります。
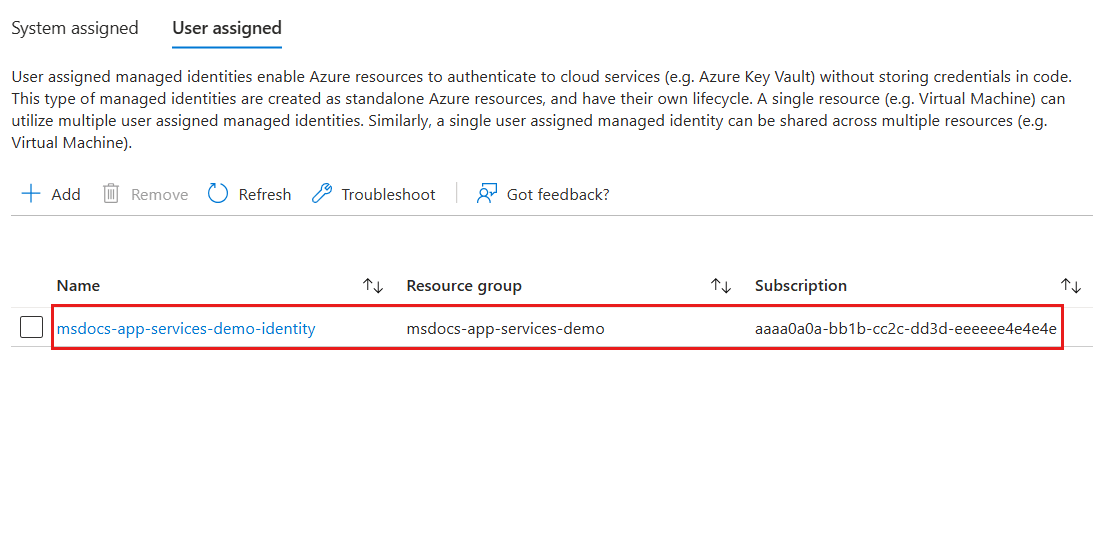
New-AzWebAppを使用して新しい App Service Web アプリを作成します。$parameters = @{ ResourceGroupName = "<name-of-existing-resource-group>" Name = "<name-of-new-web-app>" Location = "<azure-region>" } New-AzWebApp @parameters新しく作成した Web アプリにパッチを適用して、
identity.typeプロパティをUserAssignedに設定し、既存のユーザー割り当てマネージド ID をidentity.userAssignedIdentitiesプロパティに追加します。 このタスクを実行するには、最初に、このガイドで前に記録したidフィールドをidentityIdシェル変数の値として指定します。 次に、ペイロード オブジェクトを構築し、JSON に変換します。 最後に、PATCHHTTP 動詞を指定してInvoke-AzRestMethodを使用し、既存の Web アプリを更新します。$identityId = "<resource-id-recorded-earlier>" $payload = @{ identity = @{ type = "UserAssigned" userAssignedIdentities = @{ "$identityId" = @{} } } } | ConvertTo-Json -Depth 3 $parameters = @{ ResourceGroupName = "<name-of-existing-resource-group>" Name = "<name-of-existing-web-app>" ResourceProviderName = 'Microsoft.Web' ResourceType = 'sites' ApiVersion = '2023-12-01' Method = 'PATCH' Payload = $payload } Invoke-AzRestMethod @parametersGet-AzWebApp、Select-Objectを使用し、ConvertTo-JsonでIdentityプロパティのみを選択して Web アプリに割り当てられているすべての ID の詳細を取得します。$parameters = @{ ResourceGroupName = "<name-of-existing-resource-group>" Name = "<name-of-existing-web-app>" } Get-AzWebApp @parameters | Select-Object Identity | ConvertTo-Json -Depth 3このコマンドからの出力を確認します。 ID とテナントの一意識別子を含める必要があります。
{
  "Identity": {
    "Type": "UserAssigned",
    "TenantId": null,
    "PrincipalId": null,
    "UserAssignedIdentities": {
      "/subscriptions/aaaa0a0a-bb1b-cc2c-dd3d-eeeeee4e4e4e/resourcegroups/msdocs-identity-example/providers/Microsoft.ManagedIdentity/userAssignedIdentities/msdocs-identity-example-user-assigned": {
        "PrincipalId": "cccccccc-dddd-eeee-3333-444444444444",
        "ClientId": "11112222-bbbb-3333-cccc-4444dddd5555"
      }
    }
  }
}

