Getting Started with ASP.NET Core in Visual Studio for Mac
Important
Visual Studio for Mac was retired on August 31, 2024 in accordance with Microsoft’s Modern Lifecycle Policy. While you can continue to work with Visual Studio for Mac, there are several other options for developers on Mac such as the preview version of the new C# Dev Kit extension for VS Code.
Visual Studio for Mac makes it easy to develop your app's service with its support for the latest ASP.NET Core Web development platform. ASP.NET Core runs on the latest evolution of the .NET platform and runtime. It's been tuned for fast performance, factored for small install sizes, and reimagined to run on Linux and macOS, as well as Windows.
Installing .NET 6
.NET 6 is automatically installed when you install Visual Studio for Mac. For more information about versions of .NET supported in Visual Studio for Mac, see Supported versions of .NET.
Creating an ASP.NET Core app in Visual Studio for Mac
Open Visual Studio for Mac. On the Start Screen, select New
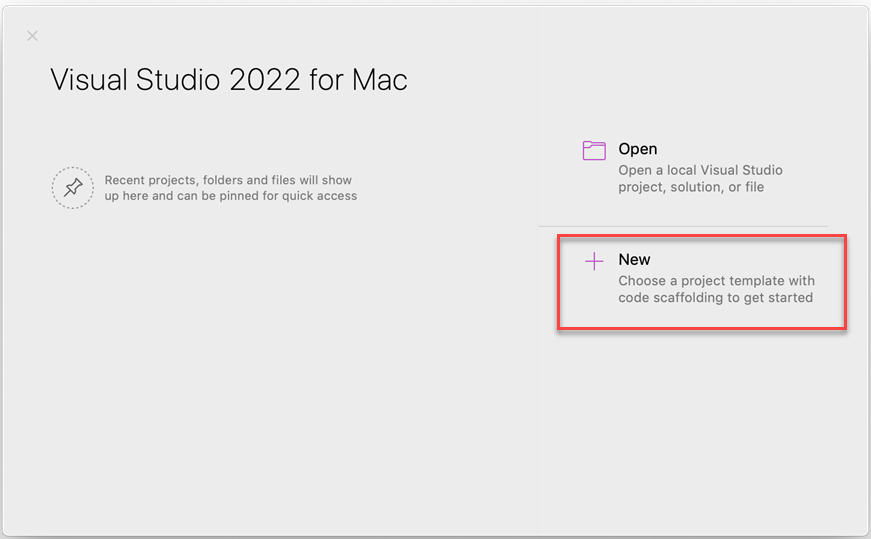
The New Project dialog is shown. It lets you select a template to create your application.
There are many projects that'll provide you with a prebuilt template to start building your ASP.NET Core Application. They are:
- .NET Core > Empty
- .NET Core > API
- .NET Core > Web Application
- .NET Core > Web Application (Model-View-Controller)
- gRPC Service
- .NET Core > Blazor Server App
- .NET Core > Blazor WebAssembly App
- Razor Class Library
- Angular
- React.js
- React.js and Redux
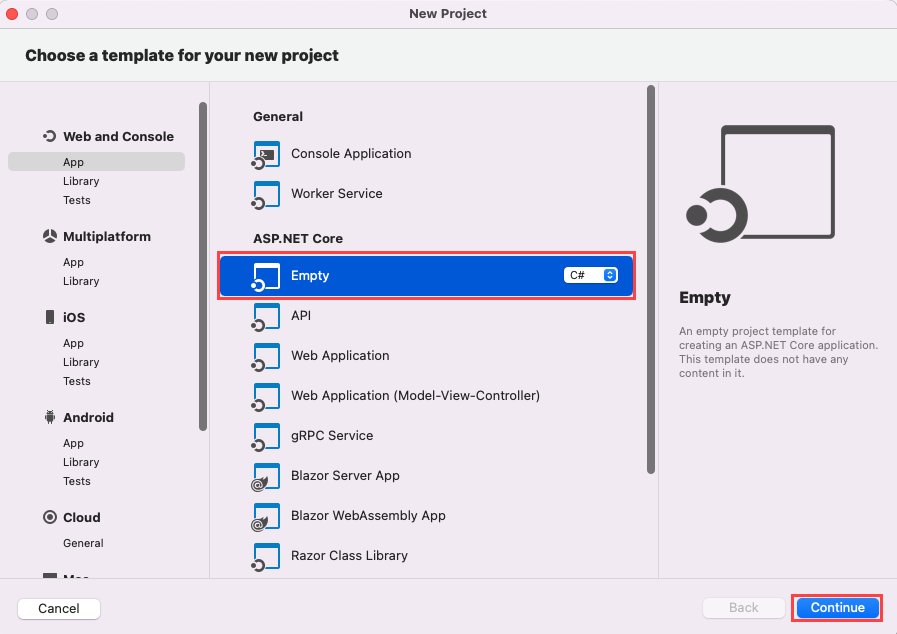
Select the ASP.NET Core Empty Web Application and select Continue. Give the Project a name and select Continue. These steps create a new ASP.NET Core app. In the Solution window's left pane, expand the second arrow and then select Program.cs. It should look similar to the following image:
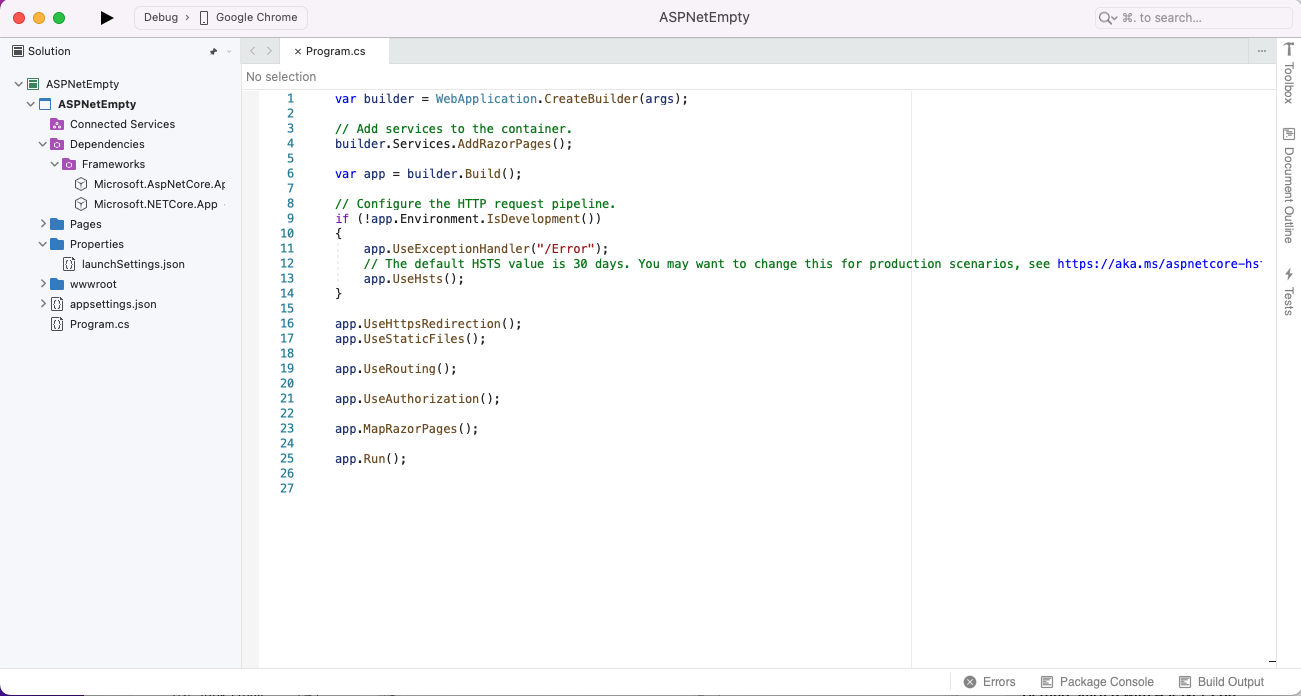
The ASP.NET Core Empty template creates a web application with default files like Program.cs that is explained here. It also creates a Dependencies folder, which contains your project's NuGet package dependencies such as ASP.NET Core, the .NET Core framework, and the MSBuild targets that build the project:
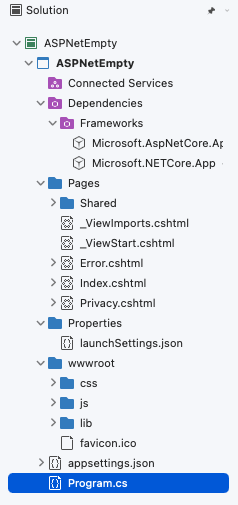
Program.cs
Open and inspect the Program.cs file in your project. Notice that several things are happening. The first is that there's no Main method. By default the Empty template is configured to use the minimal Web API type projects introduced in .NET 6.
var builder = WebApplication.CreateBuilder(args);
var app = builder.Build();

app.MapGet("/", () => "Hello World!");

app.Run();
The following code creates a WebApplicationBuilder and a WebApplication with pre-configured defaults:
var builder = WebApplication.CreateBuilder(args);
var app = builder.Build();
The following code creates an HTTP GET endpoint / that returns Hello World!:
app.MapGet("/", () => "Hello World!");
app.Run(); runs the app.
This simple Hello, World project can run now without any extra code being added. To run the app, you can either select which browser you want to run app in using the dropdown list right of the Play button. Or, you can hit the Play (triangular) button to use your default browser:
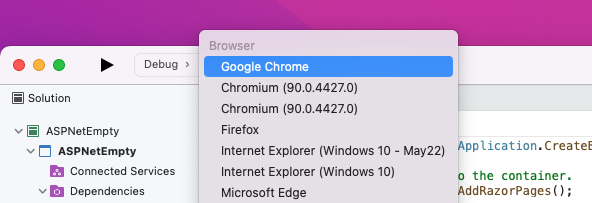
Visual Studio for Mac uses a random port to launch your web project. To find out what port it is, open the Application Output, which is listed under the View > Other Windows menu. You should find output similar as the following sample:

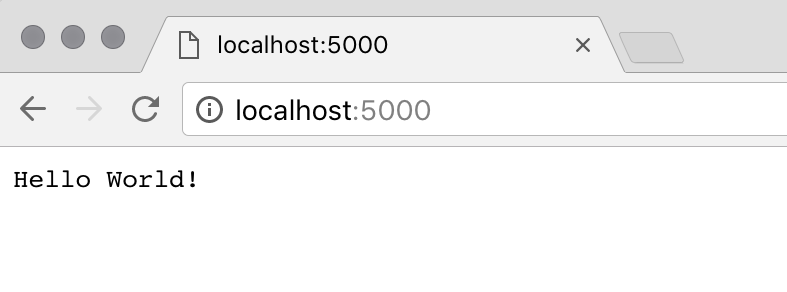
Once the project is running, your default web browser should launch and connect to the URL listed in the Application Output. Alternatively, you can open any browser of your choice, and enter http://localhost:5000/, replacing the 5000 with the port that Visual Studio output in the Application Output. You should see the text Hello World!:
Troubleshooting
If you need to install .NET Core manually on macOS 10.15 (Catalina) and higher, follow these steps:
Before you start installing .NET Core, ensure that you've updated all OS updates to the latest stable version. You can check by going to the App Store application, and selecting the Updates tab.
Follow the steps listed on the .NET Core site.
Make sure to complete all steps successfully to ensure that .NET Core is installed successfully.
Summary
This guide gave an introduction to ASP.NET Core. It describes what it is, when to use it, and provided information on using it in Visual Studio for Mac. For more information on the next steps from here, see the following guides:
- ASP.NET Core docs.
- Create Backend Services for Native Mobile Applications, which shows how to build a REST service using ASP.NET Core for a Xamarin.Forms app.
- ASP.NET Core hands-on lab.