Lean manufacturing: Picking activities and kanban line events
When using Lean manufacturing in Microsoft Dynamics AX 2012, you can model production flows that use multiple activities to produce a single product. This was described in the whitepaper, Lean Manufacturing: Production flows and activities, in the section “Semi-finished” on page 26. In that context, “semi-finished” refers to the output product from an activity that has not yet reached the next BOM level and requires additional activities.
With R2, we extended this functionality with the capability to distribute the material consumption over the different activities of the production flow. In order to achieve this, specific picking activities must be created and assigned for each process activity of the production flow. This determines which kanban line will be associated with which kanban job.
In this blog, I will walk you through a small scenario, to illustrate how to define a production flow that uses this capability, and to provide a couple of hints to help you understand the possible issues in this process.
Assume the following production flow:
A finished product is produced from one lean production flow with a kanban rule spanning over two activities. The finished product needs two components, the first is consumed by process 1 and the second is consumed by process 2.
Additionally, both components are pulled to the activities by using a withdrawal kanban line event kanban.
In the following we will explain the critical elements of the definition of the production flow. We will not include every step of the configuration, to keep the focus on the elements that influence and enable the specific desired behavior.
We start with defining the products and the bill of material (BOM):
Consider that the BOM and BOM version do not specify a site, and the lines specify resource consumption. This allows us to produce the same product on multiple sites or multiple alternative production flows. The warehouse
and locations will be determined out of the production flow during creation of the kanban.
Now we will define the work cells, the production flow, version, and the respective activities.
We define two work cells for the two activities, WCP1 and WCP2 as resource groups:
SpProd is the warehouse on the production shop floor on Site 2. Each work cell has a dedicated input and output location. The input location of WCP1 is Input, the input location of WCP2 is SpAsm.
The finished products will be put to location Pack when the kanbans are received.
We will now create a production flow and version:
And then create the activities for that version:
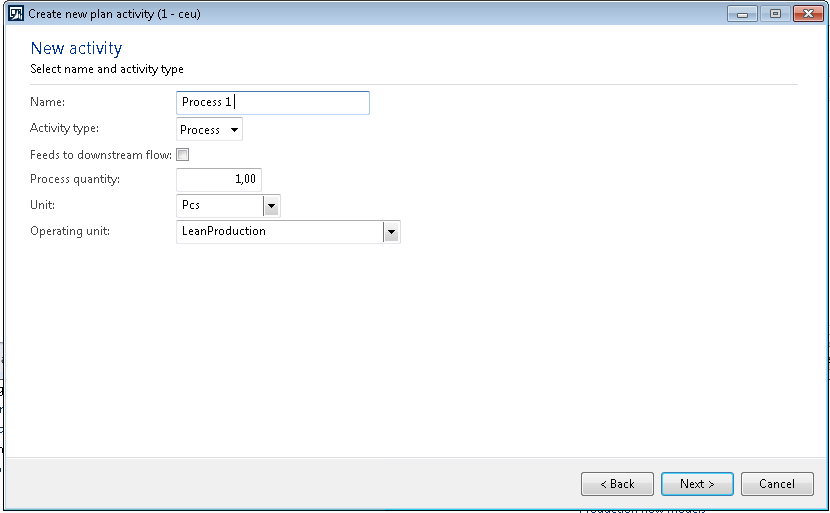
The first activity is Process 1, activity type Process.
In the next step, we select the work cell WCP1. As this activity is not the activity that finishes the product and posts the receipt of the product back to inventory, we must deselect Update on hand receipt. Instead we select receive Semi finished product, to specify that this activity requires one (or multiple) successor activities to finish the product.
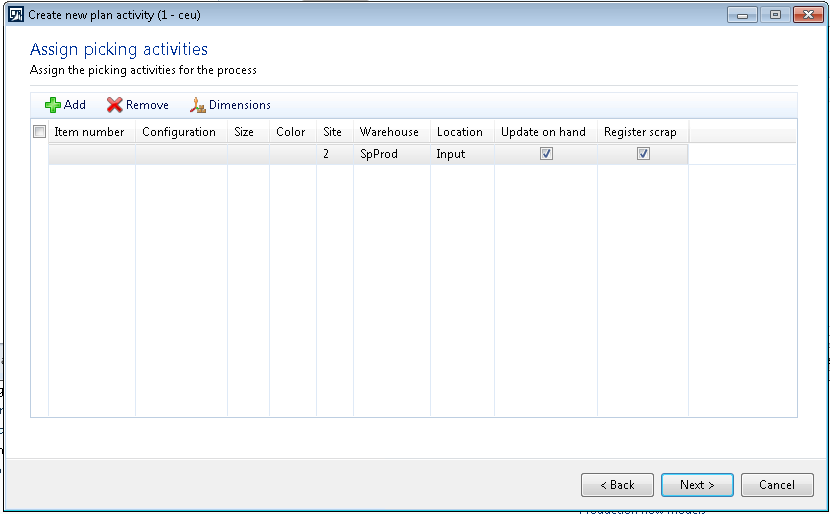
As the first process activity in the production flow, the Pick up semi finished check box must stay unselected. Because this check box is unselected, the next step will open the Picking activity definition and show the default picking activity that has been created for the input location of work cell WCP1:
The picking activity is set up to Update on hand and Register scrap by default. Click Next.
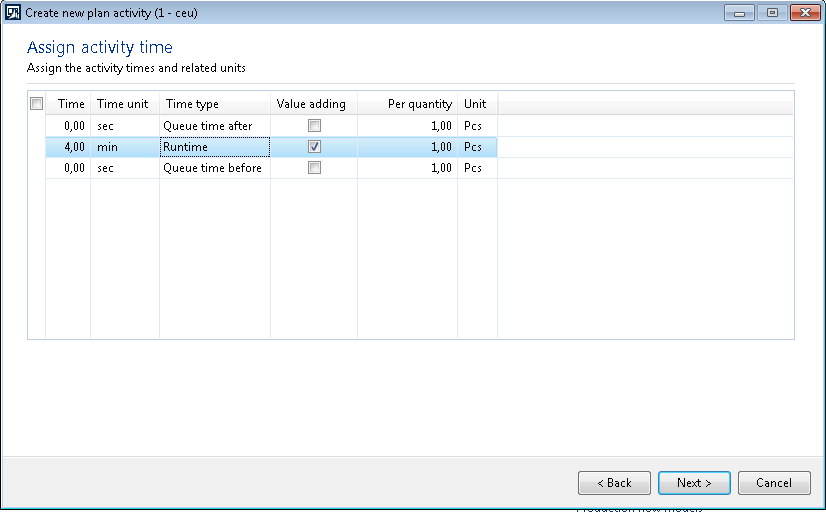
In the last step we assign an activity time, and finish the creation of the activity. (Note that time and capacity are not specifically discussed in this blog, as they do not influence the discussed behavior. However, they are mandatory data to set up to make the scenario work.)
We will now create Process 2.
Again, we assign a Name and select the activity type Process.
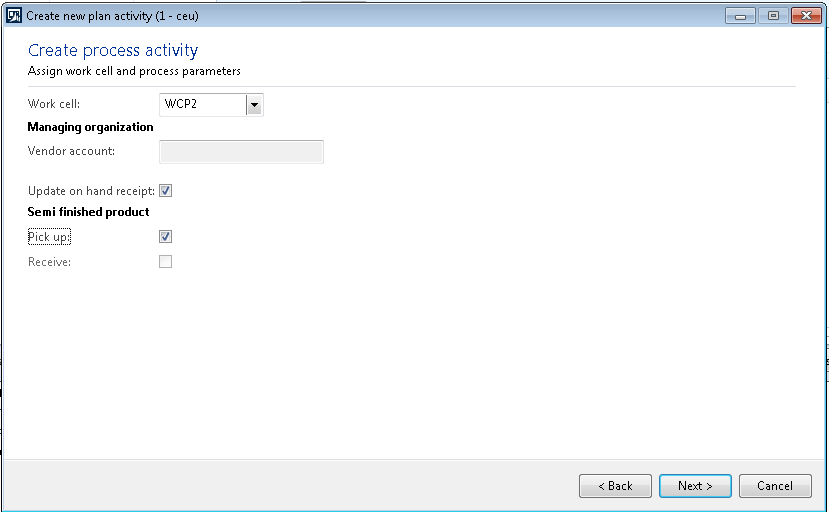
As the second activity in the flow after Process one, we have to specify the activity as Pick up Semi finished product. If you forget this setting, you will receive an error when you attempt to create the activity relation between these two activities.
As this is the last activity in the production flow, the activity must be set to Update on hand receipt. The output of the activity must be posted to inventory. This configuration deselects and disables the Receive Semi Finished product check box.
Because the activity is set to Pick up Semi finished product, the Next button will take you directly to the activity time definition. Notice that there is NO default picking activity defined for this activity. You may define picking activities in a later step by using the activity details form. We will return to this, as this must be done for the given scenario.
Back to our activity, again, we have to specify a runtime to complete the creation:
Then we can finish the creation of the activity.
If everything has been correctly created, you should be able to create the activity relation between the two activities now:
The next step is to create the two transfer activities that will be used to pull the material to the work cells.
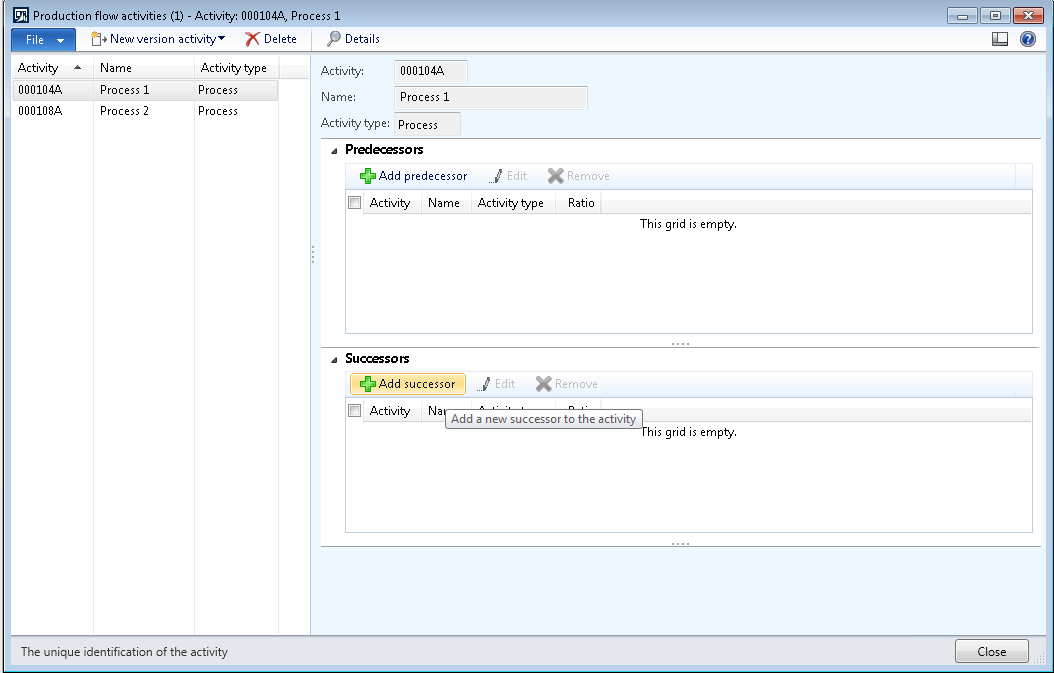
Again, add a new version activity:
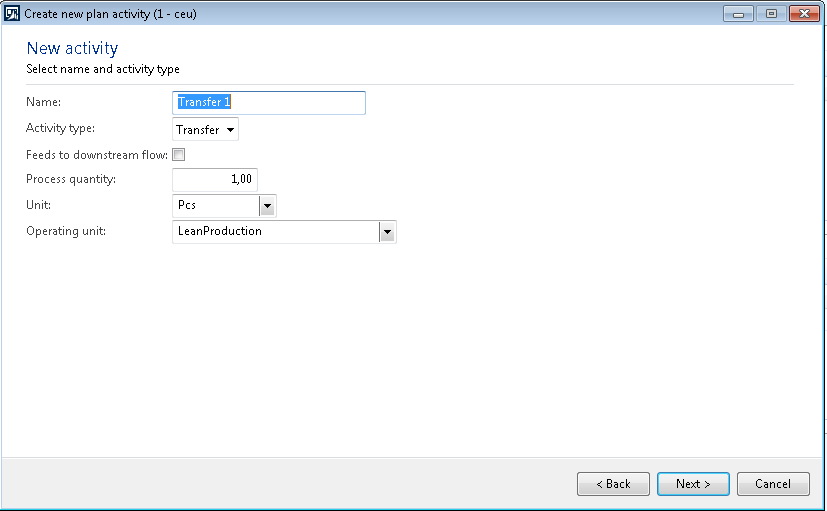
Select the name Transfer 1 and the type Transfer and click Next.
For transfer activities, the second page of the activity wizard is different. To make the configuration simpler, you can directly select the work cells that replenish or are replenished by this transfer activity. In our case, we select WCP1 as the replenished work cell, as the activity should pull material to this cell. (Note that the relation to the work cell is not persisted in the data model. This is just used to provide the input and output locations from the selected work cells.)
Use the default settings for finished products and update the on hand for this activity. (There are variations to this scenario that would not update the on hand inventory, but that is another story.)
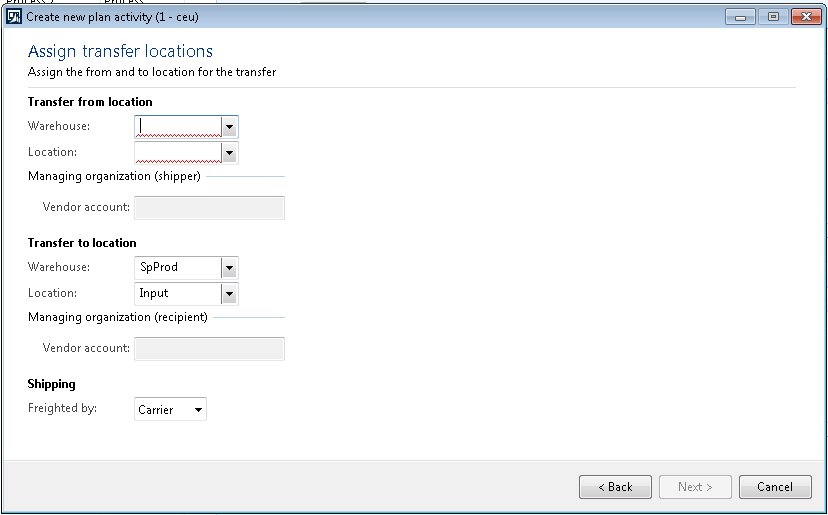
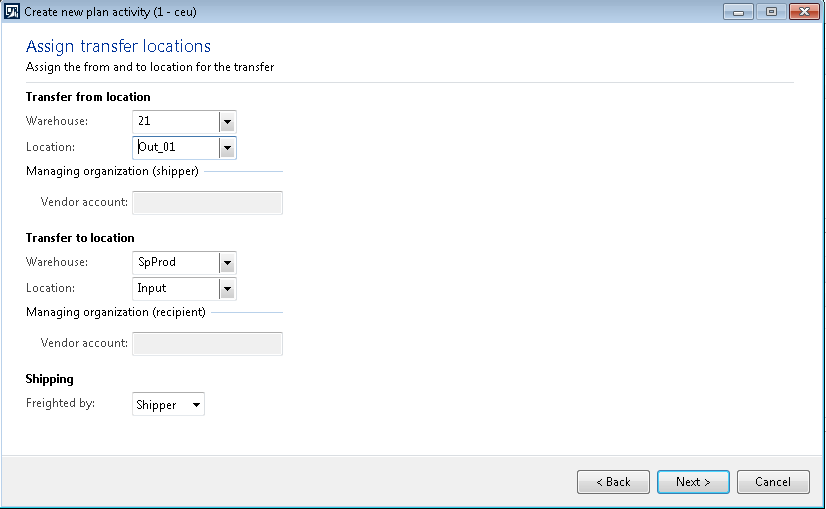
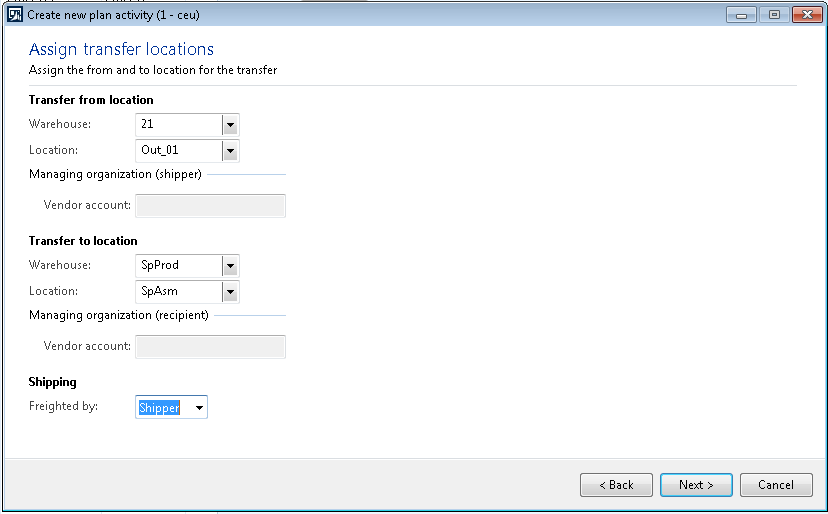
On the next page, note that the Transfer to location has been included from the replenished work cell WCP1. Select a source warehouse and location for the transfer, and select Shipper in the Freighted by field:
Finish creating the activity by assigning an activity runtime. Then you can assign Transfer 1 as a predecessor activity to Activity Process 1:
Be aware that this only works because there is a default picking activity on activity Process 1, that matches the target warehouse and location of the transfer activity. If one of these conditions is not met, an error message is displayed.
We will now repeat the activity creation for Transfer 2, to replenish WCP2:
Again, specify a process time to complete the creation of the activity.
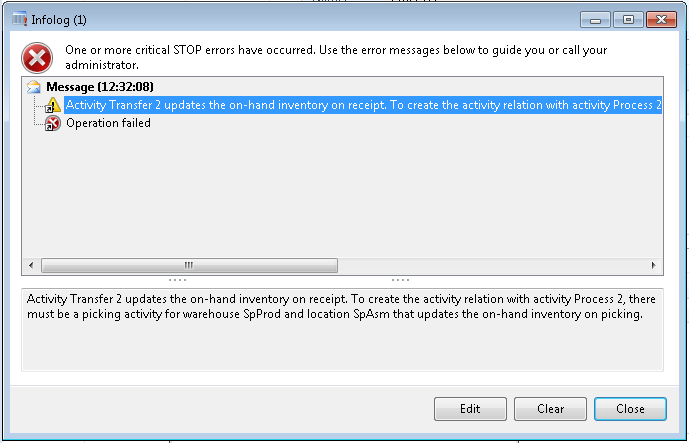
However, our attempt to connect this transfer activity to Process 2 will fail:
As mentioned earlier, Process 2 does NOT have a default picking activity.
In order to create the activity relation, we need to create a default picking activity for this activity. We can do this in the activity details form:
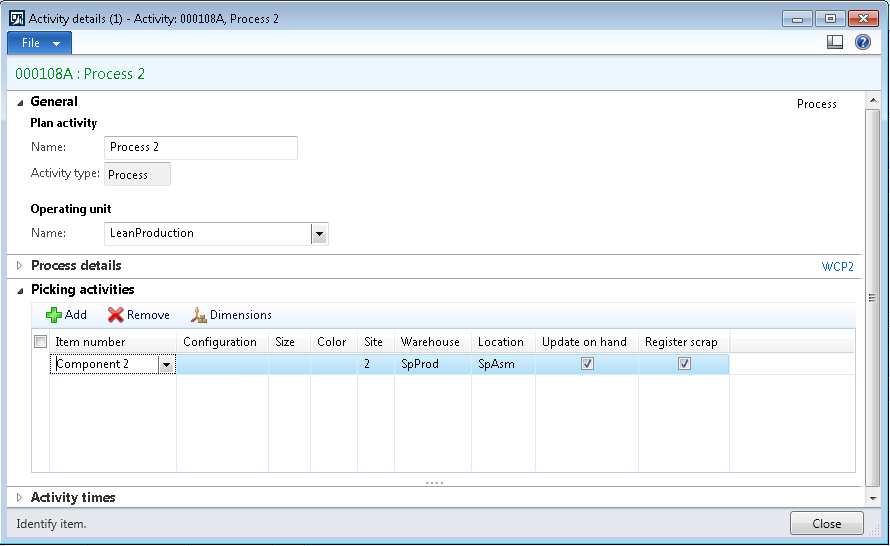
Open the details form for Process 2, open the FastTab for picking activities, and add a new line:
Add a default picking activity for warehouse SpProd and Location SpAsm. A default picking activity has NO item and no product dimensions.
Close the form and repeat the creation of the activity relation and you will get the following result:
We are now almost done.
In order to configure the expected picking behavior of Process 2, we need to get back to this activity again and change the picking activities once more. For this, open the details again:
To ensure that Component 2 is picked for Activity 2 and that a kanban line event is created for this activity, there must be a valid picking activity for Component 2. The previously created default picking activity (no item) would be valid for this as well. However, it would also catch Component 1 to be picked at activity 2. Therefore, the picking activity should be updated with Component 2 and the default picking activity should remain on Process 1.
Remember that for any product that should be picked on Process 2 instead of Process 1 you will need to add a line to the picking activities of Process 2. You can also do this after the production flow has been activated.
You can now activate the production flow. (Depending on your capacities, you may have to adjust the takt requirements of the production flow version. Again this mandatory setup, but it is not important to the outcome of this scenario.)
We will now proceed with creating the kanban rules. We start by creating the two kanban line event rules for Component 1 and Component 2:
The kanban rule type is Withdrawal. Select the activity Transfer 1 and the replenishment strategy Event. The kanban line event should be set to Automatic. The product selection is Component 1.
Create a similar rule for Component 2 and activity Transfer 2:
Finally, create the kanban rule for the finished product:
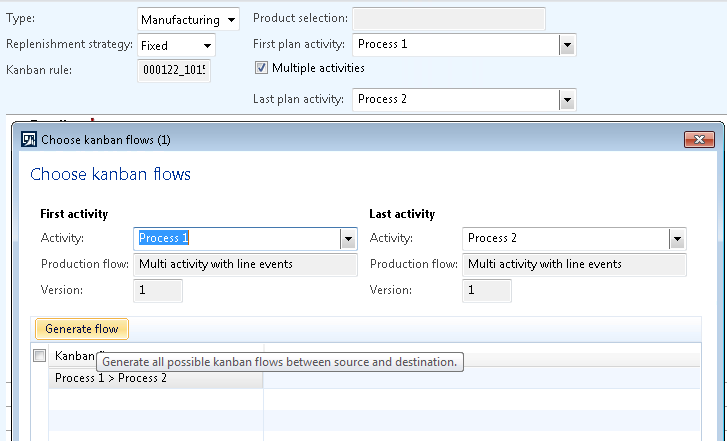
Select Manufacturing type. The replenishment strategy could be any. In this case we use Fixed. The first plan activity is Process 1. Check multiple activities, which activates the last activity field. Fill in Process 2, which opens the selection of the Kanban flow form. As this is the first rule created for these activities, you need to generate the flows by using the Generate flow button and then confirm the warning message that will be shown.
There will be one resulting line: Process 1 > Process 2. Select the line and close the dialog with Ok.
Enter the default quantity and the fixed kanban quantity to complete the kanban rule definition.
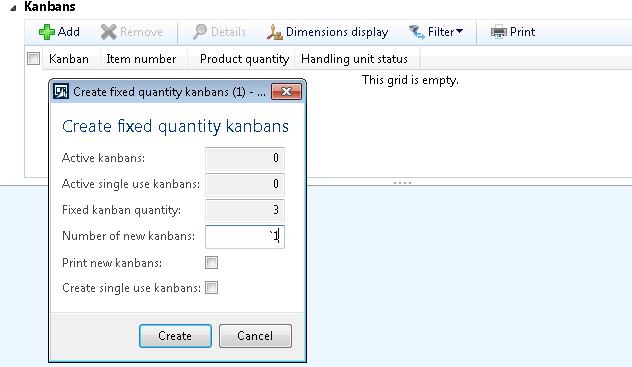
If you now go to the Kanbans FastTab and click Add, you can create the first kanban:
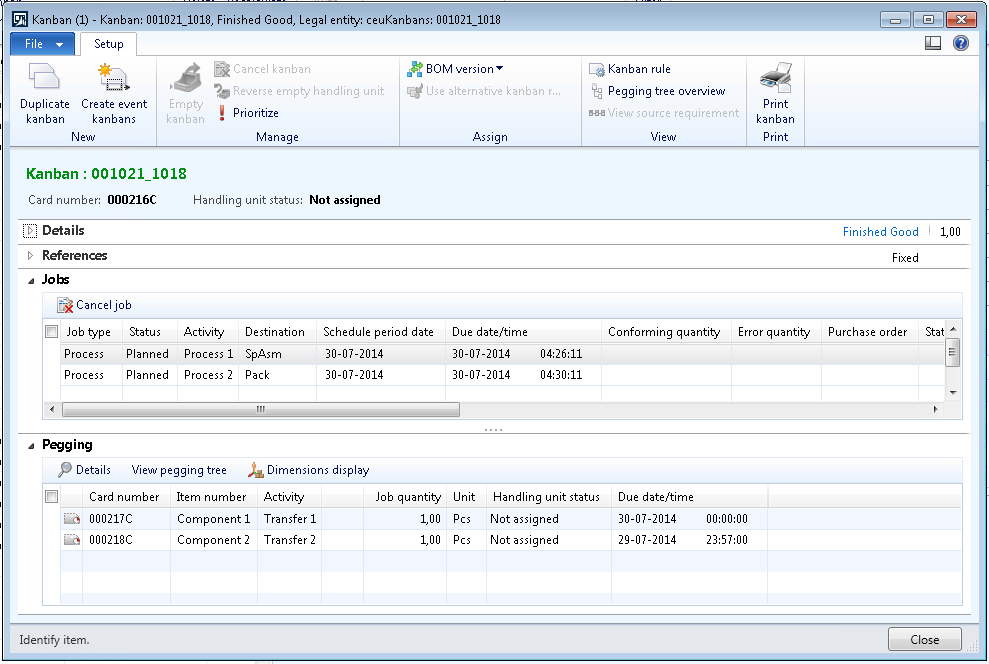
After the creation of the kanban, open the kanban details form and view the Jobs and Pegging FastTabs:
Two kanbans and the respective kanban cards have been created and pegged to each of the activities of the parent kanban.
Summary:
To model more complex material flows for Lean manufacturing for Dynamics AX you need some basic understanding of the underlying concepts:
- Use kanban line events to pull material to kanban activities
Use activities that consume or receive semi-finished products (work in process between two BOM levels) to model lean manufacturing processes that require multiple process activities to produce a product
- Use picking activities to allocate material consumption to specific activities in a production flow
- Understand and use default picking activities in production flows that have multiple activities
When you have understood these basic concepts, the full power of the Lean manufacturing for Microsoft Dynamics AX is available to you.
Comments
- Anonymous
August 26, 2014
Great practical and useful article. Will open a VM and do some testing.


