Continuous deployment with Web App for Containers using Azure Container Registry - Part 4
This Post is in continuation of Post : https://blogs.msdn.microsoft.com/paraspatidar/continuous-deployment-with-web-app-for-containers-using-azure-container-registry-part-3/ and it is Part 4 of the thread.
To start Over , please begin from Here
Our next steps are from Setting up Azure Web app for container for that Image section .
11. Create Web app for container.
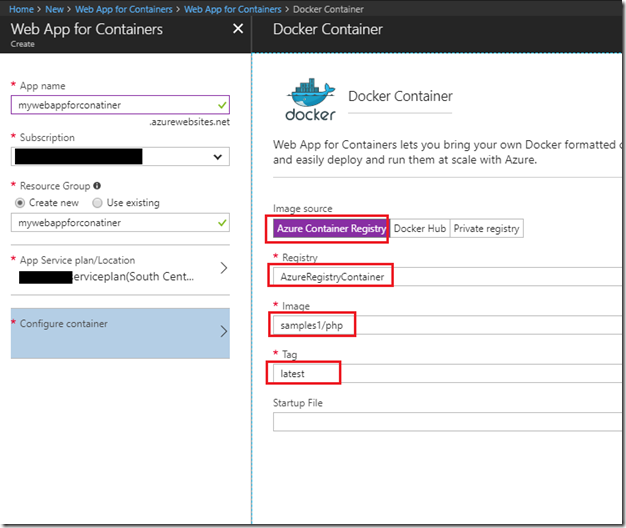
From Azure market place, create a new web app for containers & select the containers values here (which covers up the steps 12 & 13 as well)
After create button click it will create that web app in few minutes from that image which we pushed earlier.
12. In Docker Container option, select the Azure Container registry.
Same was already done in step 11, however can be reconfigure at Web app’s “Docker Container” option
13. Select the values for Registry, Image, Tag & hit Save.
Same was already done in step 11 , however can be reconfigure at Web app’s “Docker Container” option
14. Restart the Web App.
If you are changing the Registry, Image, Tag , please restart the web app after save to reflect the changes.
(optional)
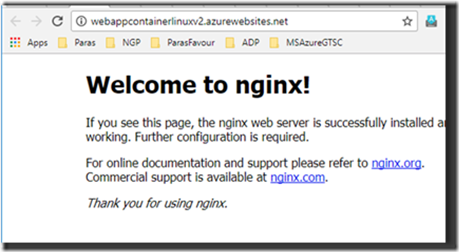
15. Browser the web app to see if the image is up and running on Web app.
Now browsing my web app will show the container image.
Now in Next Post we will go through Setting up Continuous Deployment for Azure Web app for container for that Image section here :
continuous deployment with web app for containers using azure container registry -part-5


