Creating a PHP Web Role in Windows Azure
Earlier this week, I posted an overview of the “new” Windows Azure SDK for PHP. In that post, I promised deeper dives into a few areas of the SDK. In this post I’ll begin delivering on that promise by looking at how to use Windows Azure PowerShell to create and publish a PHP Web Role in Windows Azure. I’ll assume you have created a Windows Azure account.
Note: If you are looking to simply host a PHP website in Windows Azure, you should use Windows Azure Websites. During the free trial period, you can create up to 10 websites and run up to 3 instances of each site at no charge. If your site needs more horsepower, you can move to “reserved” mode (though this mode is not free – see Pricing Details for more information). If, however, you are building an application that requires a customized PHP installation, a multi-tier application, an application that requires advanced administration, or an application that requires advanced networking, then you should consider Windows Azure Web Roles (i.e. Windows Azure’s platform-as-a-service offering). More guidance can be found in this post: Windows Azure Websites, Web Roles, and VMs: When to use which?
The main PowerShell cmdlet for creating a PHP Web Role is the Add-AzurePHPWebRole cmdlet. This cmdlet creates a local directory that is a ready-to-deploy PHP application (though it is very simple – it just displays the output of phpinfo). You simply need to add your code and deploy it. When you deploy the application to Windows Azure, the project will install PHP and configure IIS appropriately using the Web Platform Installer. The version of PHP that gets installed is the latest version of PHP that is available via the Web Platform Installer (which, as of this writing, is PHP 5.3.13). The PHP installation is fully customizable – you can provide your own php.ini file and extension directory to be used by the PHP installation.
Note: The Windows Azure team hopes to make it possible to choose from several PHP versions in the near future. Additionally, the team is working to add support for developing and deploying Web and Worker Roles from non-Windows platforms by adding to the commands available in the Windows Azure Command Line Tools for Mac and Linux.
For a general overview of the cmdlets, see How to use Windows Azure PowerShell.
Get the tools
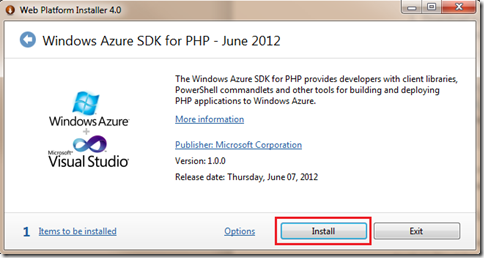
The easiest way to get the Windows Azure PowerShell cmdlets is to install the Windows Azure SDK for PHP: download the Windows Azure SDK for PHP. That link will download the Web Platform Installer and set you up to install both the PowerShell cmdlets and the Windows Azure Emulators:
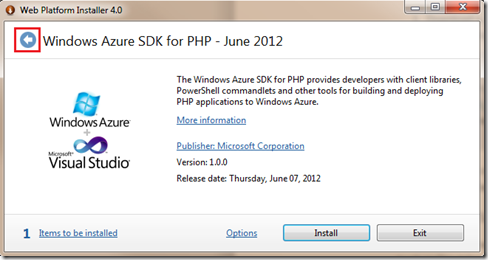
If you would rather install just the PowerShell cmdlets (and not the Emulators), click the “back” button…
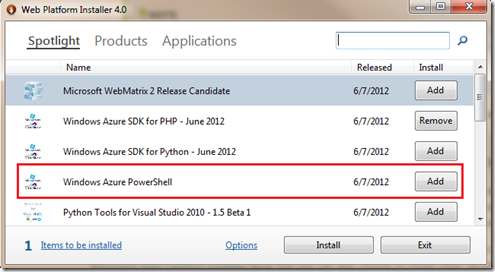
…and select Windows Azure PowerShell:
Import your publish settings
After you have installed the cmdlets, follow the steps below to import your publish settings. You only need to perform these steps once.
1. Start Windows Azure PowerShell with elevated privileges (from the Start menu, search for Windows Azure PowerShell, right-click and select Run as Administrator).
2. Download your publish settings by executing the command below. This will pull up your web browser and require you to sign in with your Windows Azure account credentials. (Make note of where you save the .publishsettings file.)
Get-AzurePublishSettingsFile
3. Import your publish settings with this command:
Import-AzurePublishSettingsFile <path to downloaded .publishsettings file>
Create a PHP Web Role
After you have imported your publish settings, create a PHP Web Role by following these steps:
1. Create a new Azure project. Note that this command will create a new directory called myAzureProject and automatically change directories to it.
New-AzureServiceProject myAzureProject
2. From the myAzureProject directory (or whatever you called your Azure project), add a PHP Web Role:
Add-AzurePHPWebRole myWebRole
You now have a skeleton PHP/Azure project. Actually, you have a very simple PHP application (displays output of phpinfo) that is ready to deploy. (At this point,you can skip ahead to the Publish to Windows Azure section if you want.)
Inspecting the directory structure, you should see something similar to this:
/myAzureProject
deploymentSettings.json
ServiceConfiguration.Cloud.cscfg
ServiceConfiguration.Local.cscfg
ServiceDefinition.csdef
/myWebRole
index.php
Web.cloud.config
Web.config
/bin
Microsoft.Web.Deployment.dll
Microsoft.Web.PlatformInstaller.dll
Microsoft.Web.PlatformInstaller.UI.dll
setup.cmd
setup.ps1
setup_web.cmd
WebpiCmdLine.exe
You can now add your application code to the myWebRole folder. If you want to add startup tasks, you can do so by editing the .csdef file and adding scripts to the bin folder. For more information, see How to Define Startup Tasks for a Role.
Customize your PHP configuration
As I mentioned earlier, the Add-AzurePHPWebRole cmdlet creates a scaffold project that, when deployed, will install the latest version of PHP available via the Web Platform Installer. As of this writing, PHP 5.3.13 is the available version, and it comes with the standard, “out-of the-box” configuration. However, you can customize this configuration by doing the following (skip step 2 if you don’t want to enable any custom extensions):
1. Add a php folder to the bin directory.
2. Add a ext folder to the php directory and put any PHP extensions you want to be available in the folder (e.g. php_mongo.dll).
3. Add a custom php.ini file to the php directory. You can turn settings on/off and enable extensions as you would with any other PHP installation via this .ini file.
Test in the Compute Emulator
If you installed the Windows Azure Emulators, you can test your application locally by executing the following command from the project directory:
Start-AzureEmulator
However, to will need to have PHP installed to do this, as the emulator uses your local PHP installation. More specifically, it will use the PHP version that is in your PATH environment variable, or it will use any version of PHP that was installed using the Web Platform Installer. (Look for a more detailed post soon about how to use the emulators.)
Enable Remote Desktop access
This is a completely optional step, but I have found that enabling remote desktop access has been very helpful in troubleshooting. And, this one cmdlet makes it easy:
Enable-AzureServiceProjectRemoteDesktop
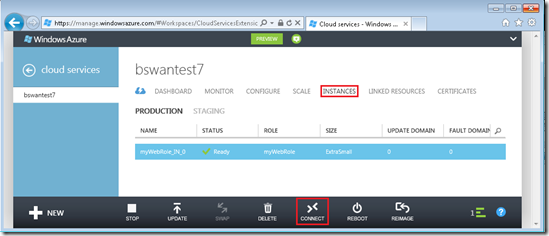
You will be prompted to provide a user name and password that you will use when accessing an instance. After you have deployed the project (details in the section below), you can access an instance by logging into the management portal, clicking INSTANCES on your website’s dashboard, selecting an instance, and clicking CONNECT at the bottom of the page.
If you are using the production portal, navigate to an instance and click the connect icon:
Publish to Windows Azure
Finally, you can publish your project to Windows Azure with the following command:
Publish-AzureServiceProject
This will attempt to create a cloud service using your project name (myAzureProject in the examples above). If that name is not available, you may get an error. If that happens you can deploy it with a different name by using the –ServiceName flag:
Publish-AzureServiceProject –ServiceName myNewServiceName
You can check to see if a name is available with this command:
Test-AzureName –Service “myAzureProject”
Additional flags for the Publish-AzureServiceProject cmdlet are –Slot, –Location, –Subscription, and –Storage. For more information on using these flags, see How to use Windows Azure PowerShell.
After you deploy a project, it will take several minutes before it is available as Windows Azure provisions and configures new virtual machines for each deployment.
That’s it for now. As usual, let us know if you have any feedback.
Thanks.
-Brian
Comments
Anonymous
July 20, 2012
he main PowerShell cmdlet for creating a PHP Web Role is the Add-AzurePHPWebRole cmdlet. This cmdlet creates a local directory that is a ready-to-deploy PHP application. You simply need to add your code and deploy it.Anonymous
August 20, 2012
The comment has been removedAnonymous
January 06, 2013
Thanks for the post Brian. This is very useful for the PHP community. I guess there is a correction needed in the command to import the publish settings, it should be Import-AzurePublishSettingsFile instead of Import-PublishSettingsFile.Anonymous
January 07, 2013
Thanks Bibin! Good catch. I've updated the post.


