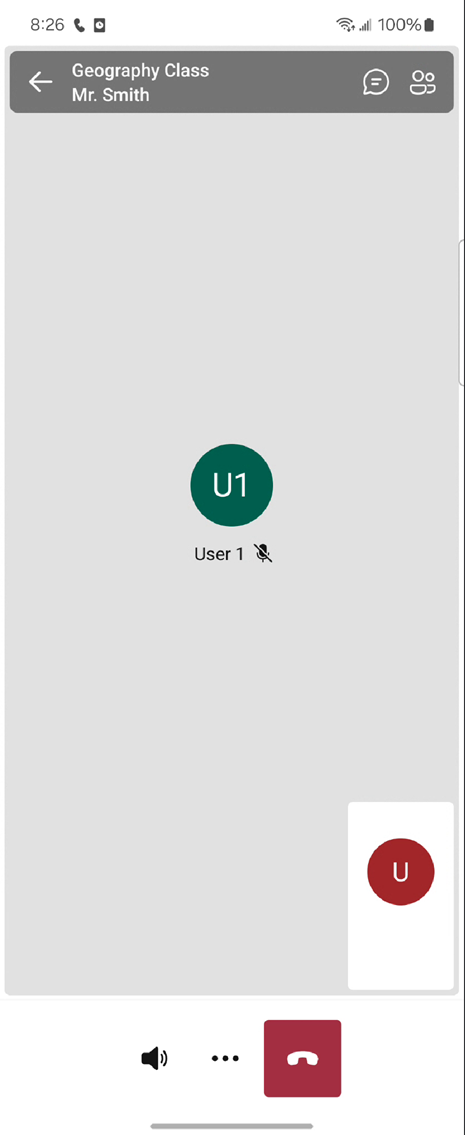
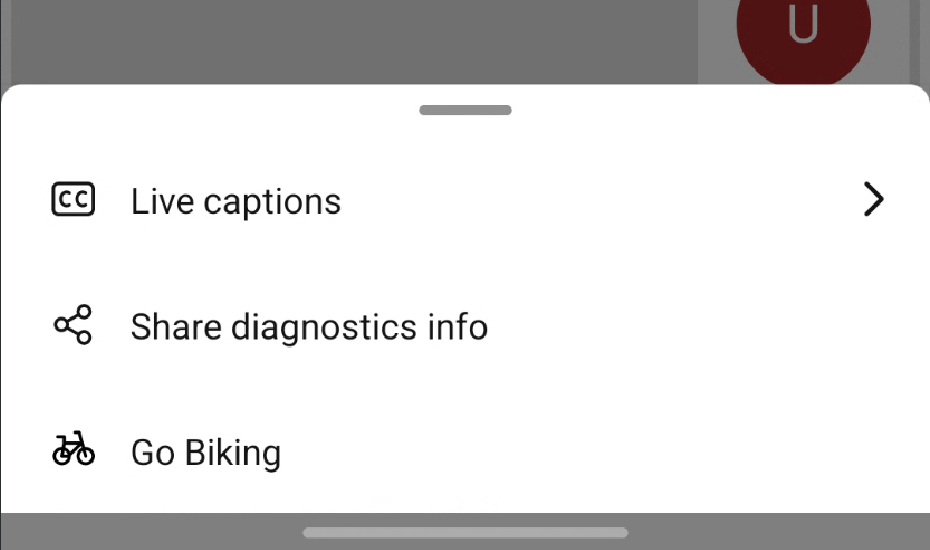
단추 사용자 지정
사용자 지정 작업을 구현하거나 현재 단추 레이아웃을 수정하려면 네이티브 UI 라이브러리의 API와 상호 작용할 수 있습니다. 이 API는 사용자 지정 단추 구성 정의, 작업 지정, 단추 모음의 현재 작업 관리를 포함합니다. API는 사용자 지정 작업을 추가하고 기존 단추를 제거하는 방법을 제공하며, 이는 모두 간단한 함수 호출을 통해 액세스할 수 있습니다.
이 기능은 높은 수준의 사용자 지정 기능을 제공하며, 사용자 인터페이스가 응집력 있도록 하고 애플리케이션의 전반적인 디자인과 일관성을 유지하도록 보장합니다.
필수 조건
- 활성 구독이 있는 Azure 계정. 체험 계정을 만듭니다.
- 배포된 Communication Services 리소스. Communication Services 리소스 만들기
- 호출 클라이언트를 사용하도록 설정하는 사용자 액세스 토큰입니다. 사용자 액세스 토큰을 가져옵니다.
- 선택 사항: UI 라이브러리 복합 구성 요소 시작 빠른 시작을 완료합니다.
기능 설정
단추 제거
CallCompositeCallScreenControlBarOptions에서는 카메라, 마이크 및 오디오 컨트롤과 같은 특정 단추를 제거하여 단추를 유연하게 사용자 지정할 수 있습니다. 이 API를 사용하면 특정 애플리케이션 요구 사항과 사용자 환경 디자인에 따라 사용자 인터페이스를 맞춤화할 수 있습니다. CallCompositeButtonViewData 단추를 숨기거나 사용하지 않도록 설정하려면 visible 또는 enabled를 false로 설정하기만 하면 됩니다.

val controlBarOptions = CallCompositeCallScreenControlBarOptions()

val cameraButton = CallCompositeButtonViewData()
    .setVisible(false)

controlBarOptions.setCameraButton(cameraButton)

val callScreenOptions = CallCompositeCallScreenOptions()
    .setControlBarOptions(controlBarOptions)

val localOptions = CallCompositeLocalOptions()
    .setCallScreenOptions(callScreenOptions)

val callComposite = CallCompositeBuilder()
    .build()

callComposite.launch(context, locator, localOptions)
호출 복합을 시작한 후 단추를 업데이트할 수 있습니다.
사용자 지정 작업 추가
Call composite는 Fluent UI 아이콘을 사용하고 있습니다. Fluent UI GitHub 리포지토리에서 아이콘을 직접 다운로드하여 필요에 따라 프로젝트에 통합할 수 있습니다. 이러한 방식은 모든 사용자 인터페이스 요소에서 시각적 일관성을 보장하여 전반적인 사용자 환경을 향상합니다.

// Custom header button
val headerCustomButton =
    CallCompositeCustomButtonViewData(
        "headerCustomButton",
        R.drawable.my_header_button_icon,
        "My header button",
        fun(it: CallCompositeCustomButtonClickEvent) {
            // process my button onClick
        }
    )

val headerOptions = CallCompositeCallScreenHeaderViewData()
    .setCustomButtons(listOf(headerCustomButton))

// Custom control bar button
val controlBarOptions = CallCompositeCallScreenControlBarOptions()

controlBarOptions.setCustomButtons(
    listOf(
        CallCompositeCustomButtonViewData(
            "customButtonId",
            R.drawable.my_button_image,
            "My button",
            fun(it: CallCompositeCustomButtonClickEvent) {
                // Process my button onClick
            },
        )
    )
)

val callScreenOptions = CallCompositeCallScreenOptions()
    .setHeaderViewData(headerOptions)
    .setControlBarOptions(controlBarOptions)

val localOptions = CallCompositeLocalOptions()
    .setCallScreenOptions(callScreenOptions)

val callComposite = CallCompositeBuilder()
    .build()

callComposite.launch(context, locator, localOptions)
Call composite 제공된 단추와 마찬가지로 사용자 지정 단추는 시작 후 업데이트할 수 있습니다.
단추 제거 또는 사용 안 함
CallScreenControlBarOptions에서는 카메라, 마이크 및 오디오 컨트롤과 같은 특정 단추를 제거하여 단추를 유연하게 사용자 지정할 수 있습니다. 이 API를 사용하면 특정 애플리케이션 요구 사항과 사용자 환경 디자인에 따라 사용자 인터페이스를 맞춤화할 수 있습니다. ButtonViewData 단추를 숨기거나 사용하지 않도록 설정하려면 visible 또는 enabled를 false로 설정하기만 하면 됩니다.

let cameraButton = ButtonViewData(visible: false)

let callScreenControlBarOptions = CallScreenControlBarOptions(
    cameraButton: cameraButton
)

let callScreenOptions = CallScreenOptions(controlBarOptions: callScreenControlBarOptions)
let localOptions = LocalOptions(callScreenOptions: callScreenOptions)

let callComposite = CallComposite(credential: credential)
callComposite.launch(locator: .roomCall(roomId: "..."), localOptions: localOptions)
호출 복합을 시작한 후 단추를 업데이트할 수 있습니다.
cameraButton.visible = true
사용자 지정 작업 추가
Call composite는 Fluent UI 아이콘을 사용하고 있습니다. Fluent UI GitHub 리포지토리에서 아이콘을 직접 다운로드하여 필요에 따라 프로젝트에 통합할 수 있습니다. 이러한 방식은 모든 사용자 인터페이스 요소에서 시각적 일관성을 보장하여 전반적인 사용자 환경을 향상합니다.

// Custom header button
let headerCustomButton = CustomButtonViewData(image: UIImage(named: "...")!,
                                              title: "My header button") {_ in
    // Process my button onClick
}
let callScreenHeaderViewData = CallScreenHeaderViewData(
    customButtons: [headerCustomButton]
)

// Custom control bar button
let customButton = CustomButtonViewData(image: UIImage(named: "...")!,
                                        title: "My button") {_ in
    // Process my button onClick
}

let callScreenControlBarOptions = CallScreenControlBarOptions(
    customButtons: [customButton]
)

let callScreenOptions = CallScreenOptions(
    controlBarOptions: callScreenControlBarOptions, headerViewData: callScreenHeaderViewData)

let localOptions = LocalOptions(callScreenOptions: callScreenOptions)

let callComposite = CallComposite(credential: credential)
callComposite.launch(locator: .roomCall(roomId: "..."), localOptions: localOptions)
Call composite 제공된 단추와 마찬가지로 사용자 지정 단추는 시작 후 업데이트할 수 있습니다.
customButton.enabled = true