통화 녹음/녹화: 사용자 고유의 Azure 스토리지 가져오기 빠른 시작
이 빠른 시작에서는 통화 녹음/녹화를 위한 사용자 고유의 Azure 스토리지 가져오기를 시작합니다. 사용자 고유의 Azure 스토리지 가져오기 기능 사용을 시작하려면 통화 녹음/녹화 API에 대해 잘 알고 있어야 합니다.
필수 조건: 관리 ID 및 RBAC(역할 기반 액세스 제어) 역할 할당 설정
1. Azure Communication Services의 시스템 할당 관리 ID 사용
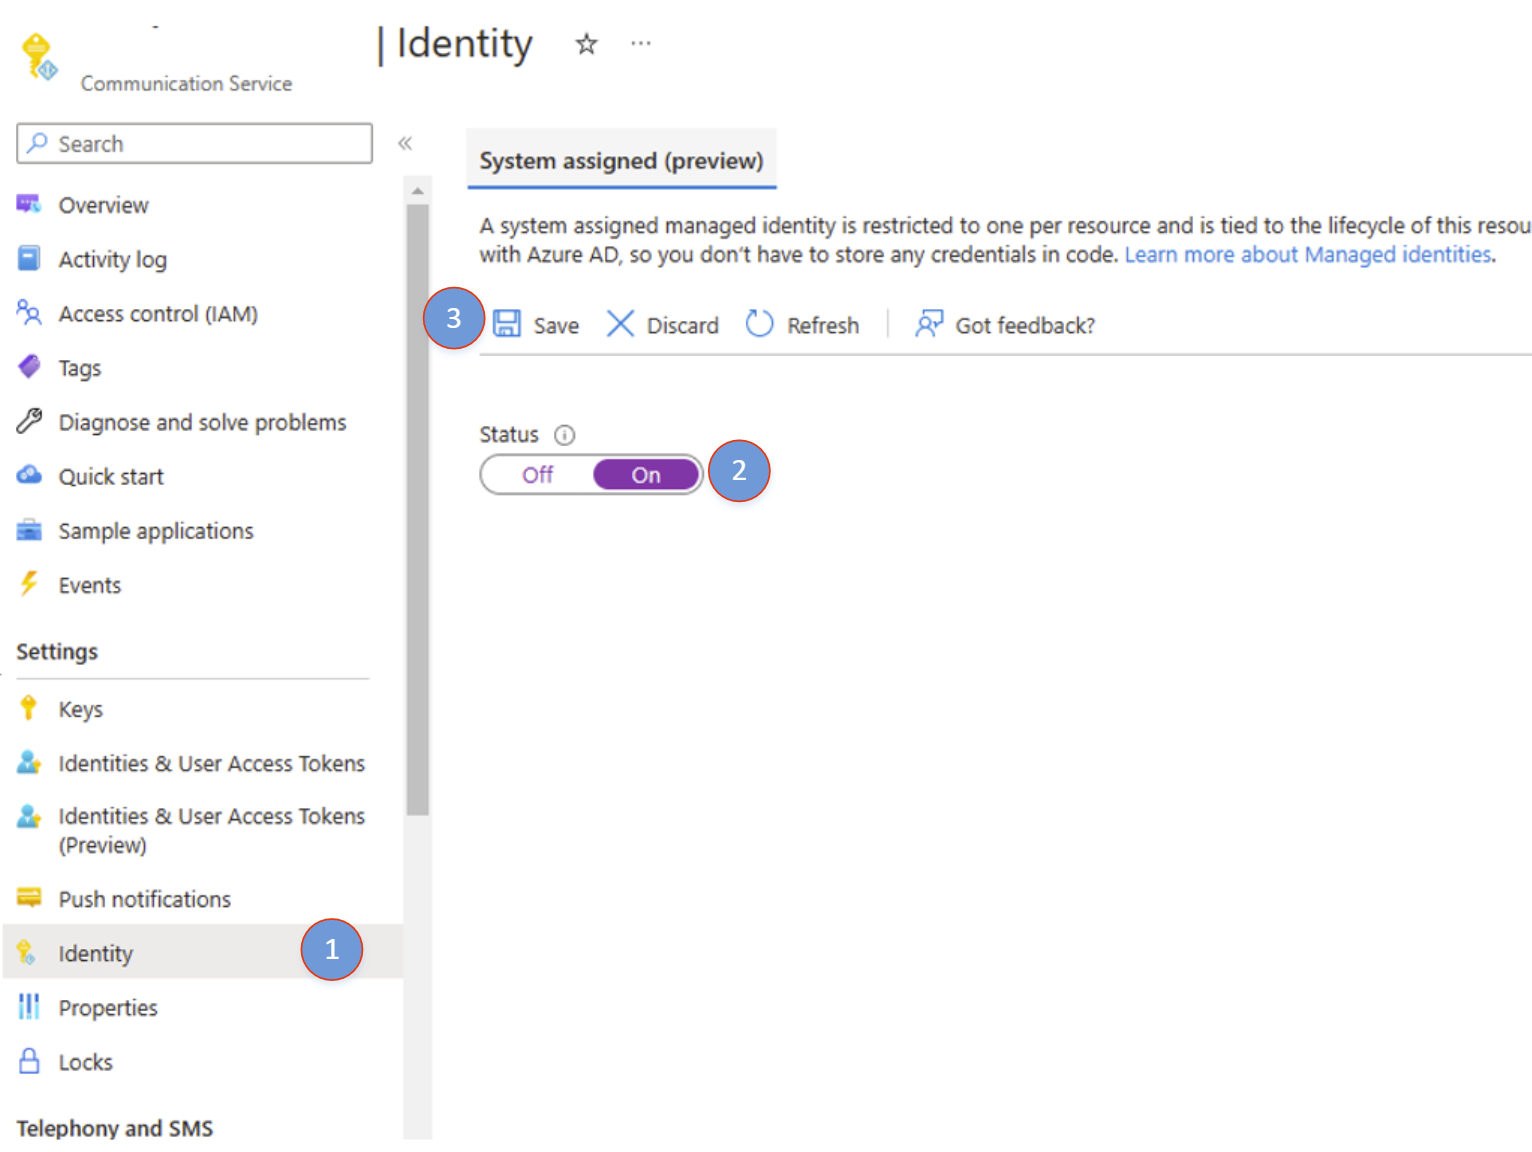
- Azure Communication Services 리소스를 엽니다. 왼쪽의 ID로 이동합니다.
- 시스템이 할당한 관리 ID를 사용하도록 설정하고 저장을 클릭합니다.
- 완료되면 새로 만든 ID의 개체 보안 주체 ID를 볼 수 있습니다.
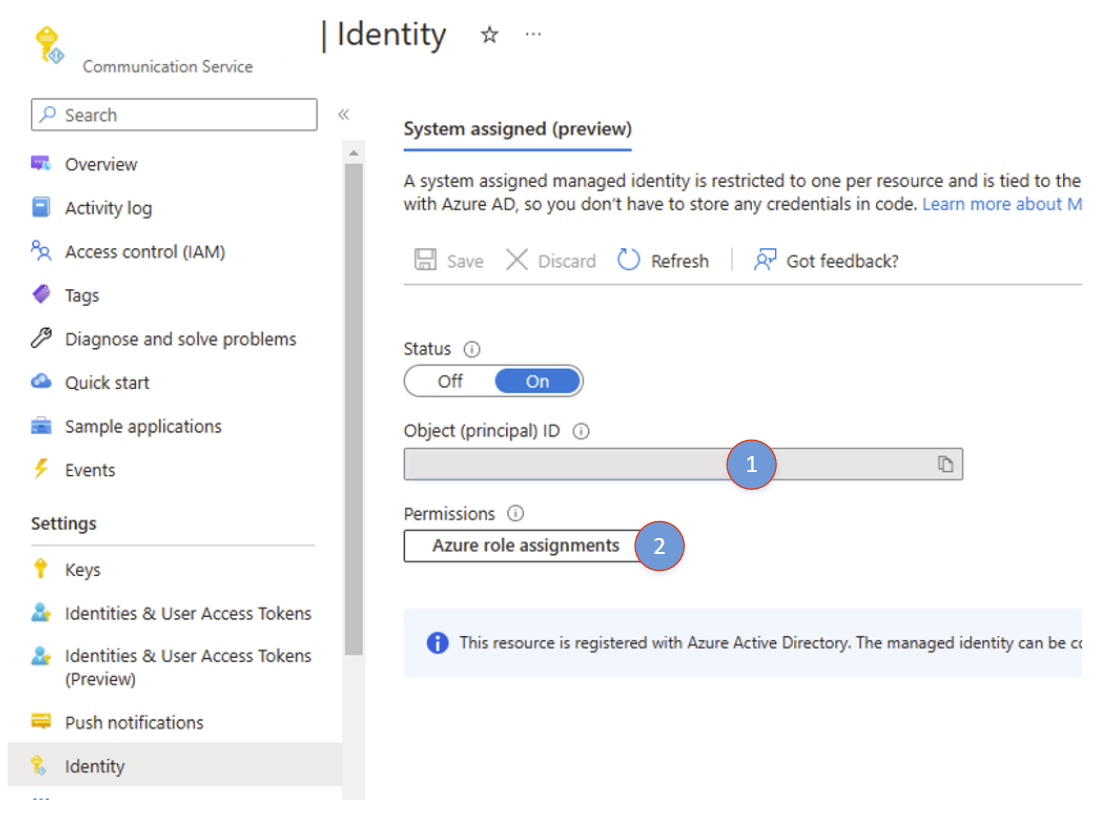
- ID가 성공적으로 만들어지면 Azure 역할 할당을 클릭하여 역할 할당 추가를 시작합니다.
2. 역할 할당 추가
- "역할 할당 추가"를 클릭합니다.

- "역할 할당 추가" 패널에서 다음 값을 선택합니다.
- 범위: 스토리지
- 구독: 구독 선택
- 리소스: 스토리지 계정 선택
- 역할: Azure Communication Services는 스토리지 계정에 쓸 수 있도록 "Storage Blob 데이터 기여자"가 필요합니다.
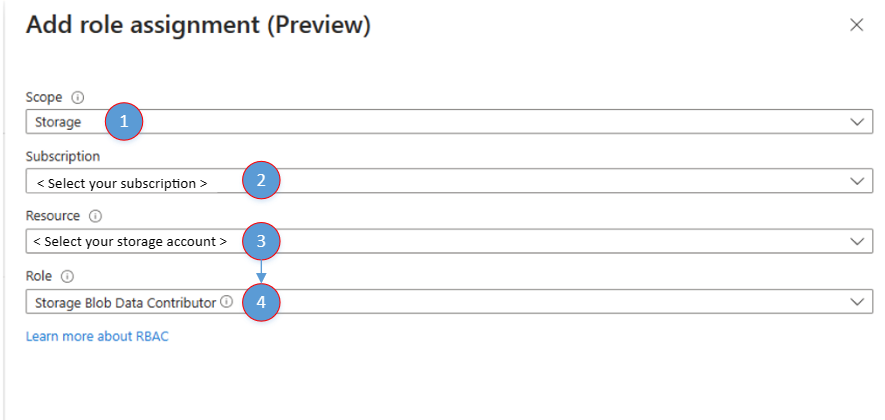
- "저장"을 클릭합니다.
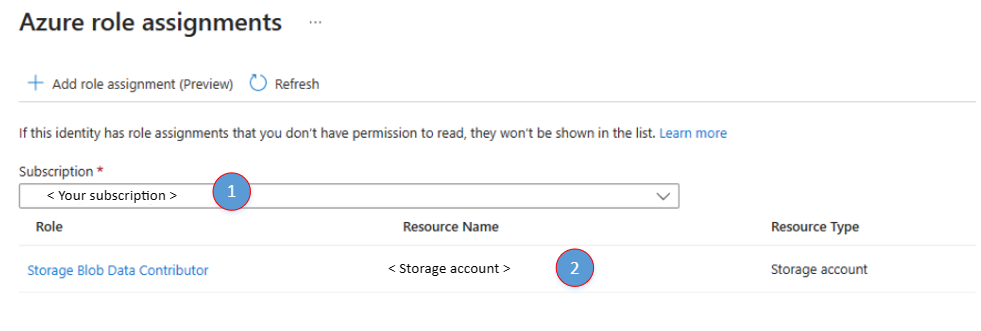
- 완료되면 "Azure 역할 할당" 창에 새로 추가된 역할 할당이 표시됩니다.
외부 스토리지가 지정된 상태에서 녹음/녹화 세션 시작
통화 시작 시 수신한 서버 통화 ID를 사용합니다.
외부 스토리지에 Azure Blob Storage 사용
StartRecordingOptions recordingOptions = new StartRecordingOptions(new ServerCallLocator("<serverCallId>"))
{
    //...
    ExternalStorage = new BlobStorage(new Uri("<Insert Container / Blob Uri>"))
};

Response<RecordingStateResult> startRecordingWithResponse = await callAutomationClient.GetCallRecording()
        .StartRecordingAsync(options: recordingOptions);
외부 스토리지에 Azure Blob Storage 사용
StartRecordingOptions recordingOptions = new StartRecordingOptions(new ServerCallLocator("<serverCallId>"))
                .setExternalStorage(new BlobStorage("<Insert Container / Blob Uri>"));

Response<StartCallRecordingResult> response = callAutomationClient.getCallRecording()
.startRecordingWithResponse(recordingOptions, null);
성공적인 내보내기 알림
Azure Event Grid 웹후크 또는 기타 트리거된 작업을 사용하여 녹화된 미디어가 준비되고 외부 스토리지 위치로 내보낼 때 서비스에 알립니다.
이벤트 스키마의 이 예제를 참조하세요.
{
    "id": "string", // Unique guid for event
    "topic": "string", // /subscriptions/{subscription-id}/resourceGroups/{group-name}/providers/Microsoft.Communication/communicationServices/{communication-services-resource-name}
    "subject": "string", // /recording/call/{call-id}/serverCallId/{serverCallId}
    "data": {
        "storageType": "string", // AzureBlob etc.
        "recordingId": "string", // unique id for recording
        "recordingStorageInfo": {
            "recordingChunks": [
                {
                    "documentId": "string", // Document id for the recording chunk
                    "contentLocation": "string", //Azure Communication Services URL where the content is located
                    "metadataLocation": "string", // Azure Communication Services URL where the metadata for this chunk is located
                    "deleteLocation": "string", // Azure Communication Services URL to use to delete all content, including recording and metadata.
                    "index": "int", // Index providing ordering for this chunk in the entire recording
                    "endReason": "string", // Reason for chunk ending: "SessionEnded", "ChunkMaximumSizeExceeded”, etc.
                }
            ]
        },
        "recordingStartTime": "string", // ISO 8601 date time for the start of the recording
        "recordingDurationMs": "int", // Duration of recording in milliseconds
        "sessionEndReason": "string" // Reason for call ending: "CallEnded", "InitiatorLeft”, etc.
    },
    "eventType": "string", // "Microsoft.Communication.RecordingFileStatusUpdated"
    "dataVersion": "string", // "1.0"
    "metadataVersion": "string", // "1"
    "eventTime": "string" // ISO 8601 date time for when the event was created
}
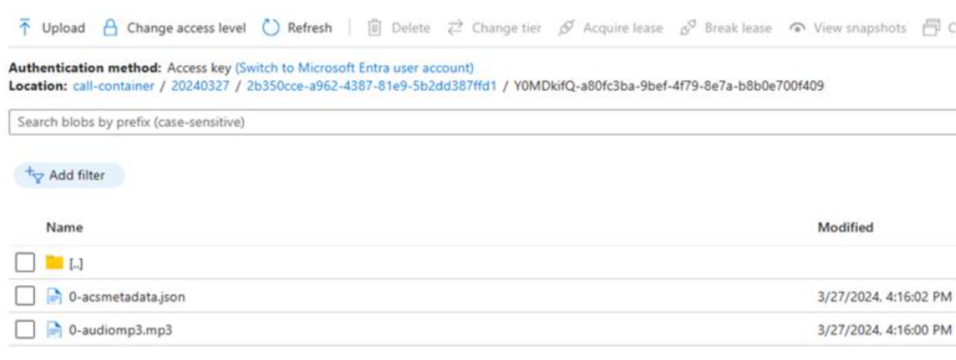
통화 녹음 폴더 구조
녹음은 그림과 같이 다음 형식으로 저장됩니다.
- /YYYYMMDD/callId/first_8_of_recordingId + '-' + 고유 guid/[chunk-id]-acsmetadata.documentId.json
- /YYYYMMDD/callId/first_8_of_recordingId + '-' + 고유 guid/[chunk-id]-audiomp3.documentId.mp3
다음 단계
자세한 내용은 다음 문서를 참조하세요.