GraphQL용 Fabric API에 애플리케이션 연결
참고 항목
GraphQL용 Microsoft Fabric API는 프리뷰로 제공됩니다.
GraphQL용 API에 애플리케이션을 연결하려면 클라이언트 ID, 테넌트 ID 및 Fabric의 GraphQL 엔드포인트 주소라는 세 가지 중요한 정보가 필요합니다. 다음 섹션에서는 필요한 모든 세부 정보를 만들고 검색하는 방법과 응용 프로그램 예제를 사용하여 API에 액세스하는 방법을 보여 줍니다.
필수 조건
현재, GraphQL용 API를 사용하려면 애플리케이션에서 인증에 Microsoft Entra를 사용해야 합니다. Fabric에 대한 API 호출을 수행하려면 애플리케이션을 등록하고 적절하게 구성해야 합니다. 자세한 내용은 Azure에서 Microsoft Entra 앱 만들기를 참조하세요.
API를 호출하는 인증된 사용자는 GraphQL API에 대한 실행 권한(직접 액세스 권한을 추가할 때 쿼리 및 변형 실행 옵션)이 필요하며, API에서 SSO(Single sing-On)를 연결 옵션으로 사용하는 경우 그에 따라 선택한 데이터 원본에서 읽기 또는 쓰기 권한이 필요합니다. 자세한 내용은 데이터 원본에 연결하고 스키마를 빌드하는 방법을 보려면 및을 참조하세요.
애플리케이션을 연결하기 전에 Fabric에서 GraphQL용 API가 있어야 합니다. 자세한 내용은 Fabric에서 GraphQL용 API 만들기 및 데이터 추가를 참조하세요.
Microsoft Entra 앱 만들기
다음 단계에서는 Microsoft Entra에서 ReactJS 애플리케이션에 대한 지원을 구성하는 방법을 보여 줍니다.
- 빠른 시작에 설명된 단계를 사용하여 애플리케이션을 등록합니다. Microsoft ID 플랫폼애플리케이션을 등록합니다.
- Microsoft Entra 앱 애플리케이션(클라이언트) ID 및 디렉터리(테넌트) ID 값이 요약 상자에 표시됩니다. 이러한 값은 나중에 필요하므로 기록합니다.
- 관리 목록에서 API 사용 권한을선택한 다음, 권한을 추가합니다.
- PowerBI 서비스를 추가하고 위임된 권한을 선택한 다음 Item.Execute.All 권한을 선택합니다. 관리자 동의가 필요하지 않은지 확인합니다.
- 관리 목록으로
- 로컬 개발 목적으로 리디렉션 URI 아래에 추가하고
http://localhost:3000애플리케이션이 PKCE(코드 교환용 증명 키)를 사용하여 권한 부여 코드 흐름에 대해 사용하도록 설정되어 있는지 확인합니다. 구성 버튼을 선택하여 변경 내용을 저장합니다. 애플리케이션이 원본 간 요청과 관련된 오류를 수신하는 경우 이전 단계에서 동일한 리디렉션 URI를 사용하여 모바일 및 데스크톱 애플리케이션 플랫폼을 추가합니다. 인증 돌아가서고급 설정 아래로 스크롤하고,공용 클라이언트 흐름 허용 아래에서 다음 모바일 및 데스크톱 흐름사용하도록예 선택합니다.
애플리케이션 액세스를 위한 샘플 GraphQL API 설정
이 예제에서는 샘플 레이크하우스 데이터를 클라이언트에 노출하는 GraphQL API를 만듭니다.
패브릭 포털 홈페이지의 워크로드 목록에서 데이터 엔지니어 선택합니다.
데이터 엔지니어링 환경에서 샘플 사용을 선택하고, 레이크하우스에서 공휴일을 선택하여 공휴일 데이터가 있는 새 레이크하우스를 자동으로 만듭니다.
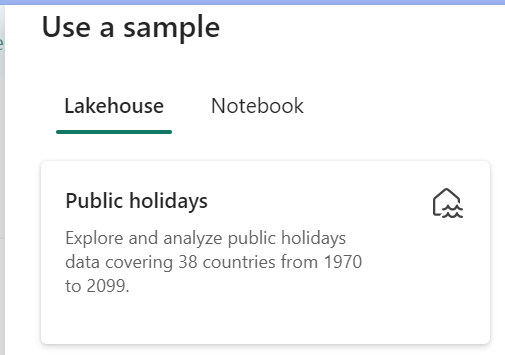
GraphQL용 API 만들기의 단계에 따라 새 GraphQL API를 만들고 만든 레이크하우스를 선택합니다. 클라이언트가 이 데이터에 액세스할 수 있도록 공휴일 테이블을 추가합니다.
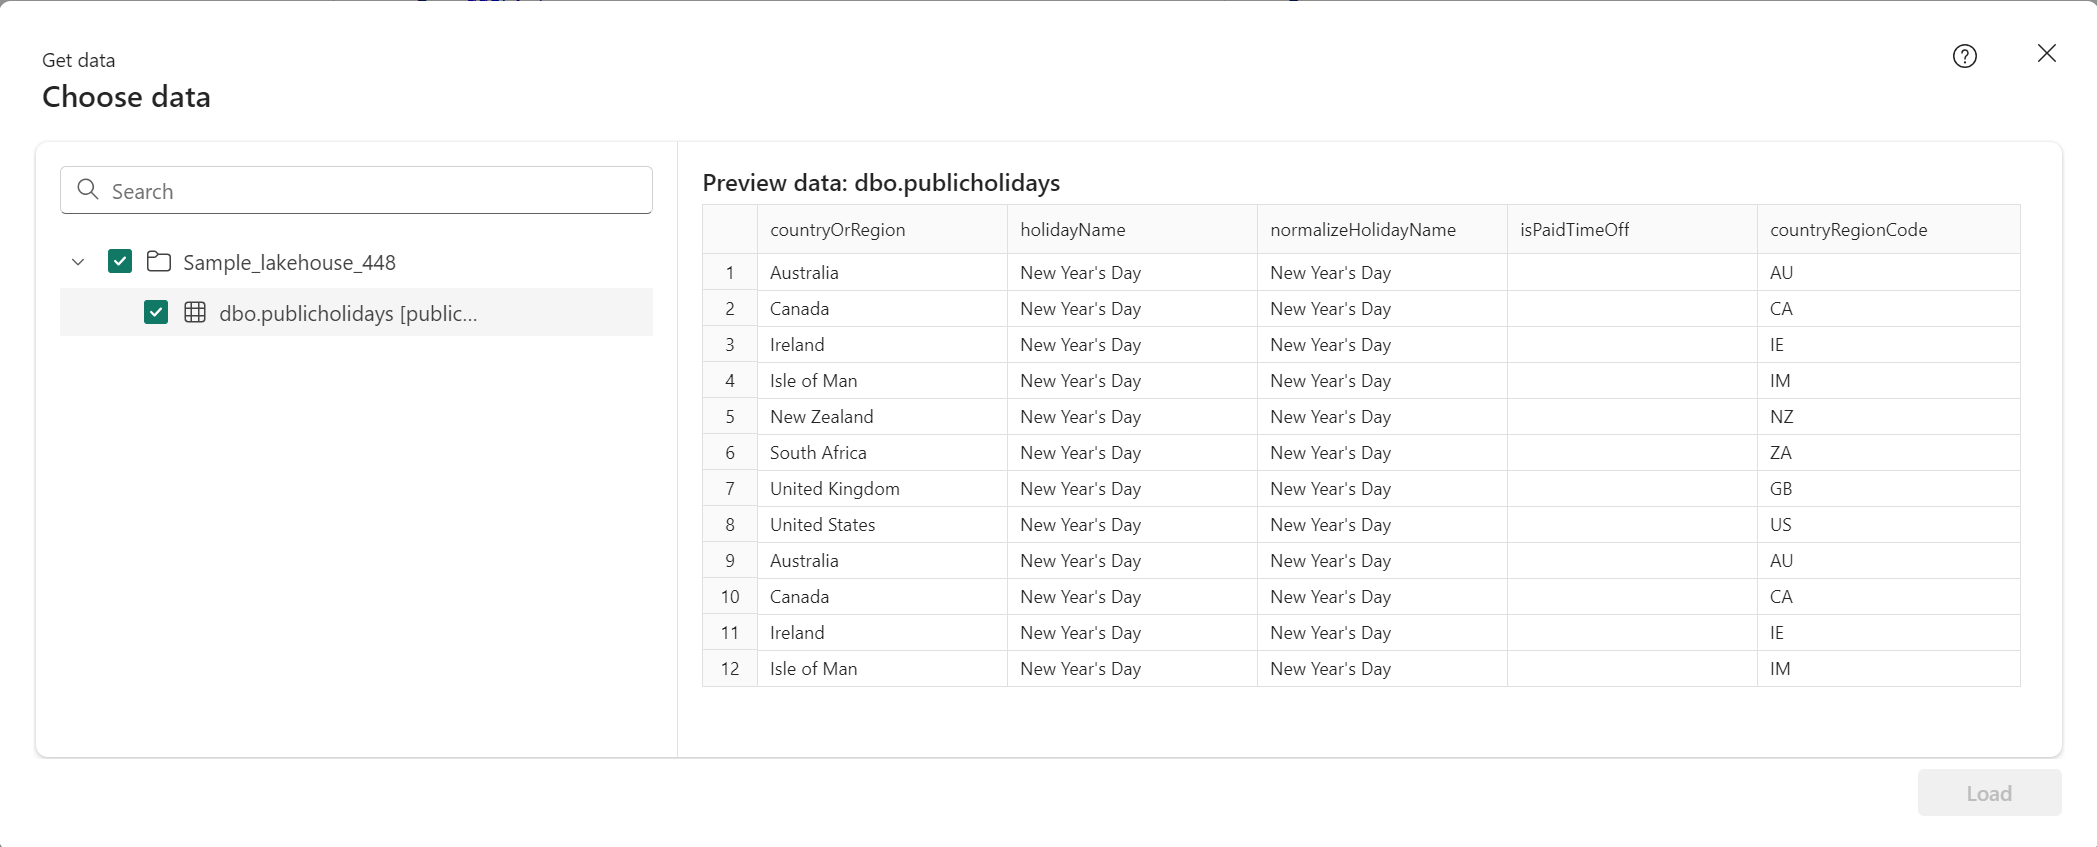
다음 샘플 쿼리를 사용하여 API 편집기에서 GraphQL API를 테스트합니다. React 클라이언트 애플리케이션에서 사용하는 것과 동일한 쿼리입니다.
 query {
   publicholidays (filter: {countryRegionCode: {eq:"US"}, date: {gte: "2024-01-01T00:00:00.000Z", lte: "2024-12-31T00:00:00.000Z"}}) {
     items {
       countryOrRegion
       holidayName
       date
     }
   }
 }
API 항목의 툴바에서 엔드포인트 복사를 선택합니다.

링크 복사 화면에서 복사를 선택합니다.
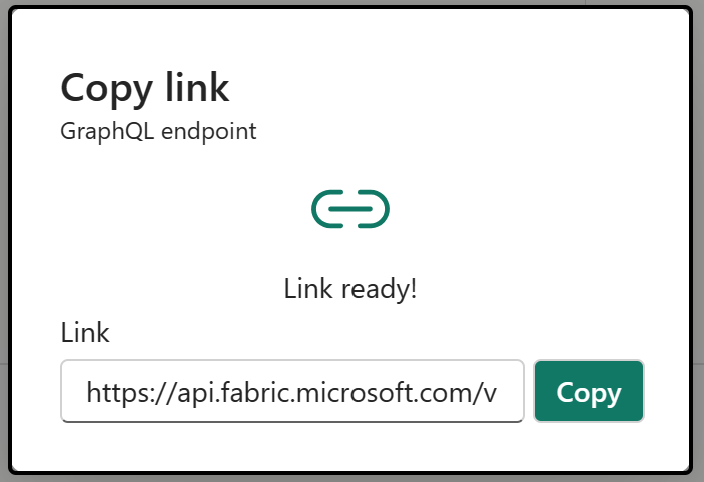
이전에 기록된 Microsoft Entra 앱의 클라이언트 ID 및 테넌트 ID로 나중에 필요하므로 엔드포인트 URI를 복사합니다.
공휴일 API에 액세스하도록 React 앱 구성
기존 React 앱을 시작점으로 사용합니다. React 단일 페이지 애플리케이션 만들기 자습서 의 모든 단계에 따라 프로젝트 구조에 추가해야 하는 추가 파일 및 폴더를 포함하여 Microsoft Entra 인증이 이미 구성된 React 프로젝트를 만들기 위한 인증 을 준비합니다. GraphQL 사용 사례에 맞게 앱을 조정하려면 파일을 3개만 변경하면 됩니다.
src 폴더에서 authConfig.js 파일을 열고 파일 내용을 다음 코드 조각으로 바꿉니다.
 /*
  * Copyright (c) Microsoft Corporation. All rights reserved.
  * Licensed under the MIT License.
  */

 import { LogLevel } from "@azure/msal-browser";

 /**
  * Configuration object to be passed to MSAL instance on creation.
  * For a full list of MSAL.js configuration parameters, visit:
  * https://github.com/AzureAD/microsoft-authentication-library-for-js/blob/dev/lib/msal-browser/docs/configuration.md
  */

 export const graphqlConfig = {
     graphqlEndpoint: "`Enter_the_GraphQL_Endpoint_Here"
 };

 export const msalConfig = {
     auth: {
         clientId: "Enter_the_Application_Id_Here",
         authority: "https://login.microsoftonline.com/Enter_the_Tenant_Info_Here",
         redirectUri: "http://localhost:3000",
     },
     cache: {
         cacheLocation: "sessionStorage", // This configures where your cache will be stored
         storeAuthStateInCookie: false, // Set this to "true" if you are having issues on IE11 or Edge
     },
     system: {
         loggerOptions: {
             loggerCallback: (level, message, containsPii) => {
                 if (containsPii) {
                     return;
                 }
                 switch (level) {
                     case LogLevel.Error:
                         console.error(message);
                         return;
                     case LogLevel.Info:
                         console.info(message);
                         return;
                     case LogLevel.Verbose:
                         console.debug(message);
                         return;
                     case LogLevel.Warning:
                         console.warn(message);
                         return;
                     default:
                         return;
                 }
             }
         }
     }
 };

 /**
  * Scopes you add here will be prompted for user consent during sign-in.
  * By default, MSAL.js will add OIDC scopes (openid, profile, email) to any login request.
  * For more information about OIDC scopes, visit:
  * https://docs.microsoft.com/azure/active-directory/develop/v2-permissions-and-consent#openid-connect-scopes
  */
 export const loginRequest = {
     scopes: ["https://analysis.windows.net/powerbi/api/Item.Execute.All"]
 };

 /**
  * Add here the scopes to request when obtaining an access token for MS Graph API. For more information, see:
  * https://github.com/AzureAD/microsoft-authentication-library-for-js/blob/dev/lib/msal-browser/docs/resources-and-scopes.md
  */
 export const graphConfig = {
     graphMeEndpoint: "https://graph.microsoft.com/v1.0/me",
 };
위의 코드에서 볼 수 있듯이 올바른 범위를 사용하여 애플리케이션에 액세스하는 것이 중요합니다. 우리의 경우
https://analysis.windows.net/powerbi/api/Item.Execute.All.Important
범위는 GraphQL용 Microsoft Fabric API 프리뷰 중에 변경될 수 있습니다.
다음 값을 Microsoft Entra 관리 센터의 값으로 바꿉니다.
-
clientId- 클라이언트라고도 하는 애플리케이션의 식별자입니다. 등록된 Microsoft Entra 애플리케이션의Enter_the_Application_Id_Here값으로 바꿉 니다. -
authority- 이 작업은 다음 두 부분으로 구성됩니다.- 인스턴스는 클라우드 공급자의 엔드포인트입니다. 국가별 클라우드에서 사용 가능한 다양한 엔드포인트를 확인합니다.
- 테넌트 ID는 애플리케이션이 등록된 테넌트 식별자입니다. Enter_the_Tenant_Info_Here을(를) 등록된 애플리케이션의 개요 페이지에서 이전에 기록된 디렉터리(테넌트) ID 값으로 바꿉니다.
-
graphQLEndpoint- GraphQL 엔드포인트용 Fabric API입니다.Enter_the_GraphQL_Endpoint_Here를 이전에 기록된 GraphQL API 엔드포인트로 바꿉니다.
-
파일을 저장합니다.
동일한 src 폴더에서 App.jsx를 열고 파일 내용을 다음 코드 조각으로 바꿉니다.
 import React, { useState } from 'react';
 import { PageLayout } from './components/PageLayout';
 import { loginRequest, graphqlConfig } from './authConfig';
 import { ProfileData } from './components/ProfileData';
 import { AuthenticatedTemplate, UnauthenticatedTemplate, useMsal } from '@azure/msal-react';
 import './App.css';
 import Button from 'react-bootstrap/Button';
 import Spinner from 'react-bootstrap/Spinner';

 /**
 * Renders information about the signed-in user or a button to retrieve data about the user
 */
 const ProfileContent = () => {
   const { instance, accounts } = useMsal();
   const [graphqlData, setGraphqlData] = useState(null);
   const [display, setDisplay] = useState(false);

   function RequestGraphQL() {
       // Silently acquires an access token which is then attached to a request for GraphQL data
       instance
           .acquireTokenSilent({
               ...loginRequest,
               account: accounts[0],
           })
           .then((response) => {
               callGraphQL(response.accessToken).then((response) => setGraphqlData(response));
           });
   }

 async function callGraphQL(accessToken) {
   setDisplay(true);
   const query = `query {
     publicholidays (filter: {countryRegionCode: {eq:"US"}, date: {gte: "2024-01-01T00:00:00.000Z", lte: "2024-12-31T00:00:00.000Z"}}) {
       items {
         countryOrRegion
         holidayName
         date
       }
     }
   }`;
   fetch(graphqlConfig.graphqlEndpoint, {
           method: 'POST',
           headers: {
               'Content-Type': 'application/json',
               'Authorization': `Bearer ${accessToken}`,
           },
           body: JSON.stringify({
               query: query
           })
       })
       .then((res) => res.json())
       .then((result) => setGraphqlData(result));
 }

   return (
       <>
           <h5 className="card-title">Welcome {accounts[0].name}</h5>
           <br/>
           {graphqlData ? (
               <ProfileData graphqlData={graphqlData} />
           ) : (
               <Button variant="primary" onClick={RequestGraphQL}>
                   Query Fabric API for GraphQL Data
                   {display ? (
                         <Spinner
                             as="span"
                             animation="border"
                             size="sm"
                             role="status"
                             aria-hidden="true"
                         />
                     ) : null}
               </Button>
           )}
       </>
   );
 };

 /**
 * If a user is authenticated the ProfileContent component above is rendered. Otherwise a message indicating a user is not authenticated is rendered.
 */
 const MainContent = () => {
   return (
       <div className="App">
           <AuthenticatedTemplate>
               <ProfileContent />
           </AuthenticatedTemplate>

           <UnauthenticatedTemplate>
               <h5>
                   <center>
                       Please sign-in to see your profile information.
                   </center>
               </h5>
           </UnauthenticatedTemplate>
       </div>
   );
 };

 export default function App() {
   return (
       <PageLayout>
           <center>
               <MainContent />
           </center>
       </PageLayout>
   );
 }
파일을 저장합니다.
src/components 폴더에서 ProfileData.jsx 파일을 열고 파일 내용을 다음 코드 조각으로 바꿉니다.
 import React from "react";
 import ListGroup from 'react-bootstrap/ListGroup';
 import Table from 'react-bootstrap/Table';
 /**
  * Renders information about the user obtained from MS Graph
  * @param props
  */
 export const ProfileData = (props) => {
   const holidays = props.graphqlData.data.publicholidays.items;
   return (
     <Table striped bordered hover responsive>
     <thead>
       <tr>
         <th>Country</th>
         <th>Holiday</th>
         <th>Date</th>
       </tr>
     </thead>
     <tbody>
       {holidays.map((item,i) => (
       <tr key={i}>
         <td>{item.countryOrRegion}</td>
         <td>{item.holidayName}</td>
         <td>{item.date}</td>
       </tr>
       ))}
       </tbody>
     </Table>
 )};
모든 파일 변경 내용을 저장합니다.
선택한 터미널 애플리케이션에서 React 프로젝트의 루트 폴더로 이동하여
npm start명령을 실행하여 애플리케이션을 로컬로 테스트합니다.애플리케이션이
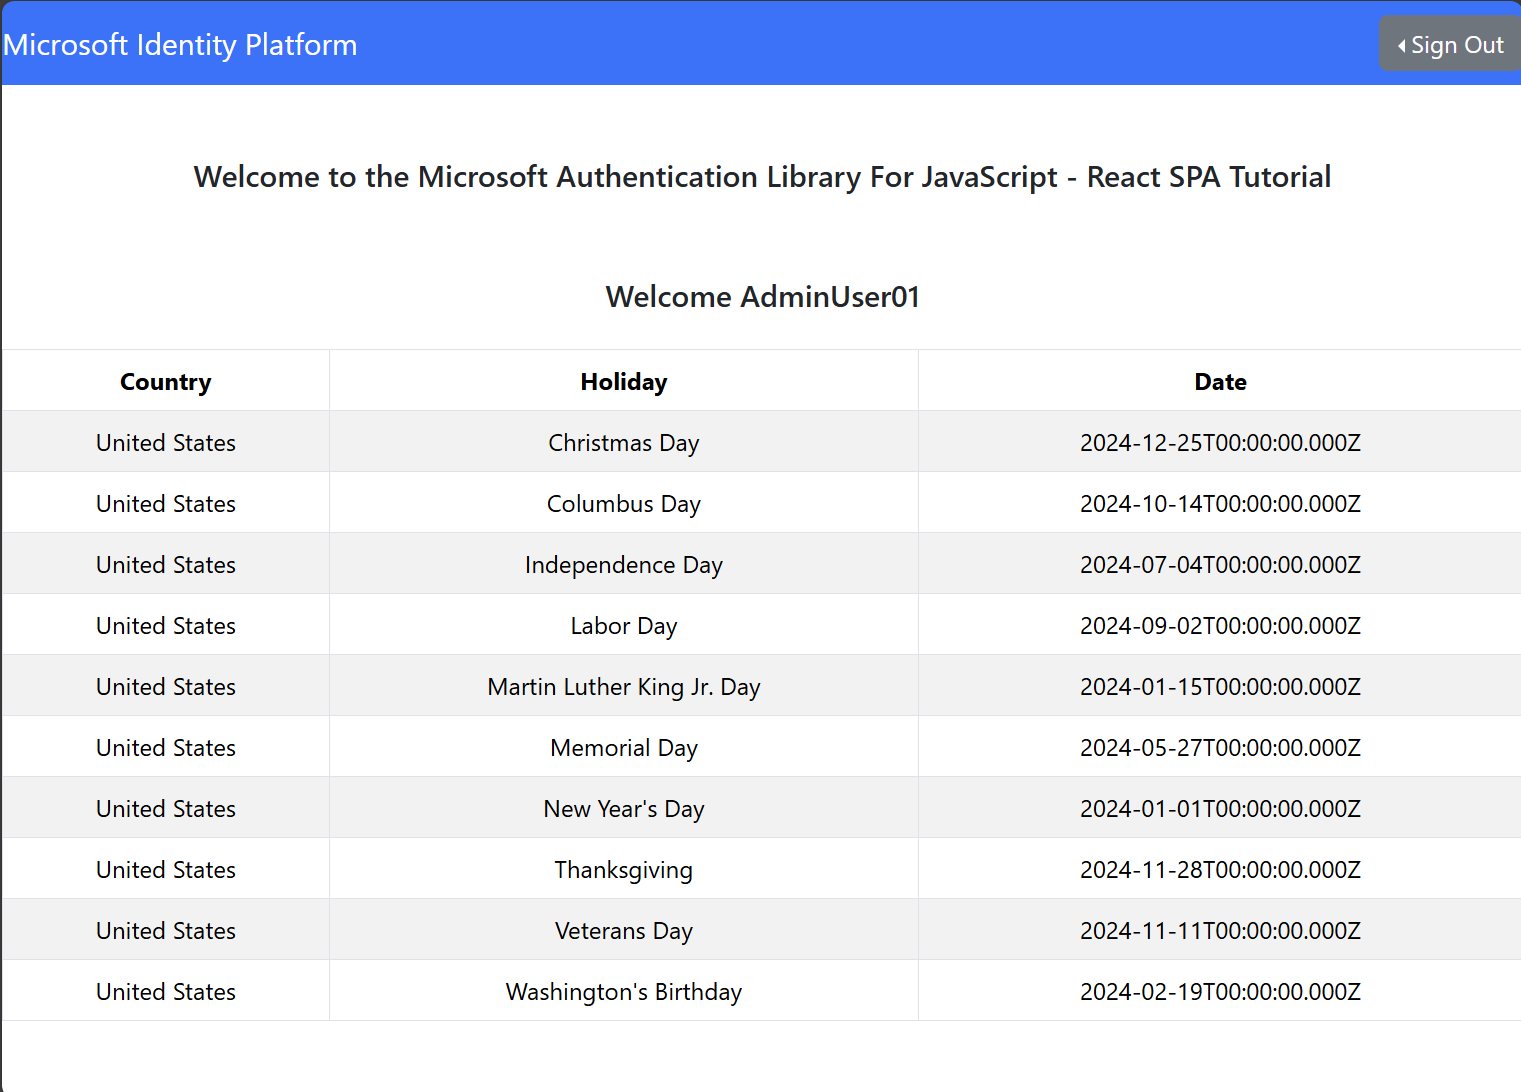
http://localhost:3000로부터 브라우저에서 로드되면 자습서 애플리케이션에서 API를 호출의 마지막 부분에서 설명하는 단계에 따라 인증합니다.로그인한 후 GraphQL용 Fabric API 데이터 쿼리 버튼을 클릭합니다.
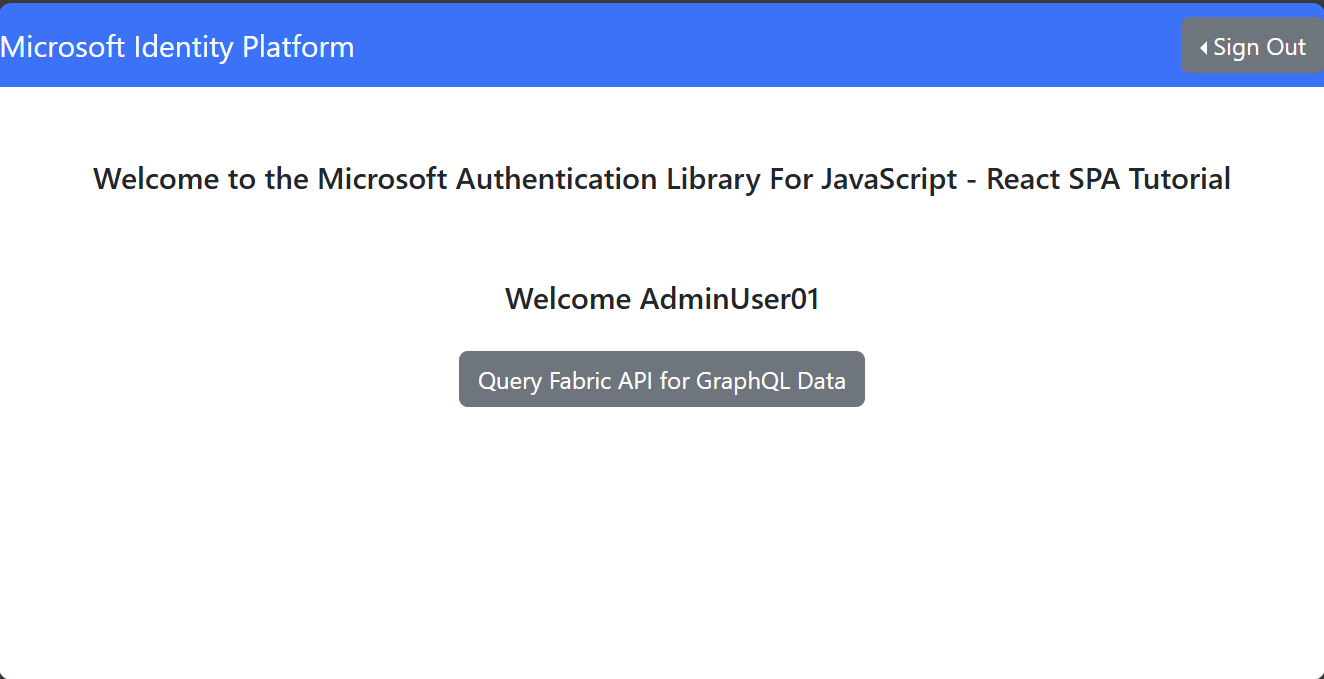
Fabric에서 GraphQL API에 대한 인증 요청에 성공하면 GraphQL 쿼리에서 React 클라이언트 애플리케이션의 레이크하우스로 데이터를 반환합니다.
서비스 주체 사용
이전 섹션의 단계는 사용자 보안 주체에 대한 액세스를 제공하는 데 필요하지만 서비스 주체를 사용하여 GraphQL API에 액세스할 수도 있습니다.
이전 섹션의 단계에 따라 비슷한 권한을 가진 두 번째 Microsoft Entra 앱(PowerBI 서비스의 Item.Execute.All 범위)을 만듭니다. 새 앱에서 인증서 및 비밀 아래에 클라이언트 암호를 추가합니다. 자세한 내용은 Microsoft Entra 앱 등록 및 서비스 주체 만들기를 참조하세요.
테넌트 관리자가 패브릭에서 서비스 주체를 사용하도록 설정했는지 확인합니다. 테넌트 관리 포털에서 테넌트 설정으로 이동합니다. 개발자 설정에서 서비스 주체는 패브릭 API를 사용할 수 있습니다. 이 설정을 사용하도록 설정하면 역할 또는 권한 할당을 위해 애플리케이션이 패브릭 포털에 표시됩니다. ID 지원에 대한 자세한 정보를 찾을 수 있습니다.
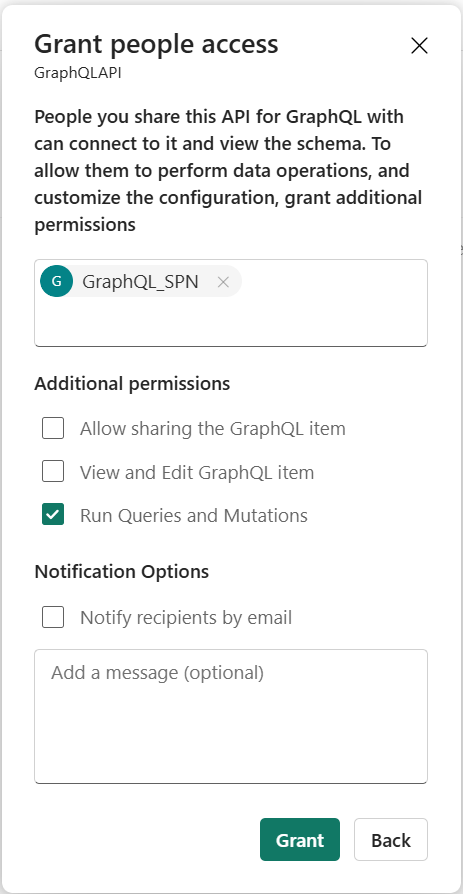
서비스 주체는 GraphQL API와 데이터 원본 모두에 대한 액세스 권한이 필요하며, 특히 GraphQL API에 대한 권한 실행 및 그에 따라 선택한 데이터 원본에 필요한 읽기 또는 쓰기 액세스 권한이 필요합니다. 패브릭 포털에서 작업 영역을 열고 API 옆에 있는 줄임표를 선택합니다. API에 대한 권한 관리를 선택한 다음, 사용자 추가를 선택합니다. 애플리케이션을 추가하고 서비스 주체에 필요한 실행 권한을 제공하는 쿼리 및 변경 실행을 선택합니다. 테스트를 위해 API 및 데이터 원본 모두에 필요한 권한을 구현하는 가장 쉬운 방법은 GraphQL API 및 데이터 원본 항목이 둘 다 있는 기여자 역할이 있는 작업 영역 멤버로 애플리케이션을 추가하는 것입니다.
Important
API에 대한 연결 옵션을 정의할 때 API가 SSO(Single Sign-On)를 사용하도록 구성되어 있는지 확인합니다. 현재 서비스 주체는 저장된 자격 증명을 지원하지 않습니다. 자세한 내용은 Fabric에서 GraphQL용 API 만들기 및 데이터 추가를 참조 하세요.
서비스 주체에는 인증서 또는 클라이언트 암호가 필요하므로 마지막 단계에서 빌드한 React 앱과 같은 SPA(단일 페이지 애플리케이션)에서 MSAL(Microsoft 인증 라이브러리)에서 지원되지 않습니다. 요구 사항 및 사용 사례에 따라 잘 정의된 권한 부여 논리로 적절하게 보호되는 백 엔드 서비스를 활용할 수 있습니다.
서비스 주체가 API에 액세스하도록 구성되면 로컬 컴퓨터에서 간단한 Node.JS 애플리케이션을 사용하여 로컬로 테스트할 수 있습니다.
const { ClientSecretCredential } = require('@azure/identity');

// Define your Microsoft Entra ID credentials
const tenantId = "<YOUR_TENANT_ID>";
const clientId = "<YOUR_CLIENT_ID>";
const clientSecret = "<YOUR_CLIENT_SECRET>"; // Service principal secret value

const scope = "https://api.fabric.microsoft.com/.default"; // The scope of the token to access Fabric

// Create a credential object with service principal details
const credential = new ClientSecretCredential(tenantId, clientId, clientSecret);

// Function to retrieve the token
async function getToken() {
    try {
        // Get the token for the specified scope
        const tokenResponse = await credential.getToken(scope);
        console.log("Access Token:", tokenResponse.token);
    } catch (err) {
        console.error("Error retrieving token:", err.message);
    }
}
선택한 Node.JS 패키지 관리자와 함께 종속성(@azure/identity)을 설치하고, 필요한 정보로 파일을 수정하고, 저장하고 실행한 후(node <filename.js>) Microsoft Entra에서 토큰을 검색할 수 있습니다.
그런 다음, 토큰을 사용하여 PowerShell을 사용하여 적절한 세부 정보를 방금 검색한 토큰 , 실행하려는 GraphQL 쿼리 및 GraphQL API 엔드포인트로 바꿔서 GraphQL API를 호출할 수 있습니다.
$headers = @{
    Authorization = "Bearer <YOUR_TOKEN>"
    'Content-Type' = 'application/json'
}

$body = @{
    query = @"
    <YOUR_GRAPHQL_QUERY>
"@
}

# Make the POST request to the GraphQL API
$response = Invoke-RestMethod -Uri "<YOUR_GRAPHQL_API_ENDPOINT>" -Method POST -Headers $headers -Body ($body | ConvertTo-Json)

# Output the response
$response | ConvertTo-Json -Depth 10
또는 cURL을 사용하여 동일한 결과를 얻을 수 있습니다.
curl -X POST <YOUR_GRAPHQL_API_ENDPOINT> \
-H "Authorization: <YOUR_TOKEN>" \
-H "Content-Type: application/json" \
-d '{"query": "<YOUR_GRAPHQL_QUERY(in a single line)>"}'
로컬 테스트를 위해 Node.JS 코드를 추가 종속성(axios)으로 약간 수정하여 토큰을 검색하고 단일 실행에서 API를 호출할 수 있습니다.
const { ClientSecretCredential } = require('@azure/identity');
const axios = require('axios');

// Microsoft Entra ID credentials
const tenantId = "<YOUR_TENANT_ID>";
const clientId = "<YOUR_CLIENT_ID>";
const clientSecret = "<YOUR_CLIENT_SECRET>"; // Service principal secret value

// GraphQL API details
const graphqlApiUrl = "YOUR_GRAPHQL_API_ENDPOINT>";
const scope = "https://api.fabric.microsoft.com/.default"; // The scope to request the token for

// The GraphQL query
const graphqlQuery = {
  query: `
  <YOUR_GRAPHQL_QUERY>
  `
};

// Function to retrieve a token and call the GraphQL API
async function fetchGraphQLData() {
  try {
    // Step 1: Retrieve token using the ClientSecretCredential
    const credential = new ClientSecretCredential(tenantId, clientId, clientSecret);
    const tokenResponse = await credential.getToken(scope);
    const accessToken = tokenResponse.token;

    console.log("Access token retrieved!");

    // Step 2: Use the token to make a POST request to the GraphQL API
    const response = await axios.post(
      graphqlApiUrl,
      graphqlQuery,
      {
        headers: {
          'Authorization': `Bearer ${accessToken}`,
          'Content-Type': 'application/json'
        }
      }
    );

    // Step 3: Output the GraphQL response data
    console.log("GraphQL API response:", JSON.stringify(response.data));

  } catch (err) {
    console.error("Error:", err.message);
  }
}

// Execute the function
fetchGraphQLData();
기타 언어
Microsoft Fabric 샘플 GitHub 리포지토리에서 GraphQL API에 연결하기 위한 C#, Python 및 기타 언어 샘플을 찾습니다.