Tutorial: Create a PowerPoint task pane add-in
In this tutorial, you'll create a PowerPoint task pane add-in that:
- Adds an image to a slide
- Adds text to a slide
- Gets slide metadata
- Adds new slides
- Navigates between slides
Create the add-in
Tip
If you've already completed the Build your first PowerPoint task pane add-in quick start using the Yeoman generator, and want to use that project as a starting point for this tutorial, go directly to the Insert an image section to start this tutorial.
If you want a completed version of this tutorial, visit the Office Add-ins samples repo on GitHub.
Prerequisites
Node.js (the latest LTS version). Visit the Node.js site to download and install the right version for your operating system.
The latest version of Yeoman and the Yeoman generator for Office Add-ins. To install these tools globally, run the following command via the command prompt.
npm install -g yo generator-officeNote
Even if you've previously installed the Yeoman generator, we recommend you update your package to the latest version from npm.
Office connected to a Microsoft 365 subscription (including Office on the web).
Note
If you don't already have Office, you might qualify for a Microsoft 365 E5 developer subscription through the Microsoft 365 Developer Program; for details, see the FAQ. Alternatively, you can sign up for a 1-month free trial or purchase a Microsoft 365 plan.
Create the add-in project
Run the following command to create an add-in project using the Yeoman generator. A folder that contains the project will be added to the current directory.
yo office
Note
When you run the yo office command, you may receive prompts about the data collection policies of Yeoman and the Office Add-in CLI tools. Use the information that's provided to respond to the prompts as you see fit.
When prompted, provide the following information to create your add-in project.
- Choose a project type:
Office Add-in Task Pane project - Choose a script type:
JavaScript - What do you want to name your add-in?
My Office Add-in - Which Office client application would you like to support?
PowerPoint
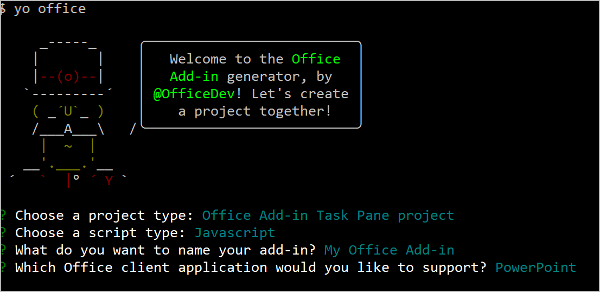
After you complete the wizard, the generator creates the project and installs supporting Node components.
Complete setup
Navigate to the root directory of the project.
cd "My Office Add-in"Open your project in VS Code or your preferred code editor.
Tip
On Windows, you can navigate to the root directory of the project via the command line and then enter
code .to open that folder in VS Code. On Mac, you'll need to add thecodecommand to the path before you can use that command to open the project folder in VS Code.
Insert an image
Complete the following steps to add code that inserts an image into a slide.
Open the project in your code editor.
In the root of the project, create a new file named base64Image.js.
Open the file base64Image.js and add the following code to specify the Base64-encoded string that represents an image.
export const base64Image =
    "iVBORw0KGgoAAAANSUhEUgAAAZAAAAEFCAIAAABCdiZrAAAACXBIWXMAAAsSAAALEgHS3X78AAAgAElEQVR42u2dzW9bV3rGn0w5wLBTRpSACAUDmDRowGoj1DdAtBA6suksZmtmV3Qj+i8w3XUB00X3pv8CX68Gswq96aKLhI5bCKiM+gpVphIa1qQBcQbyQB/hTJlpOHUXlyEvD885vLxfvCSfH7KIJVuUrnif+z7nPOd933v37h0IIWQe+BEvASGEgkUIIRQsQggFixBCKFiEEELBIoRQsAghhIJFCCEULEIIBYsQQihYhBBCwSKEULAIIYSCRQghFCxCCAWLEEIoWIQQQsEihCwQCV4CEgDdJvYM9C77f9x8gkyJV4UEznvs6U780rvAfgGdg5EPbr9CyuC1IbSEJGa8KopqBWC/gI7Fa0MoWCROHJZw/lxWdl3isITeBa8QoWCRyOk2JR9sVdF+qvwnnQPsF+SaRSEjFCwSCr0LNCo4rYkfb5s4vj/h33YOcFSWy59VlIsgIRQs4pHTGvYMdJvIjupOx5Ir0Tjtp5K/mTKwXsSLq2hUWG0R93CXkKg9oL0+ldnFpil+yhlicIM06NA2cXgXySyuV7Fe5CUnFCziyQO2qmg8BIDUDWzVkUiPfHY8xOCGT77EWkH84FEZbx4DwOotbJpI5nj5CQWLTOMBj8votuRqBWDP8KJWABIr2KpLwlmHpeHKff4BsmXxFQmhYBGlBxzoy7YlljxOcfFAMottS6JH+4Xh69IhEgoWcesBNdVQozLyd7whrdrGbSYdIqFgkQkecMD4epO9QB4I46v4tmbtGeK3QYdIKFhE7gEHjO/odSzsfRzkS1+5h42q+MGOhf2CuPlIh0goWPSAogcccP2RJHI1riP+kQYdVK9Fh0goWPSAk82a5xCDG4zPJaWTxnvSIVKwKFj0gEq1go8QgxtUQQeNZtEhUrB4FZbaA9pIN+98hhhcatbNpqRoGgRKpdAhUrDIMnpAjVrpJSNApK/uRi7pEClYZIk84KDGGQ+IBhhicMP6HRg1ycedgVI6RELBWl4POFCr8VWkszpe3o76G1aFs9ws+dMhUrDIInvAAeMB0ZBCDG6QBh2kgVI6RAoWWRYPqBEI9+oQEtKgg3sNpUOkYJGF8oADxgOioUauXKIKOkxV99EhUrDIgnhAG+mCUQQhBpeaNb4JgOn3AegQKVhkvj2gjXRLLrIQgxtUQYdpNYsOkYJF5tUDarQg4hCDS1u3VZd83IOw0iFSsMiceUCNWp3WYH0Wx59R6ls9W1c6RAoWmQ8PaCNdz55hiMEN4zsDNhMDpXSIFCwylx5Qo1a9C3yVi69a2ajCWZ43NOkQKVgkph5wwHi+KQ4hBs9SC9+RMTpEChaJlwfUFylWEafP5uMKqIIOPv0sHSIFi8TFAzpLiXxF/KCbdetEGutFUSa6TXQsdKypv42UgZQhfrWOhbO6q8nPqqCD/zU4OkQKFpm9B7SRbrTpQwzJHNaL/VHyiRVF0dfC2xpOzMnKlUgjW0amhGRW/ZM+w5sqzuqTNWtb9nKBZDLoEClYZGYe0EYaENWHGDaquHJv5CPnz/H9BToWkjmsFkTdOX0GS22p1ovYNEdUr9vCeR3dJlIG1gojn2o8RKPiRX+D0iw6RAoWmYEH1HioiQZqq47VW32dalUlfi1fQf7ByEdUQpMpYfOJ46UPcFweKaMSaWyaWL8z/Mibxzgqe3G4CC6pT4dIwSLReUCNWrkJMdjh8sMSuk1d3bReRGb3hy97iS/SEl+5bQ0LqM4B9gvytaptC6kbwz++vD3ZG0r3EBDoWUg6RAoWCd0D9isXReTKTYghZbhdUB/UYlKV2TSHitZtYc9QrqynDGy/GnGg+4XJr779ShJ0gNdAKR3i/PAjXoIZe8BGBS+uhqtWAF4VXUWu3G//ORVqdVRiEumhWgFoVHT7gB1LnFAvVaJxYZJ+qx/XRuo1X0+RFqzPsF/QFZuEgrVcHnDPCGbFylnajN/wAZZvqgpR8IzO275tTvjnwl/4sORC6C9xWJLoYCKNrbpuR3Jazp/jxdUJmksoWIvvAfcLsD4LuLfn5hOJhWlVQ+lyNZDFcUl636GY5/Wpyzo3FRZ+WBeT1JhpGDVlIMMbjYfYM3Ba4zuXgkUPGBD5B5Kl6LaJ4/uh/CCDTvDjW4ROxZm4gj7+dwZLY24067AkF9OtesCaRYdIwaIHDIzMrmSzv2NNTgl4fLlSXw6kjs8pWN+FfHu3n8p/xpSBjWrwL0eHSMGiB/TL+h1JnNJ+xTA6MawXh1ogTWA5S5tvLS8vMVUM6s1j+TKZEASjQ6RgkVl6wH4pcUM+zs8qBq9WyRyMGozP+5J0/nzygrrLSkS4ONPmNg/vyr1npiQG9+kQKVhkBh5woFbSI8EuQwxTkS1j2xoG0zsHeBVcRsl/RNMqyoMOG9WRjAUd4pzD4GhoHjDsMIEqchX48JuUgU1zJN+kSa4D+LnjHfXiqqsa5Oejb8J/fs9TAZjFtiXXvgADpaqXZsqUFRY94NRq1agErFbrRWzVR9Tq9JlOrWy75NncCf982n+o+sYCDJTSIVKw6AGnRhoQbZsBv3S+MlyxAtC7xPF9WMUJDsi5M+gmVCWImpvolorOgXzTMPBAKR0iBWvuPWB4+4CiWj2Rz3MPcFSXHb90NmawbWDLRVZAc2pHZTkF2fWDKugQRqBUCvcQKVj0gI6qRxYQtfvGBIUdvHQ2fmk/VR7fk5Q5jr+2fmfygrpTfM+fu8qa6lEFHcIIlGocolWkQwwcLrr79oBB9YRxg7SDXbDjJISue71LHJWnrno+vRh+BX2Xq2QOO6+Hf3TTXsYl43M3BhVcZFNjEyvIluUNvAgrrIX1gINqRdpvM0C1EhatbBvowaM5neOVe/L2VX176/jip88CUysAhyV5SRheoFRSfV+i8RAvckH+XKyweBW8qNWeEelEP1XkKqgQw3j/T3sxyNv6cSKNm02xA3KrOvLV1gq4Xh1u3vUusWcE7KESK7jZlHvSoDqU+q/4CAUrItomWtUoRvup1KpRCWxb0KiNqFXvcoreWCem/ETh+ILRYJnvJzlxz+7wrt/l9qkuHUIIrMk9bxaZEjIltl2mYMWDjoVWFae1sAouVeQq2LUYZwfRaVG1dR9PnKp802EpxG016TCOgZsOb6tk9RayZVZVFKwZ8cff4b/+Htcq8sd17wInJt5UA17SUqnVWR0vbwf5Qn5KgPO6bo0mU0K2LJetbgtvqjgxQw8uqcbthDH+OrHS/5FV19MuJDXreoSCFQC9C3yxisQK8hVk1dteZ3W8qQY2VFm68OF/emj0JNJ430DKQCKN3gU6FrrNSHf9VaMrfI68F+ynXVKpkhxndRyX0TlQzv4hFKyABWuwMPGROWxiJ6kdmmibaJu+7gTpPRbgDbZsqJa9/T8AMrvIlnWx/m4Tx+XhY4yC5RXGGjzRbeHlbd3ZsWQO+Qp2mth84nFtSBoQtS0M1cobqqCD50BpMovrj/Dpufyk1OBXZueKgyq6KVjEI/bZMf3ef6aErTp2XiOzO8UtIe0gCuCoHMWm5MLWyJfK09HTdihdvwPjc+w0J4wvbJv4KhfF2VIKFnHLm8f4KjfhkF0yh00TN5vYfDJ510wVED0qR7ENv7Sa5SZQmlhB/gF2XsOoTdj+O6tjz8Dh3Tlbaow9XMNy/153rGGpDIJ+Ycv5bm6bcvVR5YaiPFCy8Kze6s+4lj4VpIHS1Vv4sORqa09YrlL5fa5hUbBmLFiDd/am6Soi0LtAqzqyMK9Sq8BDDEQVdMBooDSxgvXihAV14RfqxgBSsChYcREsmyv3lImtcU5raJs4q8sjV/MYYpgLrj9SxlP2C/iuiXxFl1EYL4GPym5/TRQsCla8BKu/3qFNbLl80a9yVKuwUIWzpmKQrnIPBcsrXHQPT+AucXzf70l91lahclT2FV7tNmEV8fI2t24jI8FLEC52Ysv9wpbAtsVLGNNy2+VyFWGFNX+4SWyReYHpKgrWUuAmsUXiDNNVFKwlsxJBLGyRGVh7LlfFAq5hzeTd38LL27oo0ABpnykSIG766pzWYH3GS0XBWvJr7yLg8/1F1J18l4pk1lXuhM1CaQkJPixN/jvXKlGMpVpa8u7CvSkj9CGshIIV92e7tOvxeBXGhGFIrN6Sp0ZPa5Jw1gfsdEzBWmbGb4BuE4d3JbdKtszHe1jllZTjsqTBvJtymFCwFpbxpRM77nAouzE+MnnBAiazK++rYZ9Flw4B4mODgrWkpG5I1nHf1gDFrPa1gveRNmQc+5jnOL2L/pDqzoGkN2mArpChFgrWXD3eS5J38KDJjDTKsMG4aaDlrXTjr1UdJkJPTLpCChYBAEmzSqcHOX8utySZXV65AFBFGezjgULBS1dIwaIflDzehVVeVZHFiIN/VFEGoZtVtyUxbtwrpGDNDb3fheUH26Z4Nq3bkhw5TKT9dtciqihDtynpWN2mK6RgzS/vemH5QemU9kZF0tohX6Er8VteSTmWPQlOZa5w4gwRQsFaZD/Yu5APLOhdyvs6XOfqu+faVhFlOKsrfwXjRRZHzFOwlumeKbkqr2xaVUmOdL3IiEPA5ZXmhPn4b2edy1gUrOVh/O2uaY/Vu2TEITi1eiCPMrRNnD9XC9Yz0Zgnc3SFFKxl9YPd5oT+Su2nkgQjIw7TklhR7ldMbOBzQldIwVpOxu+Z8SWScY7K8iKLEQf3bFTlUYZWdZjXVT4zTLrCGD16eAlm6QfdCJZ9WEdYLbYjDmG3FU/mRqoJD90EV3+Ga//o5aUPS77m2QiFrbQm6l24+ok6B+g2R0pj2xWy9SgFa6HV6o74kO9Ykx/vNsdlyficfGVkanRIgpV/4Euw3v/E4xZBMheYYKn2VZ0HcfS0quK6YaaE4/t8U9MSLlN55X4aRedAXouxVZab54Q0ytBtTnH933KvkIJFwdIEGsaRVjeZEiMOHsurRmWKyTfdlrj1wb1CCtZy+cHT2nSjorotuWbFvMj6w6/xhxN81xL/G/zsvY7ks384wfdBDHBURRmkB3EmukIBHpOaBVzDmlF55Wa5ffyeyZZF4VsrILM79e0XGb/5JX7zS8nHt+r92rDz79gvhPPWVkcZpF0S9cgTpHf51maFtQSCpTqOo0d1WCfPQRUyVFGGs7ouKaq5+IJmJdJYv8PLTMFaDj/ojcZDyd5ZMkd7IqKKMsDHqEcGsihYS+oHT0zvX016v3FQhYBqrV1/EGeCKxw7pkPBomAtGokV8W3dbXq/Z6A4rMNpYE5Wb8mjDPA9SZuucOb3Ey9B6OVVUH5wwFEZW3Xxg5kSTkxfUmjj/MrCdz7+ovpvclxYo2HTVKqVz5xtqyo6zfWil+VIQsGaGz/4xnevBelhHQD5Cl7eDqA88fCpcX6cns0Fv3JPHmUQWrZ7Y/yYDvcKaQkX2Q+6P46j5+uS5IN2xCEO9C7xrTWbC36toiyOpgq+KS25SVfICmtpyqsTM5ivbA/7HN8Iy1emjqQKOGu0lIHrj+SfEhD+5mFJ0t85AlQDJrrNwA6Kt01xuZCukIK1sILlIS+qolGRLJDZEQc/N6dmxqfmU85dufbTANbpPKCa3wXfa+3Co6JjIWX4coWzWt2jJSRT+EGftc/4nSNdlMmWo86R5ivDg3XdlryBVwR8ZCrVIdiTACdjrnBaJx7g24CCRcIqrwKvO1pVifNKpCPtoZwyRlrQfD0jM6iJMgQuoEyQUrAWX7B6F8ELVu8S38jMTqYUXS8BZ4ag8VBnGyP7NgQb6z/qMX7ZhV/lepGnoyhYMeP/vouRHxzw5rG80V0008CcZrBzEORS0VSoogxQDBz0D6fpULAWSrAi8IPDukYmE2uF0LfbBTPooQVCIGiiDG0zrEbG7ac8pkPBWiCEwEG3GeLOd/up3IiFXWQ5Xdjx/ZntfKmiDEC4FR9dIQVrQUhmxQXgsLf5pXem0JE9PDN4/jyAELnnS62JMoTa8P7EpCukYC0EH4QZv5JiH9YZJ6SIg9MM9i5nZgY1VWQgB3EmXnNh9ZCCRcGaSz4cvYE7VhQjoaSHdUKKODjNYIDzuKZl9ZZSI76pRJF1oiukYC2CH3TGoBHccRw99mGdcQKPODjN4Omz2YTabVRa3G3izeMovoHxc+wssihYc+8H30Z1Szcq8tBmgKvv8TGDmV3xweC8DtEwPk2HgkXBmm8/eFoLd+lXuH+kCzcBRhycZtAqzibUDiCxoiyvzuqRjuQQyuf1Ilu/UrDm2Q9G7Jikh3WCKrKcZvDN41BC7X/+NzBq+Nk3yurJZnx6UPTllap8/oBFFgVrfv1gxILVu5QfnUvmcOWe3y8+CBB0DuRHgvyI1F//Cp9+i7/6Bdbv4E/zuv5/yayyH3QYB3EmVrXCr/jDEu8DCtZ8+sG2OYNz+e2n8m27a76ngQ3+eYDtrlZv9UXqp3+BRMrVP9FUi1/PQiwEwUoZdIUULPrBaZAeoAtqUEXj4SzbOWmiDG0zuuVC4bcsyDddIQVrDhCO43iblhrMLfRMmSP1+fCP4ITz//4WHUuZ7dpQJ0VndfR6vHkDXSEFa/4E68Sc5Tejuns/Mn3dmVY4tUOvg9//J379C/zbTdQ/wN7HcsHSRBla1dmUV3SFFKy5JHVD7HAS9nEcPefP5YZ0rTDd8BtBBIMKtf/oJwDwP/+N869w/Hf44n3861/iP/4WFy+U/0QTZfB/EGe9qOyo5bKkFa4MXWE4sKd7OOVVtxnFcRw9x2X5cs+miRdXXX2Fb62RwRMB5hga/4Df/2o6+dNEGfwfxLle7ddEnqOwp7WRY9gfliJK27PCIh4f0YJDmTmqwzruIw69C5zVh/8FyG//aTq10nRl8H8QJ1/pq1VmVzKIyCXCpaYrpGDNkx98W4vFN3ZUlucPrlXm7JhueE2vEukRKfS8kdo5EDdPPWsfoWBF6gfP6gEvAKcM5Cv9/zIl5a0rKZEu5bVeUBGHaFi9pbz5/R/E2aiOaHcy611oTkwKVti89+7dO14Fd49QC3sfyz+183qkwjosBXacba2AfEVcJrdlSHUKR9SmFdxsyjXuRW6WO2vu+eRL5USc/YKvaHvKwPYriZV+kfPy1ZJZ7Iz63D1DuZT5c953rLBi4gcDyYsmc9g08cmXkk29xAryD3CzqbyNBXVTzbnyE3GIrnrdVf6YpzW/B3Gc247dVl++PRdZ3Za40qf5OrM6N07Boh8U7yKfO1a2VO28njCeM7GCT750dWupDuv4iThEQ2JFZ119TsRZL478+F+Xhsthnv2ysPSu6TbzLYc/U7BmgvCm9Bm/ShnYtiRS1TlA4yEaD3H+fEQQN5+46imq2q3fqMb62mbLyvld/g/iOM8k2mcDBl/Tc5ElFNfJXHQDIilYxIVa3Rm5o3wex0kZ2KqL+3ftp3hxFXsGGhU0Ktgv4Is0Xt4eytaVe5MrAlXT95Qx9Zj1yNBEGXoXk+c5pwydZR5EGWzXPCjWfBZZvUvxicWldwrWbHjXm1xe+Vy92jRH1KpzgL2P5U3Tz+ojp2TyD5SVyADV9r+wTRYfNFGGVnWC706kYdTwyZfYqktkS4gytKrDKzxw9EEVWexBSsGaDb3fTRYsP3lRofl65wD7BV1fBGFH302RJbWrwt0bEzRRBjcHca79UECt3pLIllOju60RKXd+cW9F1umzkQV1ukIKVoz8oLME8Hkcx6l9vUvsFyZvJDnv29XC5JdQFVlOfxSf8krFUXlCeZXMiWLnlC3BBY+30BqUb56LrBO6QgpWHAUr0OV2Z49NVUJdoGMNb103iqNq+o7wx0RPV2yqowzd5uSMW7eJPUOymDiQLWc1NL6057/Icr9XSChY8ypYmnUQvWYNcBPLUk3WEfb4Z0ggUYZuE1YR1meSWmxgBp1r7SrF8VZkdQ5Glh2TubjHRyhYS+cHO5bfXXan9LhPFTrvBDfHiVWHdRCbiIMmynBWn24T9rSGr3LKo9HfXygX9Z11nLciS7jIbOlHwYpXeeW/PcP3DpHSz4xRlVQu+x84N8WcxCHikFjR7QB4OOdsByBe3pYsLyaz2H6FTVOuj4PX8lZkveVeIQUrzoI10cQl0hNaxDkrLDfbdon0yMKT+0Mqvcv4Rhw2qsqqx89BnLM69gx5CZzZxc5ryev6LLKEGauJdGCjISlYxK8fnHgcZ72Im01dh1+MtsfL7E7OVW1UR/bLT8wpvn/VYZ3ZRhxSN3S1jM+DOGuF4b6EcFoAwJV7uNkUk1+DqtlbkSUU3SyyKFhzU14Zn/crF826eO9iZP9r09S1kcmWR+zb6bOpl/xVh3VmGHHQ7FT6b9k+qJJ6l3hVxJ4h7jYOjpQPtKljDWs6D0UWE6QUrFiQWBl53gpCI7d7Pyyg6B/UDUer39Vb2KpLNCuRxkYV1x+NfHEPjX1Vh3Uwo4jD+h2lmvufiOM85m235ek2cVjCy9uizUysYPMJdn6QLT8rWcI0HbpCCtZ8lFdOd5C6oSuy7LvIaZGcD/y1AjIlbFsjDY57l97HmqpM1kwiDvryymcDDLuNcrclbpKe1bFfwOFd8esns9h80k9s+SmyGMgKGjbwc81ZvT+Rwfh85J3npodcIo2bzb4rPH+O/cIEQRQOFWqe4frjOxPZfCIvHAY/bDTkHyjlwE6BBjVAO5nTLd7lH8i+gdbQIx/endp6f3o+LJN7F/hitf//mq6EhBVWkH7QqVbdpqutK2d4WjO7eFCyfZVD4+GEgz7+1QrqoMBaIbqIw8QoQ1BqBXXyw3adL65KfpvOFT2fK1l0hRSsOfCD475m05zwdLXvnz0DL66i8VByx3YOsGcEMDJeOPo7UvVENahCE2VwcxAnQLpN7Bfw8rZygd/DShb3CilYMRKsN67Xp3sXw/Upu1mopn2KfXzXqGHnNfIPROGwTWVQM01VveGTuSgiDvoog+cpgT69/4scju8HU9kJx3TWi3M2ryhmcA1rmvexVcSnjntbM5ZCxaY5YrXsjaSOhY6FRBopA8kcUoauIUnjod8tM0kxpVhC6l0o85ZBoVnKiXgdTeJV09iojvy+vM2nEC6vPaOEa1gUrNAFq22OpNWPyl5GeAqa5Z7z52hUAh5oOkAY/DOgbeLwbmjl6h0Yak/tcyJOYDWggY1qf9vUw6I7xqbpnNZgfUbBoiWM3A96a89wWJrabpw+w8vb2C+EpVZQr75nSiFGHDRRhrYZC7Wy6+j9AqzPvKRzB3WZc7WRrpAVVhRc/AvSPxOfk37sxnoRawUkc0ikJR6w28J5HWd1nNYiGgm1/Up+cigka3blnq4/xLzMTPT2wx6WkCmxwqJghcnvj/DTDXElItgVk/cNAPjWms3QOjtbr6oKA/5h1eNdAbSqOL6/UG+exMrI6udpDYk0BYuCFSZ//B3+5M/6/9+7wFe5IPNBMUG1sBJsehPA9Ue6iTgLeW2FvHHHcttEiDjgGpZrBmqFIKalxhPVYZ1gIw6a+V0I4iBOPBEie1QrCtbM3nwLQ+dAua6cLQfWxeEjU/mpbhONh4t5bdtPOZ6egjULuk1f01JjjqrpeyLtfYC7k9VburWbwCNmfM5RsFheLbQcqyfrCJMTvaFpu9qxIj2IEz0nJu8eClb0tf2iv+1Uh3Xgu1XWlXu6TqpH5QW/sOfPAztQRcEiruhYvqalzgW9S3yjsGZrBe/9BhIruKZ2fGf1uCRFWZ5TsFjVzxlvHitrAc9FluawN3y3bGd5TsEiEt4uzRNStf6dzMkb3enRRxna5uLXrf0K/SCApkAULOK2nl+k8yITaoGnyqOL2fLUp+E+Mr2II4t0QsHyJVhLhUpH7L4r7pkYZViex8BSFekULApWpGgm60wVcdCom7N59JLQbXHp3TMJXgK3vOvBqKF3gY6FbhPdJr5rLn5p8HVppJeTk+tVV10c9ONjF/UgzshNtoKUgR+nkTKGbRqJJ3j42f8Ds4luEx2rr2XfX6BjLdRNqJqsA8AqTgj967sydJt4cXWh3gypG8M2DKsFAGzJQMGaE2wzdV7v/3/vYl43wpJZbFty0ZmoOJr5XQiha02U1+QnOSRz/ZbWdmsgTWiDULDmkt5Fv93VfPlKje40KsrjykJr4HFBn23Lds9ujoaOgkVfGWtfqXF2mvZVQgcogZi0bKebo2CRBfSVmo7G0gahmv6lsy2v6OYoWMuL7ewiftPPyleqJutA1oJd1SFe9fcXz83ZD5vvmlPPXiUUrBBpm8Pooz1gZmAr7LtlYXylZiqXUDFldnVtZAIfHTZbN6e67IkVZMvIllm+UbDiR6uKRkWuDs5HfTI39CPz6Cs10/QGa1L6KIOf4ayzdXNTFbaZXWxUKVUUrBhjh7bdJyHt289pW+LvKzUrU4OIgz7KoNlVjJub8ybxmV3kK9xJpGDNj2wdlX3Fi2LuKzV7f0dlvK3pogzjW4rxdHOef3H5CvcWKVhzSLeJ43KQrd/j4yuTOeUqsl21ae7YjoXT2tyUk1N51Y9MShUFa845q6NRCTdtNFtfGc9rjgiDIMks8hXuA1KwFojTGo7LUcfZZ+srI3Nz3/3g6aKP2nITkIK1yLRNHJVnHF6fua/06eZsVYrDYaYr93CtQqmiYC00024jRkZMfKUtSQM3B8RxLAU3ASlYSydb31Tw5vEcfKsh+cqZuznPV2OjyhHzFKylpNtEozKXzVXc+8p4ujkPpG7gepWbgBSspSeCbcRoGA+LzkX3GDdmmZuAsXpc8hLMkrUC1uo4q+Pr0nINYpiLQjJb1kX2ySzgEIp4yNZOE5tPkMzyYsSlYLzZpFpRsIiaTAnbFvIPph75R4L8Lexi5/WEIdWEgkUAIJFGvoKbTS+jlYlPVm9h5zU2TUYWKFhketnaeY3MLi9GRFL1yZfYqlOqKFjEK8kcNk1sv+qHoUgoFzmLzSfYqjOyQMEiQZAysFXHJ19OMWaZuCpjV3D9EXbYv5iCRQJnrYBti9uIgUmVvYzBIcUAAAIqSURBVAmYLfNiULBIaGRK2GlyG9HfNdzFtsVNQAoWiYrBNiJlayq4CUjBIjMyNWnkK9i2uI3oVqq4CUjBIjPG3kbcec1tRPUlysL4nJuAFCwSJ9mytxEpWyNF6Ao2n2CnqZyXQShYZGasFbBV5zZiX6rsTUDmFShYJNbY24jXHy3venxmt39omZuAFCwyH2TLy7iNuH6nvwlIqaJgkXmzRcu0jWhvAho1bgJSsMg8M9hGXL+zoD9gtp9X4CYgBYssjmwZtUXbRrQPLe80KVUULLKI2NuIxudzv41obwJuW9wEpGCRRWe92O/FPKfr8VfucROQgkWWjExp/rYR7c7FG1VKFQWLLB+DXszx30a0NwF5aJlQsChb/W3EeMpW6gY3AQkFi4xipx9itY1obwJuW5QqIj5keQkIEJuRrhxfSlhhkSlka4YjXTm+lFCwyNREP9KV40sJBYv4sGY/bCNeuRfuC63ewvYrbgISChYJQrY2qmFtIw46F6cMXmlCwSIBEfhIV44vJRQsEi6BjHTl+FJCwSLR4XmkK8eXEgoWmQ3TjnTl+FJCwSIzZjDSVQPHl5JAee/du3e8CsQX3Sa6Y730pB8khIJFCKElJIQQChYhhFCwCCEULEIIoWARQggFixBCwSKEEAoWIYRQsAghFCxCCKFgEUIIBYsQQsEihBAKFiGEULAIIRQsQgihYBFCCAWLEELBIoQQChYhhILFS0AIoWARQkjA/D87uqZQTj7xTgAAAABJRU5ErkJggg==";
Open the file ./src/taskpane/taskpane.html. This file contains the HTML markup for the task pane.
Locate the
<body>element. Replace it with the following markup, then save the file.<body class="ms-font-m ms-welcome ms-Fabric"> <!-- TODO2: Update the header node. --> <header class="ms-welcome__header ms-bgColor-neutralLighter"> <img width="90" height="90" src="../../assets/logo-filled.png" alt="Contoso" title="Contoso" /> <h1 class="ms-font-su">Welcome</h1> </header> <section id="sideload-msg" class="ms-welcome__main"> <h2 class="ms-font-xl">Please <a target="_blank" href="https://zcusa.951200.xyz/office/dev/add-ins/testing/test-debug-office-add-ins#sideload-an-office-add-in-for-testing">sideload</a> your add-in to see app body.</h2> </section> <main id="app-body" class="ms-welcome__main" style="display: none;"> <div class="padding"> <!-- TODO1: Create the insert-image button. --> <!-- TODO3: Create the insert-text button. --> <!-- TODO4: Create the get-slide-metadata button. --> <!-- TODO5: Create the add-slides and go-to-slide buttons. --> </div> </main> <section id="display-msg" class="ms-welcome__main"> <div class="padding"> <h3>Message</h3> <div id="message"></div> </div> </section> </body>In the taskpane.html file, replace
TODO1with the following markup. This markup defines the Insert Image button that will appear within the add-in's task pane.<button class="ms-Button" id="insert-image">Insert Image</button><br/><br/>Open the file ./src/taskpane/taskpane.js. This file contains the Office JavaScript API code that facilitates interaction between the task pane and the Office client application. Replace the entire contents with the following code and save the file.
/*
 * Copyright (c) Microsoft Corporation. All rights reserved. Licensed under the MIT license.
 * See LICENSE in the project root for license information.
 */

/* global document, Office */

// TODO1: Import Base64-encoded string for image.
Office.onReady((info) => {
  if (info.host === Office.HostType.PowerPoint) {
    document.getElementById("sideload-msg").style.display = "none";
    document.getElementById("app-body").style.display = "flex";
    // TODO2: Assign event handler for insert-image button.
    // TODO4: Assign event handler for insert-text button.
    // TODO6: Assign event handler for get-slide-metadata button.
    // TODO8: Assign event handlers for add-slides and the four navigation buttons.
  }
});

// TODO3: Define the insertImage function.

// TODO5: Define the insertText function.

// TODO7: Define the getSlideMetadata function.

// TODO9: Define the addSlides and navigation functions.

async function clearMessage(callback) {
  document.getElementById("message").innerText = "";
  await callback();
}

function setMessage(message) {
  document.getElementById("message").innerText = message;
}

// Default helper for invoking an action and handling errors.
async function tryCatch(callback) {
  try {
    document.getElementById("message").innerText = "";
    await callback();
  } catch (error) {
    setMessage("Error: " + error.toString());
  }
}
In the taskpane.js file above the
Office.onReadyfunction call near the top of the file, replaceTODO1with the following code. This code imports the variable that you defined previously in the file ./base64Image.js.import { base64Image } from "../../base64Image";In the taskpane.js file, replace
TODO2with the following code to assign the event handler for the Insert Image button.document.getElementById("insert-image").onclick = () => clearMessage(insertImage);In the taskpane.js file, replace
TODO3with the following code to define theinsertImagefunction. This function uses the Office JavaScript API to insert the image into the document. Note:The
coercionTypeoption that's specified as the second parameter of thesetSelectedDataAsyncrequest indicates the type of data being inserted.The
asyncResultobject encapsulates the result of thesetSelectedDataAsyncrequest, including status and error information if the request failed.
function insertImage() {
  // Call Office.js to insert the image into the document.
  Office.context.document.setSelectedDataAsync(
    base64Image,
    {
      coercionType: Office.CoercionType.Image
    },
    (asyncResult) => {
      if (asyncResult.status === Office.AsyncResultStatus.Failed) {
        setMessage("Error: " + asyncResult.error.message);
      }
    }
  );
}
Save all your changes to the project.
Test the add-in
Navigate to the root folder of the project.
cd "My Office Add-in"Complete the following steps to start the local web server and sideload your add-in.
Note
Office Add-ins should use HTTPS, not HTTP, even while you're developing. If you're prompted to install a certificate after you run one of the following commands, accept the prompt to install the certificate that the Yeoman generator provides. You may also have to run your command prompt or terminal as an administrator for the changes to be made.
If this is your first time developing an Office Add-in on your machine, you may be prompted in the command line to grant Microsoft Edge WebView a loopback exemption ("Allow localhost loopback for Microsoft Edge WebView?"). When prompted, enter
Yto allow the exemption. Note that you'll need administrator privileges to allow the exemption. Once allowed, you shouldn't be prompted for an exemption when you sideload Office Add-ins in the future (unless you remove the exemption from your machine). To learn more, see "We can't open this add-in from localhost" when loading an Office Add-in or using Fiddler.
Tip
If you're testing your add-in on Mac, run the following command before proceeding. When you run this command, the local web server starts.
npm run dev-serverTo test your add-in in PowerPoint, run the following command in the root directory of your project. This starts the local web server (if it's not already running) and opens PowerPoint with your add-in loaded.
npm startTo test your add-in in PowerPoint on a browser, run the following command in the root directory of your project. When you run this command, the local web server starts. Replace "{url}" with the URL of a PowerPoint document on your OneDrive or a SharePoint library to which you have permissions.
Note
If you are developing on a Mac, enclose the
{url}in single quotation marks. Do not do this on Windows.npm run start -- web --document {url}The following are examples.
npm run start -- web --document https://contoso.sharepoint.com/:t:/g/EZGxP7ksiE5DuxvY638G798BpuhwluxCMfF1WZQj3VYhYQ?e=F4QM1Rnpm run start -- web --document https://1drv.ms/x/s!jkcH7spkM4EGgcZUgqthk4IK3NOypVw?e=Z6G1qpnpm run start -- web --document https://contoso-my.sharepoint-df.com/:t:/p/user/EQda453DNTpFnl1bFPhOVR0BwlrzetbXvnaRYii2lDr_oQ?e=RSccmNP
If your add-in doesn't sideload in the document, manually sideload it by following the instructions in Manually sideload add-ins to Office on the web.
If the add-in task pane isn't already open in PowerPoint, choose the Home tab, and then choose the Show Taskpane button on the ribbon to open the add-in task pane.

In the task pane, choose the Insert Image button to add the image to the current slide.
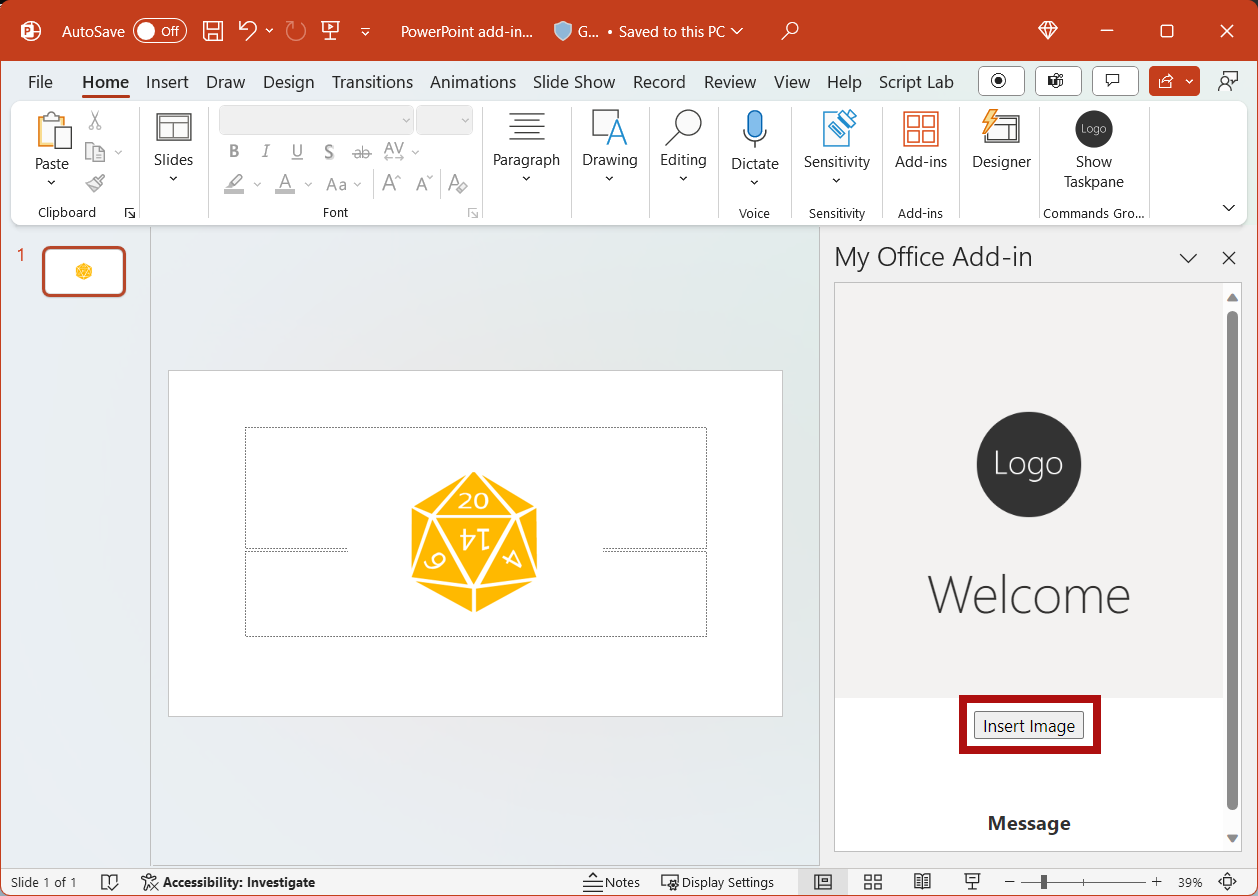
When you want to stop the local web server and uninstall the add-in, follow the applicable instructions:
To stop the server, run the following command. If you used
npm start, the following command also uninstalls the add-in.npm stopIf you manually sideloaded the add-in, see Remove a sideloaded add-in.
Customize user interface (UI) elements
Complete the following steps to add markup that customizes the task pane UI.
In the taskpane.html file, replace
TODO2and the current header section with the following markup to update the header section and title in the task pane. Note:- The styles that begin with
ms-are defined by Fabric Core in Office Add-ins, a JavaScript front-end framework for building user experiences for Office. The taskpane.html file includes a reference to the Fabric Core stylesheet.
<header id="content-header"> <div class="ms-Grid ms-bgColor-neutralPrimary"> <div class="ms-Grid-row"> <div class="padding ms-Grid-col ms-u-sm12 ms-u-md12 ms-u-lg12"> <div class="ms-font-xl ms-fontColor-white ms-fontWeight-semibold">My PowerPoint add-in</div></div> </div> </div> </header>- The styles that begin with
Save all your changes to the project.
Test the add-in
If the local web server isn't already running, complete the following steps to start the local web server and sideload your add-in.
Note
Office Add-ins should use HTTPS, not HTTP, even while you're developing. If you're prompted to install a certificate after you run one of the following commands, accept the prompt to install the certificate that the Yeoman generator provides. You may also have to run your command prompt or terminal as an administrator for the changes to be made.
If this is your first time developing an Office Add-in on your machine, you may be prompted in the command line to grant Microsoft Edge WebView a loopback exemption ("Allow localhost loopback for Microsoft Edge WebView?"). When prompted, enter
Yto allow the exemption. Note that you'll need administrator privileges to allow the exemption. Once allowed, you shouldn't be prompted for an exemption when you sideload Office Add-ins in the future (unless you remove the exemption from your machine). To learn more, see "We can't open this add-in from localhost" when loading an Office Add-in or using Fiddler.
Tip
If you're testing your add-in on Mac, run the following command before proceeding. When you run this command, the local web server starts.
npm run dev-serverTo test your add-in in PowerPoint, run the following command in the root directory of your project. This starts the local web server (if it's not already running) and opens PowerPoint with your add-in loaded.
npm startTo test your add-in in PowerPoint on a browser, run the following command in the root directory of your project. When you run this command, the local web server starts. Replace "{url}" with the URL of a PowerPoint document on your OneDrive or a SharePoint library to which you have permissions.
Note
If you are developing on a Mac, enclose the
{url}in single quotation marks. Do not do this on Windows.npm run start -- web --document {url}The following are examples.
npm run start -- web --document https://contoso.sharepoint.com/:t:/g/EZGxP7ksiE5DuxvY638G798BpuhwluxCMfF1WZQj3VYhYQ?e=F4QM1Rnpm run start -- web --document https://1drv.ms/x/s!jkcH7spkM4EGgcZUgqthk4IK3NOypVw?e=Z6G1qpnpm run start -- web --document https://contoso-my.sharepoint-df.com/:t:/p/user/EQda453DNTpFnl1bFPhOVR0BwlrzetbXvnaRYii2lDr_oQ?e=RSccmNP
If your add-in doesn't sideload in the document, manually sideload it by following the instructions in Manually sideload add-ins to Office on the web.
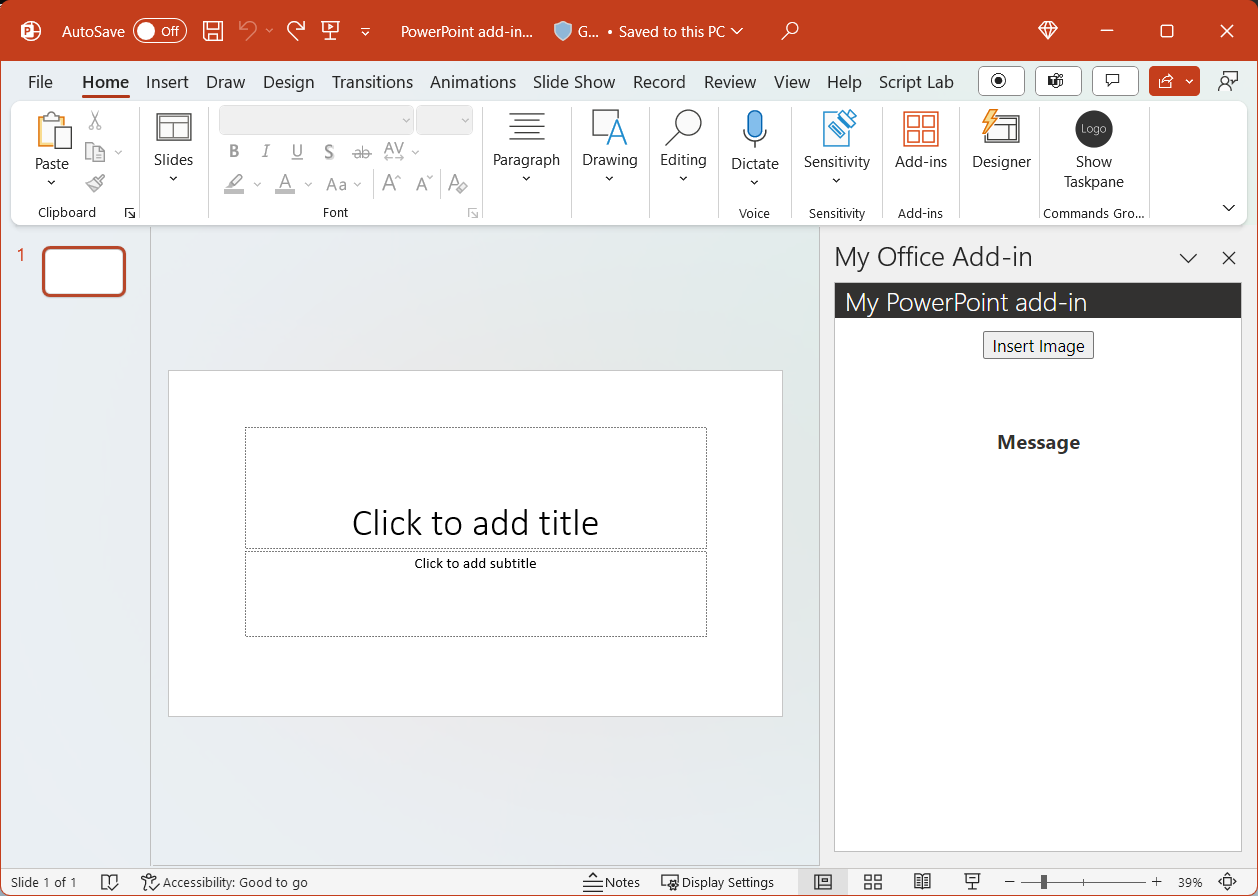
If the add-in task pane isn't already open in PowerPoint, select the Show Taskpane button on the ribbon to open it.

Notice that the task pane now contains an updated header section and title.
Insert text
Complete the following steps to add code that inserts text into the title slide which contains an image.
In the taskpane.html file, replace
TODO3with the following markup. This markup defines the Insert Text button that will appear within the add-in's task pane.<button class="ms-Button" id="insert-text">Insert Text</button><br/><br/>In the taskpane.js file, replace
TODO4with the following code to assign the event handler for the Insert Text button.document.getElementById("insert-text").onclick = () => clearMessage(insertText);In the taskpane.js file, replace
TODO5with the following code to define theinsertTextfunction. This function inserts text into the current slide.function insertText() { Office.context.document.setSelectedDataAsync("Hello World!", (asyncResult) => { if (asyncResult.status === Office.AsyncResultStatus.Failed) { setMessage("Error: " + asyncResult.error.message); } }); }Save all your changes to the project.
Test the add-in
Navigate to the root folder of the project.
cd "My Office Add-in"If the local web server isn't already running, complete the following steps to start the local web server and sideload your add-in.
Note
Office Add-ins should use HTTPS, not HTTP, even while you're developing. If you're prompted to install a certificate after you run one of the following commands, accept the prompt to install the certificate that the Yeoman generator provides. You may also have to run your command prompt or terminal as an administrator for the changes to be made.
If this is your first time developing an Office Add-in on your machine, you may be prompted in the command line to grant Microsoft Edge WebView a loopback exemption ("Allow localhost loopback for Microsoft Edge WebView?"). When prompted, enter
Yto allow the exemption. Note that you'll need administrator privileges to allow the exemption. Once allowed, you shouldn't be prompted for an exemption when you sideload Office Add-ins in the future (unless you remove the exemption from your machine). To learn more, see "We can't open this add-in from localhost" when loading an Office Add-in or using Fiddler.
Tip
If you're testing your add-in on Mac, run the following command before proceeding. When you run this command, the local web server starts.
npm run dev-serverTo test your add-in in PowerPoint, run the following command in the root directory of your project. This starts the local web server (if it's not already running) and opens PowerPoint with your add-in loaded.
npm startTo test your add-in in PowerPoint on a browser, run the following command in the root directory of your project. When you run this command, the local web server starts. Replace "{url}" with the URL of a PowerPoint document on your OneDrive or a SharePoint library to which you have permissions.
Note
If you are developing on a Mac, enclose the
{url}in single quotation marks. Do not do this on Windows.npm run start -- web --document {url}The following are examples.
npm run start -- web --document https://contoso.sharepoint.com/:t:/g/EZGxP7ksiE5DuxvY638G798BpuhwluxCMfF1WZQj3VYhYQ?e=F4QM1Rnpm run start -- web --document https://1drv.ms/x/s!jkcH7spkM4EGgcZUgqthk4IK3NOypVw?e=Z6G1qpnpm run start -- web --document https://contoso-my.sharepoint-df.com/:t:/p/user/EQda453DNTpFnl1bFPhOVR0BwlrzetbXvnaRYii2lDr_oQ?e=RSccmNP
If your add-in doesn't sideload in the document, manually sideload it by following the instructions in Manually sideload add-ins to Office on the web.
If the add-in task pane isn't already open in PowerPoint, select the Show Taskpane button on the ribbon to open it.

In the task pane, choose the Insert Image button to add the image to the current slide, then choose a design for the slide that contains a text box for the title.
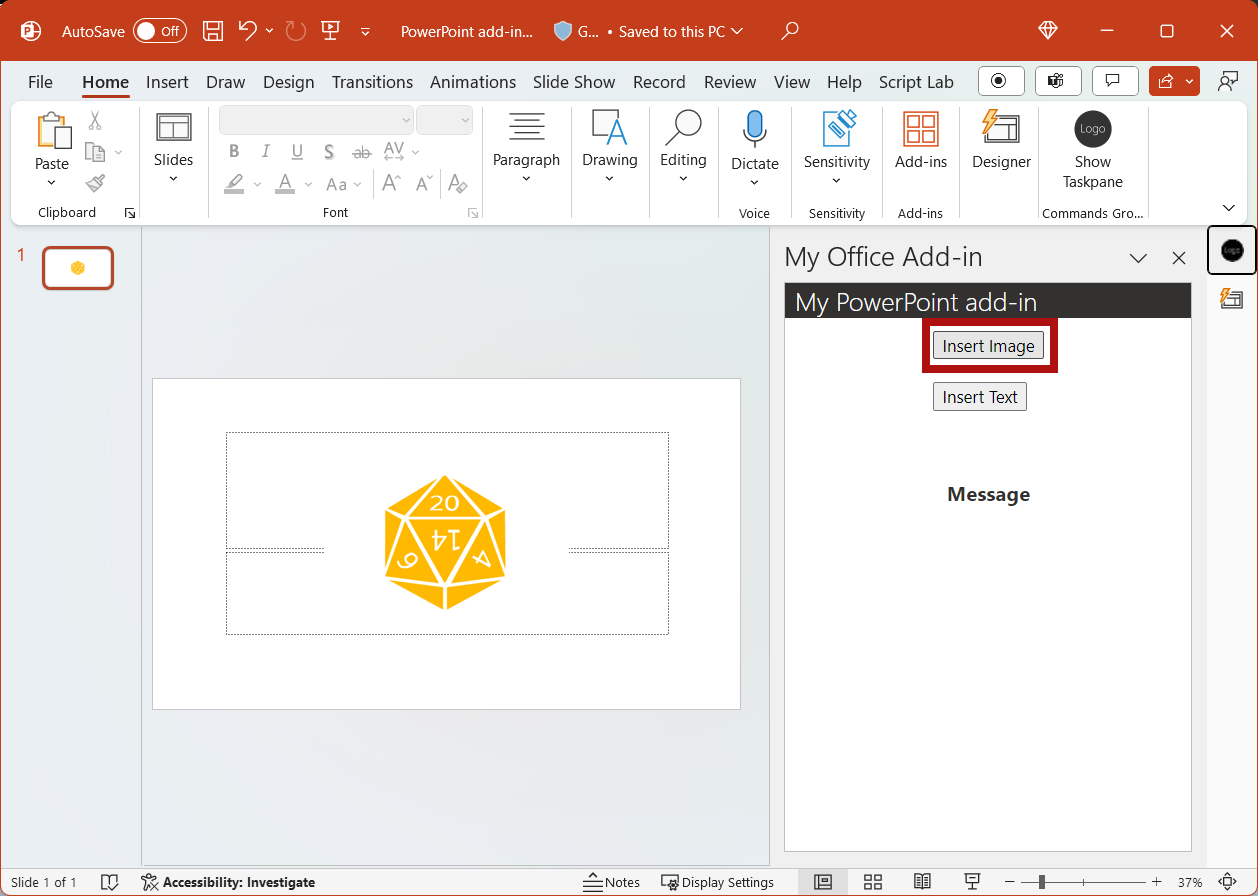
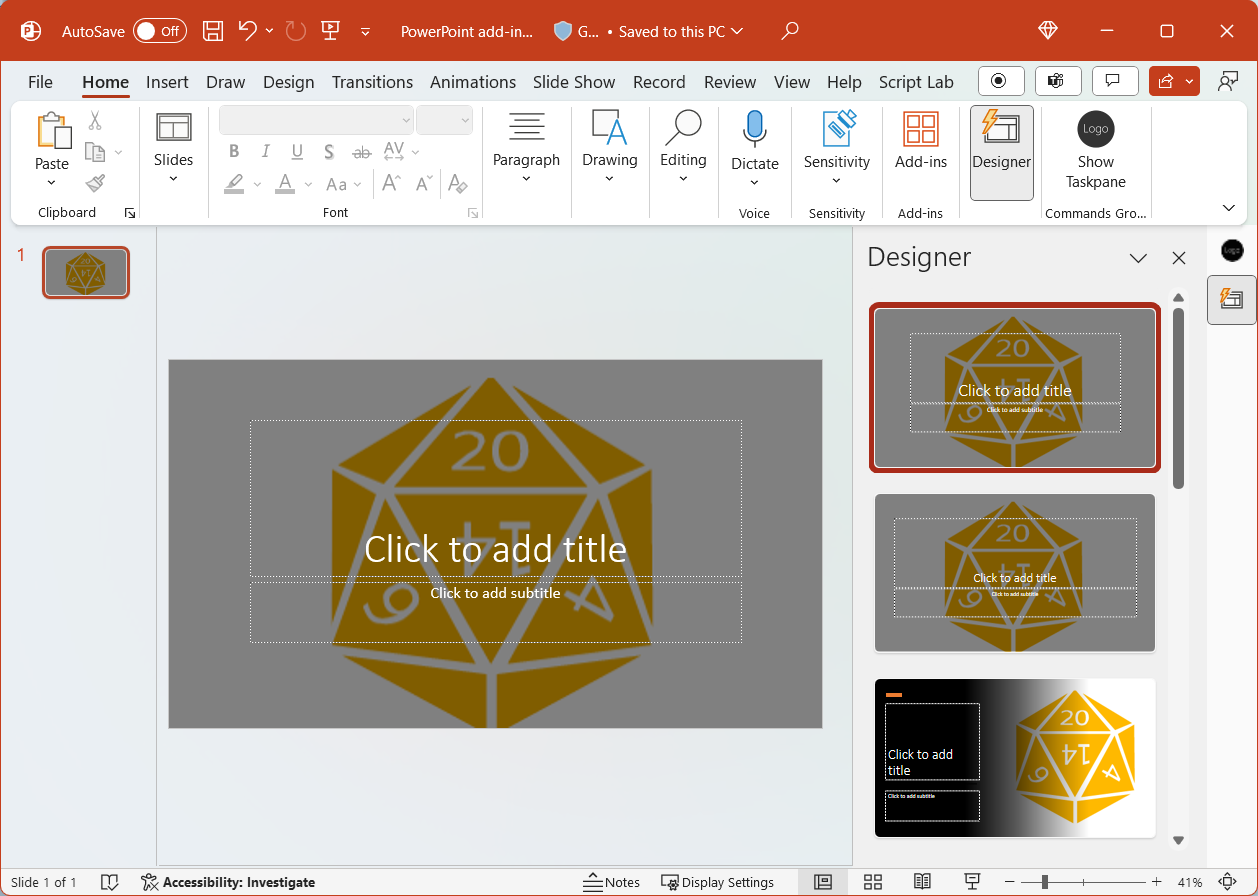
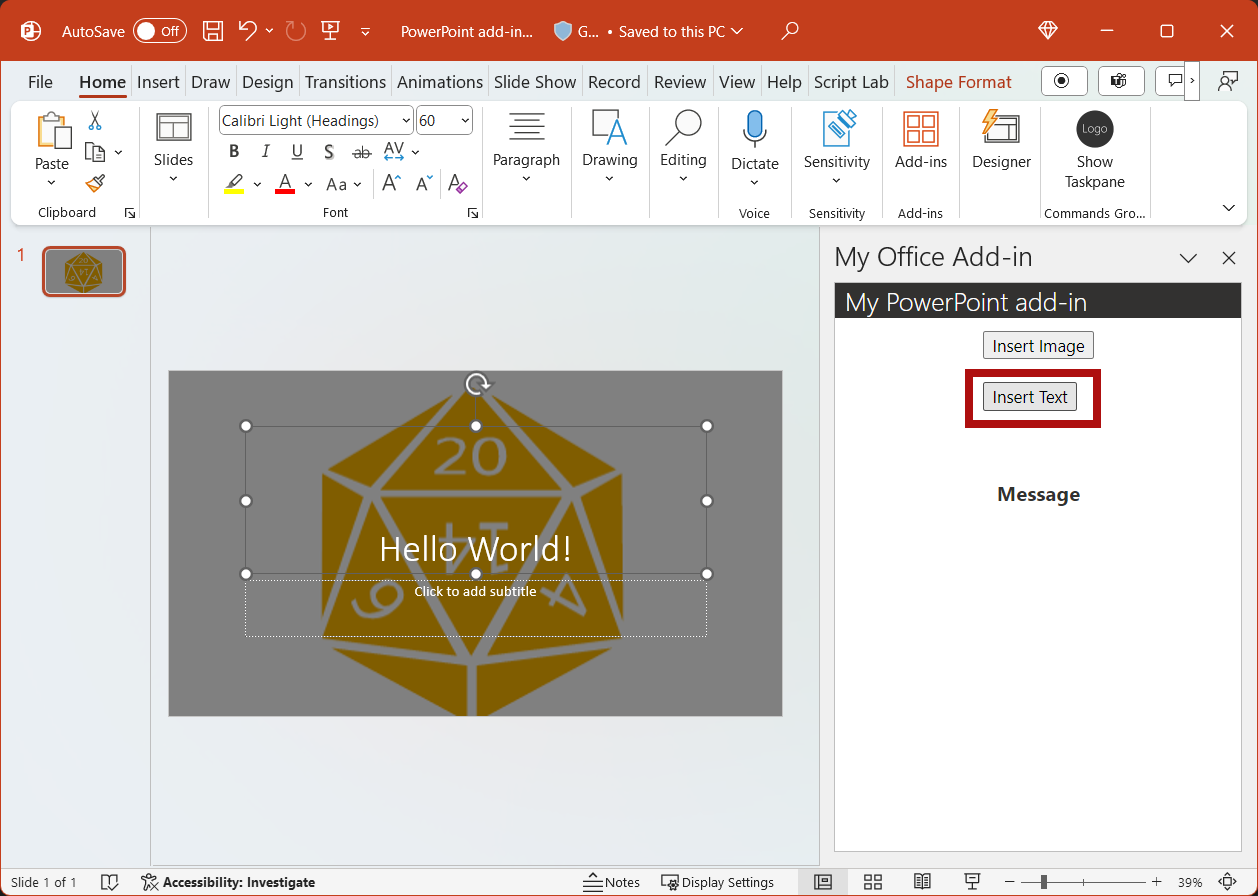
Put your cursor in the text box on the title slide and then in the task pane, choose the Insert Text button to add text to the slide.
Get slide metadata
Complete the following steps to add code that retrieves metadata for the selected slide.
In the taskpane.html file, replace
TODO4with the following markup. This markup defines the Get Slide Metadata button that will appear within the add-in's task pane.<button class="ms-Button" id="get-slide-metadata">Get Slide Metadata</button><br/><br/>In the taskpane.js file, replace
TODO6with the following code to assign the event handler for the Get Slide Metadata button.document.getElementById("get-slide-metadata").onclick = () => clearMessage(getSlideMetadata);In the taskpane.js file, replace
TODO7with the following code to define thegetSlideMetadatafunction. This function retrieves metadata for the selected slides and writes it to the Message section in the add-in task pane.function getSlideMetadata() { Office.context.document.getSelectedDataAsync(Office.CoercionType.SlideRange, (asyncResult) => { if (asyncResult.status === Office.AsyncResultStatus.Failed) { setMessage("Error: " + asyncResult.error.message); } else { setMessage("Metadata for selected slides: " + JSON.stringify(asyncResult.value)); } }); }Save all your changes to the project.
Test the add-in
Navigate to the root folder of the project.
cd "My Office Add-in"If the local web server isn't already running, complete the following steps to start the local web server and sideload your add-in.
Note
Office Add-ins should use HTTPS, not HTTP, even while you're developing. If you're prompted to install a certificate after you run one of the following commands, accept the prompt to install the certificate that the Yeoman generator provides. You may also have to run your command prompt or terminal as an administrator for the changes to be made.
If this is your first time developing an Office Add-in on your machine, you may be prompted in the command line to grant Microsoft Edge WebView a loopback exemption ("Allow localhost loopback for Microsoft Edge WebView?"). When prompted, enter
Yto allow the exemption. Note that you'll need administrator privileges to allow the exemption. Once allowed, you shouldn't be prompted for an exemption when you sideload Office Add-ins in the future (unless you remove the exemption from your machine). To learn more, see "We can't open this add-in from localhost" when loading an Office Add-in or using Fiddler.
Tip
If you're testing your add-in on Mac, run the following command before proceeding. When you run this command, the local web server starts.
npm run dev-serverTo test your add-in in PowerPoint, run the following command in the root directory of your project. This starts the local web server (if it's not already running) and opens PowerPoint with your add-in loaded.
npm startTo test your add-in in PowerPoint on a browser, run the following command in the root directory of your project. When you run this command, the local web server starts. Replace "{url}" with the URL of a PowerPoint document on your OneDrive or a SharePoint library to which you have permissions.
Note
If you are developing on a Mac, enclose the
{url}in single quotation marks. Do not do this on Windows.npm run start -- web --document {url}The following are examples.
npm run start -- web --document https://contoso.sharepoint.com/:t:/g/EZGxP7ksiE5DuxvY638G798BpuhwluxCMfF1WZQj3VYhYQ?e=F4QM1Rnpm run start -- web --document https://1drv.ms/x/s!jkcH7spkM4EGgcZUgqthk4IK3NOypVw?e=Z6G1qpnpm run start -- web --document https://contoso-my.sharepoint-df.com/:t:/p/user/EQda453DNTpFnl1bFPhOVR0BwlrzetbXvnaRYii2lDr_oQ?e=RSccmNP
If your add-in doesn't sideload in the document, manually sideload it by following the instructions in Manually sideload add-ins to Office on the web.
If the add-in task pane isn't already open in PowerPoint, select the Show Taskpane button on the ribbon to open it.

In the task pane, choose the Get Slide Metadata button to get the metadata for the selected slide. The slide metadata is written in the Message section below the buttons in the task pane. In this case, the
slidesarray within the JSON metadata contains one object that specifies theid,title, andindexof the selected slide. If multiple slides had been selected when you retrieved slide metadata, theslidesarray within the JSON metadata would contain one object for each selected slide.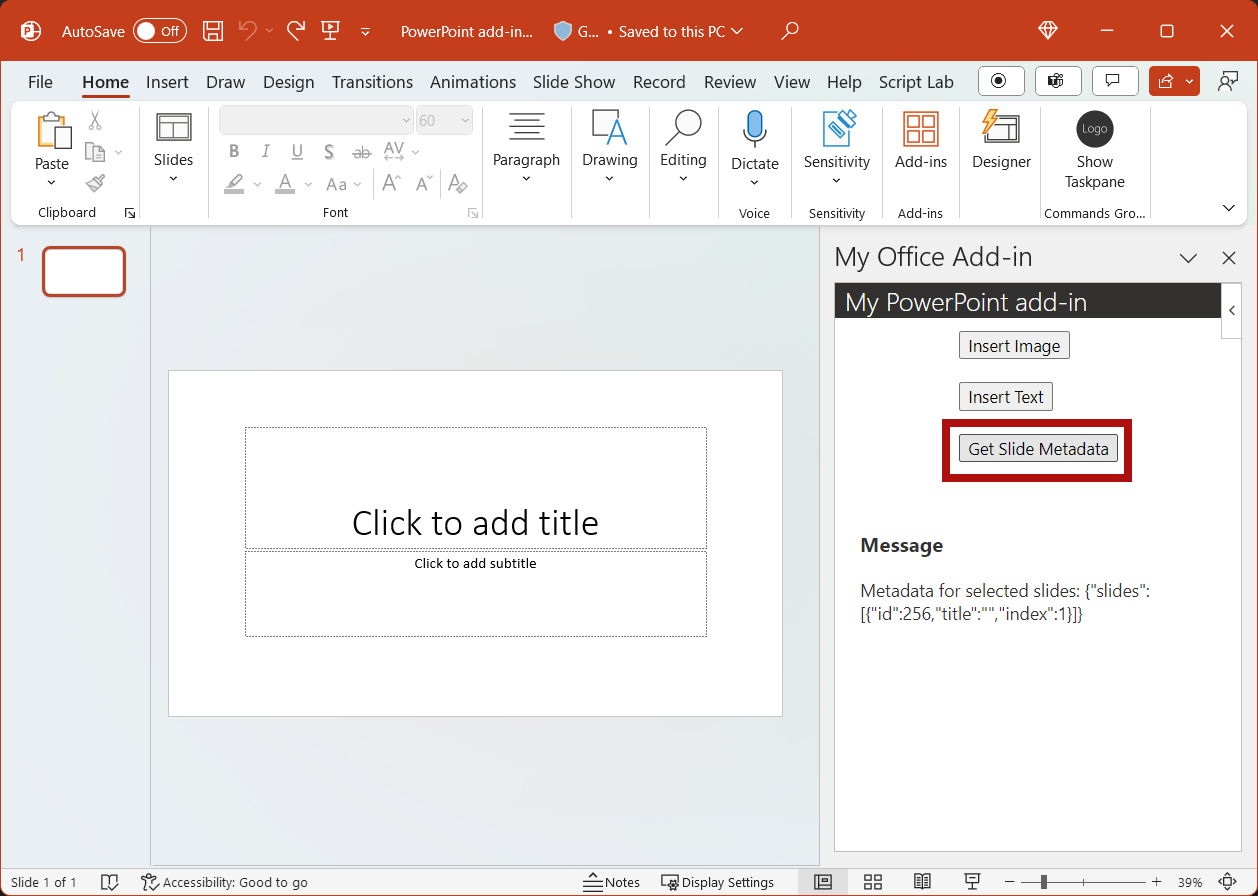
Navigate between slides
Complete the following steps to add code that navigates between the slides of a document.
In the taskpane.html file, replace
TODO5with the following markup. This markup defines the four navigation buttons that will appear within the add-in's task pane.<button class="ms-Button" id="add-slides">Add Slides</button><br/><br/> <button class="ms-Button" id="go-to-first-slide">Go to First Slide</button><br/><br/> <button class="ms-Button" id="go-to-next-slide">Go to Next Slide</button><br/><br/> <button class="ms-Button" id="go-to-previous-slide">Go to Previous Slide</button><br/><br/> <button class="ms-Button" id="go-to-last-slide">Go to Last Slide</button><br/><br/>In the taskpane.js file, replace
TODO8with the following code to assign the event handlers for the Add Slides and four navigation buttons.document.getElementById("add-slides").onclick = () => tryCatch(addSlides); document.getElementById("go-to-first-slide").onclick = () => clearMessage(goToFirstSlide); document.getElementById("go-to-next-slide").onclick = () => clearMessage(goToNextSlide); document.getElementById("go-to-previous-slide").onclick = () => clearMessage(goToPreviousSlide); document.getElementById("go-to-last-slide").onclick = () => clearMessage(goToLastSlide);In the taskpane.js file, replace
TODO9with the following code to define theaddSlidesand navigation functions. Each of these functions uses thegoToByIdAsyncmethod to select a slide based upon its position in the document (first, last, previous, and next).async function addSlides() { await PowerPoint.run(async function (context) { context.presentation.slides.add(); context.presentation.slides.add(); await context.sync(); goToLastSlide(); setMessage("Success: Slides added."); }); } function goToFirstSlide() { Office.context.document.goToByIdAsync(Office.Index.First, Office.GoToType.Index, (asyncResult) => { if (asyncResult.status === Office.AsyncResultStatus.Failed) { setMessage("Error: " + asyncResult.error.message); } }); } function goToLastSlide() { Office.context.document.goToByIdAsync(Office.Index.Last, Office.GoToType.Index, (asyncResult) => { if (asyncResult.status === Office.AsyncResultStatus.Failed) { setMessage("Error: " + asyncResult.error.message); } }); } function goToPreviousSlide() { Office.context.document.goToByIdAsync(Office.Index.Previous, Office.GoToType.Index, (asyncResult) => { if (asyncResult.status === Office.AsyncResultStatus.Failed) { setMessage("Error: " + asyncResult.error.message); } }); } function goToNextSlide() { Office.context.document.goToByIdAsync(Office.Index.Next, Office.GoToType.Index, (asyncResult) => { if (asyncResult.status === Office.AsyncResultStatus.Failed) { setMessage("Error: " + asyncResult.error.message); } }); }Save all your changes to the project.
Test the add-in
Navigate to the root folder of the project.
cd "My Office Add-in"If the local web server isn't already running, complete the following steps to start the local web server and sideload your add-in.
Note
Office Add-ins should use HTTPS, not HTTP, even while you're developing. If you're prompted to install a certificate after you run one of the following commands, accept the prompt to install the certificate that the Yeoman generator provides. You may also have to run your command prompt or terminal as an administrator for the changes to be made.
If this is your first time developing an Office Add-in on your machine, you may be prompted in the command line to grant Microsoft Edge WebView a loopback exemption ("Allow localhost loopback for Microsoft Edge WebView?"). When prompted, enter
Yto allow the exemption. Note that you'll need administrator privileges to allow the exemption. Once allowed, you shouldn't be prompted for an exemption when you sideload Office Add-ins in the future (unless you remove the exemption from your machine). To learn more, see "We can't open this add-in from localhost" when loading an Office Add-in or using Fiddler.
Tip
If you're testing your add-in on Mac, run the following command before proceeding. When you run this command, the local web server starts.
npm run dev-serverTo test your add-in in PowerPoint, run the following command in the root directory of your project. This starts the local web server (if it's not already running) and opens PowerPoint with your add-in loaded.
npm startTo test your add-in in PowerPoint on a browser, run the following command in the root directory of your project. When you run this command, the local web server starts. Replace "{url}" with the URL of a PowerPoint document on your OneDrive or a SharePoint library to which you have permissions.
Note
If you are developing on a Mac, enclose the
{url}in single quotation marks. Do not do this on Windows.npm run start -- web --document {url}The following are examples.
npm run start -- web --document https://contoso.sharepoint.com/:t:/g/EZGxP7ksiE5DuxvY638G798BpuhwluxCMfF1WZQj3VYhYQ?e=F4QM1Rnpm run start -- web --document https://1drv.ms/x/s!jkcH7spkM4EGgcZUgqthk4IK3NOypVw?e=Z6G1qpnpm run start -- web --document https://contoso-my.sharepoint-df.com/:t:/p/user/EQda453DNTpFnl1bFPhOVR0BwlrzetbXvnaRYii2lDr_oQ?e=RSccmNP
If your add-in doesn't sideload in the document, manually sideload it by following the instructions in Manually sideload add-ins to Office on the web.
If the add-in task pane isn't already open in PowerPoint, select the Show Taskpane button on the ribbon to open it.

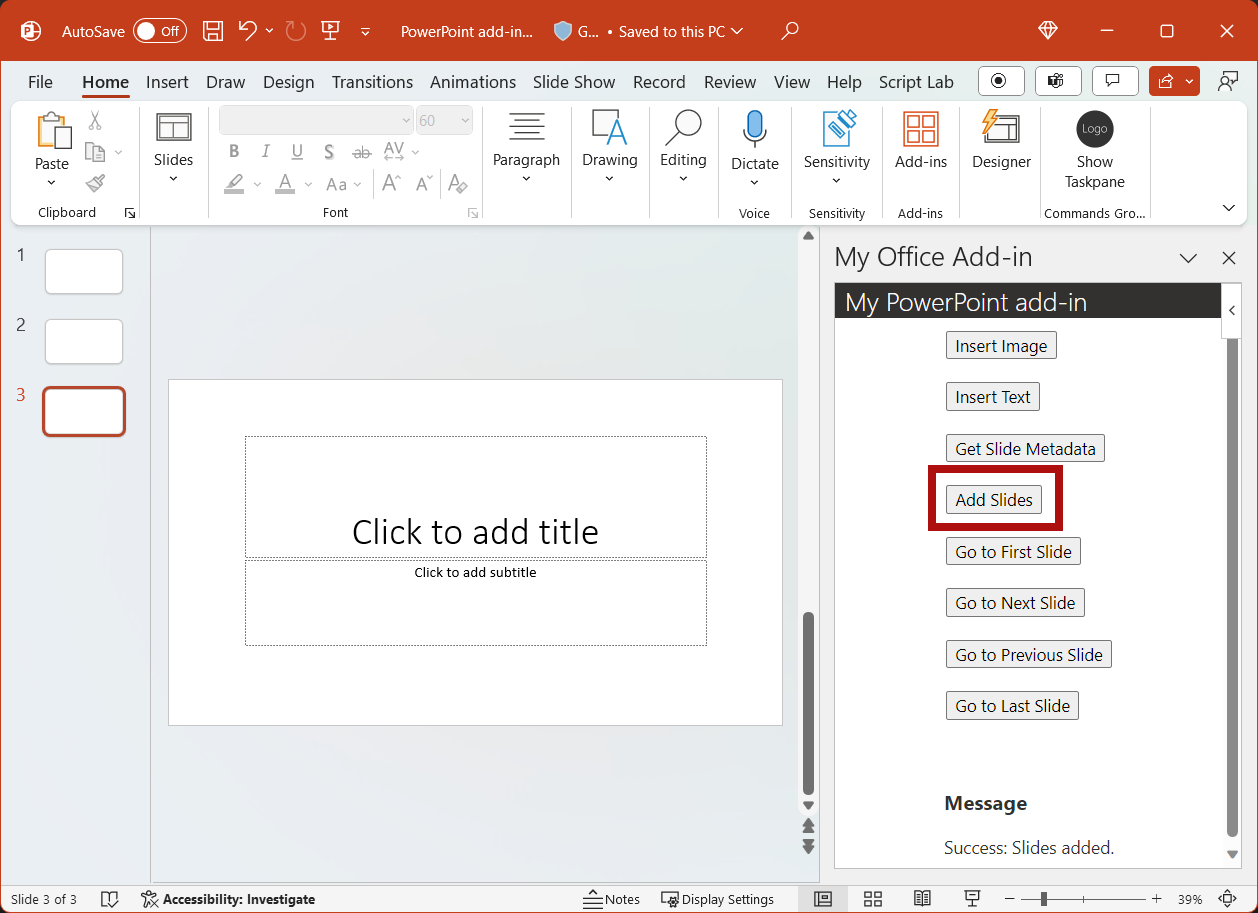
In the task pane, choose the Add Slides button. Two new slides are added to the document and the last slide in the document is selected and displayed.
In the task pane, choose the Go to First Slide button. The first slide in the document is selected and displayed.
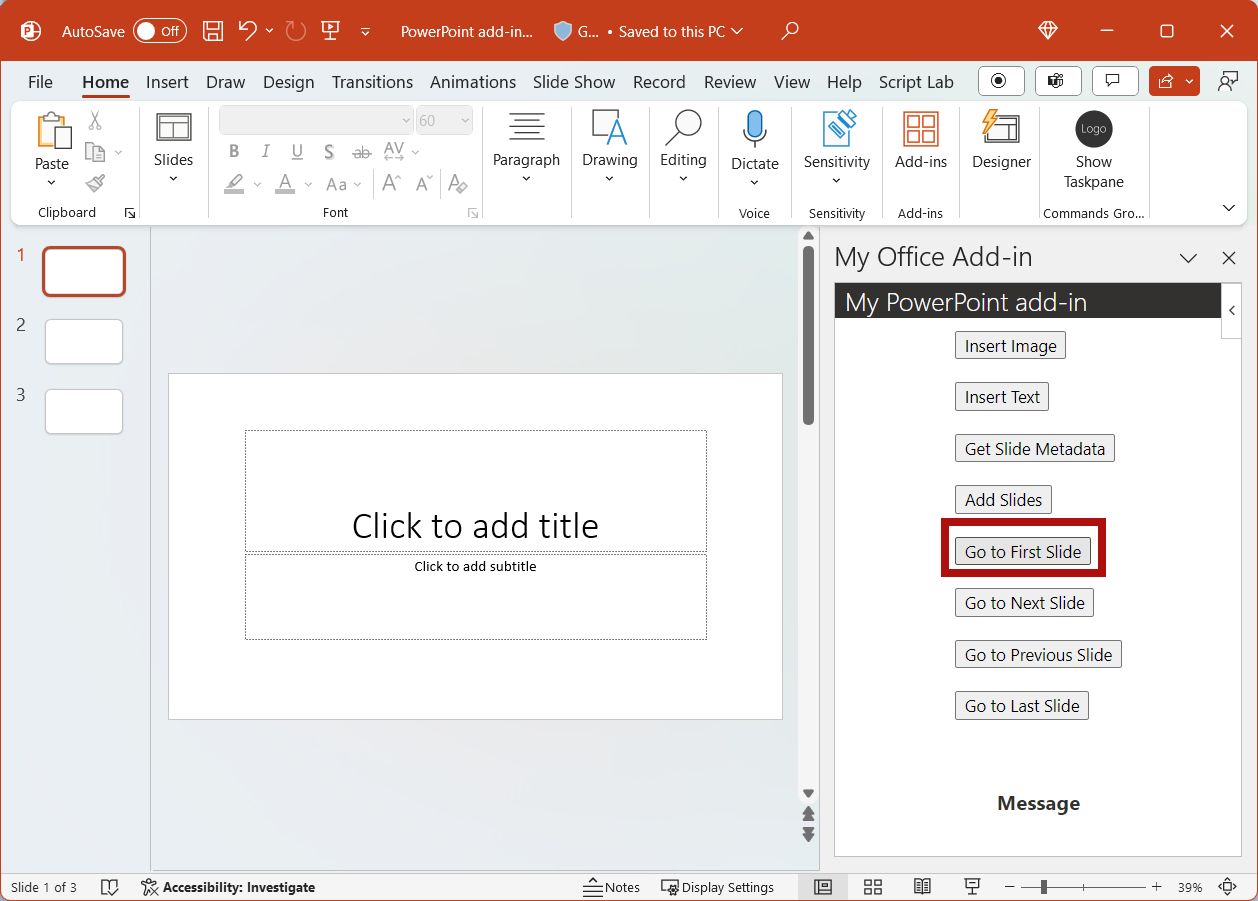
In the task pane, choose the Go to Next Slide button. The next slide in the document is selected and displayed.
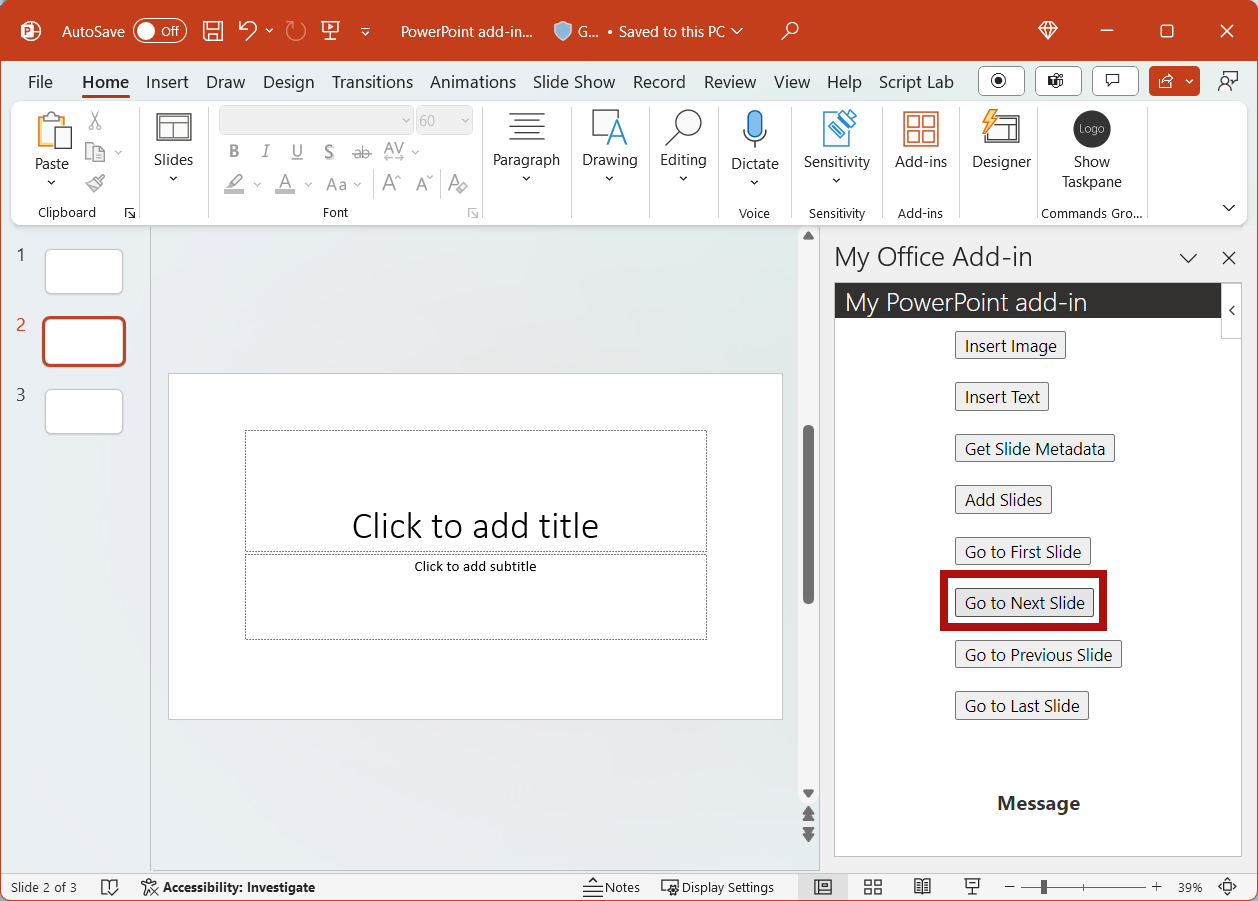
In the task pane, choose the Go to Previous Slide button. The previous slide in the document is selected and displayed.
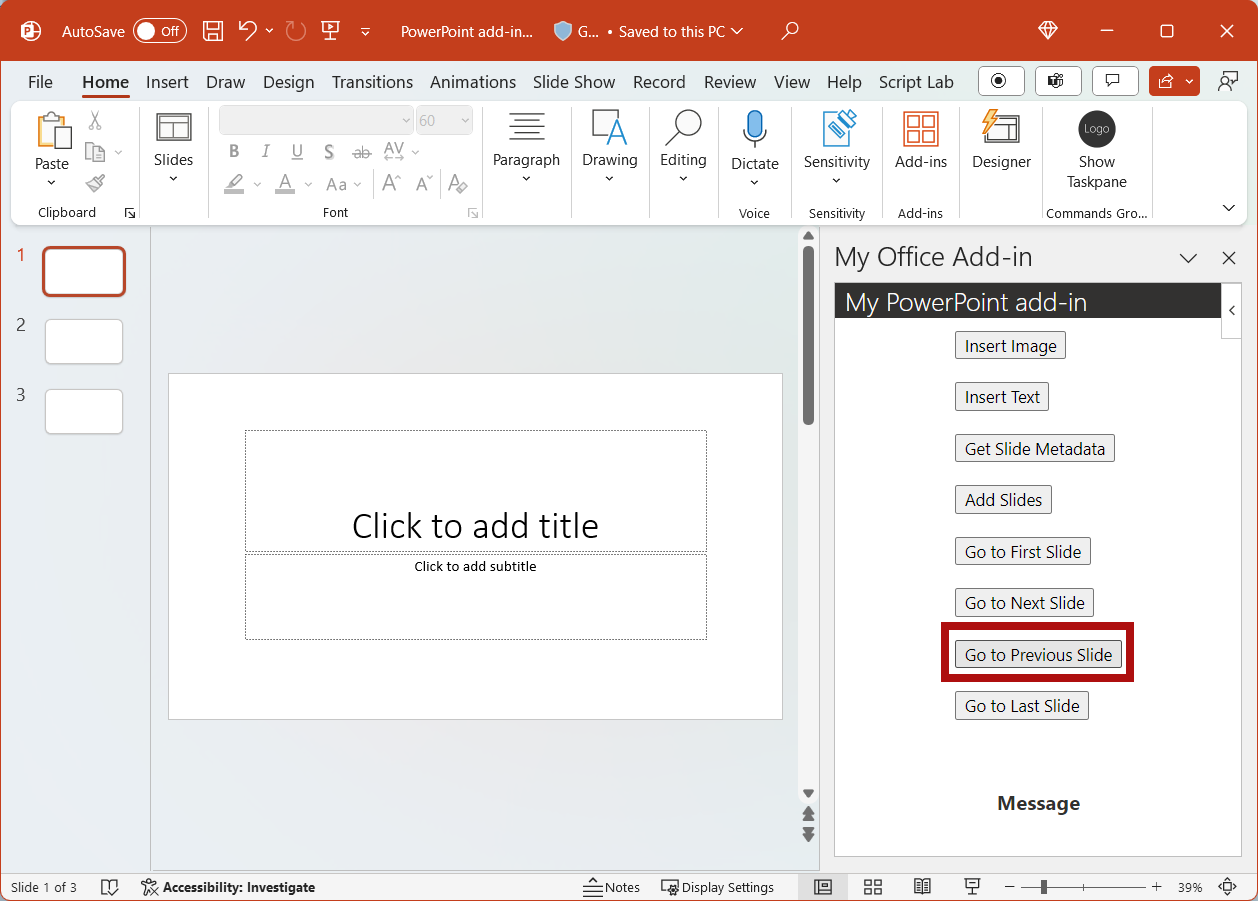
In the task pane, choose the Go to Last Slide button. The last slide in the document is selected and displayed.
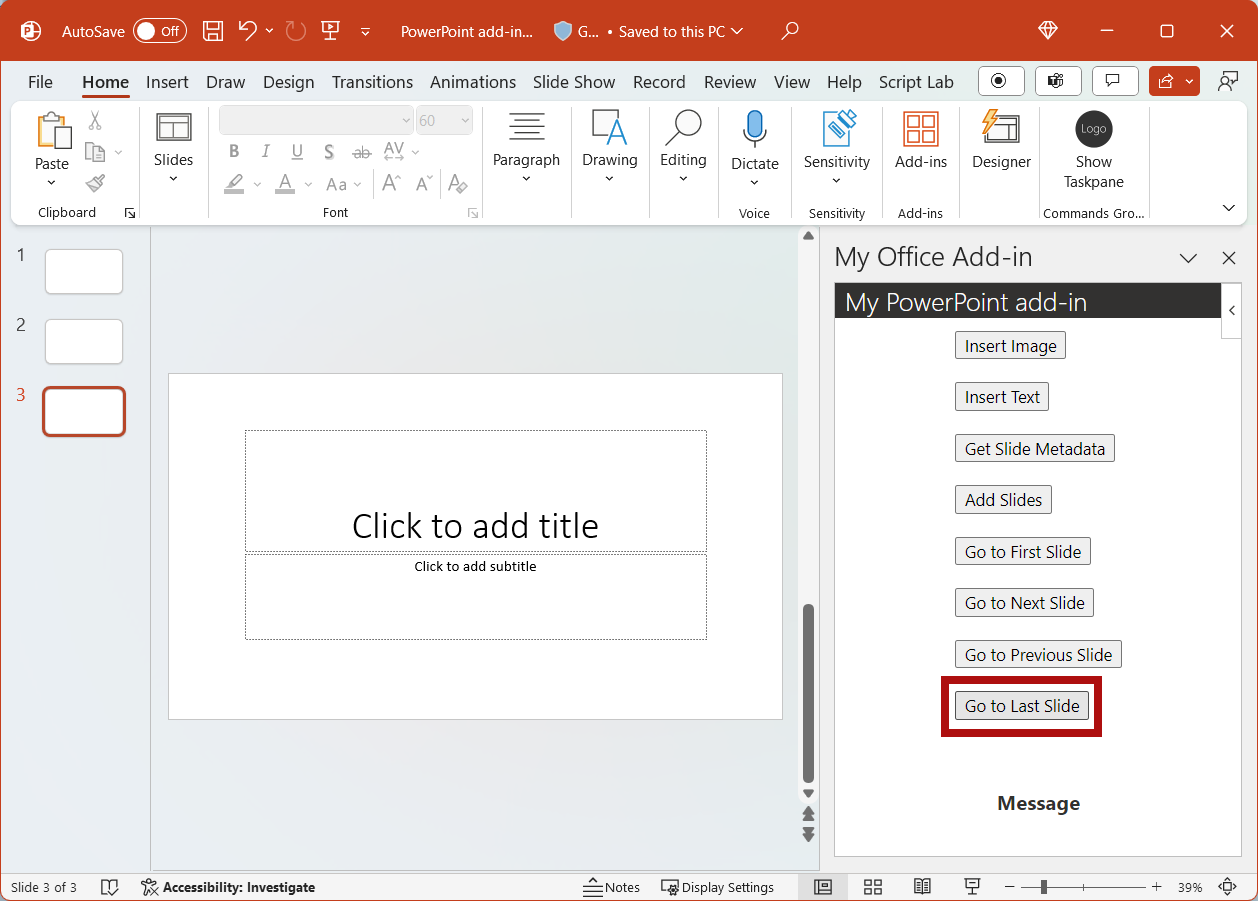
If the web server is running, run the following command when you want to stop the server.
npm stop
Code samples
- Completed PowerPoint add-in tutorial: The result of completing this tutorial.
Next steps
In this tutorial, you created a PowerPoint add-in that inserts an image, inserts text, gets slide metadata, and navigates between slides. To learn more about building PowerPoint add-ins, continue to the following article.
See also
Office Add-ins