Create workflows that you can call, trigger, or nest using HTTPS endpoints in Azure Logic Apps
Applies to: Azure Logic Apps (Consumption + Standard)
Some scenarios might require that you create a logic app workflow that can receive inbound requests from other services or workflows, or a workflow that you can call by using a URL. For this task, you can expose a native synchronous HTTPS endpoint on your workflow when you use any of the following request-based trigger types:
- Request
- HTTP Webhook
- Managed connector triggers that have the ApiConnectionWebhook type and can receive inbound HTTPS requests
This guide shows how to create a callable endpoint for your workflow by adding the Request trigger and then call that endpoint from another workflow. All principles identically apply to the other request-based trigger types that can receive inbound requests.
Prerequisites
An Azure account and subscription. If you don't have a subscription, sign up for a free Azure account.
A logic app workflow where you want to use the Request trigger to create the callable endpoint. You can start with either a blank workflow or an existing workflow where you can replace the current trigger. This example starts with a blank workflow.
Install or use a tool that can send HTTP requests to test your solution, for example:
- Visual Studio Code with an extension from Visual Studio Marketplace
- PowerShell Invoke-RestMethod
- Microsoft Edge - Network Console tool
- Bruno
- curl
Caution
For scenarios where you have sensitive data, such as credentials, secrets, access tokens, API keys, and other similar information, make sure to use a tool that protects your data with the necessary security features, works offline or locally, doesn't sync your data to the cloud, and doesn't require that you sign in to an online account. This way, you reduce the risk around exposing sensitive data to the public.
Create a callable endpoint
Based on whether you have a Standard or Consumption logic app workflow, follow the corresponding steps:
In the Azure portal, open your Standard logic app resource and blank workflow in the designer.
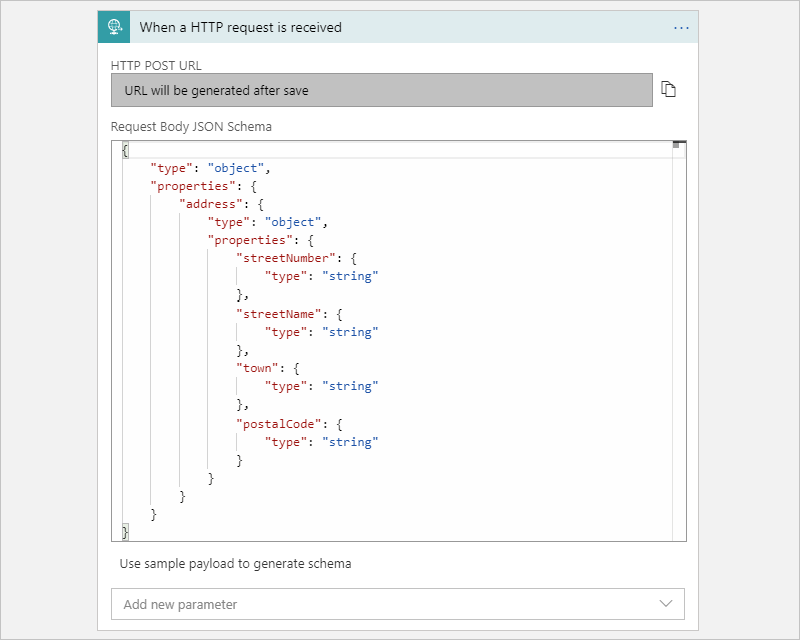
Follow these general steps to add the Request trigger named When a HTTP request is received.
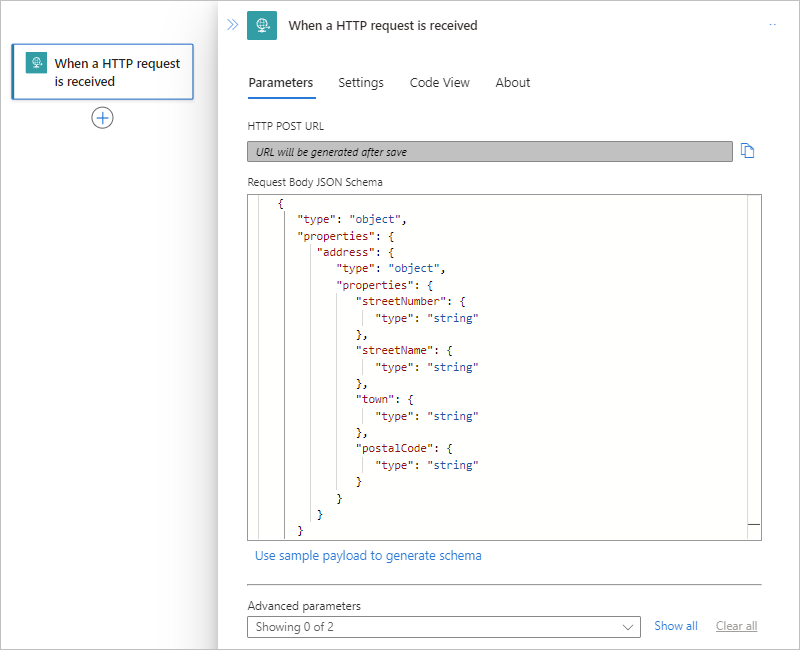
Optionally, in the Request Body JSON Schema box, you can enter a JSON schema that describes the payload or data that you expect the trigger to receive.
The designer uses this schema to generate tokens that represent trigger outputs. You can then easily reference these outputs throughout your logic app's workflow. Learn more about tokens generated from JSON schemas.
For this example, enter the following schema:
{
   "type": "object",
   "properties": {
      "address": {
         "type": "object",
         "properties": {
            "streetNumber": {
               "type": "string"
            },
            "streetName": {
               "type": "string"
            },
            "town": {
               "type": "string"
            },
            "postalCode": {
               "type": "string"
            }
         }
      }
   }
}
Or, you can generate a JSON schema by providing a sample payload:
In the Request trigger, select Use sample payload to generate schema.
In the Enter or paste a sample JSON payload box, enter your sample payload, for example:
{
   "address": {
      "streetNumber": "00000",
      "streetName": "AnyStreet",
      "town": "AnyTown",
      "postalCode": "11111-1111"
  }
}
When you're ready, select Done.
The Request Body JSON Schema box now shows the generated schema.
Save your workflow.
The HTTP POST URL box now shows the generated callback URL that other services can use to call and trigger your logic app workflow. This URL includes query parameters that specify a Shared Access Signature (SAS) key, which is used for authentication.
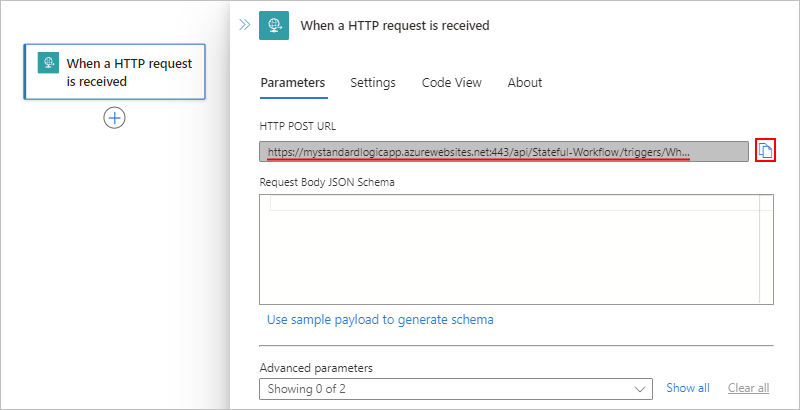
To copy the callback URL, you have these options:
To test the callback URL and trigger the workflow, send an HTTP request to the URL, including the method that the Request trigger expects, by using your HTTP request tool and its instructions.
This example uses the POST method with the copied URL, which looks like the following sample:
POST https://{logic-app-name}.azurewebsites.net:443/api/{workflow-name}/triggers/{trigger-name}/invoke?api-version=2022-05-01&sp=%2Ftriggers%2F{trigger-name}%2Frun&sv=1.0&sig={shared-access-signature}
Select expected request method
By default, the Request trigger expects a POST request. However, you can specify a different method that the caller must use, but only a single method.
In the Request trigger, open the Advanced parameters list, and select Method, which adds this property to the trigger.
From the Method list, select the method that the trigger should expect instead. Or, you can specify a custom method.
For example, select the GET method so that you can test your endpoint's URL later.
Pass parameters through endpoint URL
When you want to accept parameter values through the endpoint's URL, you have these options:
Accept values through GET parameters or URL parameters.
These values are passed as name-value pairs in the endpoint's URL. For this option, you need to use the GET method in your Request trigger. In a subsequent action, you can get the parameter values as trigger outputs by using the
triggerOutputs()function in an expression.Accept values through a relative path for parameters in your Request trigger.
These values are passed through a relative path in the endpoint's URL. You also need to explicitly select the method that the trigger expects. In a subsequent action, you can get the parameter values as trigger outputs by referencing those outputs directly.
Accept values through GET parameters
In the Request trigger, open the Advanced parameters, add the Method property to the trigger, and select the GET method.
For more information, see Select expected request method.
In the designer, follow these general steps to add the action where you want to use the parameter value.
For this example, select the action named Response.
To build the
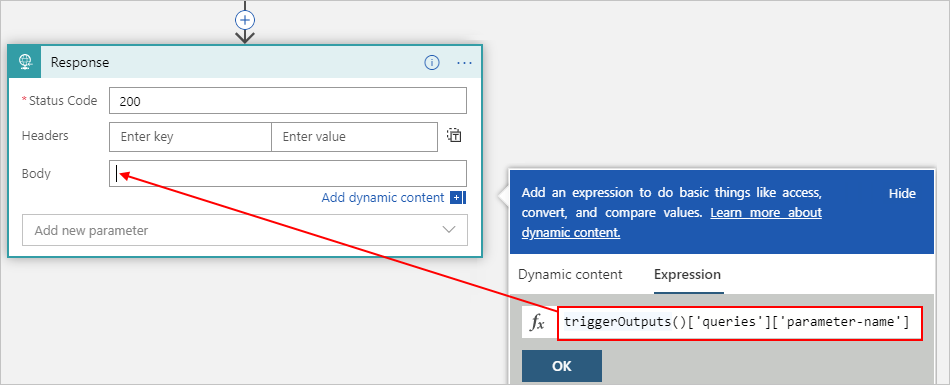
triggerOutputs()expression that retrieves the parameter value, follow these steps:In the Response action, select inside the Body property so that the options for dynamic content (lightning icon) and expression editor (formula icon) appear. Select the formula icon to open the expression editor.
In the expression box, enter the following expression, replacing
parameter-namewith your parameter name, and select OK.triggerOutputs()['queries']['parameter-name']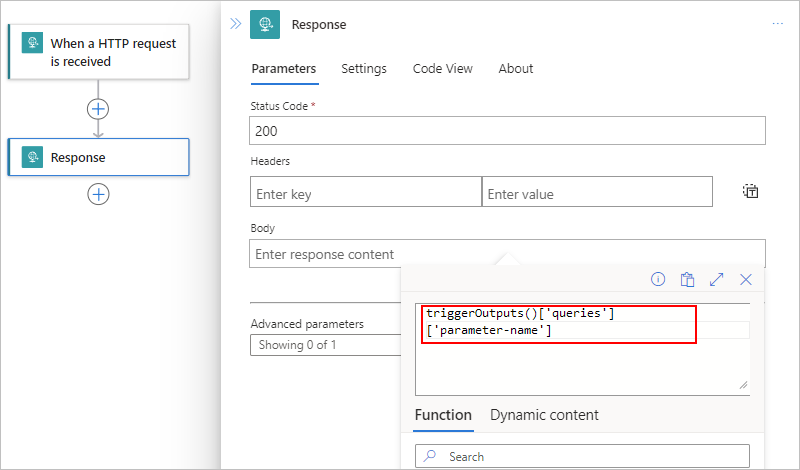
In the Body property, the expression resolves to the
triggerOutputs()token.
If you save the workflow, navigate away from the designer, and return to the designer, the token shows the parameter name that you specified, for example:

In code view, the Body property appears in the Response action's definition as follows:
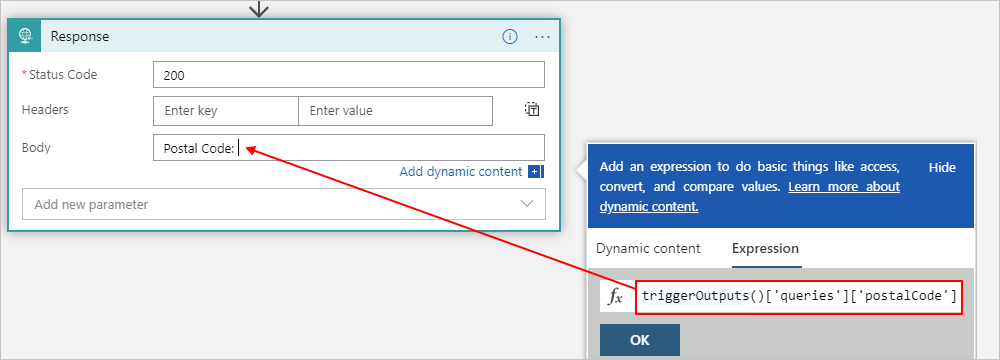
"body": "@{triggerOutputs()['queries']['parameter-name']}",For example, suppose that you want to pass a value for a parameter named
postalCode. The Body property specifies the string,Postal Code:with a trailing space, followed by the corresponding expression: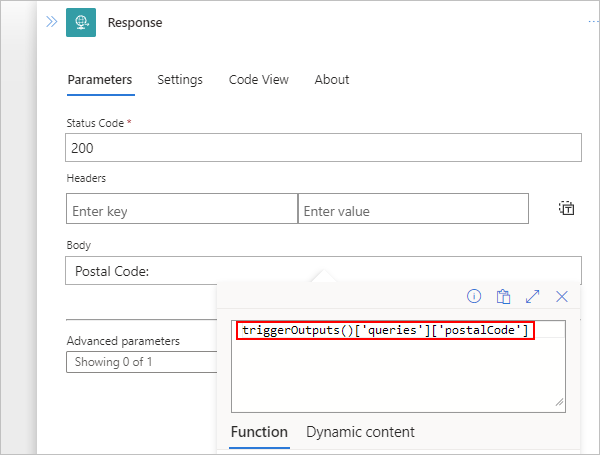
Test your callable endpoint
From the Request trigger, copy the workflow URL, and paste the URL into another browser window. In the URL, add the parameter name and value to the URL in the following format, and press Enter.
...invoke/{parameter-name}/{parameter-value}?api-version=2022-05-01...For example:
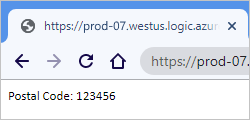
https://mystandardlogicapp.azurewebsites.net/api/Stateful-Workflow/triggers/When_a_HTTP_request_is_received/invoke/address/12345?api-version=2022-05-01&sp=%2Ftriggers%2FWhen_a_HTTP_request_is_received%2Frun&sv=1.0&sig={shared-access-signature}The browser returns a response with this text:
Postal Code: 123456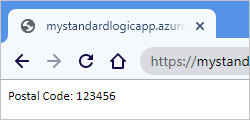
Note
If you want to include the hash or pound symbol (#) in the URI,
use this encoded version instead: %25%23
Accept values through a relative path
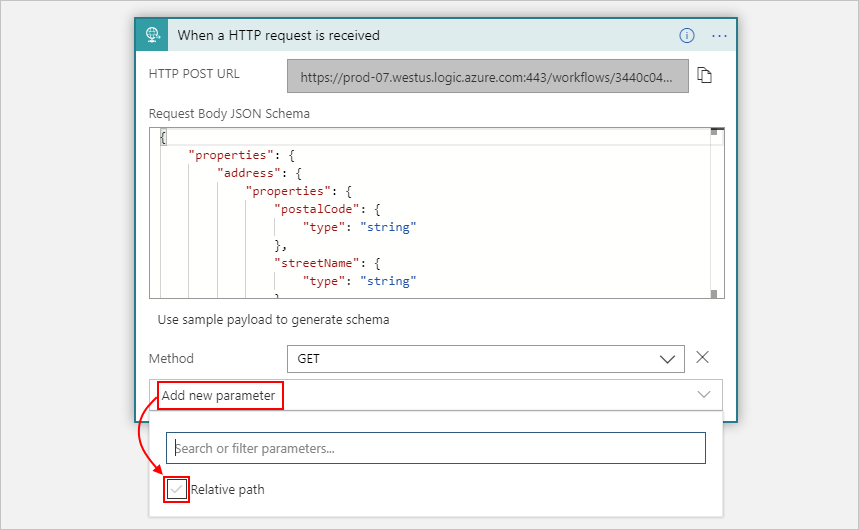
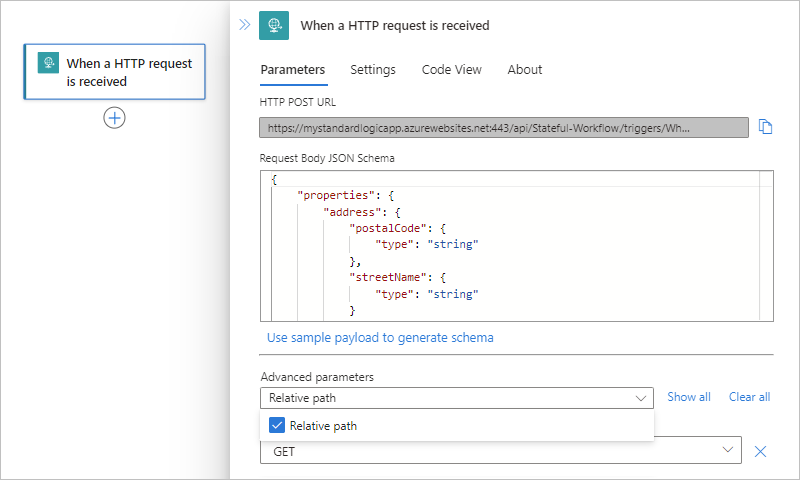
In the Request trigger, open the Advanced parameters list, and select Relative path, which adds this property to the trigger.
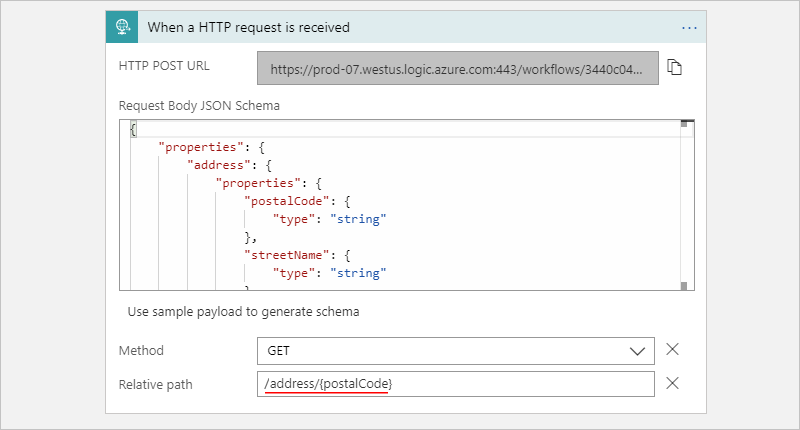
In the Relative path property, specify the relative path for the parameter in your JSON schema that you want your URL to accept, for example,
/address/{postalCode}.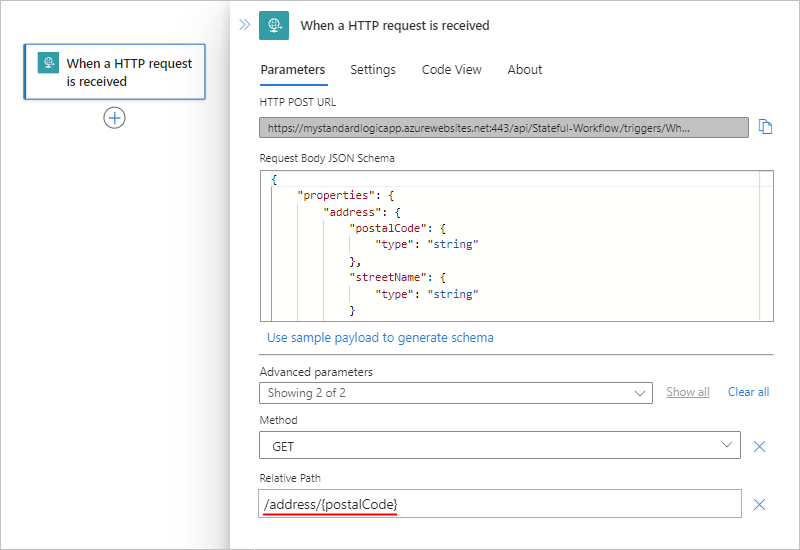
Under the Request trigger, follow these general steps to add the action where you want to use the parameter value.
For this example, add the Response action.
In the Response action's Body property, include the token that represents the parameter that you specified in your trigger's relative path.
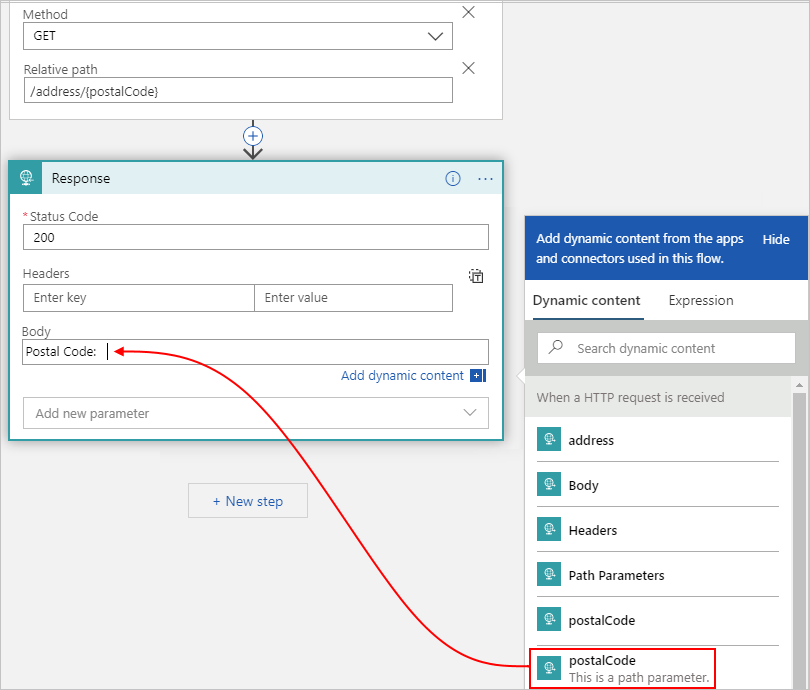
For example, suppose that you want the Response action to return
Postal Code: {postalCode}.In the Body property, enter
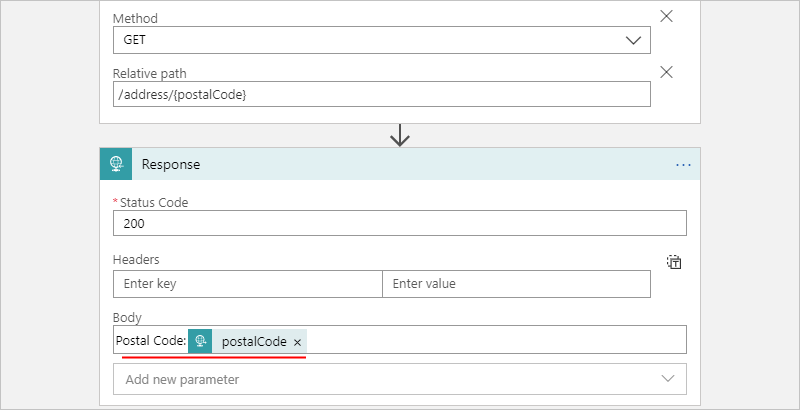
Postal Code:with a trailing space. Keep your cursor inside the edit box so that the dynamic content list remains open.In the dynamic content list, from the When a HTTP request is received section, select the Path Parameters postalCode trigger output.
The Body property now includes the selected parameter:

Save your workflow.
In the Request trigger, the callback URL is updated and now includes the relative path, for example:
https://mystandardlogicapp.azurewebsites.net/api/Stateful-Workflow/triggers/When_a_HTTP_request_is_received/invoke/address/%7BpostalCode%7D?api-version=2022-05-01&sp=%2Ftriggers%2FWhen_a_HTTP_request_is_received%2Frun&sv=1.0&sig={shared-access-signature}To test the callable endpoint, copy the updated callback URL from the Request trigger, paste the URL into another browser window, replace
%7BpostalCode%7Din the URL with123456, and press Enter.The browser returns a response with this text:
Postal Code: 123456
Note
If you want to include the hash or pound symbol (#) in the URI,
use this encoded version instead: %25%23
Call workflow through endpoint URL
After you create the endpoint, you can trigger the workflow by sending an HTTPS request to the endpoint's full URL. Azure Logic Apps workflows have built-in support for direct-access endpoints.
Tokens generated from schema
When you provide a JSON schema in the Request trigger, the workflow designer generates tokens for the properties in that schema. You can then use those tokens for passing data through your workflow.
For example, if you add more properties, such as "suite", to your JSON schema, tokens for those properties are available for you to use in the later steps for your workflow. Here's the complete JSON schema:
{
   "type": "object",
   "properties": {
      "address": {
         "type": "object",
         "properties": {
            "streetNumber": {
               "type": "string"
            },
            "streetName": {
               "type": "string"
            },
            "suite": {
               "type": "string"
            },
            "town": {
               "type": "string"
            },
            "postalCode": {
               "type": "string"
            }
         }
      }
   }
}
Call other workflows
You can call other workflows that can receive requests by nesting them inside the current workflow. To call these workflows, follow these steps:
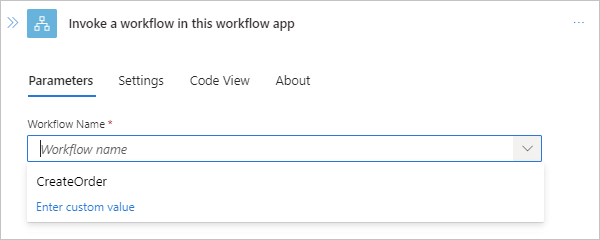
In the designer, follow these general steps to add the Workflow Operations action named Invoke a workflow in this workflow app.
The Workflow Name list shows the eligible workflows for you to select.
From the Workflow Name list, select the workflow that you want to call, for example:
Reference content from an inbound request
If the incoming request's content type is application/json, you can reference the properties in the incoming request. Otherwise, this content is treated as a single binary unit that you can pass to other APIs. To reference this content inside your logic app's workflow, you need to first convert that content.
For example, if you're passing content that has application/xml type, you can use the @xpath() expression to perform an XPath extraction, or use the @json() expression for converting XML to JSON. Learn more about working with supported content types.
To get the output from an incoming request, you can use the @triggerOutputs expression. For example, suppose you have output that looks like this example:
{
   "headers": {
      "content-type" : "application/json"
   },
   "body": {
      "myProperty" : "property value"
   }
}
To access specifically the body property, you can use the @triggerBody() expression as a shortcut.
Respond to requests
Sometimes you want to respond to certain requests that trigger your workflow by returning content to the caller. To construct the status code, header, and body for your response, use the Response action. This action can appear anywhere in your workflow, not just at the end of your workflow. If your workflow doesn't include a Response action, the endpoint responds immediately with the 202 Accepted status.
For the original caller to successfully get the response, all the required steps for the response must finish within the request timeout limit unless the triggered workflow is called as a nested workflow. If no response is returned within this limit, the incoming request times out and receives the 408 Client timeout response.
For nested workflows, the parent workflow continues to wait for a response until all the steps are completed, regardless of how much time is required.
Construct the response
In the response body, you can include multiple headers and any type of content. For example, the following response's header specifies that the response's content type is application/json and that the body contains values for the town and postalCode properties, based on the JSON schema described earlier in this topic for the Request trigger.
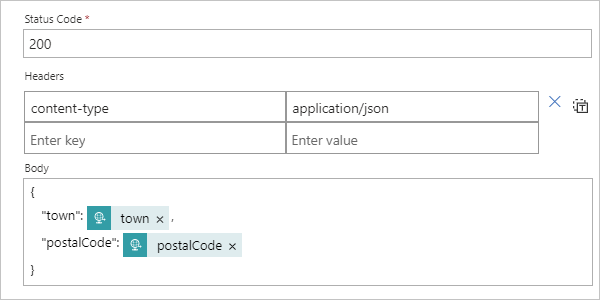
Responses have these properties:
| Property (Display) | Property (JSON) | Description |
|---|---|---|
| Status Code | statusCode |
The HTTPS status code to use in the response for the incoming request. This code can be any valid status code that starts with 2xx, 4xx, or 5xx. However, 3xx status codes aren't permitted. |
| Headers | headers |
One or more headers to include in the response |
| Body | body |
A body object that can be a string, a JSON object, or even binary content referenced from a previous step |
To view the JSON definition for the Response action and your workflow's complete JSON definition, change from designer view to code view.
"Response": {
   "type": "Response",
   "kind": "http",
   "inputs": {
      "body": {
         "postalCode": "@triggerBody()?['address']?['postalCode']",
         "town": "@triggerBody()?['address']?['town']"
      },
      "headers": {
         "content-type": "application/json"
      },
      "statusCode": 200
   },
   "runAfter": {}
}
Q & A
Q: What about URL security for inbound calls?
A: Azure securely generates logic app callback URLs by using Shared Access Signature (SAS). This signature passes through as a query parameter and must be validated before your workflow can run. Azure generates the signature using a unique combination of a secret key per logic app, the trigger name, and the operation that's performed. So unless someone has access to the secret logic app key, they can't generate a valid signature.
Important
For production and higher security systems, we strongly advise against calling your workflow directly from the browser for these reasons:
- The shared access key appears in the URL.
- You can't manage security content policies due to shared domains across Azure Logic Apps customers.
For more information about security, authorization, and encryption for inbound calls to your workflow, such as Transport Layer Security (TLS), previously known as Secure Sockets Layer (SSL), Microsoft Entra ID Open Authentication (Microsoft Entra ID OAuth), exposing your logic app workflow with Azure API Management, or restricting the IP addresses that originate inbound calls, see Secure access and data - Access for inbound calls to request-based triggers.
Q: Can I configure callable endpoints further?
A: Yes, HTTPS endpoints support more advanced configuration through Azure API Management. This service also offers the capability for you to consistently manage all your APIs, including logic apps, set up custom domain names, use more authentication methods, and more, for example:
- Change the request method
- Change the URL segments of the request
- Set up your API Management domains in the Azure portal
- Set up policy to check for Basic authentication

