Extend Smart store analytics
Advanced users of Smart store analytics can access relevant data and analytics from within their own data lake storage. The access can be through any other services or applications which support Microsoft Azure Data Lake Storage and Common Data Model definition, for example, Microsoft Azure Synapse Analytics, Microsoft Azure Data Factory, or Microsoft Power BI.
Important
You have to use Microsoft Azure Data Lake Storage Gen2 since Microsoft Azure Data Lake Storage Gen1 will be incompatible.
Smart store analytics data model complies with Azure Synapse database templates for Retail, is enhanced with Smart store analytics specifics, and simplifies the connection of other applications to the lake data.
Smart store analytics data lake structure
Smart store analytics data lake follows Common Data Model definition (Common Data Model metadata).
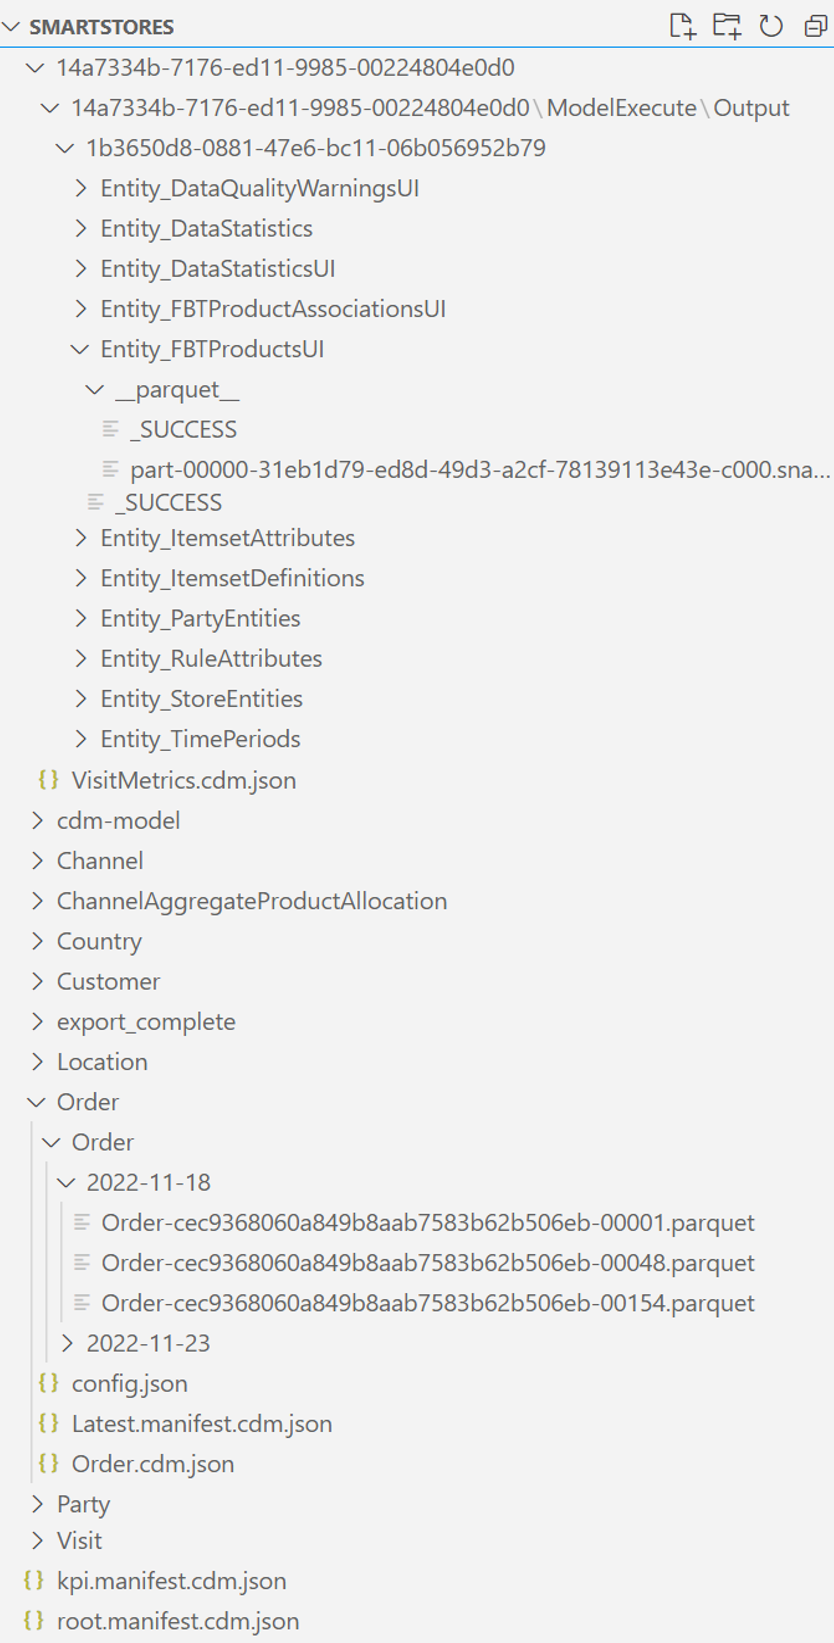
The root folder is named smartstores/. Under the root folder, there are two data snapshots:
Data transformed from the smart store provider (raw smart store data)
The root Common Data Model manifest for the raw data is root.manifest.cdm.json. The manifest file refers to the schema files and actual data files located in the subfolders (named after the tables), for example, smartstores/Order/.
Each table’s subfolder contains:
schema file, which defines the table metadata, columns, and types, in table-name.cdm.json format, for example, Order.cdm.json
data files, also known as data partitions or table records, in parquetformat, for example, Order-cec9368060a849b8aab7583b62b506eb-00001.parquet
Data generated by the Retail Analytical and AI modules from the raw smart store data
All generated data are in a GUID-named folder, for example, smartstores/14a7334b-7176-ed11-9985-00224804e0d0/. The root Common Data Model manifest for this data is kpi.manifest.cdm.json. The manifest file refers to the schema files and actual data files located in the GUID-named folder.
The GUID-named folder contains:
Schema file for each table, which defines table metadata, columns, and types, in table-name.cdm.json format, for example, OrderMetrics.cdm.json
Data files, also known as data partitions or table records, in parquet format, for example, part-00000-1e110bf0-6474-400b-b40a-086fce9f8e2a-c000.snappy.parquet
Important
According to the Common Data Model metadata contract, users need data from only the manifest.cdm.json files. They need not interpret the folder structure, or other internal files present in the data lake.
Smart store analytics data lake usage
Here are some examples of data synchronized into analytical/AI insights generated by Microsoft Cloud for Retail.
Data pipeline with Microsoft Azure Data Factory
To create a data pipeline:
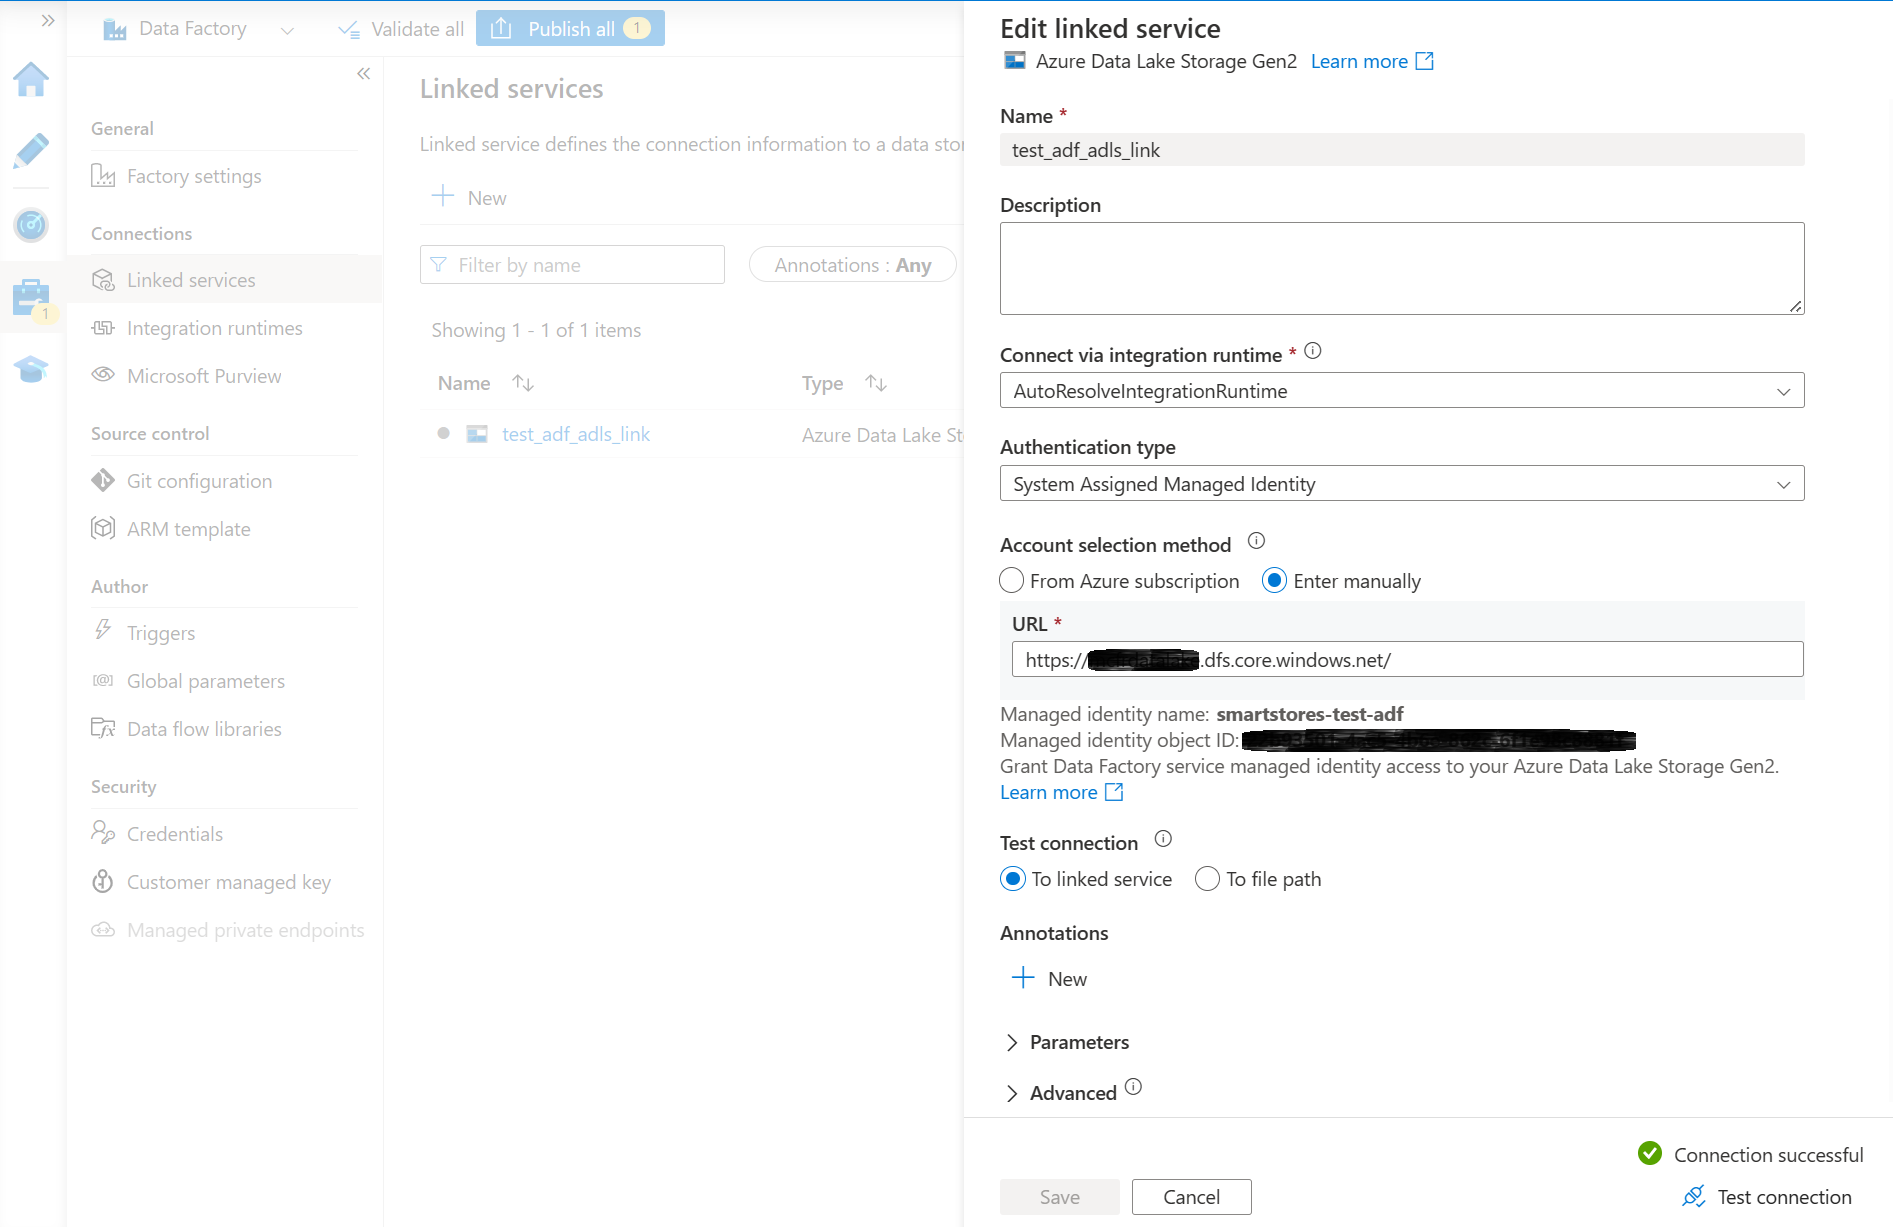
- Create an Azure Data Factory instance and link it to the Smart store analytics data lake storage. You should have a linked service with a successful connection test.
Note
The easiest way to connect an Azure Data Factory instance to Azure Data Lake Storage is to assign a contributor role to an Azure Data Factory managed identity in the Azure Data Lake Storage account . See Azure Data Factory documentation for details.
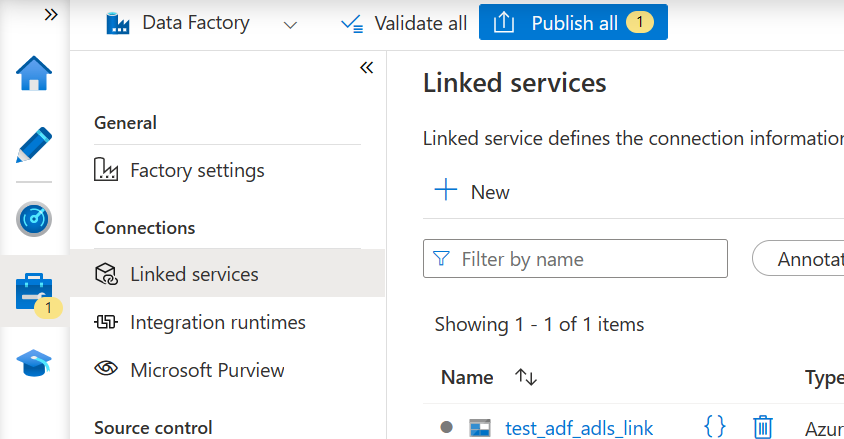
- Select Publish all to publish the new link.
Create a data pipeline with Microsoft Azure Data Factory
To create a copy pipeline for the smartstores/ folder as a source, do the following steps:
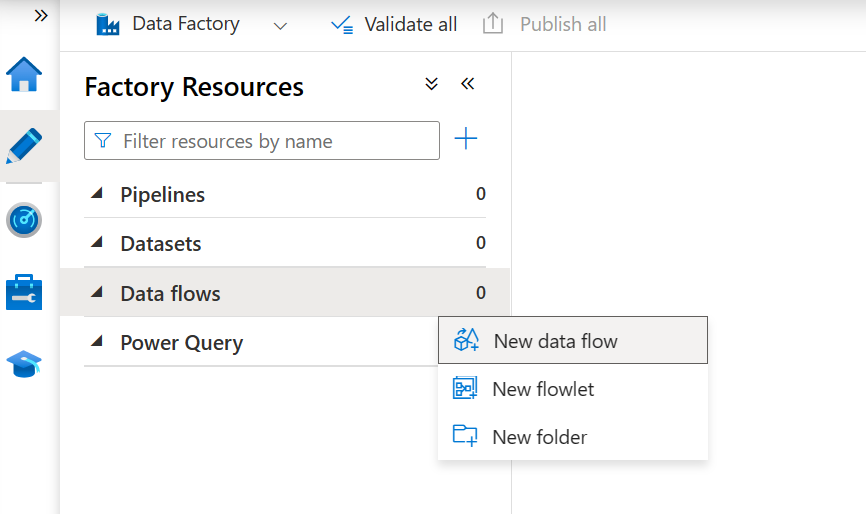
- In the Author section, select New data flow to create a new data flow.
- Start debugging for faster check of the pipeline setup.
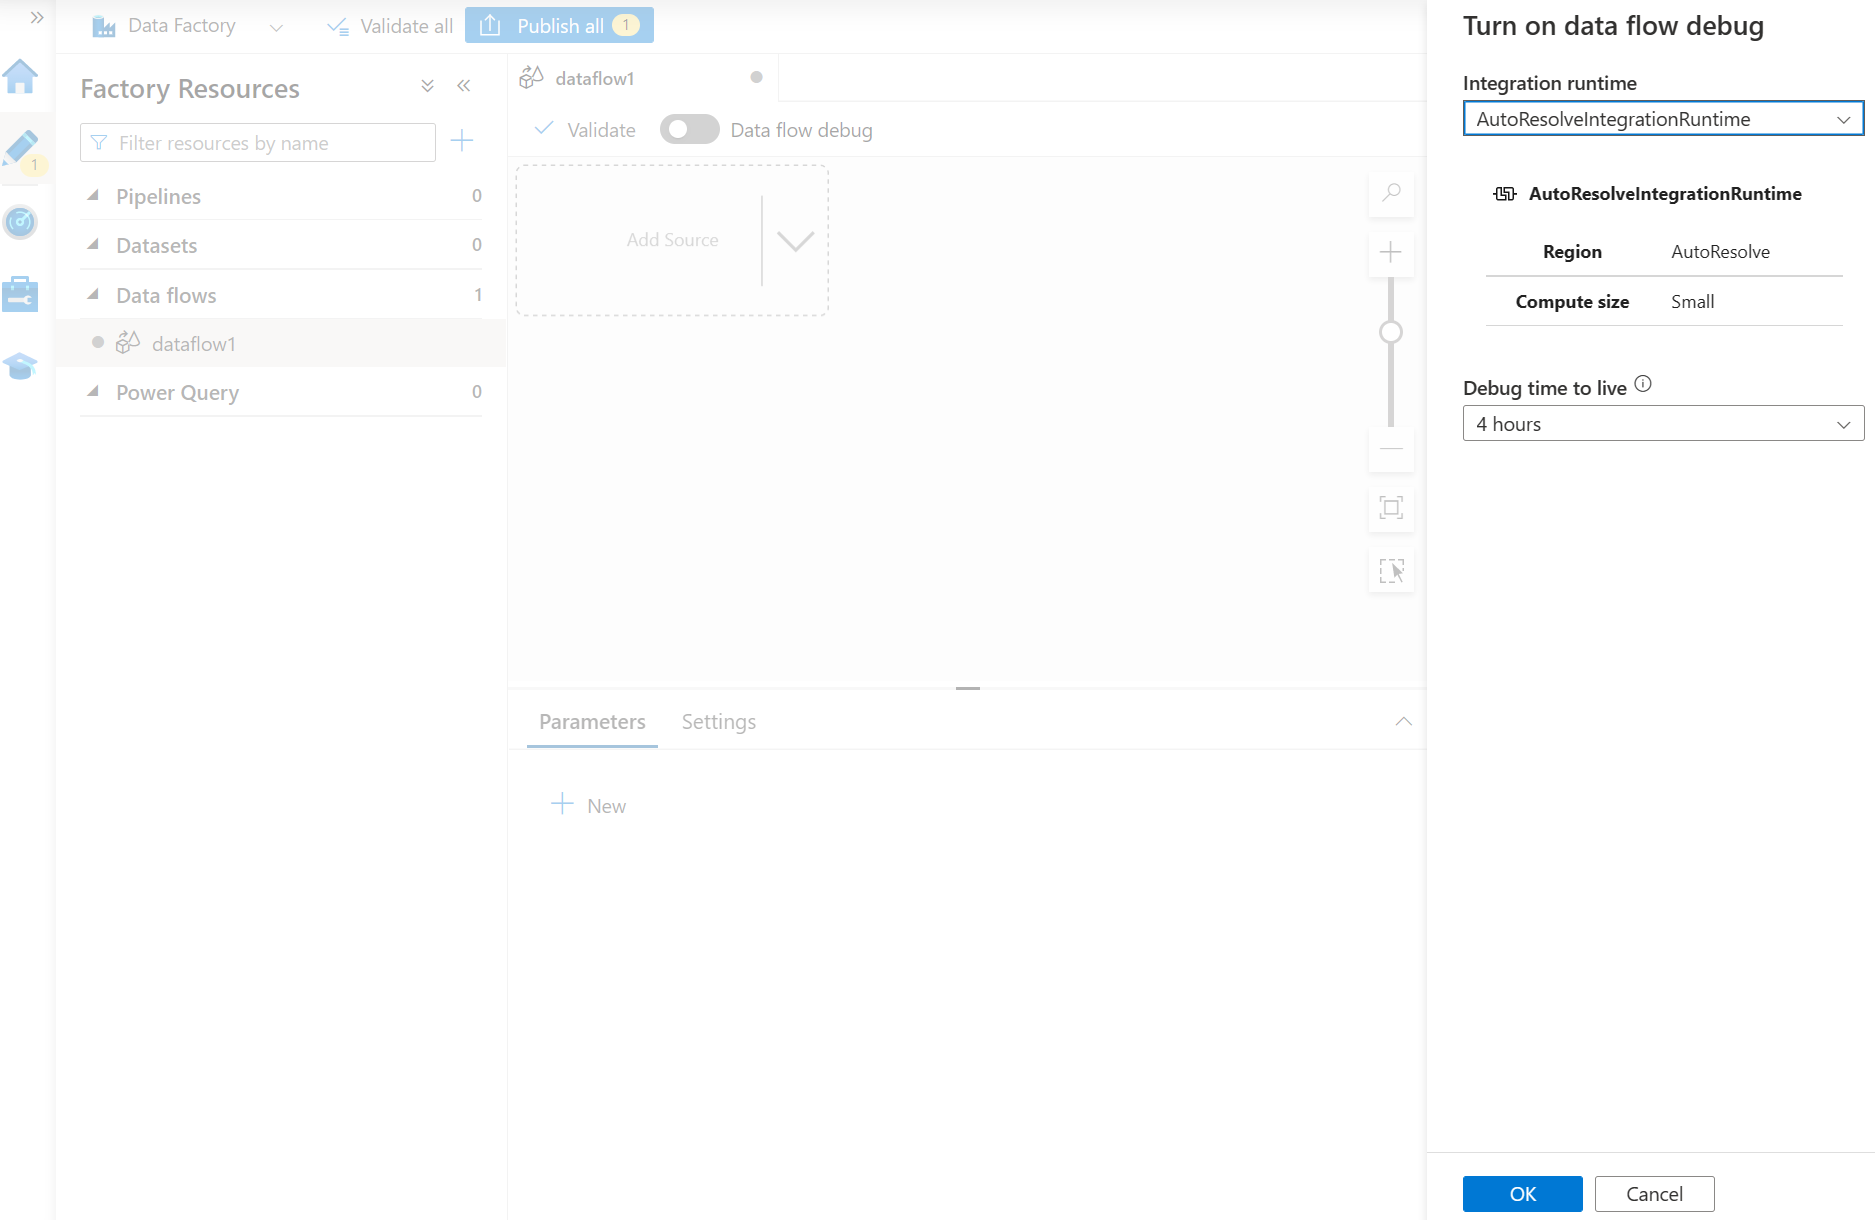
- Configure Source settings as follows:
- For the Source type, select Inline
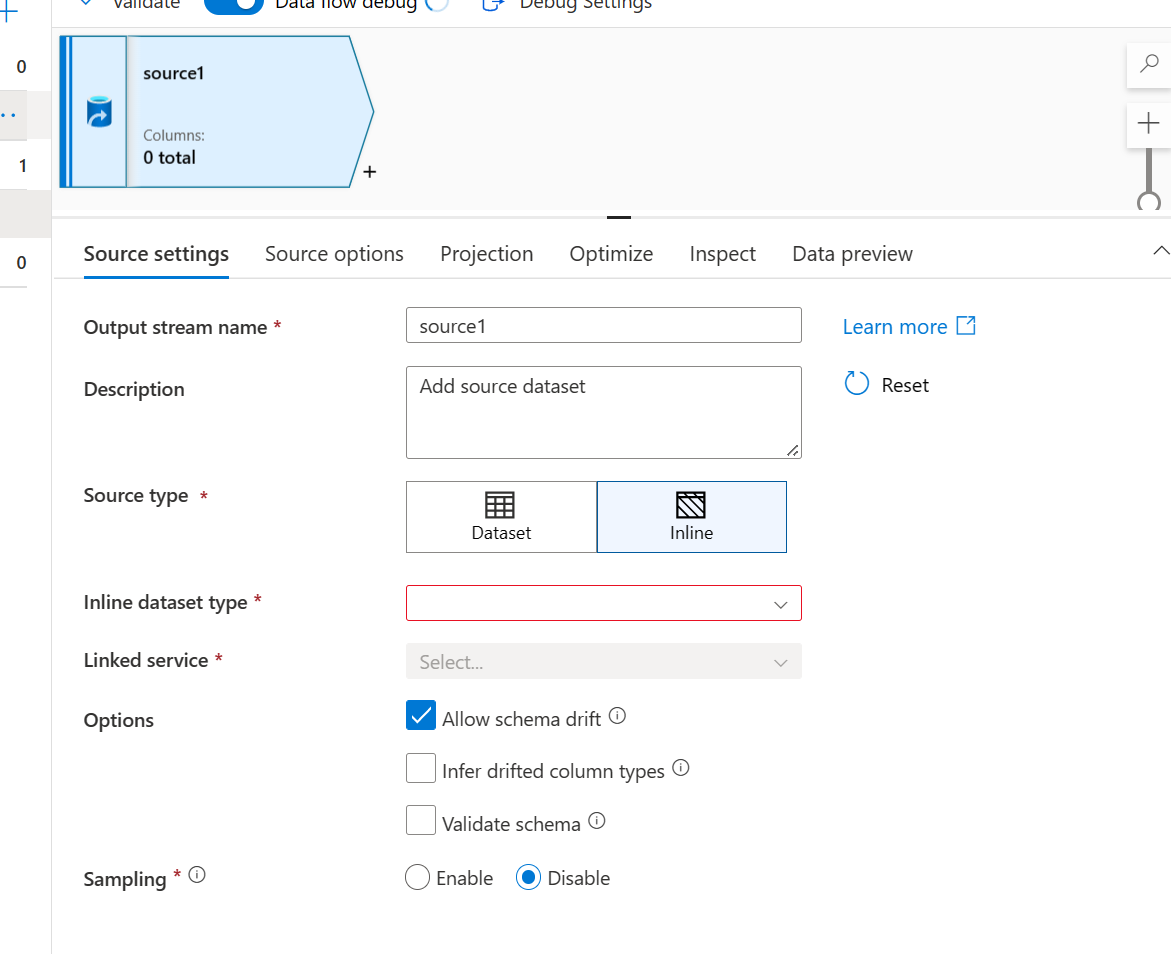
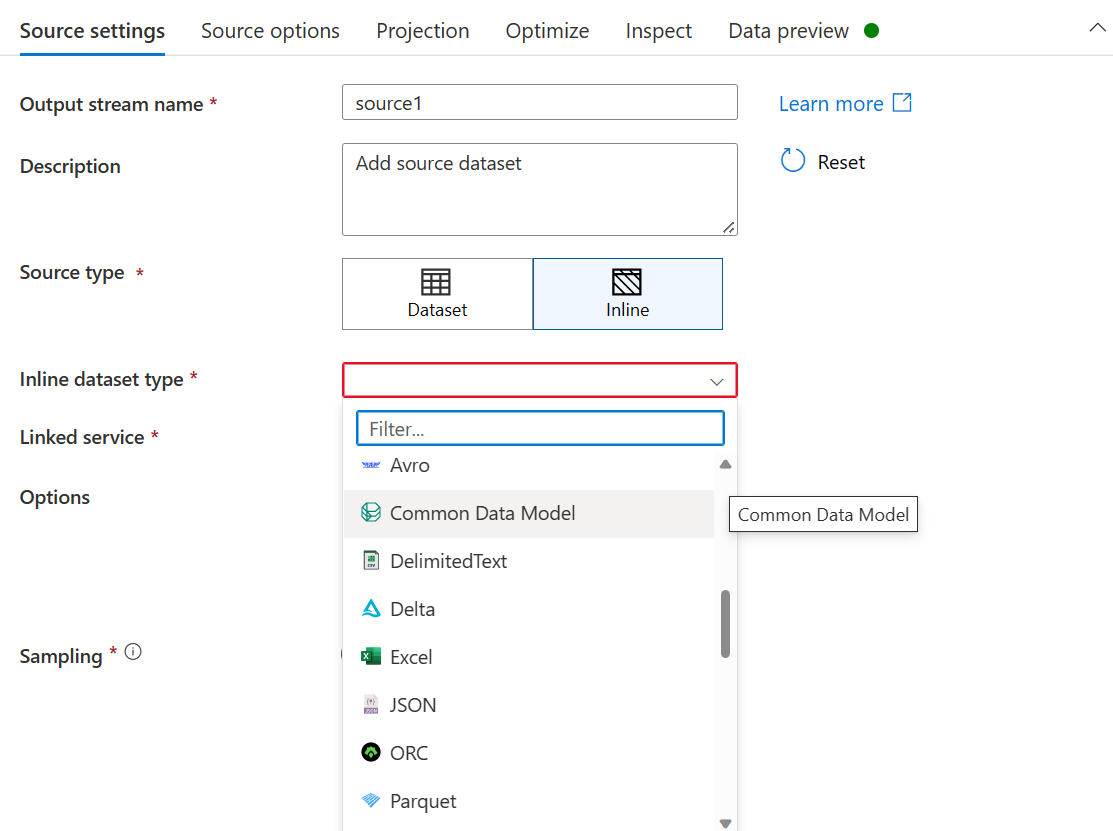
- For Inline dataset type, select Common Data Model
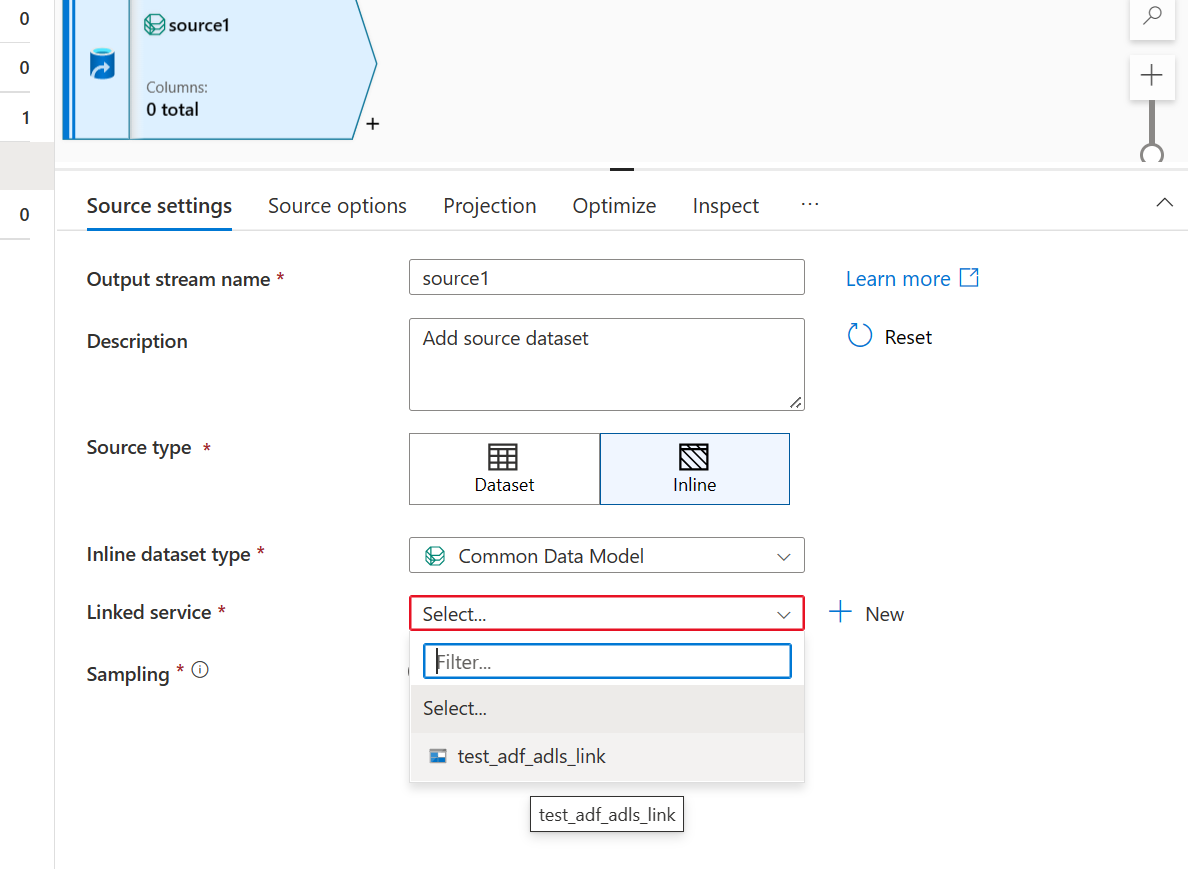
- Use the Azure Data Lake Storage link created for the Smart store analytics data lake.
- In the Source options section, set up the Common Data Model schema source as follows:
- Select Manifest as Metadata format.
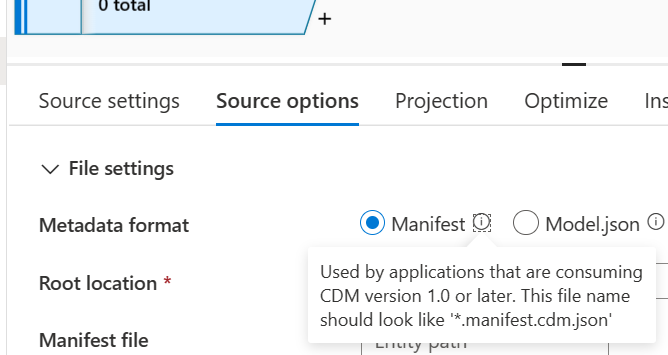
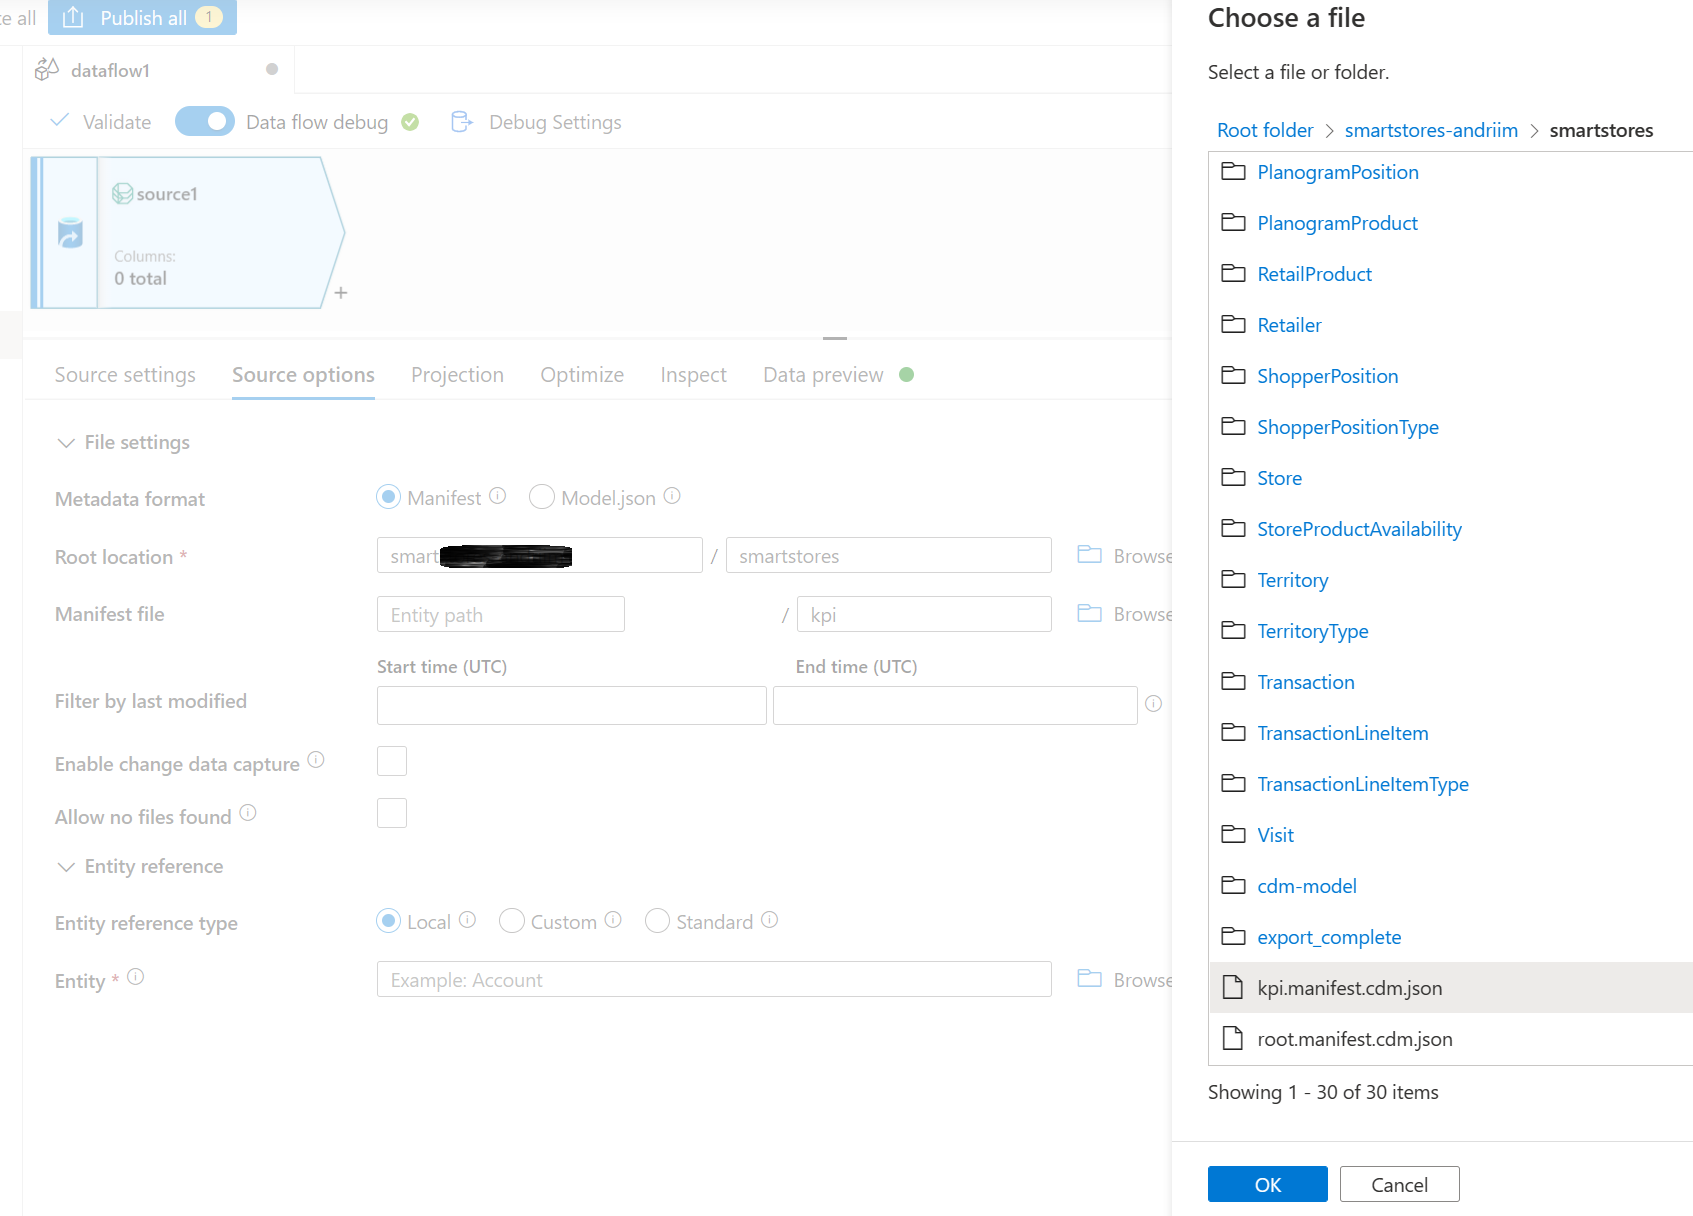
In the root location, browse and select smartstores folder.
In the Manifest file section, browse to select the required root manifest. Select the root file for the analytical and AI insights data, kpi.manifest.cdm.json.
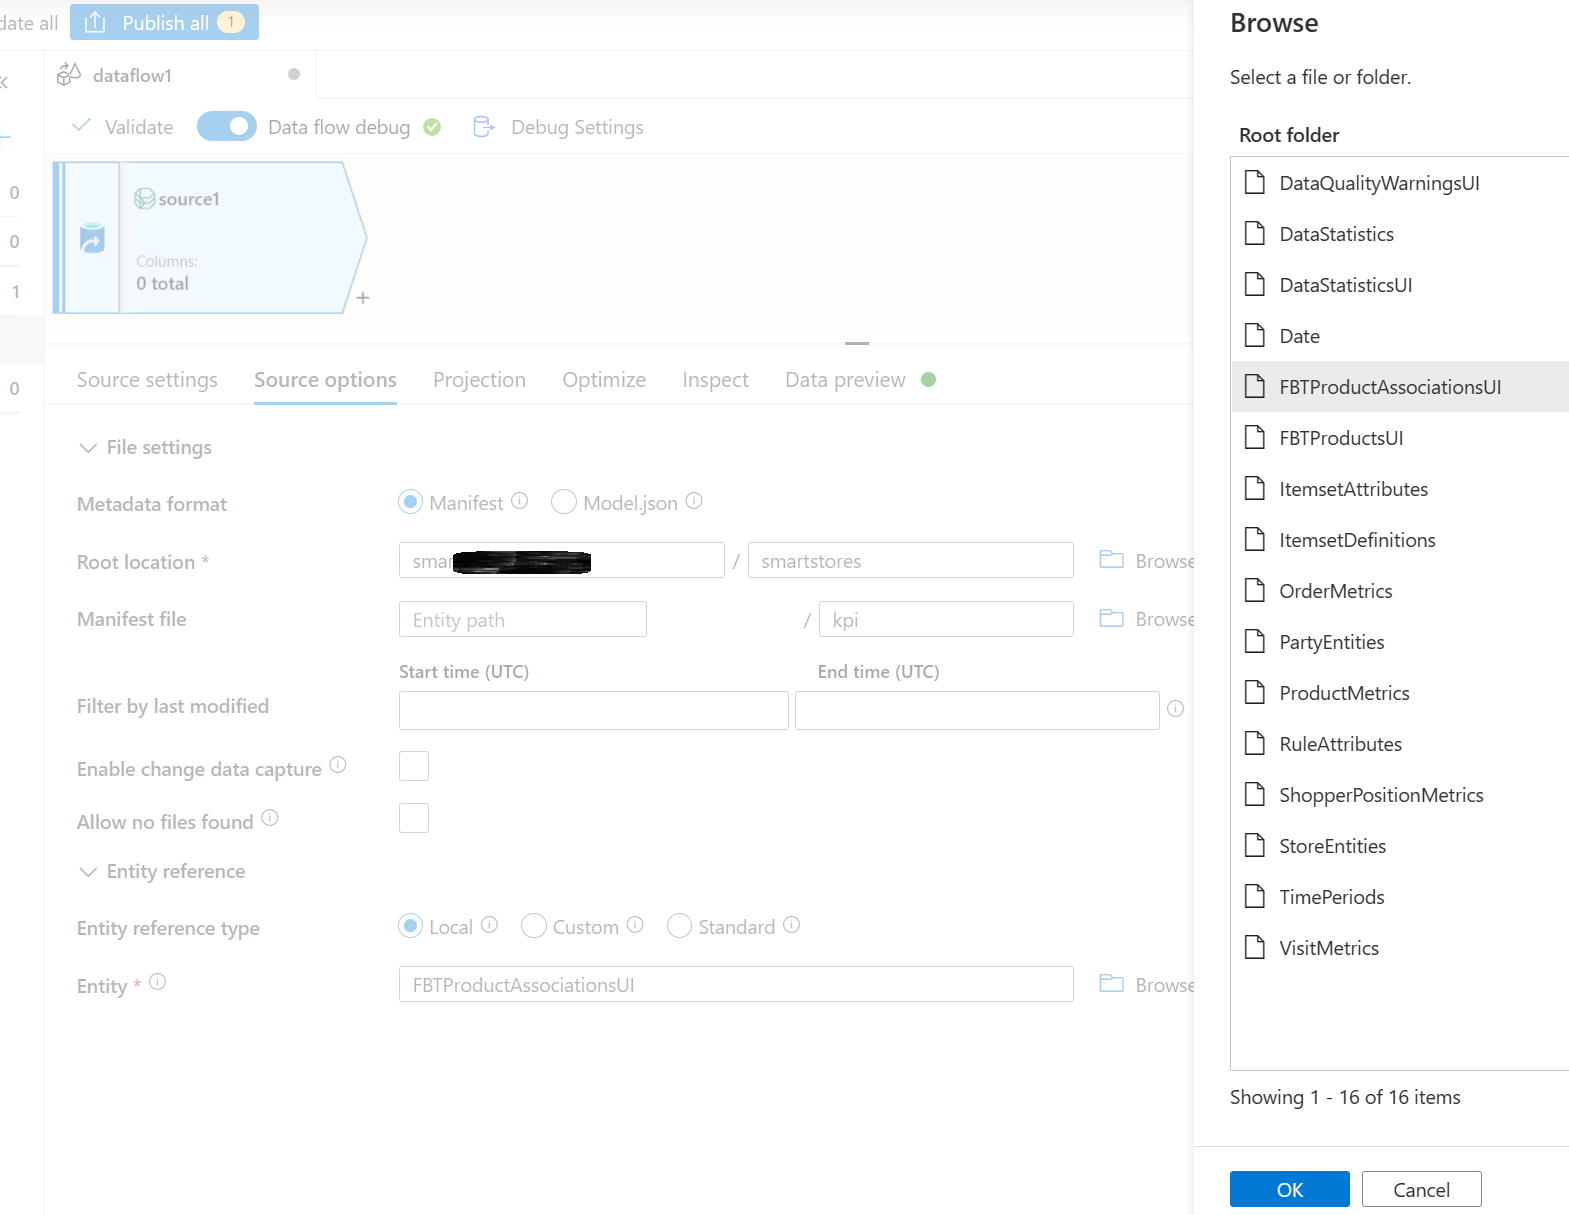
In the Entity section, select the entity (table) you need to copy/transform, for example, FBTProductAssociationsUI from the Frequently Bought Together package.
- In the Projection tab, select Allow schema drift. This selection will ensure that the schema won’t be validated at source but will drift to other transformation/sink steps.

- In the Data preview tab, select Reload to validate the data source setup.
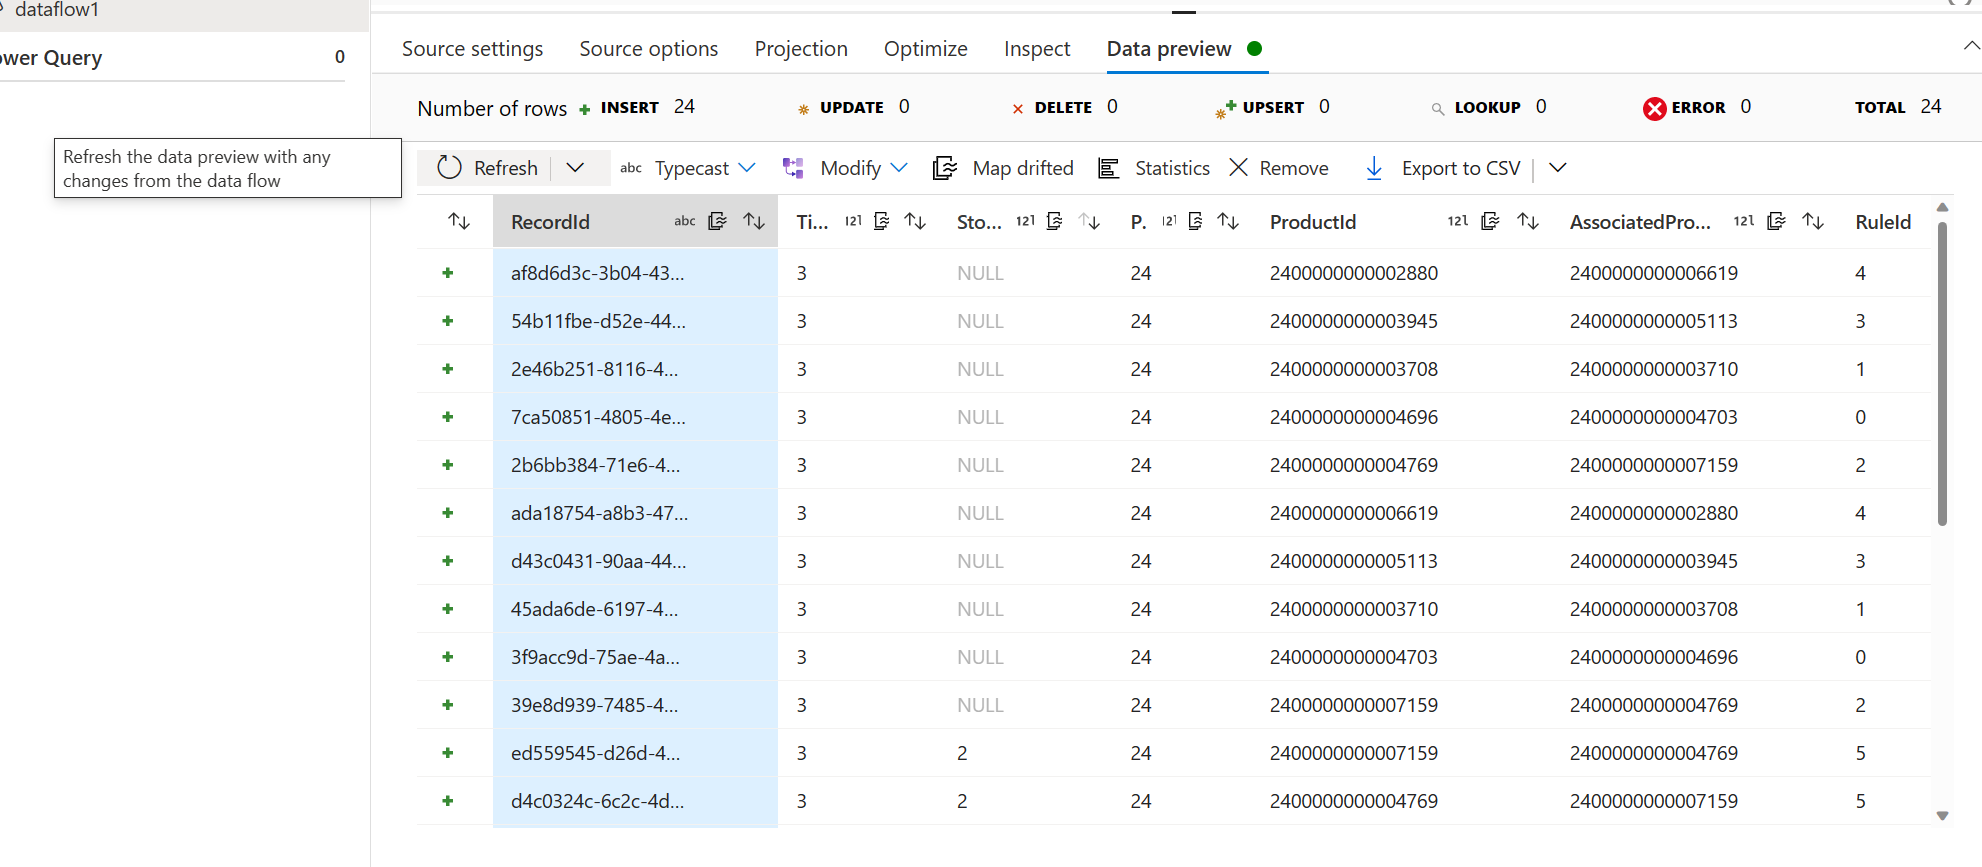
Add a sink step - set the parameters and data mapping as needed for your scenario.
Select Publish to publish the changes.