Criar e usar regras personalizadas do Firewall do Aplicativo Web v2 no Gateway de Aplicativo
O WAF (Firewall de Aplicativo Web) v2 no Gateway de Aplicativo do Azure fornece proteção para aplicativos Web. Essa proteção é fornecida pelo CRS (conjunto de regras principais) do OWASP (Open Web Application Security Project). Em alguns casos, talvez seja necessário criar suas próprias regras personalizadas para atender às suas necessidades específicas. Para obter mais informações sobre regras personalizadas do WAF, confira Visão geral das regras de firewall do aplicativo Web personalizado.
Este artigo mostra alguns exemplos de regras personalizadas que você pode criar e usar com o WAF v2. Para saber como implantar um WAF com uma regra personalizada usando o Azure PowerShell, leia Configurar regras personalizadas do firewall do aplicativo Web usando Azure PowerShell.
Os trechos de código JSON mostrados neste artigo são derivados de um recurso ApplicationGatewayWebApplicationFirewallPolicies resource.
Observação
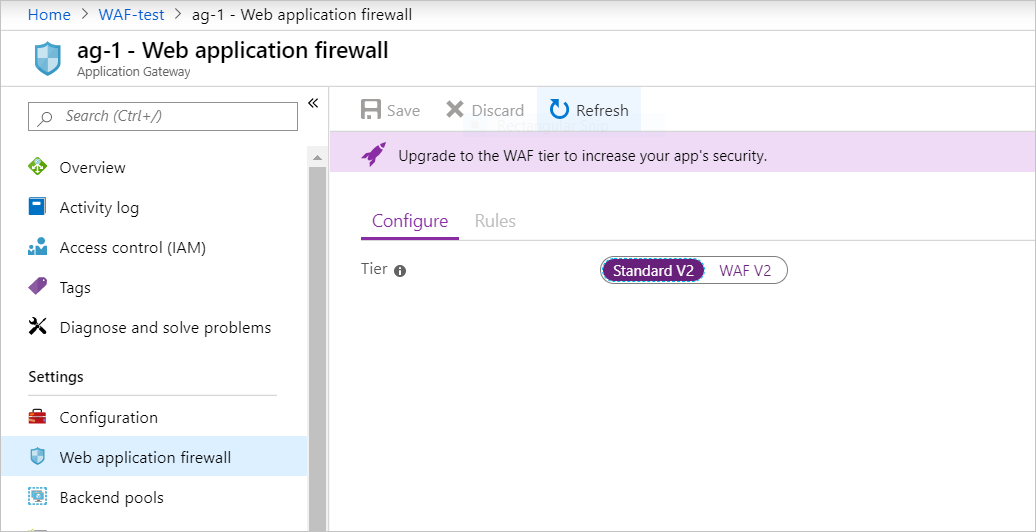
Se o gateway de aplicativo não estiver usando a camada WAF, será exibida no painel direito a opção de atualizar o gateway de aplicativo para a camada WAF.
Exemplo 1
Você sabe que existe um bot chamado evilbot que você deseja impedir de rastrear seu site. Nesse caso, você bloqueia o User-Agent evilbot nos cabeçalhos da solicitação.
Lógica: p
$variable = New-AzApplicationGatewayFirewallMatchVariable `
   -VariableName RequestHeaders `
   -Selector User-Agent

$condition = New-AzApplicationGatewayFirewallCondition `
   -MatchVariable $variable `
   -Operator Contains `
   -MatchValue "evilbot" `
   -Transform Lowercase `
   -NegationCondition $False

$rule = New-AzApplicationGatewayFirewallCustomRule `
   -Name blockEvilBot `
   -Priority 2 `
   -RuleType MatchRule `
   -MatchCondition $condition `
   -Action Block `
   -State Enabled
E aqui temos o JSON correspondente:
{
  "customRules": [
    {
      "name": "blockEvilBot",
      "priority": 2,
      "ruleType": "MatchRule",
      "action": "Block",
      "state": "Enabled",
      "matchConditions": [
        {
          "matchVariables": [
            {
              "variableName": "RequestHeaders",
              "selector": "User-Agent"
            }
          ],
          "operator": "Contains",
          "negationCondition": false,
          "matchValues": [
            "evilbot"
          ],
          "transforms": [
            "Lowercase"
          ]
        }
      ]
    }
  ]
}
Para ver um WAF implantado usando essa regra personalizada, leia Configurar uma regra personalizada de firewall do aplicativo Web usando Azure PowerShell.
Exemplo 1a
Você pode fazer a mesma coisa usando uma expressão regular:
$variable = New-AzApplicationGatewayFirewallMatchVariable `
   -VariableName RequestHeaders `
   -Selector User-Agent

$condition = New-AzApplicationGatewayFirewallCondition `
   -MatchVariable $variable `
   -Operator Regex `
   -MatchValue "evilbot" `
   -Transform Lowercase `
   -NegationCondition $False

$rule = New-AzApplicationGatewayFirewallCustomRule `
   -Name blockEvilBot `
   -Priority 2 `
   -RuleType MatchRule `
   -MatchCondition $condition `
   -Action Block `
   -State Enabled
E o JSON correspondente:
{
  "customRules": [
    {
      "name": "blockEvilBot",
      "priority": 2,
      "ruleType": "MatchRule",
      "action": "Block",
      "state": "Enabled",
      "matchConditions": [
        {
          "matchVariables": [
            {
              "variableName": "RequestHeaders",
              "selector": "User-Agent"
            }
          ],
          "operator": "Regex",
          "negationCondition": false,
          "matchValues": [
            "evilbot"
          ],
          "transforms": [
            "Lowercase"
          ]
        }
      ]
    }
  ]
}
Exemplo 2
Você deseja permitir tráfego somente dos EUA usando o operador GeoMatch e continuar fazendo com que as regras gerenciadas se apliquem:
$variable = New-AzApplicationGatewayFirewallMatchVariable `
   -VariableName RemoteAddr `

$condition = New-AzApplicationGatewayFirewallCondition `
   -MatchVariable $variable `
   -Operator GeoMatch `
   -MatchValue "US" `
   -Transform Lowercase `
   -NegationCondition $True

$rule = New-AzApplicationGatewayFirewallCustomRule `
   -Name "allowUS" `
   -Priority 2 `
   -RuleType MatchRule `
   -MatchCondition $condition `
   -Action Block `
   -State Enabled
E o JSON correspondente:
{
  "customRules": [
    {
      "name": "allowUS",
      "priority": 2,
      "ruleType": "MatchRule",
      "action": "Block",
      "state": "Enabled",
      "matchConditions": [
        {
          "matchVariables": [
            {
              "variableName": "RemoteAddr"
            }
          ],
          "operator": "GeoMatch",
          "negationCondition": true,
          "matchValues": [
            "US"
          ],
          "transforms": [
            "Lowercase"
          ]
        }
      ]
    }
  ]
}
Exemplo 3
Você deseja bloquear todas as solicitações de endereços IP no intervalo 198.168.5.0/24.
Nesse exemplo, você bloqueia todo o tráfego proveniente de um intervalo de endereços IP. O nome da regra é myrule1 e a prioridade é definida como 10.
Lógica: p
$variable1 = New-AzApplicationGatewayFirewallMatchVariable `
   -VariableName RemoteAddr

$condition1 = New-AzApplicationGatewayFirewallCondition `
   -MatchVariable $variable1 `
   -Operator IPMatch `
   -MatchValue "192.168.5.0/24" `
   -NegationCondition $False

$rule = New-AzApplicationGatewayFirewallCustomRule `
   -Name myrule1 `
   -Priority 10 `
   -RuleType MatchRule `
   -MatchCondition $condition1 `
   -Action Block `
   -State Enabled
Aqui está o JSON correspondente:
{
  "customRules": [
    {
      "name": "myrule1",
      "priority": 10,
      "ruleType": "MatchRule",
      "action": "Block",
      "state": "Enabled",
      "matchConditions": [
        {
          "matchVariables": [
            {
              "variableName": "RemoteAddr"
            }
          ],
          "operator": "IPMatch",
          "negationCondition": false,
          "matchValues": [
            "192.168.5.0/24"
          ],
          "transforms": []
        }
      ]
    }
  ]
}
Regra de CRS correspondente: SecRule REMOTE_ADDR "@ipMatch 192.168.5.0/24" "id:7001,deny"
Exemplo 4
Neste exemplo, você deseja bloquear o User-Agent evilbot e o tráfego no intervalo 192.168.5.0/24. Para fazê-lo, você pode criar duas condições de correspondência separadas e colocá-las na mesma regra. Essa configuração garante que, se ambas as condições corresponderem, o evilbot no cabeçalho do User-Agent e os endereços IP do intervalo 192.168.5.0/24, a solicitação será bloqueada.
Lógica: p e q
$variable1 = New-AzApplicationGatewayFirewallMatchVariable `
   -VariableName RemoteAddr

 $variable2 = New-AzApplicationGatewayFirewallMatchVariable `
   -VariableName RequestHeaders `
   -Selector User-Agent

$condition1 = New-AzApplicationGatewayFirewallCondition `
   -MatchVariable $variable1 `
   -Operator IPMatch `
   -MatchValue "192.168.5.0/24" `
   -NegationCondition $False

$condition2 = New-AzApplicationGatewayFirewallCondition `
   -MatchVariable $variable2 `
   -Operator Contains `
   -MatchValue "evilbot" `
   -Transform Lowercase `
   -NegationCondition $False

 $rule = New-AzApplicationGatewayFirewallCustomRule `
   -Name myrule `
   -Priority 10 `
   -RuleType MatchRule `
   -MatchCondition $condition1, $condition2 `
   -Action Block `
   -State Enabled
Aqui está o JSON correspondente:
{
  "customRules": [
    {
      "name": "myrule",
      "priority": 10,
      "ruleType": "MatchRule",
      "action": "Block",
      "state": "Enabled",
      "matchConditions": [
        {
          "matchVariables": [
            {
              "variableName": "RemoteAddr"
            }
          ],
          "operator": "IPMatch",
          "negationCondition": false,
          "matchValues": [
            "192.168.5.0/24"
          ],
          "transforms": []
        },
        {
          "matchVariables": [
            {
              "variableName": "RequestHeaders",
              "selector": "User-Agent"
            }
          ],
          "operator": "Contains",
          "negationCondition": false,
          "matchValues": [
            "evilbot"
          ],
          "transforms": [
            "Lowercase"
          ]
        }
      ]
    }
  ]
}
Exemplo 5
Neste exemplo, você deseja bloquear caso a solicitação esteja fora do intervalo de endereços IP 192.168.5.0/24 ou a cadeia de caracteres do agente do usuário não seja Chrome (o que significa que o usuário não está usando o navegador Chrome). Como essa lógica usa ou, as duas condições serão colocadas em regras separadas, como visto no exemplo a seguir. myrule1 e myrule2 precisam ser correspondentes para bloquear o tráfego.
Lógica: não (p e q) = não p ou não q.
$variable1 = New-AzApplicationGatewayFirewallMatchVariable `
   -VariableName RemoteAddr

$variable2 = New-AzApplicationGatewayFirewallMatchVariable `
   -VariableName RequestHeaders `
   -Selector User-Agent

$condition1 = New-AzApplicationGatewayFirewallCondition `
   -MatchVariable $variable1 `
   -Operator IPMatch `
   -MatchValue "192.168.5.0/24" `
   -NegationCondition $True

$condition2 = New-AzApplicationGatewayFirewallCondition `
   -MatchVariable $variable2 `
   -Operator Contains `
   -MatchValue "chrome" `
   -Transform Lowercase `
   -NegationCondition $True

$rule1 = New-AzApplicationGatewayFirewallCustomRule `
   -Name myrule1 `
   -Priority 10 `
   -RuleType MatchRule `
   -MatchCondition $condition1 `
   -Action Block `
   -State Enabled

$rule2 = New-AzApplicationGatewayFirewallCustomRule `
   -Name myrule2 `
   -Priority 20 `
   -RuleType MatchRule `
   -MatchCondition $condition2 `
   -Action Block `
   -State Enabled
E o JSON correspondente:
{
  "customRules": [
    {
      "name": "myrule1",
      "priority": 10,
      "ruleType": "MatchRule",
      "action": "Block",
      "state": "Enabled",
      "matchConditions": [
        {
          "matchVariables": [
            {
              "variableName": "RemoteAddr"
            }
          ],
          "operator": "IPMatch",
          "negationCondition": true,
          "matchValues": [
            "192.168.5.0/24"
          ],
          "transforms": []
        }
      ]
    },
    {
      "name": "myrule2",
      "priority": 20,
      "ruleType": "MatchRule",
      "action": "Block",
      "state": "Enabled",
      "matchConditions": [
        {
          "matchVariables": [
            {
              "variableName": "RequestHeaders",
              "selector": "User-Agent"
            }
          ],
          "operator": "Contains",
          "negationCondition": true,
          "matchValues": [
            "chrome"
          ],
          "transforms": [
            "Lowercase"
          ]
        }
      ]
    }
  ]
}
Exemplo 6
Você deseja permitir apenas solicitações de agentes de usuário conhecidos específicos.
Como a lógica usada aqui é ou, e todos os valores estão no cabeçalho User-Agent, todos os MatchValues podem estar em uma lista separada por vírgulas.
Lógica: p ou q ou r
$variable = New-AzApplicationGatewayFirewallMatchVariable `
   -VariableName RequestHeaders `
   -Selector User-Agent
$condition = New-AzApplicationGatewayFirewallCondition `
   -MatchVariable $variable `
   -Operator Equal `
   -MatchValue @('user1', 'user2') `
   -NegationCondition $True

$rule = New-AzApplicationGatewayFirewallCustomRule `
   -Name BlockUnknownUserAgents `
   -Priority 2 `
   -RuleType MatchRule `
   -MatchCondition $condition `
   -Action Block `
   -State Enabled
JSON correspondente:
{
  "customRules": [
    {
      "name": "BlockUnknownUserAgents",
      "priority": 2,
      "ruleType": "MatchRule",
      "action": "Block",
      "state": "Enabled",
      "matchConditions": [
        {
          "matchVariables": [
            {
              "variableName": "RequestHeaders",
              "selector": "User-Agent"
            }
          ],
          "operator": "Equal",
          "negationCondition": true,
          "matchValues": [
            "user1",
            "user2"
          ],
          "transforms": []
        }
      ]
    }
  ]
}
Exemplo 7
Não é incomum ver o Azure Front Door implantado na frente do Gateway de Aplicativo. Para garantir que o tráfego recebido pelo Gateway de Aplicativo seja de implantação front door, a melhor prática é verificar se o cabeçalho X-Azure-FDID contém o valor exclusivo esperado. Para obter mais informações sobre como proteger o acesso ao seu aplicativo usando o Azure Front Door, confira Como bloquear o acesso ao meu back-end de forma a permitir apenas o Azure Front Door
Lógica: não p
$expectedFDID = "xxxxxxxx-xxxx-xxxx-xxxx-xxxxxxxxxxxx"
$variable = New-AzApplicationGatewayFirewallMatchVariable `
   -VariableName RequestHeaders `
   -Selector X-Azure-FDID

$condition = New-AzApplicationGatewayFirewallCondition `
   -MatchVariable $variable `
   -Operator Equal `
   -MatchValue $expectedFDID `
   -Transform Lowercase `
   -NegationCondition $True

$rule = New-AzApplicationGatewayFirewallCustomRule `
   -Name blockNonAFDTraffic `
   -Priority 2 `
   -RuleType MatchRule `
   -MatchCondition $condition `
   -Action Block `
   -State Enabled
E aqui temos o JSON correspondente:
{
  "customRules": [
    {
      "name": "blockNonAFDTraffic",
      "priority": 2,
      "ruleType": "MatchRule",
      "action": "Block",
      "state": "Enabled",
      "matchConditions": [
        {
          "matchVariables": [
            {
              "variableName": "RequestHeaders",
              "selector": "X-Azure-FDID"
            }
          ],
          "operator": "Equal",
          "negationCondition": true,
          "matchValues": [
            "xxxxxxxx-xxxx-xxxx-xxxx-xxxxxxxxxxxx"
          ],
          "transforms": [
            "Lowercase"
          ]
        }
      ]
    }
  ]
}
Próximas etapas
Depois de criar suas regras personalizadas, você poderá aprender a visualizar seus logs WAF. Para obter mais informações, consulte Diagnósticos do Gateway de Aplicativo.