Create a custom connector from an OpenAPI definition (preview)
[This article is prerelease documentation and is subject to change.]
Note
This topic is part of a tutorial series on creating and using custom connectors in Microsoft Power Automate and Microsoft Power Apps. Make sure you read the custom connector overview to understand the process.
To create a custom connector, you must describe the API you want to connect to so that the connector understands the API's operations and data structures. In this topic, you create a custom connector using an OpenAPI definition that describes the settings required for the Copilot for Finance custom connector.
For another way to describe an API, go to Create a custom connector from scratch.
Prerequisites
An OpenAPI definition that describes the example API. When you create a custom connector, the OpenAPI definition must be less than 1 MB. The OpenAPI definition needs to be in OpenAPI 2.0 (formerly known as Swagger) format.
If there are multiple security definitions, the custom connector picks the top security definition. Custom connector creation doesn't support client credentials (for example, application and password) in OAuth security definition. For more information, see OpenAPI definition.
Customers should use the following subscription:
Import the OpenAPI definition
You are now ready to work with the OpenAPI definition you downloaded. All the required information is contained in the definition, and you can review and update this information as you go through the custom connector wizard.
Start by importing the OpenAPI definition for Power Automate and Power Apps.
Note
An OpenAPI definition needs to be in OpenAPI 2.0 (formerly known as Swagger) format. OpenAPI definitions that are in OpenAPI 3.0 format are not supported.
Import the OpenAPI definition for Power Automate and Power Apps
Sign in to Power Apps or Power Automate.
On the left pane, select Data > Custom connectors.
Select New custom connector, and then select Import an OpenAPI file.
Enter a name for the custom connector as, copilotforfinancecomms, go to the OpenAPI definition that you downloaded or created, and then select Continue.
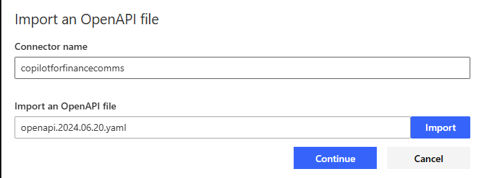
Parameter Value Custom connector title copilotforfinancecomms
Review general details
Review the following details found in the General information tab:
At the top of the wizard, make sure the name is set to copilotforfinancecomms, and then select Create connector.
On the General page, review the information that was imported from the OpenAPI definition, including the API host and the base URL for the API. The connector uses the API host and the base URL to determine how to call the API.
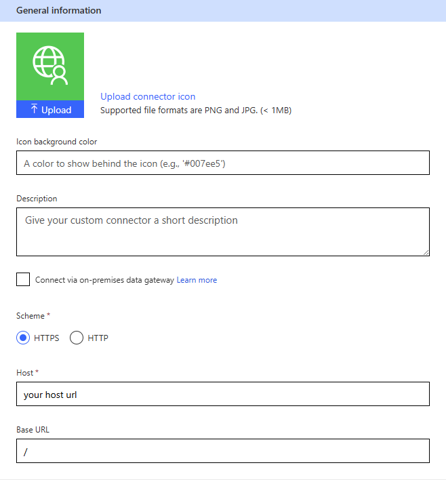
Review authentication type
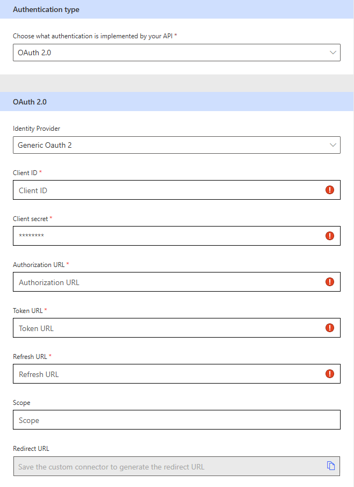
Under security tab, configure authentication type as Oauth 2.0 as shown in this screenshot:
Review the connector definition
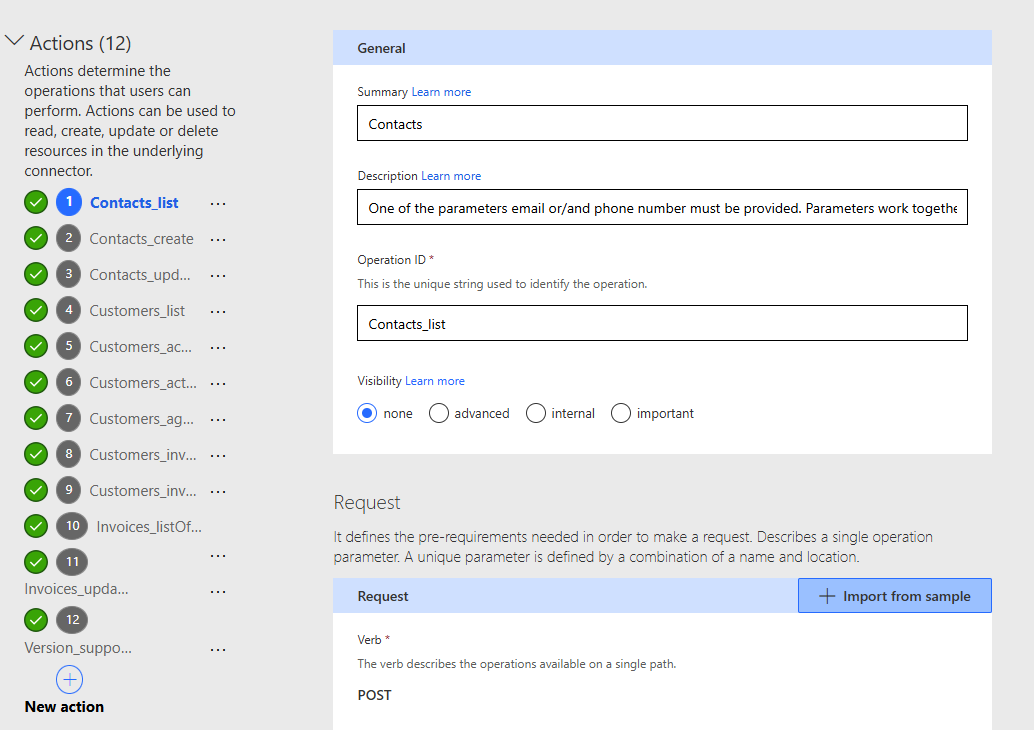
The Definition page of the custom connector wizard gives you many options for defining how your connector functions. We encourage you to explore these options on your own. For information on defining objects from scratch in this UI, go to Create the connector definition.
Open API definitions for copilot for finance should be already populated as shown in the following example screenshot.
Test the connector
Now that the connector is created, test it to make sure it's working properly. Testing is currently available only in Power Automate and Power Apps.
On the Test page, select New connection to login using OAuth credentials.
Return to the Test page, and do one of the following:
In Power Automate, you're taken back to the Test page. Select the refresh icon to make sure the connection information is updated.

In Power Apps, you're taken to the list of connections available in the current environment. In the upper-right corner, select the gear icon, and then select Custom connectors. Choose the connector you created, and then go back to the Test page.
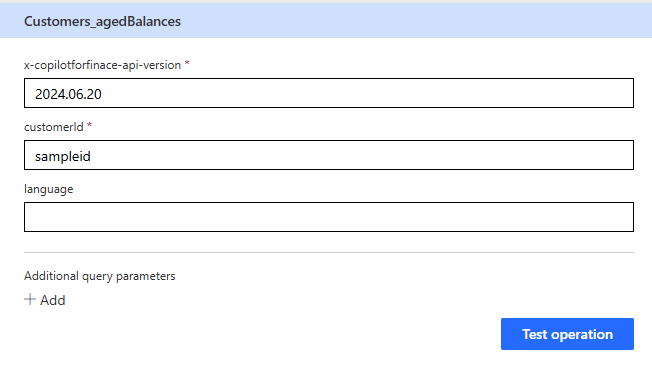
On the Test page, select an action and enter the required values to test the end point. Below is an example for Customers_agedBalances
Provide input values to API endpoint:
- x-copilotforfinace-api-version: 2024.06.20
- customerid: sampleid
Select Test operation.
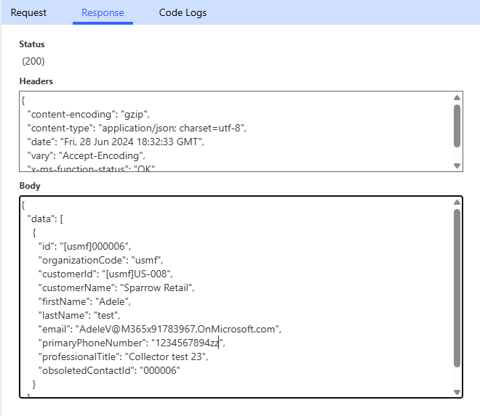
The connector calls the API, and you can review the response.
You can also share a connector within your organization or get the connector certified so that people outside your organization can use it.