Manage columns in a work item list in Azure Boards
TFS 2017 | TFS 2015 | TFS 2013
Visual Studio 2019 | Visual Studio 2017 | Visual Studio 2015 | Visual Studio 2013
Each column corresponds to a work item field. You can add and remove columns within work item lists to show the fields of interest to you. Or, you can drag a column to a new position. Your settings persist for each page you customize and are only valid for your views.
Specifically, you can do the following actions from the following list views:
Action
Add or remove a column field
Yes
Yes
Yes
Yes
Sort on a column
No
No
Yes
Yes
Tip
Unlike a query result, you can't sort a backlog by a column. However, you can use the Create Query link on each backlog to create a query that you can sort on any field column you choose from the Sorting tab of the Column options dialog. While you may be able to add a field to sort on, not all fields are supported. For example, selection of the Parent, History, Description, or other rich-text field will result in the display of an error message as you can't sort on these fields.
You can add most fields listed in the Work item field index. All fields defined within the project collection or organization are available for selection, even those fields that aren't used for your particular project.
About persistence of column options
Once you set the column options for a specific view, your settings persist until you change them. The following notes apply to specific views.
- Column options you set for a backlog apply only to the active team and backlog. Options set for the product backlog differ from those options you set for a portfolio backlog.
- Column options you set for a Sprint backlog persist for all sprints you select until you change them.
- Column options you set for a query persist when you save the query. For Shared queries, your settings can get overwritten when someone else saves different column option settings.
Note
You can't set column options for other members of your team. For projects that use the On-premises XML process model, you can set the default column options for product and portfolio backlogs. To learn how, see Process configuration XML element reference.
Open the Column options dialog
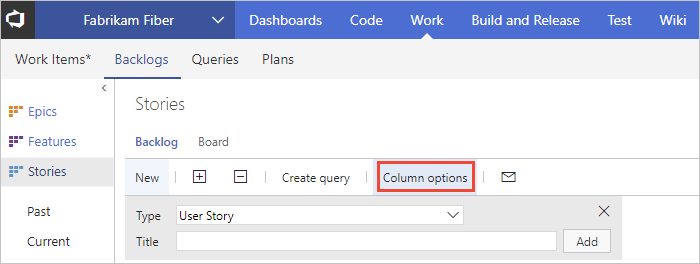
Start by opening the Column Options dialog. If you don't see the option, choose the … and choose from the options provided.

Add or remove columns
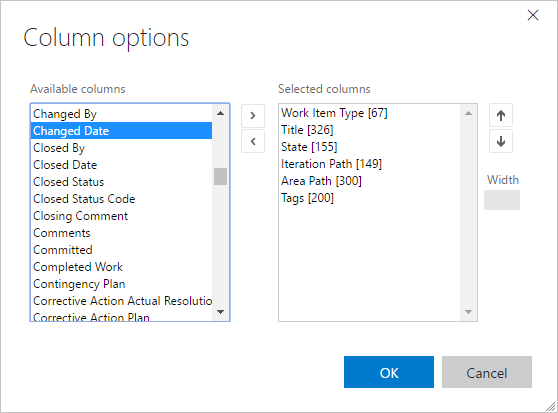
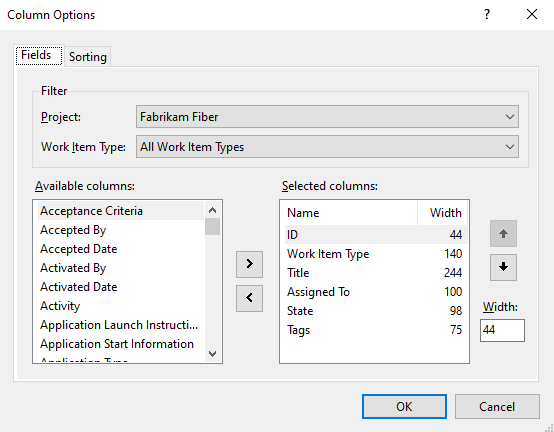
Find the field you want to add from the Available columns set and choose > (greater-than character) to move it into the Selected columns list. You can then change the order of the columns with the ↑/↓ up and down arrows. To remove a field, select it and then choose the < (less-than character).

Sort on a column
You can sort query results. From the Column options dialog, choose Sorting. Add or remove a column field and drag and drop it into the order you want. Choose the up or down arrows to choose whether it sorts in ascending or descending order.

Use keyboard shortcuts to change the column order, column width, or sort options
You can change the column order, column size, or sort options by using the following keyboard commands:
- To change the column order, choose the field and drag it to a new location
- To resize a column, choose the column divider to the right of the field and drag to a new location
- For query results:
- Add the field as a column in order to sort by that field
- To sort by a column, hold down the SHIFT key and select on the field
- To reverse the sort order, SHIFT+click on the field
- To sort by multiple columns, SHIFT+click on each column in the order you want to sort
For other keyboard shortcuts, enter ? to display available shortcuts based on the page you're on.


