How to: Customize the scroll bar
Applies to: ![]() Visual Studio
Visual Studio ![]() Visual Studio for Mac
Visual Studio for Mac
Note
This article applies to Visual Studio 2017. If you're looking for the latest Visual Studio documentation, see Visual Studio documentation. We recommend upgrading to the latest version of Visual Studio. Download it here
When you are working with long code files, it can be hard to keep track of where everything is in the file. You can customize the scroll bar of the code editor to give you an overall picture of what's happening in your code.
Annotations
You can select whether the scroll bar shows annotations such as code changes, breakpoints, bookmarks, errors, and caret position.
Open the Scroll Bars options page by choosing Tools > Options > Text Editor > All Languages > Scroll Bars.
Select Show Annotations over vertical scroll bar, and then select the annotations you want to see. The available annotations are:
- changes
- marks
- errors
- caret position
Tip
The Show marks option includes breakpoints and bookmarks.
Try it out by opening a large code file and replacing some text that occurs in several places in the file. The scroll bar shows you the effect of the replacements, so you can back out your changes if you replaced something you shouldn't have.
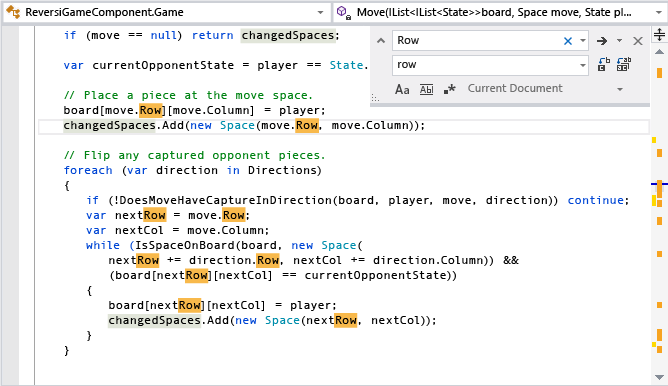
Here's how the scroll bar looks after a search for a string. Notice that all instances of the string appear in the scroll bar.

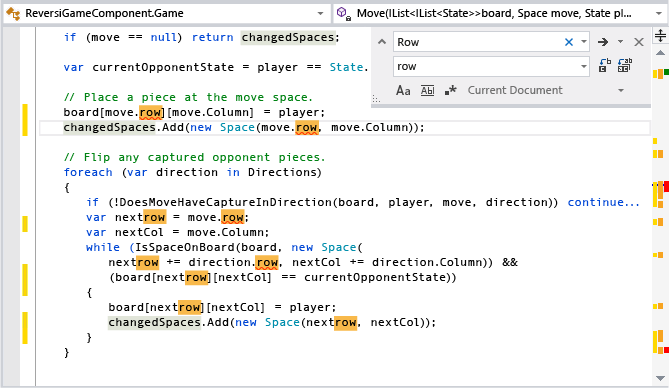
Here's the scroll bar after replacing all the instances of the string. The red marks in the scroll bar show where the text replacement introduced errors.

Display modes
The scroll bar has two modes: bar mode and map mode.
Bar mode
Bar mode displays annotation indicators on the scroll bar. Clicking on the scroll bar scrolls the page up or down but does not jump to that location in the file.
Map mode
Map mode displays lines of code, in miniature, on the scroll bar. You can choose how wide the map column is by selecting a value in Source overview. To enable a larger preview of the code when you rest the pointer on the map, select the Show Preview Tooltip option. Collapsed regions are shaded differently and expand when you double-click them.
Tip
You can turn the miniature code view off in map mode by setting Source overview to Off. If Show Preview Tooltip is selected, you still see a preview of the code at that location when you hover your pointer on the scroll bar, and the cursor still jumps to that location in the file when you click.
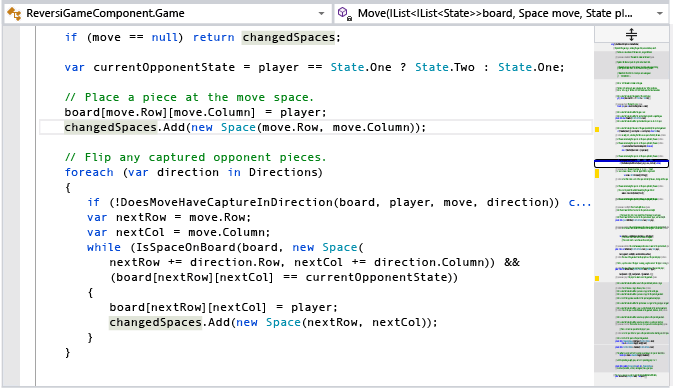
The following image shows the search example when map mode is on and the width is set to Medium:

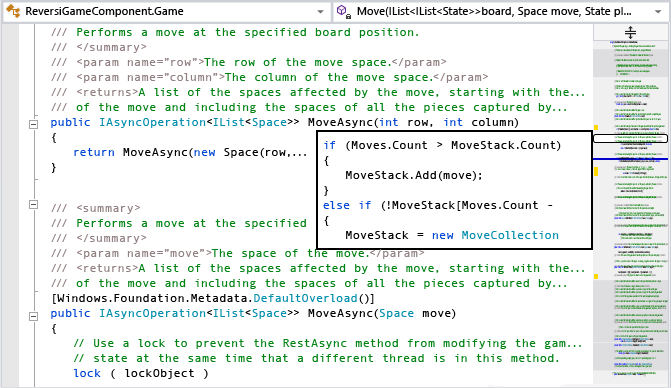
The following image shows the Show Preview Tooltip option:

Tip
To change the colors that you see in map mode, choose Tools > Options > Environment > Fonts and Colors. Next, in Display items, choose any of the items that are preceded with "Overview", make the color changes you want, and then choose OK.