Assign applications using roles in MDT
This article will show you how to add applications to a role in the MDT database and then assign that role to a computer. For the purposes of this article, the application we're adding is Adobe Reader XI. In addition to using computer-specific entries in the database, you can use roles in MDT to group settings together.
Create and assign a role entry in the database
On MDT01, using Deployment Workbench, in the MDT Production deployment share, expand Advanced Configuration and then expand Database.
In the Database node, right-click Role, select New, and create a role entry with the following settings:
- Role name: Standard PC
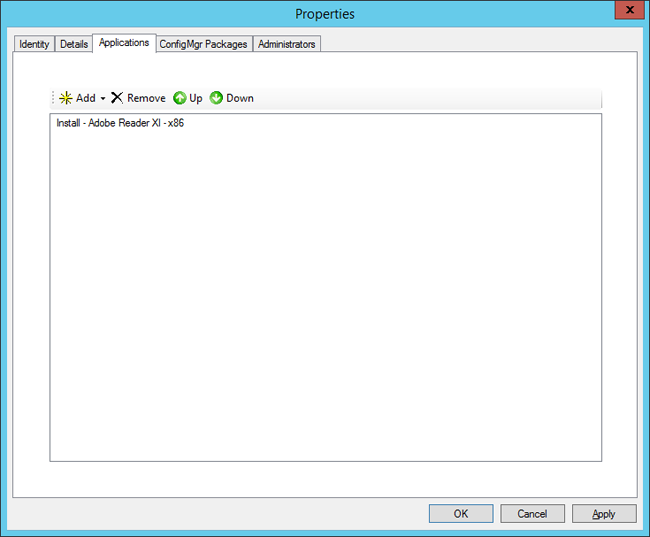
- Applications / Lite Touch Applications:
- Install - Adobe Reader XI - x86

Figure 12. The Standard PC role with the application added
Associate the role with a computer in the database
After creating the role, you can associate it with one or more computer entries.
Using Deployment Workbench, expand MDT Production, expand Advanced Configuration, expand Database, and select Computers.
In the Computers node, double-click the PC00075 entry, and add the following setting:
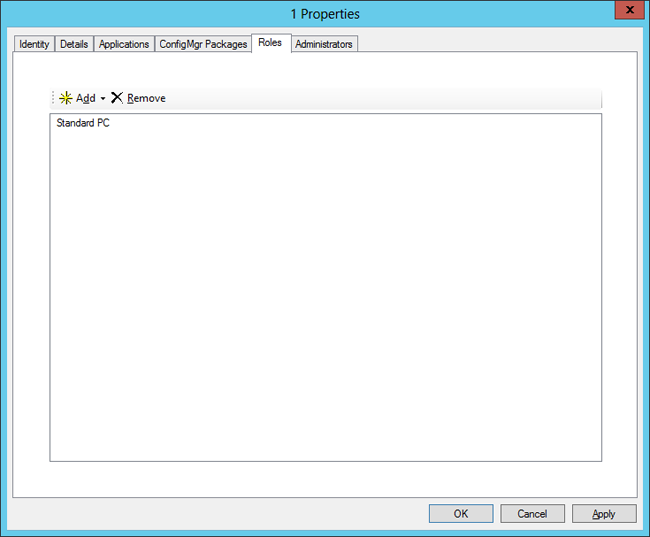
- Roles: Standard PC

Figure 13. The Standard PC role added to PC00075 (having ID 1 in the database).
Verify database access in the MDT simulation environment
When the database is populated, you can use the MDT simulation environment to simulate a deployment. The applications aren't installed, but you can see which applications would be installed if you did a full deployment of the computer.
On PC0001, log on as CONTOSO\MDT_BA.
Modify the C:\MDT\CustomSettings.ini file to look like below:
[Settings]
Priority=CSettings, CRoles, RApplications, Default
[Default]
_SMSTSORGNAME=Contoso
OSInstall=Y
UserDataLocation=AUTO
TimeZoneName=Pacific Standard Time
AdminPassword=P@ssw0rd
JoinDomain=contoso.com
DomainAdmin=CONTOSO\MDT_JD
DomainAdminPassword=P@ssw0rd
MachineObjectOU=OU=Workstations,OU=Computers,OU=Contoso,DC=contoso,DC=com
SLShare=\\MDT01\Logs$
ScanStateArgs=/ue:*\* /ui:CONTOSO\*
USMTMigFiles001=MigApp.xml
USMTMigFiles002=MigUser.xml
HideShell=YES
ApplyGPOPack=NO
SkipAppsOnUpgrade=NO
SkipAdminPassword=YES
SkipProductKey=YES
SkipComputerName=NO
SkipDomainMembership=YES
SkipUserData=NO
SkipLocaleSelection=YES
SkipTaskSequence=NO
SkipTimeZone=YES
SkipApplications=NO
SkipBitLocker=YES
SkipSummary=YES
SkipCapture=YES
SkipFinalSummary=NO
EventService=http://MDT01:9800
[CSettings]
SQLServer=MDT01
Instance=SQLEXPRESS
Database=MDT
Netlib=DBNMPNTW
SQLShare=Logs$
Table=ComputerSettings
Parameters=UUID, AssetTag, SerialNumber, MacAddress
ParameterCondition=OR
[CRoles]
SQLServer=MDT01
Instance=SQLEXPRESS
Database=MDT
Netlib=DBNMPNTW
SQLShare=Logs$
Table=ComputerRoles
Parameters=UUID, AssetTag, SerialNumber, MacAddress
ParameterCondition=OR
[RApplications]
SQLServer=MDT01
Instance=SQLEXPRESS
Database=MDT
Netlib=DBNMPNTW
SQLShare=Logs$
Table=RoleApplications
Parameters=Role
Order=Sequence
Using an elevated Windows PowerShell prompt (run as Administrator), run the following commands. Press Enter after each command:
Set-Location C:\MDT
.\Gather.ps1
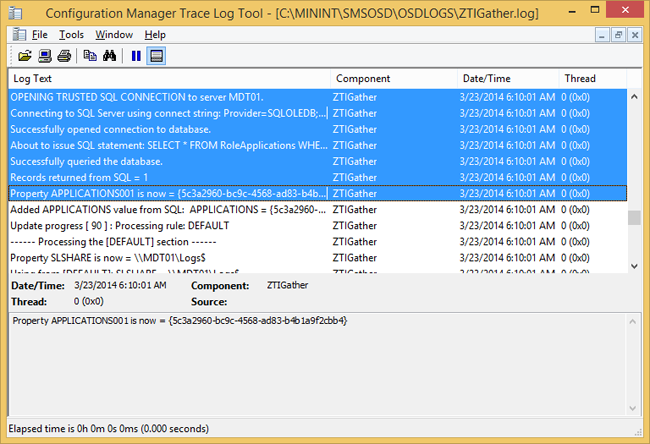
Figure 14. ZTIGather.log displaying the application GUID belonging to the Adobe Reader XI application that would have been installed if you deployed this machine.