Windows Azure Tools for Eclipse Now Support Windows Azure SDK 1.3
The Interoperability Team at Microsoft announced today the availability of an update to the Windows Azure Tools for Eclipse that includes support for the Windows Azure SDK 1.3. People who upgraded to the Windows Azure SDK 1.3 and tried using a previous release of the Eclipse plug-in ran into troubles that are fixed in this release. And, as I found out, this release also includes some subtle (but nice) improvements. This post, Using the Windows Azure Tools for Eclipse, is still relevant for getting started with the Eclipse tools, but in this post I’ll walk you through the steps I took to upgrade to the latest version and through some of the subtle changes I noticed. I’ll assume that you have already installed the previous release of the Windows Azure Tools for Eclipse and the Windows Azure SDK 1.2.
1. Install the Windows Azure SDK 1.3
If you are simply upgrading from the Windows Azure SDK 1.2 to 1.3, follow the instructions under the Standalone Windows Azure SDK section here: https://msdn.microsoft.com/en-us/windowsazure/cc974146. However, if you are starting from scratch, you can get the Windows Azure Pre-Requisites via the Microsoft Web Platform Installer 2.0 (see this link https://azurephp.interoperabilitybridges.com/articles/getting-the-windows-azure-pre-requisites-via-the-microsoft-web-platform-installer-20 ). Alternatively you can choose to manually install and configure all the required elements (see the article, “Getting the Windows Azure Pre-Requisites Via Manual Installation”). It’s easier to use the Web Platform installer, but installing and configuring manually gives you a better understanding of all the pieces that are working together.
2. Install the Latest Windows Azure Tools for Eclipse
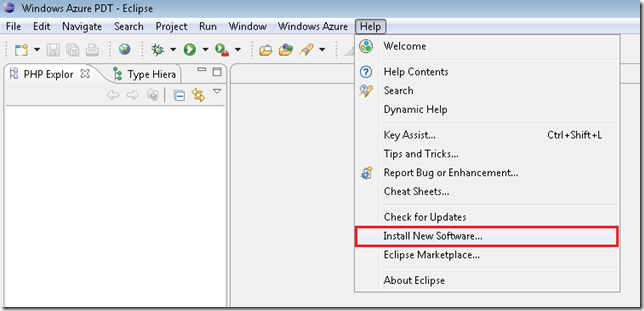
a. Start Eclipse, click Help on the menu, and select Install New Software.
b. In the dialog that opens, type https://www.windowsazure4e.org/update/ into the Work with field (as shown below). When the update becomes visible in the dialog, expand PHP Development Tools for Windows Azure Platform and select the components you want to install…I recommend installing all three. (You’ll notice in the picture below that I did not select to install the Windows Azure SDK for Java. However, this component is a requirement for the Windows Azure Storage Explorer, so it is installed anyway.) Click Next when you are ready to proceed.
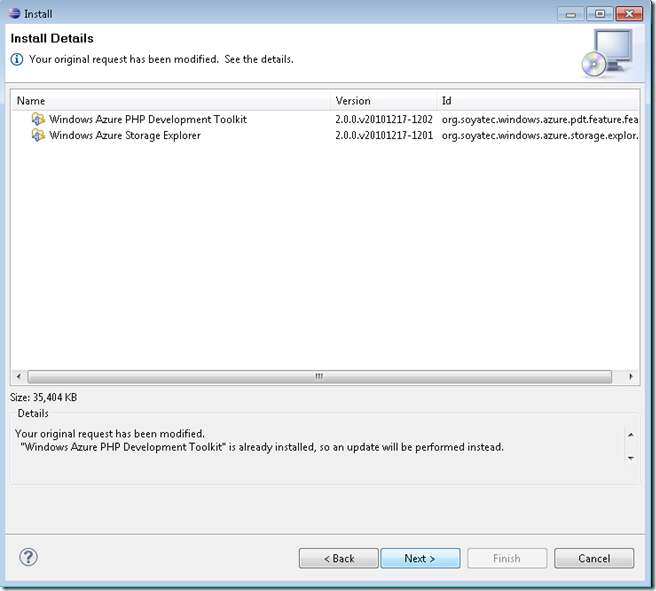
c. In the following dialog, you will be informed that only an update will be performed. Click Next.
d. As I mentioned above, the Windows Azure SDK for Java will be installed to support the Windows Azure Storage Explorer. Click Next.
e. Finally, accept the license terms and click Finish.
After you restart Eclipse you should be ready to build Windows Azure PHP projects with the latest version of the Eclipse plug-in and the Windows Azure SDK 1.3.
3. Create a Window Azure PHP Project
To create a Windows Azure PHP Project, follow the steps in the “Creating a Development Project” of this post (which I’ve updated to address the slightly changed UI in this release).
Now, write some code!
Thanks.
-Brian


