How to create a bootable USB flash drive to install Windows 8 Developer Preview
Like many folks, after watching the BUILD keynote this morning, I couldn't wait to get home and install Windows 8 Developer Preview on my laptop. The instructions for installing Windows 8 are simple enough. The only fly in the ointment is that installing Windows 8 requires a DVD to create an install package.
Of course, since I haven't used an optical drive in years, I didn't have a blank DVD and I didn't want to wait until the morning to buy some. But I did have a USB flash drive and so I decided to create a bootable USB flash drive to install Windows 8.
To create a bootable USB flash drive the easy way, you can download the Windows 7 USB/DVD download tool from the Microsoft Store. If you feel adventurous and are comfortable with command line tools, below are the step-by-step instructions for installing Windows 8 Developer Preview from a USB flash drive. But be warned, if you are not comfortable with command line tools, downloading the Windows 7 USB/DVD download tool is a much better option and will save you the effort of reading the remainder of this blog.
Instructions (using the command line)
At a high level, the steps are:
- Mount the Windows 8 Developer Preview ISO image on your computer
- Format a USB flash drive
- Copy the Windows 8 files onto the USB flash drive
- Make the USB flash drive bootable
- Install Windows 8 from the bootable flash drive
Step 1: Mount the Windows 8 Developer Preview ISO image on your computer
The first step is to mount the ISO image on your computer. Since Windows 7 doesn’t have the capability to mount an ISO image, you’ll have to use a 3rd party tool.
- Download the Windows Developer Preview ISO image (choose one of the three available)
- Using your favorite ISO image software, mount the ISO image on your computer
To check that the ISO image mounted successfully, you should be able to browse the Windows 8 files, as shown below.
Step 2: Format a USB flash drive
In case you’re wondering how big of a USB flash drive you need, an 8GB drive is perfect since it can accommodate any of the three available ISO images. Here are the steps to format a USB flash drive.
- Insert a USB flash drive into your computer
- Start a Command Prompt as an Administrator and type diskpart. This starts the Disk Partition tool which you need to use to format the flash drive. Once you see the DISKPART command prompt, type in the following commands
- DISKPART> list disk /* shows list of active disks */
- DISKPART> select disk # /* # is the number for your USB flash drive */
- DISKPART> clean /* deletes any existing partitions on the USB flash drive */
- DISKPART> create partition primary /* create a primary partition on the USB flash drive */
- DISKPART> select partition 1 /* select the newly created partition */
- DISKPART> active /* make the new partition active */
- DISKPART> format FS=NTFS /* format the USB drive with NTFS file system */
- DISKPART> assign /* assign a volume and drive letter to the USB drive */
- DISKPART> exit /* exit Disk Partition */
At this point, your USB flash drive should be showing up in Windows Explorer and have a drive letter assigned to it, e.g. F:\.
Step 3: Make the USB flash drive bootable
We just need to make the USB flash drive bootable before copying the files. To do this, you can use the Boot Sector Registration Tool (bootsect.exe) which is located in the boot folder of the Windows 8 ISO image.
- Start a Command Prompt as an Administrator and CHDIR into the boot folder of the Windows 8 ISO image, e.g. I:\boot where I :\ is the drive where the ISO image is mounted
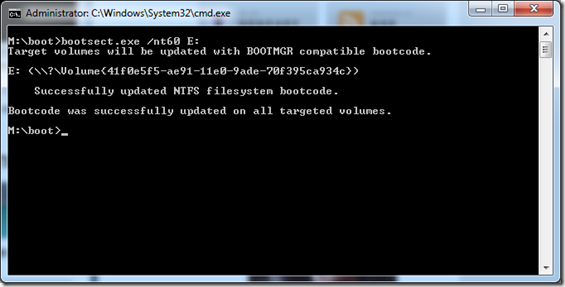
- Type bootsect /nt60 E: /* where E: is the drive assigned to the USB flash drive */
You should see the following confirmation after bootsec.exe completes:
Step 4: Copy the Windows 8 files onto the USB flash drive
From a command line, use XCOPY to copy the Windows 8 files to the USB flash drive . In the example below, I :\ is the drive where the ISO image is mounted. F:\ is the USB flash drive.
XCOPY I:\*.* F:\ /E /F /H
Step 5: Install Windows 8 from the bootable flash drive
Finally, follow these instructions to install Windows 8 on your computer.
- Remove your USB flash drive from your "source" computer and insert it into the "target" computer where you want to install Windows 8
- On the computer where you are installing Windows 8, press the power button to turn on the computer
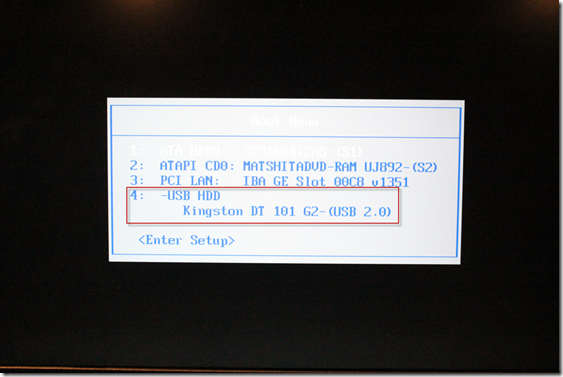
- During boot up, select the USB flash drive to boot from (if you don't see the USB flash drive as an option, you may have to adjust your BIOS settings)
- Follow the instructions to install Windows 8 Developer Preview
Here is a screen shot from the boot manager on my computer showing the USB flash drive as an option.
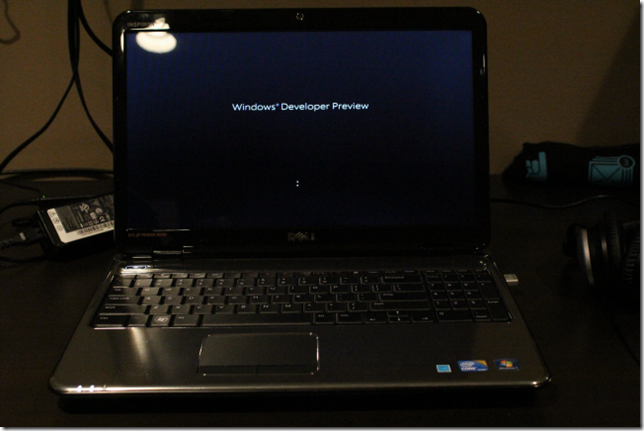
I installed Windows 8 Developer Preview on a vanilla Dell Inspiron 15R laptop which unfortunately doesn't have touch (or any other sensors for that matter).
The personalization steps in Windows 8 Developer Preview are really quick.
And here is the final screenshot of my shiny new Windows 8 installation!
Habib Heydarian.
Comments
Anonymous
September 13, 2011
Hi, Very good post. Easy to follow with the simple steps. Thanks. <a href="horloges" rel="nofollow" target="_new">http://www.sieraden-online.nl">horloges</a>Anonymous
September 13, 2011
The comment has been removedAnonymous
September 13, 2011
DISKPART> format /FS:NTFS /* format the USB drive with NTFS file system */ Should be format FS=NTFSAnonymous
September 14, 2011
@Kevin: I assume that you're trying to boot Windows 8 from a USB drive. If so, then the answer is no, you can't boot Windows 8 Developer Previews from a USB drive.Anonymous
September 14, 2011
@Brett: Thanks for catching the bug. It's now fixed.Anonymous
September 14, 2011
Hello.. sorry for my bad english in advance :) when i try create partition primary it gives me an error, not enaught space but the falsh drive is empy and formated in ntsf, so any ideas about that? ThanksAnonymous
September 14, 2011
@Habib Heydarian Nope its still not fixed yet quote : DISKPART> format /FS=NTFS /* format the USB drive with NTFS file system */ Nice post by the way.Anonymous
September 14, 2011
@Hedi: Please verify that you are selecting the correct disk # in step 2.4. If that doesn't resolve the issue, then verify that you can format the USB drive from Windows Explorer.Anonymous
September 14, 2011
@cateland: Thanks for the feedback. It's fixed now, I promise :)Anonymous
September 14, 2011
Didn't work for me. Maybe because I'm trying to use a microsd card adapter.Anonymous
September 14, 2011
@Bryan: If your BIOS doesn't recognize your mSD slot as a bootable adapter, then this is not going to work.Anonymous
September 14, 2011
Is it possible to make a bootable version on a hard drive connected externally via usb or does that require a SATA connected HD to get the full experience?Anonymous
September 14, 2011
@Michael: If your question is whether you can boot Windows 8 Developer Preview off of an external device, e.g. eSATA drive or USB drive, then the answer is no.Anonymous
September 15, 2011
Thanks, well writen guide. Copying the files as we speak.


