How to Create and Deploy PFX-Import Certificate Profiles in Configuration Manager
~ Karan Rustagi
Configuration Manager 2012 SP2 allows you to provision personal information exchange (.pfx) files to user’s devices. PFX files can be used to generate user-specific certificates to support encrypted data exchange. With Configuration Manager 2012 SP2, imported PFX certificates can be deployed to iOS, Android, and Windows 10 devices. These files can then be deployed to multiple devices to support user-based PKI communication.
This article discusses the process of deploying a PFX certificate profile to an IPAD running iOS 8.3.
22/11/2017 - Although, the steps mentioned below are still valid but a newer and better way now exists to deploy certs using PFX-Import method. Read about Import-CMClientCertificatePfx cmdlet here - https://docs.microsoft.com/en-us/powershell/module/configurationmanager/import-cmclientcertificatepfx?view=sccm-ps
Tip: Do not forget to include -ForSmimeEncryption switch if you want to use certificate for S/MIME
To know more about PFX deployment method in Intune standalone, please read the following blog post:
Want to push a Certificate to device but can’t use NDES? Read about PKCS #12 (PFX) deployment in Intune standalone
https://blogs.technet.microsoft.com/karanrustagi/?p=93
Step 1 – Export user certificate to a PFX file.
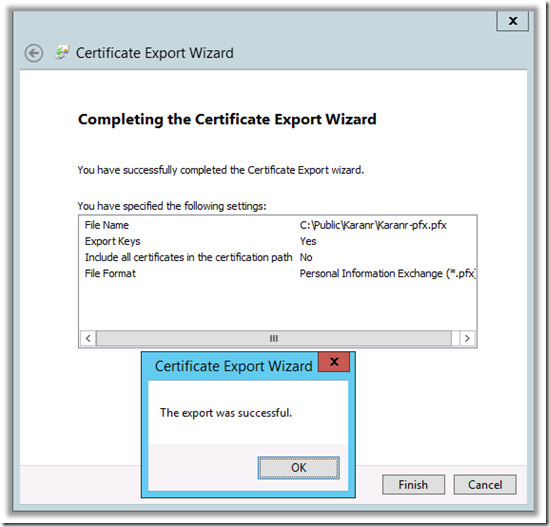
b. Export the private key.
c. Untick ‘Include all certificates in the certification path if possible’.
d. Type password. You will need this later in Step 5.
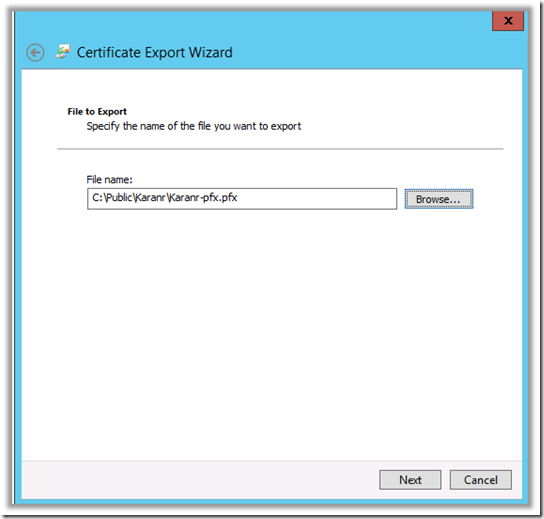
e. Specify the name of the file.
f. Click on finish to export the certificate.
Step 2 – Encode PFX file to Base64 blob using Certutil tool.
a. Open CMD and type following command:
Certutil –encode <InFile> <OutFile>
For Ex:
Certutil –encode C:\Public\Karanr\Karanr-pfx.pfx C:\Public\Karanr\base64blob.txt 
b. Open base64blob.txt and remove following lines leaving just the actual blob in it.
----- BEGIN CERTIFICATE -----
----- END CERTIFICATE -----
Save changes to file.
Step 3 – Create a Certificate Profile in Configuration manager console.
a. Open Configuration Console using following command line:
\AdminConsole\bin\Microsoft.ConfigurationManagement.exe sms:debugview 
b. Navigate to Assets and Compliance – Overview - Compliance Settings – Company Resource Access – Certificate Profiles.
c. Right click on Certificate Profiles to create a new profile.
d. Specify a Name and choose ‘Personal Information Exchange – PKCS #12 (PFX) Settings - Import’.
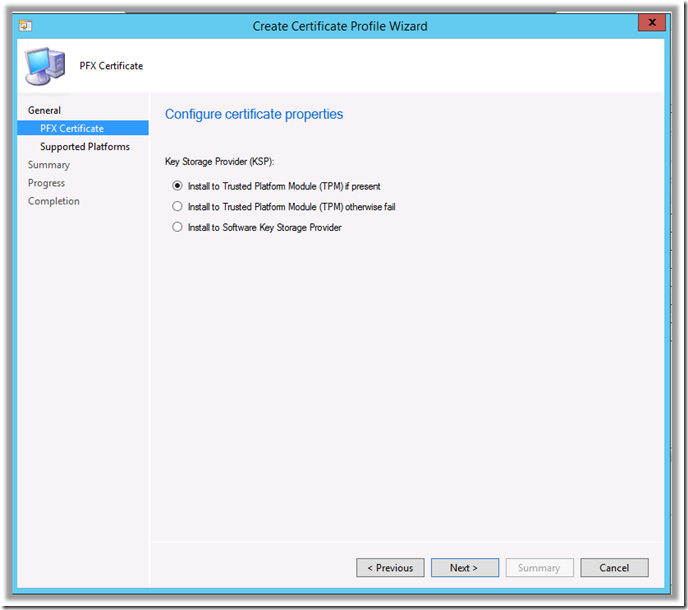
e. Select appropriate Key Storage Provider and click on Next.
f. Select Platform.
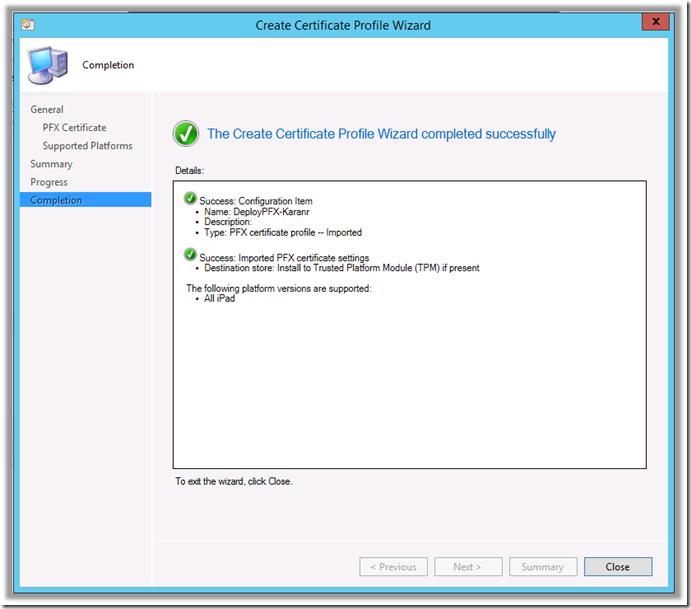
g. Click on Summary and complete the wizard.
h. Deploy newly created certificate profile to a collection.
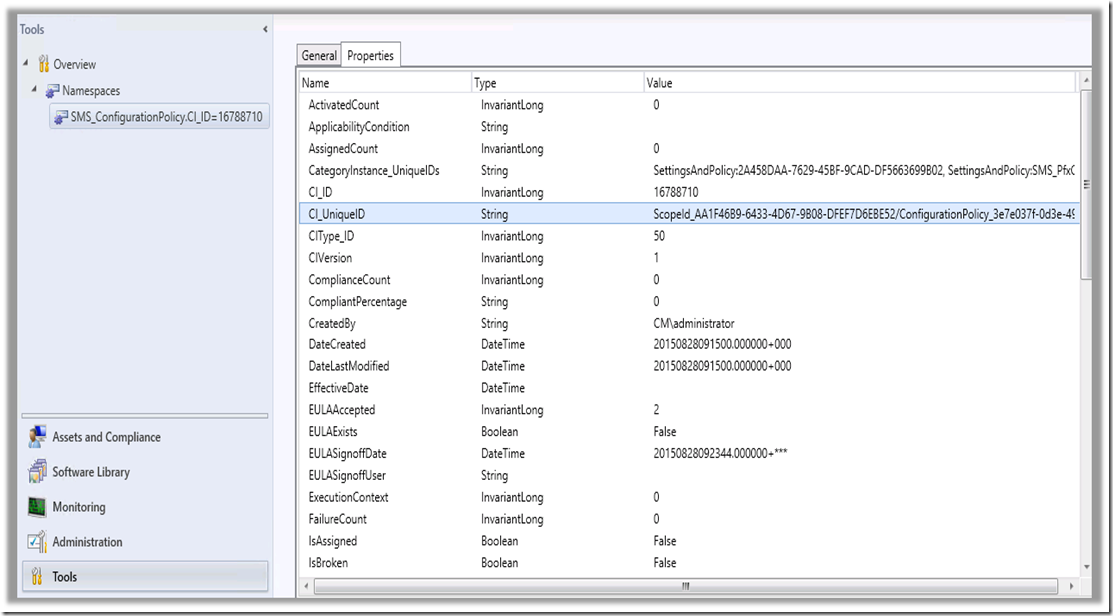
Step 4 – Note down the CI_UniqueID of newly created certificate profile.
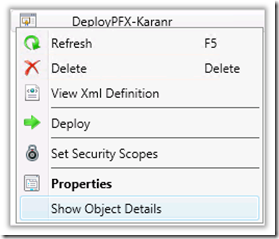
a. Right click on profile and click on ‘Show Object Details’ option.
b. You will now be re-directed to Tools workspace.
c. Copy CI_UniqueID property using Ctrl + C on your keyboard.
d. Create a new .txt file called CI_UniqueID.txt and paste the content using Ctrl + P.
e. Remove CI_UniqueID and String.
Before:
After:
f. Save the changes to CI_UniqueID.txt
Step 5 – Run the PowerShell script mentioned here to link base64 blob to certificate profile.
Sample Script:
$EncryptedPfxBlob = "<blob>"
$Password = "abc"
$ProfileName = "PFX_Profile_Name"
$UserName = "ComputerName\Administrator"
#New pfx
$WMIConnection = ([WMIClass]"\\<Name of the machine where provider is installed>\root\SMS\Site_MDM:SMS_ClientPfxCertificate")
$NewEntry = $WMIConnection.psbase.GetMethodParameters("ImportForUser")
$NewEntry.EncryptedPfxBlob = $EncryptedPfxBlob
$NewEntry.Password = $Password
$NewEntry.ProfileName = $ProfileName
$NewEntry.UserName = $UserName
$Resource = $WMIConnection.psbase.InvokeMethod("ImportForUser",$NewEntry,$null)
Note:
$EncryptedPfxBlob – This will be base64 blob from base64blob.txt we created earlier in Step 2.
$Password – Password for PFX file - Step 1.d
$ProfileName – CI_UniqueID of the profile from CI_UniqueID.txt we created earlier in Step 4.
$UserName – Unique User Name for user. You can get unique user name for a user from properties of the user record in console.
For Ex:
b. To check if script ran successfully, run following command. It should list the thumbprint of certificate you exported in Step 1.
Get-WmiObject root\SMS\Site_scs –Class sms_clientpfxcertificate | Select-Object Thumbprint
Note: Replace scs with your site code
c. Wait for DMP_Uploader to upload the policy to Intune.
Refresh policy on the device. Once done, go to Settings – General – Device Management – Management Profile – More Details. You should now see the certificate listed. iOS does not show the thumbprint so use Serial Number to verify the certificate.
Comments
- Anonymous
November 11, 2015
With Microsoft System Center 2012 Configuration Manager Service Pack 2 (ConfigMgr 2012 SP2) and System - Anonymous
July 29, 2016
Cheers!
