Event Hub adapter in BizTalk
Overview
Starting with BizTalk Server 2016 Feature Pack 2, you can send and receive messages between BizTalk Server and Azure Event Hubs.
Azure Event Hubs is a highly scalable data streaming platform, and can receive and process millions of events per second. What is Event Hubs? provides more details.
Prerequisites
- Create an Azure event hubs namespace and event hub
- Create an Azure blob storage account with a container
- Install Feature Pack 2 on your BizTalk Server
Your event hub is now created, and you have the connection strings you need to send and receive events.
Send messages to Event Hubs
In the BizTalk Server Administration console, right-click Send Ports, select New, and select Static One-way send port.
Create a Send Port provides some guidance.
Enter a Name. In Transport, set the Type to EventHub, and select Configure.
Configure the Azure Account properties:
Use this To do this Sign-in Sign into your Azure account Subscription Select the subscription that has your EventHubs namespace Resource Group Select your resource group that has your EventHubs namespace Configure the Endpoint properties:
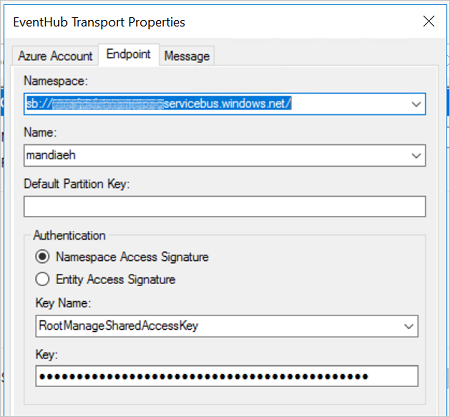
Use this To do this Namespace Select your Event Hubs namespace, which is something like sb://youreventhubnamespace.servicebus.windows.net/ Name Select the name of your Event Hub (which was created within your Event Hubs namespace) Default Partition Key Optional. Event Hubs programming guide provides more details on this key. Authentication Namespace Access Signature is the default, and automatically uses the RootManageSharedAccessKey that's created when you create an Event Hubs namespace.
Entity Access Signature is the SAS policy you can create at the Event Hub-level (not the Event Hubs namespace-level).
Event Hubs features overview explains more.When finished, your properties look similar to the following:

Optional. Configure the Message properties. The Namespace for User Defined Message Properties value represents the namespace for context properties mapped to Event Hubs message properties. This can be achieved using a property schema.
Select Ok to save your changes.
Test your send port
You can use a simple File receive port and location to send messages to your Azure Event Hub.
Create a receive port using the File adapter. Within your receive location, set the Receive folder to C:\Temp\In\, and set the file mask to *.xml.
In your Event Hub send port properties, set the Filters to
BTS.ReceivePortName == FileReceivePort.Paste the following into a text editor, and save the file as EventHubMessage.xml. This is your sample message.
<Data>
  <DataID>DataID_0</DataID>
  <DataDetails>DataDetails_0</DataDetails>
</Data>
Start the File receive location and the Event Hub send port.
Copy EventHubMessage.xml sample message into the receive folder (C:\Temp\In). The send port sends the XML file to the event hub.
Receive messages from Event Hubs
In the BizTalk Server Administration console, right-click Receive Ports, select New, and select One-Way receive port.
Create a receive port provides some guidance.
Enter a name, and select Receive Locations.
Select New, and Name the receive location. In Transport, select EventHub from the Type drop-down list, and then select Configure.
Configure the Azure Account properties:
Use this To do this Sign-in Sign into your Azure account Subscription Select the subscription that has your EventHubs namespace Resource Group Select your resource group that has your EventHubs namespace Configure the Endpoint properties:
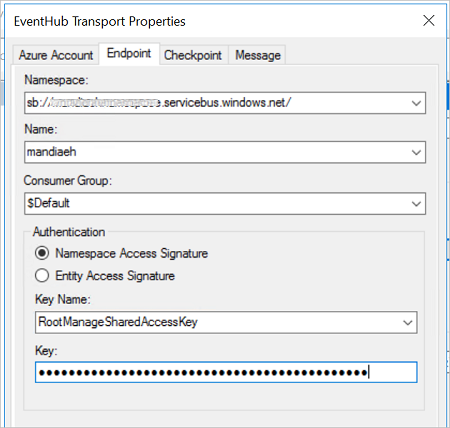
Use this To do this Namespace Select your Event Hubs namespace, which is something like sb://youreventhubnamespace.servicebus.windows.net/ Name Select the name of your Event Hub (which was created within your Event Hubs namespace) Consumer Group Select the Consumer group within your Event Hub. A default group is created automatically.
Event Hubs features overview provides more details.Authentication Namespace Access Signature is the default, and automatically uses the RootManageSharedAccessKey that's created when you create an Event Hubs namespace.
Entity Access Signature is the SAS policy you can create at the Event Hub-level (not the Event Hubs namespace-level).
Event Hubs features overview explains more.When finished, your properties look similar to the following:

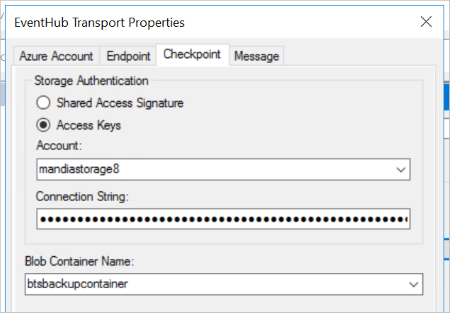
Configure the Checkpoint properties. This adapter uses an Azure blob storage account to reliably read events using a checkpoint, and resume from a restart.
Storage Authentication
Select an authentication method. Typically, it's recommended to use a Shared Access Signature. The following links are good resources to help you decide which is right for your scenario:
About Azure storage accounts
Using shared access signatures (SAS)When finished, your properties look similar to the following:

Configure the Message properties:
Use this To do this Namespace for User Defined Message Properties http://schemas.microsoft.com/BizTalk/EventHubAdapter/EventData/Useris the default schema, but you can enter another schema. This value represents a BizTalk message schema mapped to Event Hubs message properties.Promote user defined properties Optional. You can promote these properties if you prefer.
NOTE
The properties that need to be promoted should have a property schema deployed before receiving events.Select Ok to save your changes.
Test your receive settings
You can use a simple File send port to receive messages from your Azure Event Hub.
- Create a send port using the File adapter. Within your send port properties, set the Destination folder to C:\Temp\Out\, and set the and File name to %MessageID%.xml.
- In your File send port properties, set the Filters to
BTS.ReceivePortName == EHReceivePort. - Start the Event Hub receive location and the File send port.
- Look for messages in the destination folder (c:\temp\out).
Do more
Event Hubs is considered the "front door" to a lot of other Azure services, including Azure Data Lake, HD Insight, and more. It's designed to process a lot of messages, and process them fast. Read more about Event Hubs, and its features: