快速入門:搭配 Node.js 應用程式使用 Azure Cache for Redis
在本快速入門中,您會將 Azure Cache for Redis 合併到 Node.js 應用程式中,以存取可從 Azure 中的任何應用程式存取的安全專用快取。
必要條件
- Azure 訂用帳戶。 免費建立一個
- 已安裝 Node.js。 如需如何在 Windows 電腦上安裝 Node 和 npm 的資訊,請參閱在 Windows 上安裝 Node.js (部分機器翻譯)。
建立快取
若要建立快取,請登入 Azure 入口網站。 在入口網站功能表中,選取 [建立資源]。

在 [開始使用] 窗格中,於搜尋列中輸入「Azure Cache for Redis」。 在搜尋結果中,尋找「Azure Cache for Redis」,然後選取 [建立]。

在 [新增 Azure Cache for Redis] 窗格的 [基本] 索引標籤上,為您的快取設定下列設定:
設定 動作 描述 訂用帳戶 選取 Azure 訂閱。 用於建立新 Azure Cache for Redis 執行個體的訂用帳戶。 資源群組 選取資源群組,或選取 [新建] 並輸入新的資源群組名稱。 用來建立快取和其他資源的資源群組名稱。 將所有的應用程式資源放在一個資源群組中,您將可輕鬆地一併管理或刪除這些資源。 DNS 名稱 輸入唯一名稱。 快取名稱必須是 1 到 63 個字元的字串,且只能包含數字、字母和連字號。 名稱的開頭和結尾必須是數字或字母,且不可包含連續的連字號。 快取執行個體的主機名稱為 \<DNS name>.redis.cache.windows.net。地點 選取位置。 靠近使用您快取其他服務的 Azure 區域。 快取 SKU 選取 [SKU]。 快取的可用大小、效能和功能參數取決於 SKU。 如需詳細資訊,請參閱 Azure Cache for Redis 概觀。 快取大小 選取快取大小。 如需詳細資訊,請參閱 Azure Cache for Redis 概觀。 選取 [網路] 索引標籤,或選取 [下一步: 網路]。
在 [網路] 索引標籤上,選取要用於快取的連線方法。
選取 [進階] 索引標籤,或選取 [下一步: 進階]。
在 [進階] 窗格中,根據下列資訊驗證或選取驗證方法:
![顯示 [進階] 窗格,以及可供選取可用選項的螢幕擷取畫面。](../reusable-content/ce-skilling/azure/media/azure-cache-for-redis/cache-redis-version.png)
- 根據預設,對於新的基本、標準或進階快取,會啟用 Microsoft Entra 驗證並停用存取金鑰驗證。
- 對於基本或標準快取,您可以選擇非 TLS 連接埠的選取項目。
- 對於標準和進階快取,您可以選擇啟用可用性區域。 您無法在建立快取後停用可用性區域。
- 針對進階快取,設定適用於非 TLS 連接埠、叢集、受控識別和資料持續性的設定。
重要
為了獲得最佳安全性,建議您盡可能使用 Microsoft Entra ID 搭配受控識別來授權對快取的要求。 使用 Microsoft Entra ID 和受控識別進行授權,提供比共用存取金鑰授權更優異的安全性和易用性。 如需搭配快取使用受控識別的詳細資訊,請參閱使用 Microsoft Entra ID 進行快取驗證 (部分機器翻譯)。
(選用) 選取 [標籤] 索引標籤,或選取 [下一步: 標籤]。
(選用) 如果您想要分類快取資源,請在 [標籤] 索引標籤上輸入標籤名稱和值。
選取 [檢閱 + 建立] 按鈕。
在 [檢閱 + 建立] 索引標籤上,Azure 會自動驗證您的設定。
出現綠色的 [通過驗證] 訊息之後,請選取 [建立]。
新的快取部署會在幾分鐘內進行。 您可以在 Azure Cache for Redis 概觀窗格上監視部署進度。 當 [狀態] 顯示 [執行中] 時,表示快取已可供使用。
安裝 node-redis 用戶端程式庫
node-redis 程式庫是 Redis 的主要 Node.js 用戶端。 您可以使用 npm (英文) 和下列命令安裝用戶端:
npm install redis
建立 Node.js 應用程式以存取快取
建立 Node.js 應用程式,以使用 Microsoft Entra ID 或存取金鑰連線至 Azure Cache for Redis。 建議您使用 Microsoft Entra ID。
在快取上啟用 Microsoft Entra ID 驗證
針對現有的快取,請先檢查是否已啟用 Microsoft Entra 驗證。 若無,請完成下列步驟以啟用 Microsoft Entra 驗證。 建議您在應用程式中使用 Microsoft Entra ID 進行驗證。
在 Azure 入口網站中,選取 Azure Cache for Redis 執行個體,您想要在其中使用 Microsoft Entra 權杖型驗證。
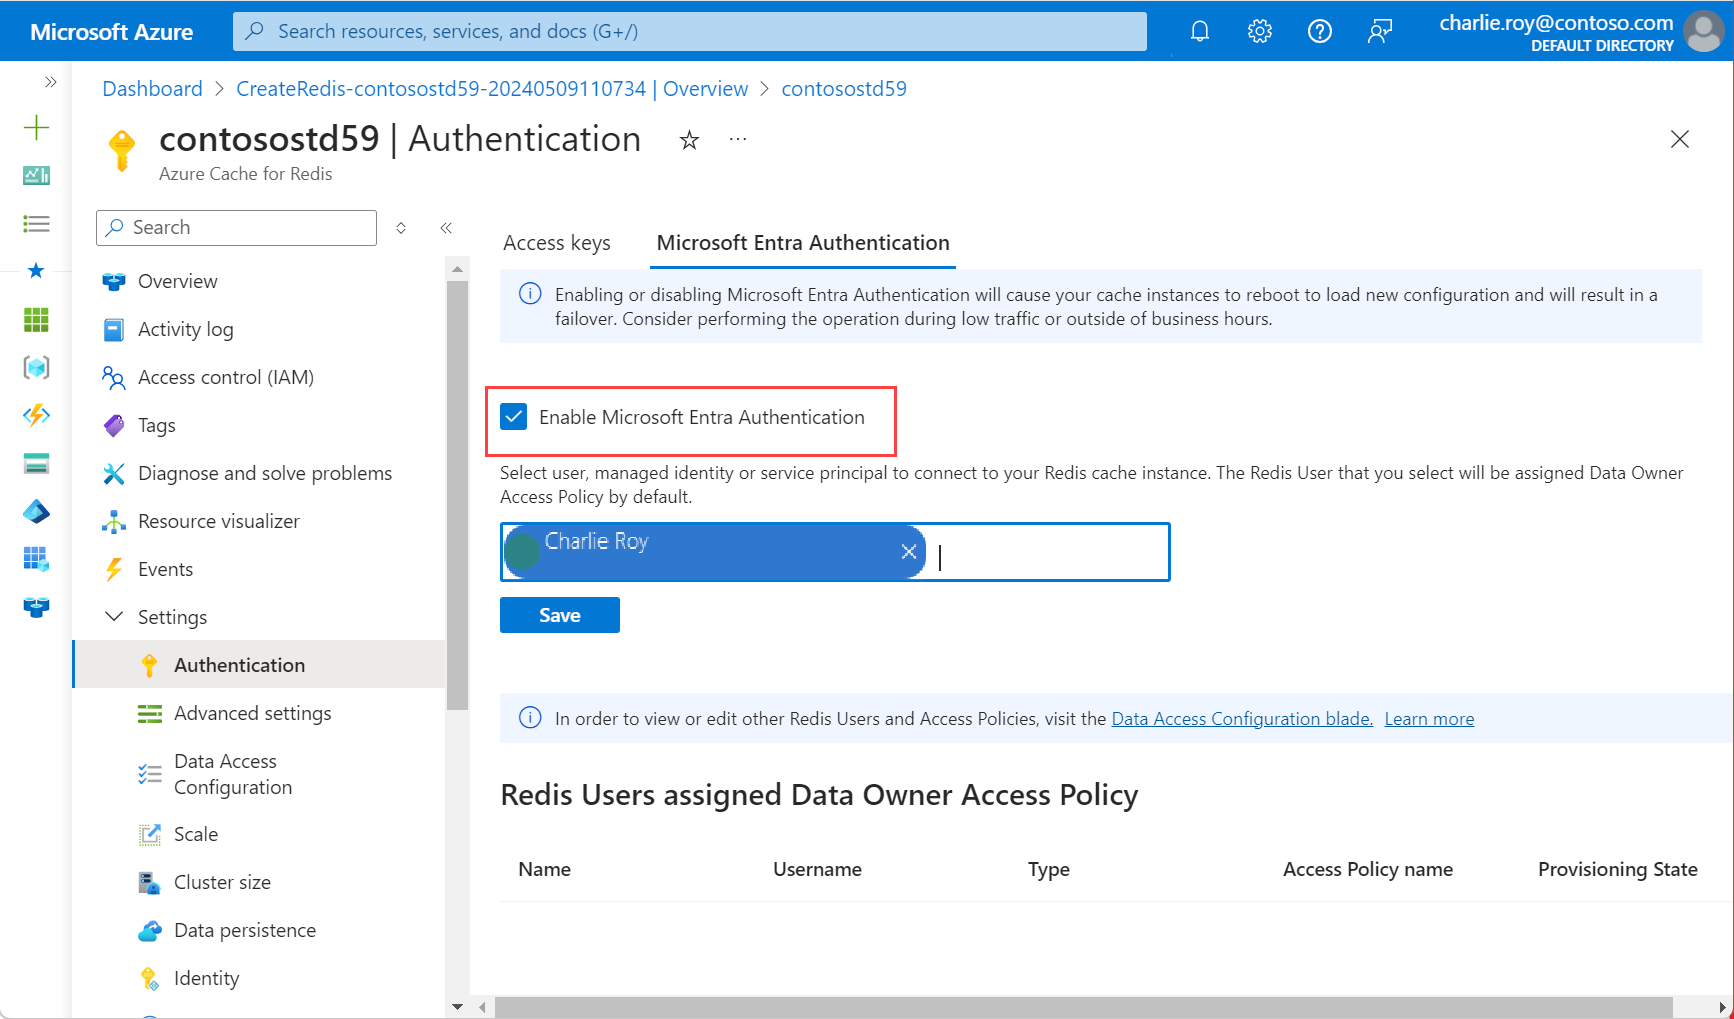
在服務功能表上的 [設定] 底下,選取 [驗證]。
在 [驗證] 窗格中,檢查是否已選取 [啟用 Microsoft Entra 驗證] 核取方塊。 如果是,您可以移至下一節。
否則,請選取 [啟用 Microsoft Entra 驗證] 核取方塊。 然後,輸入有效使用者的名稱。 選取 [儲存]。 您輸入的使用者名稱會自動指定資料擁有者存取原則。
您也可以輸入受控識別或服務主體以連線到快取。
在對話方塊中,系統會詢問您是否要更新設定,並告知您更新需要幾分鐘才能完成。 選取 [是]。
重要
啟用作業完成後,您的快取中的節點會重新啟動以載入新的設定。 建議您在標準維護視窗期間或在忙碌的上班時間之外完成這項作業。 程序最多可能需要 30 分鐘的時間。
如需搭配 Azure CLI 使用 Microsoft Entra ID 的詳細資訊,請參閱身分識別參考頁面 (部分機器翻譯)。
安裝適用於 JavaScript 的 Azure 身分識別用戶端程式庫
適用於 JavaScript 的 Azure 身分識別用戶端程式庫 (部分機器翻譯) 使用所需的 Microsoft 驗證程式庫 (MSAL) (部分機器翻譯) 來提供權杖驗證支援。 使用 npm 安裝程式庫:
npm install @azure/identity
使用 Microsoft Entra ID 建立 Node.js 應用程式
為您的主機名稱和服務主體識別碼新增環境變數。
服務主體識別碼是 Microsoft Entra ID 服務主體或使用者的物件識別碼。 在 Azure 入口網站中,此值顯示為使用者名稱。
set AZURE_CACHE_FOR_REDIS_HOST_NAME=contosoCache
set REDIS_SERVICE_PRINCIPAL_ID=XXXXXXXXXXXXXXXXXXXXXXXXXXXXXXXXXXXXXXXXXXXX
建立名為 redistest.js 的指令檔。
在檔案中新增下列 JavaScript 範例。 此程式碼示範如何使用快取主機名稱和金鑰環境變數來連線至 Azure Cache for Redis 執行個體。 此程式碼也會將字串值儲存到快取中,以及擷取其中的字串值。
PING和CLIENT LIST命令也會執行。 如需更多搭配使用 Redis 與 node-redis (英文) 用戶端的範例,請參閱 Node-Redis (英文)。const { createClient } = require("redis"); const { DefaultAzureCredential } = require("@azure/identity"); async function main() { // Construct a Token Credential from Identity library, e.g. ClientSecretCredential / ClientCertificateCredential / ManagedIdentityCredential, etc. const credential = new DefaultAzureCredential(); const redisScope = "https://redis.azure.com/.default"; // Fetch a Microsoft Entra token to be used for authentication. This token will be used as the password. let accessToken = await credential.getToken(redisScope); console.log("access Token", accessToken); // Create redis client and connect to the Azure Cache for Redis over the TLS port using the access token as password. const cacheConnection = createClient({ username: process.env.REDIS_SERVICE_PRINCIPAL_ID, password: accessToken.token, url: `redis://${process.env.AZURE_CACHE_FOR_REDIS_HOST_NAME}:6380`, pingInterval: 100000, socket: { tls: true, keepAlive: 0 }, }); cacheConnection.on("error", (err) => console.log("Redis Client Error", err)); await cacheConnection.connect(); // PING command console.log("\nCache command: PING"); console.log("Cache response : " + await cacheConnection.ping()); // SET console.log("\nCache command: SET Message"); console.log("Cache response : " + await cacheConnection.set("Message", "Hello! The cache is working from Node.js!")); // GET console.log("\nCache command: GET Message"); console.log("Cache response : " + await cacheConnection.get("Message")); // Client list, useful to see if connection list is growing... console.log("\nCache command: CLIENT LIST"); console.log("Cache response : " + await cacheConnection.sendCommand(["CLIENT", "LIST"])); cacheConnection.disconnect(); return "Done" } main().then((result) => console.log(result)).catch(ex => console.log(ex));使用 Node.js 執行指令碼:
node redistest.js確認您的程式碼輸出是否與此範例相似:
Cache command: PING
Cache response : PONG

Cache command: GET Message
Cache response : Hello! The cache is working from Node.js!

Cache command: SET Message
Cache response : OK

Cache command: GET Message
Cache response : Hello! The cache is working from Node.js!

Cache command: CLIENT LIST
Cache response : id=10017364 addr=76.22.73.183:59380 fd=221 name= age=1 idle=0 flags=N db=0 sub=0 psub=0 multi=-1 qbuf=26 qbuf-free=32742 argv-mem=10 obl=0 oll=0 omem=0 tot-mem=61466 ow=0 owmem=0 events=r cmd=client user=default numops=6

Done
建立具有重新驗證功能的範例 JavaScript 應用程式
Microsoft Entra ID 存取權杖的使用期限約為 75 分鐘。 若要維護快取的連線,則您必須重新整理權杖。
此範例示範如何使用 JavaScript 來重新整理權杖:
建立名為 redistestreauth.js 的指令檔。
將下列範例 JavaScript 新增至檔案:
 const { createClient } = require("redis");
 const { DefaultAzureCredential } = require("@azure/identity");

 async function returnPassword(credential) {
     const redisScope = "https://redis.azure.com/.default";

     // Fetch a Microsoft Entra token to be used for authentication. This token will be used as the password.
     return credential.getToken(redisScope);
 }

 async function main() {
   // Construct a Token Credential from Identity library, e.g. ClientSecretCredential / ClientCertificateCredential / ManagedIdentityCredential, etc.
   const credential = new DefaultAzureCredential();
   let accessToken = await returnPassword(credential);

   // Create redis client and connect to the Azure Cache for Redis over the TLS port using the access token as password.
   let cacheConnection = createClient({
     username: process.env.REDIS_SERVICE_PRINCIPAL_ID,
     password: accessToken.token,
     url: `redis://${process.env.AZURE_CACHE_FOR_REDIS_HOST_NAME}:6380`,
     pingInterval: 100000,
     socket: {
       tls: true,
       keepAlive: 0
     },
   });

   cacheConnection.on("error", (err) => console.log("Redis Client Error", err));
   await cacheConnection.connect();

   for (let i = 0; i < 3; i++) {
     try {
         // PING command
         console.log("\nCache command: PING");
         console.log("Cache response : " + await cacheConnection.ping());

         // SET
         console.log("\nCache command: SET Message");
         console.log("Cache response : " + await cacheConnection.set("Message",
             "Hello! The cache is working from Node.js!"));

         // GET
         console.log("\nCache command: GET Message");
         console.log("Cache response : " + await cacheConnection.get("Message"));

         // Client list, useful to see if connection list is growing...
         console.log("\nCache command: CLIENT LIST");
         console.log("Cache response : " + await cacheConnection.sendCommand(["CLIENT", "LIST"]));
       break;
     } catch (e) {
       console.log("error during redis get", e.toString());
       if ((accessToken.expiresOnTimestamp <= Date.now())|| (redis.status === "end" || "close") ) {
         await redis.disconnect();
         accessToken = await returnPassword(credential);
         cacheConnection = createClient({
           username: process.env.REDIS_SERVICE_PRINCIPAL_ID,
           password: accessToken.token,
           url: `redis://${process.env.AZURE_CACHE_FOR_REDIS_HOST_NAME}:6380`,
           pingInterval: 100000,
           socket: {
             tls: true,
             keepAlive: 0
           },
         });
       }
     }
   }
 }

 main().then((result) => console.log(result)).catch(ex => console.log(ex));
使用 Node.js 執行指令碼:
node redistestreauth.js檢查是否有類似此範例的輸出:
 Cache command: PING
 Cache response : PONG

 Cache command: GET Message
 Cache response : Hello! The cache is working from Node.js!

 Cache command: SET Message
 Cache response : OK

 Cache command: GET Message
 Cache response : Hello! The cache is working from Node.js!

 Cache command: CLIENT LIST
 Cache response : id=10017364 addr=76.22.73.183:59380 fd=221 name= age=1 idle=0 flags=N db=0 sub=0 psub=0 multi=-1 qbuf=26 qbuf-free=32742 argv-mem=10 obl=0 oll=0 omem=0 tot-mem=61466 ow=0 owmem=0 events=r cmd=client user=default numops=6
注意
如需如何使用 Microsoft Entra ID 透過 node-redis 程式庫驗證 Redis 的更多範例,請參閱 node-redis GitHub 程式庫 (英文)。
清除資源
如果您想要繼續使用在本文中建立的資源,請保留該資源群組。
否則,若要避免與資源相關的費用,如果您完成使用資源,可以刪除您所建立的 Azure 資源群組。
警告
刪除資源群組是無法回復的動作。 當您刪除資源群組時,資源群組中的所有資源都將永久刪除。 請確定您不會不小心刪除錯誤的資源群組或資源。 如果您是在具有想要保留資源的現有資源群組內建立資源,則可以個別刪除每個資源,而不必刪除整個資源群組。
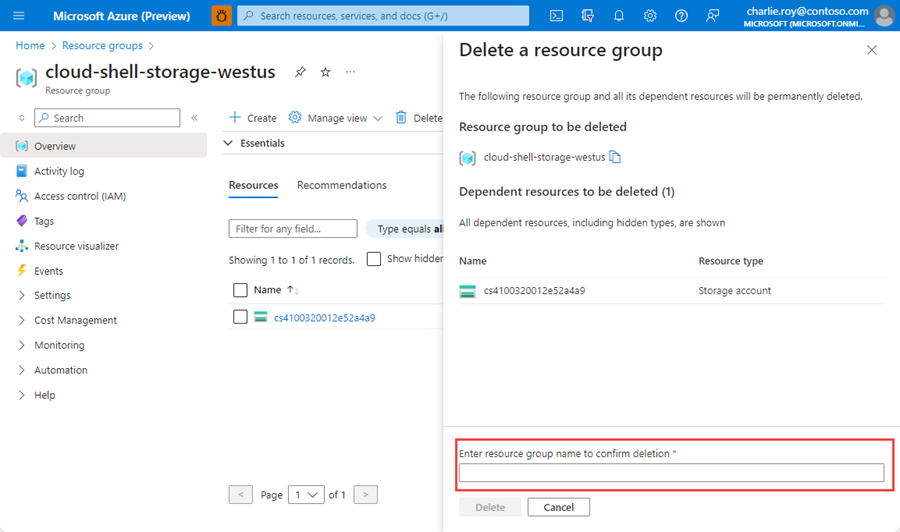
刪除資源群組
登入 Azure 入口網站,然後選取 [資源群組]。
選取要刪除的資源群組。
如果有許多資源群組,請在 [篩選任何欄位] 中,輸入您建立以完成本文的資源群組名稱。 在搜尋結果清單中,選取資源群組。
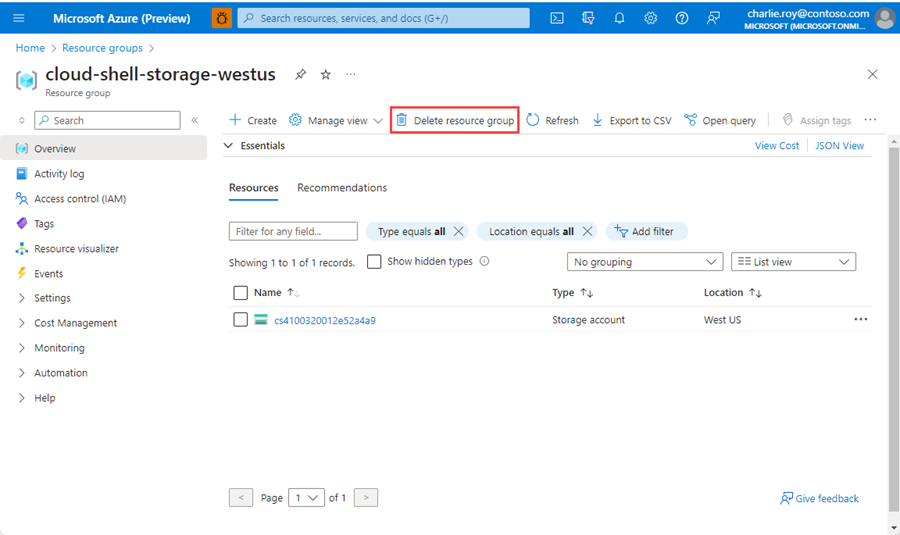
選取 [刪除資源群組]。
在 [刪除資源群組] 窗格中,輸入要確認的資源群組名稱,然後選取 [刪除]。
不久後,系統便會刪除該資源群組及其所有的資源。
取得範例程式碼
在 GitHub 上取得 Node.js 快速入門範例 (英文)。