快速入門:使用 UI 程式庫新增聊天
開始使用 Azure 通訊服務 UI 程式庫,將通訊體驗快速整合至您的應用程式中。 在本快速入門中,了解如何將 UI 程式庫聊天複合整合至應用程式中,並為您的應用程式使用者設定體驗。
Azure 通訊服務 UI 連結庫會在您的應用程式中轉譯完整的聊天體驗。 它會負責連線到 Azure 通訊服務 聊天服務,並自動更新參與者的存在。 身為開發人員,您必須決定應用程式用戶體驗中您希望聊天體驗在何處開始,並視需要只建立 Azure 通訊服務 資源。
注意
如需 Web UI 連結庫的詳細檔和快速入門,請參閱 Web UI 連結庫劇本。
必要條件
- 具有有效訂用帳戶的 Azure 帳戶。 免費建立帳戶。
- 已部署的 Azure 通訊服務資源。 建立 Azure 通訊服務資源。
- Azure 通訊服務 令牌。 請參閱此範例。
存取這些快速入門
存取這些劇本
重要
此 Azure 通訊服務功能目前處於預覽狀態。
提供的預覽 API 和 SDK 並無服務等級協定。 建議您不要將其用於生產工作負載。 部分功能可能不受支援,或是在功能上有所限制。
如需詳細資訊,請參閱 Microsoft Azure 預覽版增補使用規定。
在適用於 Android 的開放原始碼 Azure 通訊服務 UI 連結庫中,取得本快速入門的 Android 應用程式範例。
必要條件
- Azure 帳戶和作用中的 Azure 訂用帳戶。 免費建立帳戶。
- 執行 Android Studio 的 OS。
- 已部署的 Azure 通訊服務資源。 請注意端點 URL。
- Azure 通訊服務存取權杖和使用者識別碼。
- Azure 通訊服務與上一個步驟中新增的使用者聊天對話。
設定專案
完成下列各節以設定快速入門專案。
建立新的 Android 專案
在 Android Studio 中,建立新的專案。
在 [檔案] 功能表上,選取 [新增>專案]。
在 [ 新增專案] 上,選取 [ 空白活動] 項目範本。
![螢幕擷取畫面:顯示 Android Studio 中已選取 [空白活動] 的 [新增專案] 對話框。](media/composite-android-new-project.png)
選取 [下一步]。
在 [空白活動] 上,將專案命名為 UILibraryQuickStart。 針對語言,選取 [Java/Kotlin]。 針對最低 SDK,選取 [API 23: Android 6.0 (Marshmallow)] 或更新版本。
選取 [完成]。
![螢幕擷取畫面:顯示新專案選項和已選取的 [完成] 按鈕。](media/chat-android-new-project.png)
安裝套件
完成下列各節以安裝必要的應用程式套件。
新增相依性
在您的應用程式層級 UILibraryQuickStart/app/build.gradle 檔案中 (在應用程式資料夾中),新增下列相依性:
dependencies {
    ...
    implementation 'com.azure.android:azure-communication-ui-chat:+'
    ...
}
新增 Maven 存放庫
整合連結庫需要 Azure 套件存放庫。
若要新增存放庫:
在您的專案 Gradle 指令碼中,確保已新增下列存放庫。 針對 Android Studio (2020.*),
repositories位於settings.gradle的dependencyResolutionManagement(Gradle version 6.8 or greater)下。 針對舊版 Android Studio (4.*),repositories位於專案層級build.gradle的allprojects{}下。// dependencyResolutionManagement repositories { ... maven { url "https://pkgs.dev.azure.com/MicrosoftDeviceSDK/DuoSDK-Public/_packaging/Duo-SDK-Feed/maven/v1" } ... }將專案與 Gradle 檔案同步。 若要同步專案,請在 [檔案] 功能表上,選取 [與 Gradle 檔案同步專案]。
將按鈕新增至 activity_main.xml
在 app/src/main/res/layout/activity_main.xml 配置檔案中,新增下列程式碼以建立按鈕來啟動複合:
<?xml version="1.0" encoding="utf-8"?>
<androidx.constraintlayout.widget.ConstraintLayout xmlns:android="http://schemas.android.com/apk/res/android"
    xmlns:app="http://schemas.android.com/apk/res-auto"
    xmlns:tools="http://schemas.android.com/tools"
    android:layout_width="match_parent"
    android:layout_height="match_parent"
    tools:context=".MainActivity">

    <Button
        android:id="@+id/startButton"
        android:layout_width="wrap_content"
        android:layout_height="wrap_content"
        android:text="Launch"
        app:layout_constraintBottom_toBottomOf="parent"
        app:layout_constraintLeft_toLeftOf="parent"
        app:layout_constraintRight_toRightOf="parent"
        app:layout_constraintTop_toTopOf="parent" />

</androidx.constraintlayout.widget.ConstraintLayout>
初始化複合
若要初始化複合:
移至
MainActivity。新增下列程式碼,以初始化通話的複合元件。 針對 、、、 和取代屬性 (
kotlin) 或函式 (java) 的endpoint字串值。ThreadIdaccessTokendisplayNameacsIdentity將endpoint取代為 Azure 通訊服務所提供資源的 URL。 將與accessToken取代acsIdentity為您建立存取權杖時 Azure 通訊服務所提供的值,並使用相關的displayName。 將ThreadId取代為您建立對話時傳回的值。 在您嘗試執行快速入門範例之前,請先透過 REST API 呼叫或 az 命令行介面用戶端將使用者新增至線程。 否則,客戶端會拒絕加入線程的存取權。
package com.example.uilibraryquickstart

import android.os.Bundle
import android.view.View
import android.view.ViewGroup
import android.widget.Button
import androidx.appcompat.app.AlertDialog
import androidx.appcompat.app.AppCompatActivity
import com.azure.android.communication.common.CommunicationTokenCredential
import com.azure.android.communication.common.CommunicationTokenRefreshOptions
import com.azure.android.communication.common.CommunicationUserIdentifier
import com.azure.android.communication.ui.chat.ChatAdapter
import com.azure.android.communication.ui.chat.ChatAdapterBuilder
import com.azure.android.communication.ui.chat.presentation.ChatThreadView

class MainActivity : AppCompatActivity() {
    private lateinit var chatAdapter: ChatAdapter

    override fun onCreate(savedInstanceState: Bundle?) {
        super.onCreate(savedInstanceState)
        setContentView(R.layout.activity_main)
        val startButton = findViewById<Button>(R.id.startButton)
        startButton.setOnClickListener { l: View? ->
            val communicationTokenRefreshOptions =
                CommunicationTokenRefreshOptions(
                    { accessToken }, true
                )
            val communicationTokenCredential =
                CommunicationTokenCredential(communicationTokenRefreshOptions)
            chatAdapter = ChatAdapterBuilder()
                .endpoint(endpoint)
                .credential(communicationTokenCredential)
                .identity(CommunicationUserIdentifier(acsIdentity))
                .displayName(displayName)
                .threadId(threadId)
                .build()
            try {
                chatAdapter.connect(this@MainActivity).get()
                val chatView: View = ChatThreadView(this@MainActivity, chatAdapter)
                addContentView(
                    chatView,
                    ViewGroup.LayoutParams(
                        ViewGroup.LayoutParams.MATCH_PARENT,
                        ViewGroup.LayoutParams.MATCH_PARENT
                    )
                )
            } catch (e: Exception) {
                var messageCause: String? = "Unknown error"
                if (e.cause != null && e.cause!!.message != null) {
                    messageCause = e.cause!!.message
                }
                showAlert(messageCause)
            }
        }
    }

    /**
     *
     * @return String endpoint URL from Azure Communication Services Admin UI, "https://example.domain.com/"
     */
    private val endpoint: String?
        get() = "https://example.domain.com/"

    /**
     *
     * @return String identity of the user joining the chat
     * Looks like "8:acs:a6aada1f-0b1e-47ac-866a-91aae00a1c01_00000015-45ee-bad7-0ea8-923e0d008a89"
     */
    private val acsIdentity: String?
        get() = ""

    /**
     *
     * @return String display name of the user joining the chat
     */
    private val displayName: String?
        get() = ""

    /**
     *
     * @return String secure Azure Communication Services access token for the current user
     */
    private val accessToken: String?
        get() = ""

    /**
     *
     * @return String id of Azure Communication Services chat thread to join
     * Looks like "19:AVNnEll25N4KoNtKolnUAhAMu8ntI_Ra03saj0Za0r01@thread.v2"
     */
    private val threadId: String?
        get() = ""

    fun showAlert(message: String?) {
        runOnUiThread {
            AlertDialog.Builder(this@MainActivity)
                .setMessage(message)
                .setTitle("Alert")
                .setPositiveButton(
                    "OK"
                ) { _, i -> }
                .show()
        }
    }
}
執行程式碼
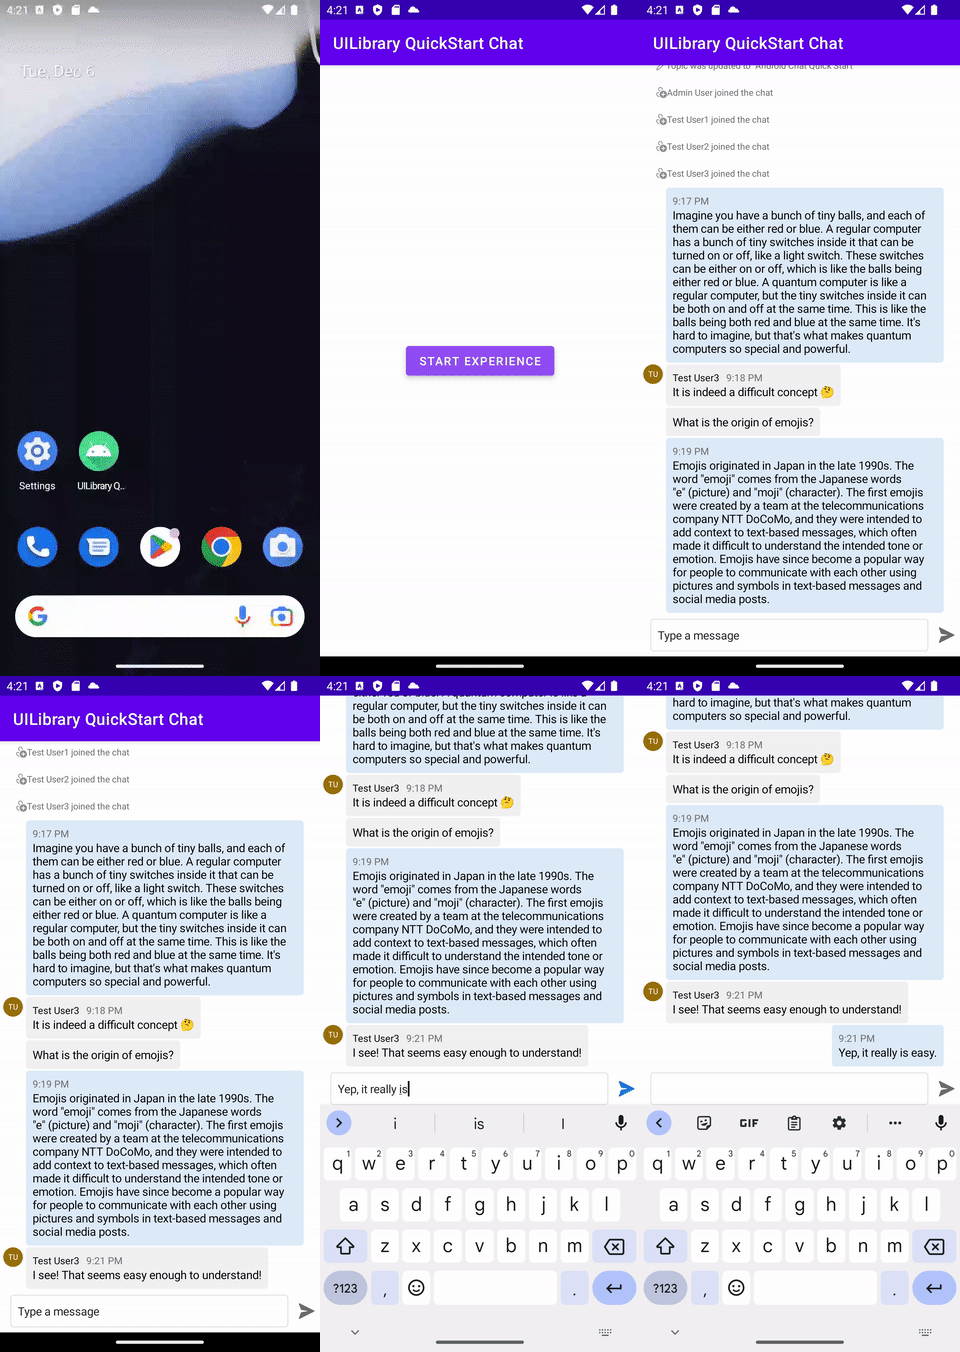
在 Android Studio 中,建置並啟動應用程式。
- 選取 [開始體驗]。
- 聊天用戶端會加入聊天對話,您可以開始輸入和傳送訊息。
- 如果客戶端無法加入線程,而且您看到
chatJoin失敗的錯誤,請確認使用者的存取令牌有效,且使用者已透過 REST API 呼叫或使用az命令行介面新增至聊天對話。

重要
此 Azure 通訊服務功能目前處於預覽狀態。
提供的預覽 API 和 SDK 並無服務等級協定。 建議您不要將其用於生產工作負載。 部分功能可能不受支援,或是在功能上有所限制。
如需詳細資訊,請參閱 Microsoft Azure 預覽版增補使用規定。
在適用於 iOS 的開放原始碼 Azure 通訊服務 UI 連結庫中,取得本快速入門的範例 iOS 應用程式。
必要條件
- Azure 帳戶和作用中的 Azure 訂用帳戶。 免費建立帳戶。
- 執行 Xcode 13 或更新版本的 Mac,以及安裝在金鑰鏈中的有效開發人員憑證。 也必須安裝 CocoaPods 以擷取相依性。
- 已部署的 Azure 通訊服務資源。 請注意端點 URL。
- Azure 通訊服務存取權杖和使用者識別碼。
- Azure 通訊服務 聊天對話。 將您在上一個步驟中建立的使用者新增至此聊天對話。
設定專案
完成下列各節以設定快速入門專案。
建立新的 Xcode 專案
在 Xcode 中,建立新的專案。
在 [檔案] 功能表上選取 [新增]>[專案]。
在 [選擇新專案的範本] 上 ,選取 iOS 平臺,然後選取 應用程式 應用程式範本。 快速入門會使用 UIKit 分鏡腳本。
![螢幕擷取畫面:顯示 [Xcode 新增專案] 對話框,其中包含已選取的 iOS 和應用程式範本。](media/xcode-new-project-template-select.png)
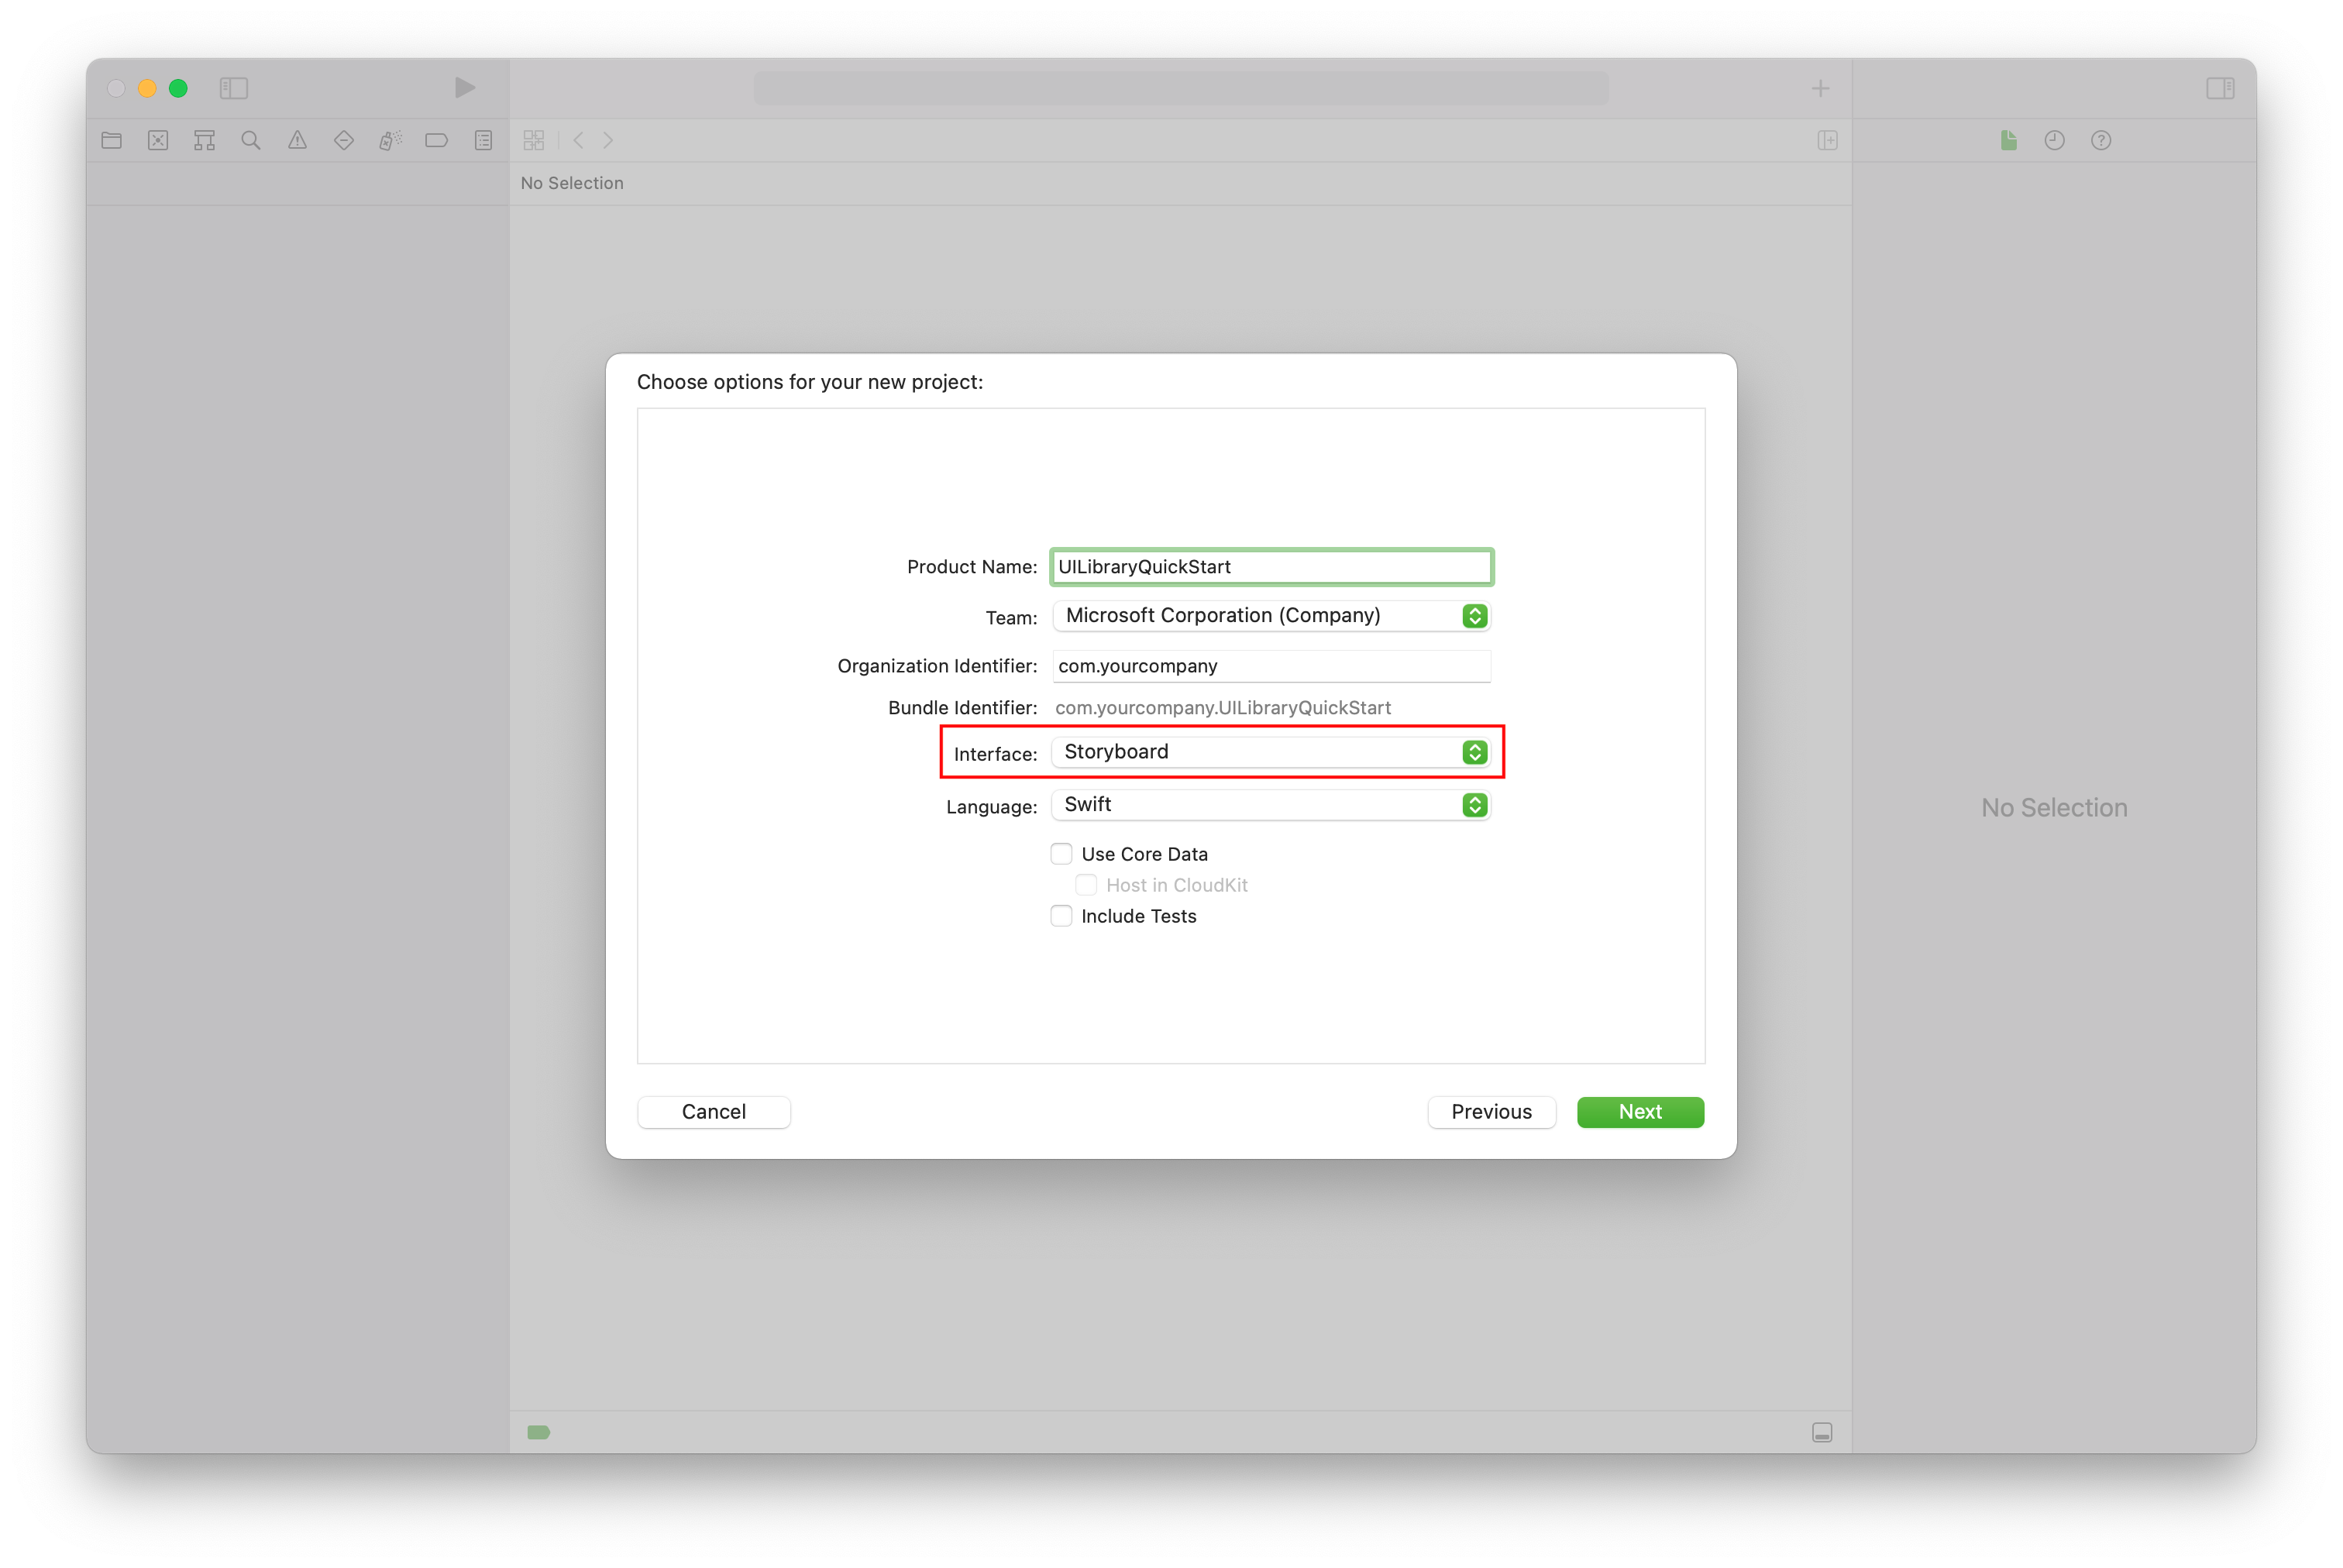
在 [選擇新項目的選項] 上,針對產品名稱輸入 UILibraryQuickStart。 針對介面,選取 [分鏡腳本]。 快速入門不會建立測試,因此您可以清除 [包含測試] 核取方塊。

安裝封裝及其相依性
(選擇性) 針對使用 M1 的 MacBook,請在 Xcode 中安裝和啟用 Rosetta。
在您的專案根目錄中,執行
pod init以建立 Podfile。 如果您遇到錯誤,請將 CocoaPods 更新為目前的版本。將下列程式碼新增至您的 Podfile 中。 將
UILibraryQuickStart取代為您的專案名稱。platform :ios, '14.0' target 'UILibraryQuickStart' do use_frameworks! pod 'AzureCommunicationUIChat', '1.0.0-beta.4' end執行
pod install --repo-update。在 Xcode 中,開啟產生的 xcworkspace 檔案。
關閉 Bitcode
在 Xcode 專案中,於 [建置設定] 底下,將 [啟用 Bitcode] 選項設定為 [否]。 若要尋找設定,請將篩選從 [基本] 變更為 [全部],或使用搜尋列。
![螢幕擷取畫面:顯示 [建置設定] 選項以關閉 Bitcode。](media/xcode-bitcode-option.png)
初始化複合
若要初始化複合:
移至
ViewController。新增下列程式碼,以初始化聊天的複合元件。 將
<USER_ID>取代為使用者識別碼。 將<USER_ACCESS_TOKEN>取代為您的存取權杖。 將<ENDPOINT_URL>取代為您的端點 URL。 將<THREAD_ID>取代為您的聊天對話識別碼。 以您的名稱取代<DISPLAY_NAME>。 (<DISPLAY_NAME>的字串長度限制為 256 個字元)。import UIKit import AzureCommunicationCommon import AzureCommunicationUIChat class ViewController: UIViewController { var chatAdapter: ChatAdapter? override func viewDidLoad() { super.viewDidLoad() let button = UIButton() button.contentEdgeInsets = UIEdgeInsets(top: 10.0, left: 20.0, bottom: 10.0, right: 20.0) button.layer.cornerRadius = 10 button.backgroundColor = .systemBlue button.setTitle("Start Experience", for: .normal) button.addTarget(self, action: #selector(startChatComposite), for: .touchUpInside) button.translatesAutoresizingMaskIntoConstraints = false self.view.addSubview(button) button.widthAnchor.constraint(equalToConstant: 200).isActive = true button.heightAnchor.constraint(equalToConstant: 50).isActive = true button.centerXAnchor.constraint(equalTo: view.centerXAnchor).isActive = true button.centerYAnchor.constraint(equalTo: view.centerYAnchor).isActive = true } @objc private func startChatComposite() { let communicationIdentifier = CommunicationUserIdentifier("<USER_ID>") guard let communicationTokenCredential = try? CommunicationTokenCredential( token: "<USER_ACCESS_TOKEN>") else { return } self.chatAdapter = ChatAdapter( endpoint: "<ENDPOINT_URL>", identifier: communicationIdentifier, credential: communicationTokenCredential, threadId: "<THREAD_ID>", displayName: "<DISPLAY_NAME>") Task { @MainActor in guard let chatAdapter = self.chatAdapter else { return } try await chatAdapter.connect() let chatCompositeViewController = ChatCompositeViewController( with: chatAdapter) let closeItem = UIBarButtonItem( barButtonSystemItem: .close, target: nil, action: #selector(self.onBackBtnPressed)) chatCompositeViewController.title = "Chat" chatCompositeViewController.navigationItem.leftBarButtonItem = closeItem let navController = UINavigationController(rootViewController: chatCompositeViewController) navController.modalPresentationStyle = .fullScreen self.present(navController, animated: true, completion: nil) } } @objc func onBackBtnPressed() { self.dismiss(animated: true, completion: nil) Task { @MainActor in self.chatAdapter?.disconnect(completionHandler: { [weak self] result in switch result { case .success: self?.chatAdapter = nil case .failure(let error): print("disconnect error \(error)") } }) } } }如果您選擇將聊天檢視放在小於螢幕大小的框架中,建議最小寬度為 250,且高度下限為 300。
執行程式碼
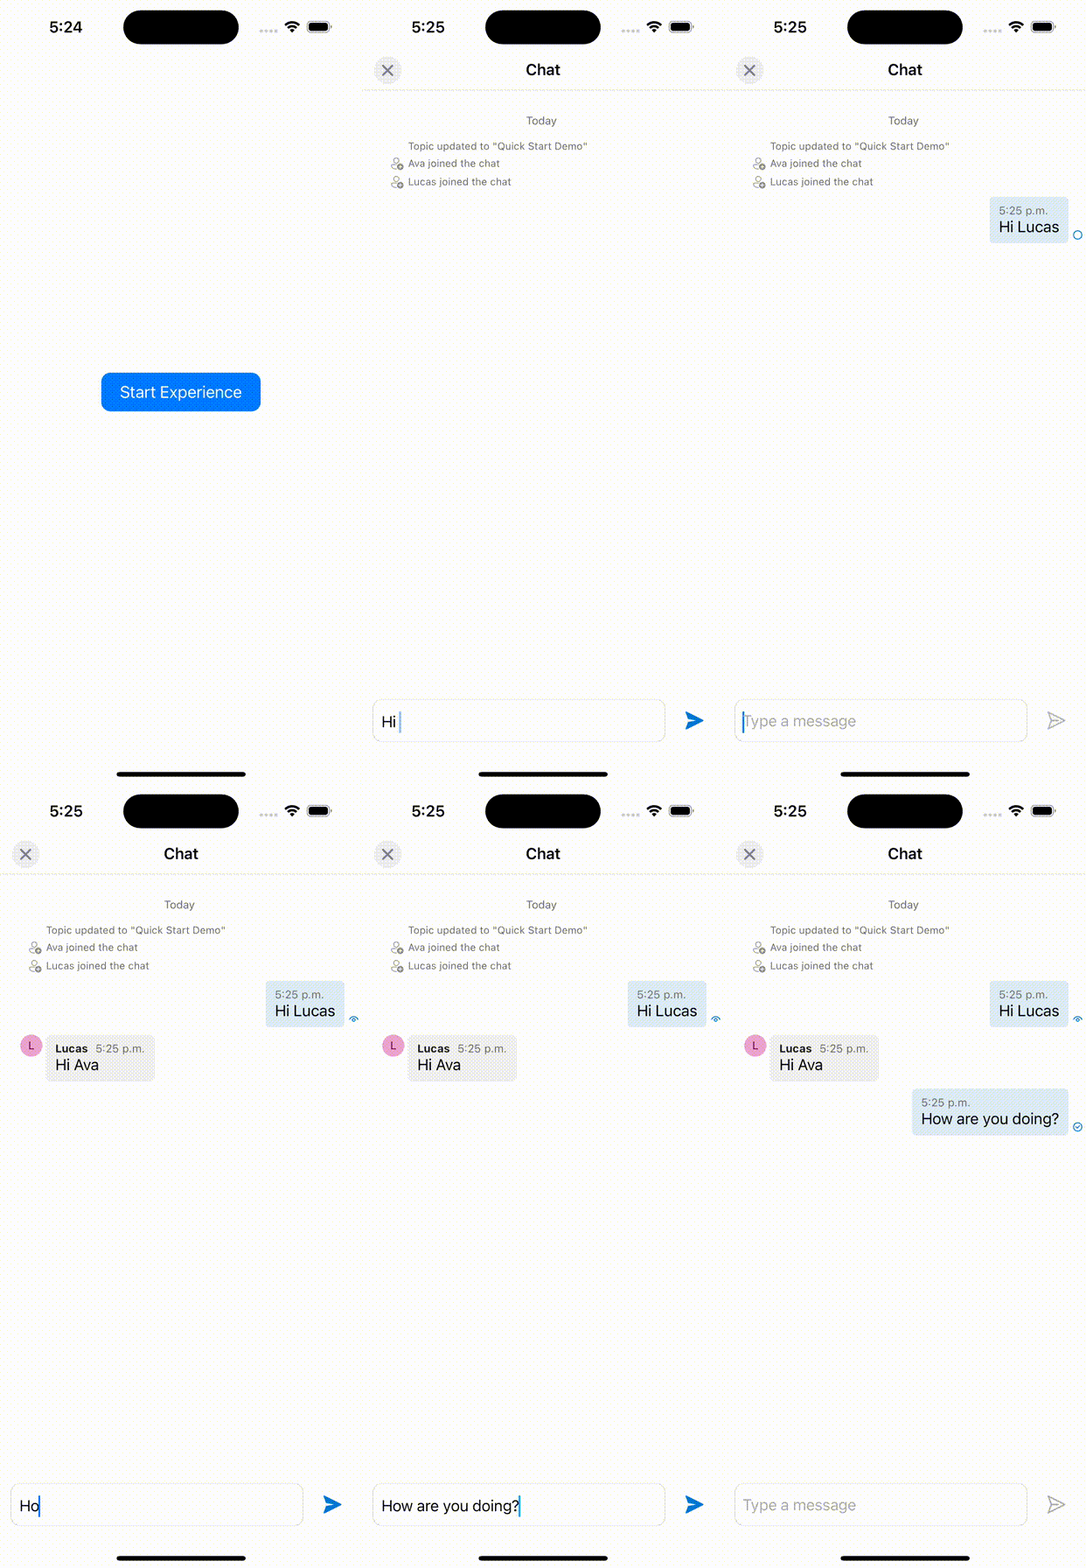
若要在 iOS 模擬器上建置並執行您的應用程式,請選取 [產品>執行]。 您也可以使用 (⌘-R) 鍵盤快捷方式。 然後,在模擬器上試用聊天體驗。
- 選取 [開始體驗]。
- 聊天用戶端會加入聊天對話,您可以開始輸入和傳送訊息。
- 如果客戶端無法加入線程,而且您看到
chatJoin失敗的錯誤,請確認使用者的存取令牌有效,且使用者已透過 REST API 呼叫或使用 az 命令行介面新增至聊天對話。

清除資源
如果您要清除和移除 Azure 通訊服務 訂用帳戶,您可以刪除資源或資源群組。
刪除資源群組也會刪除與其相關聯的任何其他資源。
深入了解如何清除資源。