使用 dbt 轉換資料
注意
Apache Airflow 作業是由 Apache Airflow 提供電源。
dbt(Data Build Tool) 是開放原始碼命令行介面 (CLI), 可藉由以結構化且可維護的方式管理複雜的 SQL 程式代碼,簡化數據倉儲中的數據轉換和模型化。 它可讓數據小組在其分析管線的核心建立可靠且可測試的轉換。
與 Apache Airflow 配對時,dbt 的轉換功能會透過 Airflow 的排程、協調流程和工作管理功能來增強。 這個結合的方法,使用 dbt 的轉換專業知識與 Airflow 的工作流程管理,提供有效率且健全的數據管線,最終導致更快速且更深入的數據驅動決策。
本教學課程說明如何建立 Apache Airflow DAG,以使用 dbt 轉換儲存在 Microsoft Fabric 數據倉儲中的數據。
必要條件
若要開始使用,您必須滿足下列必要條件:
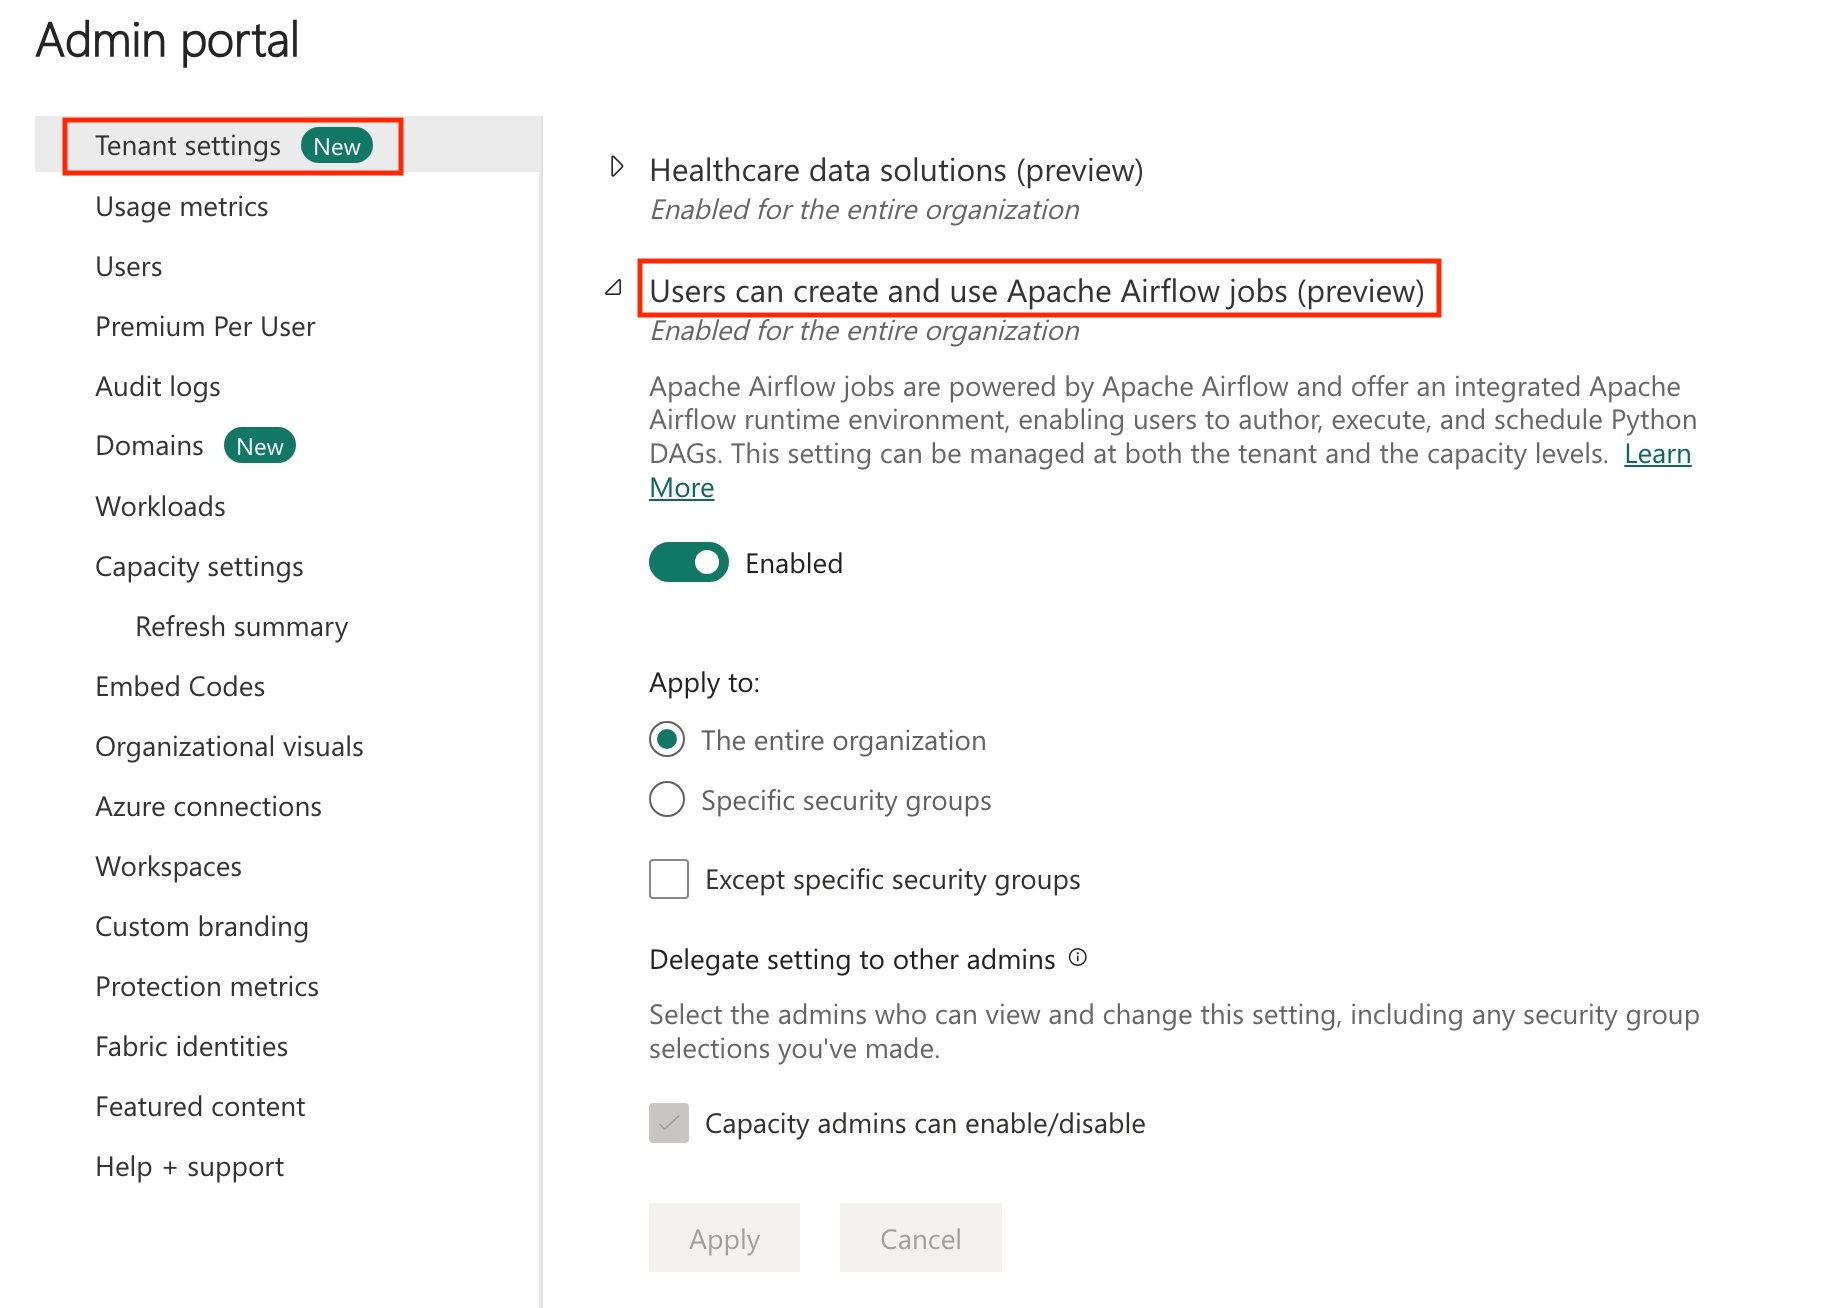
在您的租用戶中啟用 Apache Airflow 作業。
注意
由於 Apache Airflow 作業處於預覽狀態,因此您必須透過租使用者管理員加以啟用。如果您已經看到 Apache Airflow 作業,您的租用戶系統管理員可能已經啟用它。
建立服務主體。 將服務主體新增為建立資料倉儲之工作區中的
Contributor。如果您沒有 Fabric 倉儲,請建立 Fabric 倉儲。 使用資料管線將範例資料內嵌至倉儲。 在本教學課程中,我們使用紐約市綠色計程車範例。
使用 dbt 轉換儲存在 Fabric 倉儲中的資料
此章節將逐步引導您完成下列步驟:
指定需求
在 requirements.txt 資料夾中,建立 dags 檔案。 新增下方套件作為 Apache Airflow 需求。
天文學家 cosmos:此套件可以 Apache Airflow dags 和工作群組的形式執行 dbt 核心專案。
dbt-fabric:此套件可用來建立 dbt 專案,然後部署至 網狀架構數據倉儲
   astronomer-cosmos==1.0.3
   dbt-fabric==1.5.0
在 Apache Airflow 作業提供的 Fabric 受控記憶體中建立 dbt 專案。
在本節中,我們會在具有下列目錄結構的數據集
nyc_taxi_green的 Apache Airflow 作業中建立範例 dbt 專案。dags |-- my_cosmos_dag.py |-- nyc_taxi_green | |-- profiles.yml | |-- dbt_project.yml | |-- models | | |-- nyc_trip_count.sql | |-- target在
dags資料夾中,使用nyc_taxi_green檔案建立名為profiles.yml的檔案。 此資料夾包含 dbt 專案所需的所有檔案。
將下列內容複製到
profiles.yml中。 此組態檔包含 dbt 使用的資料庫連線詳細資料和設定檔。 更新預留位置值並儲存檔案。config: partial_parse: true nyc_taxi_green: target: fabric-dev outputs: fabric-dev: type: fabric driver: "ODBC Driver 18 for SQL Server" server: <sql connection string of your data warehouse> port: 1433 database: "<name of the database>" schema: dbo threads: 4 authentication: ServicePrincipal tenant_id: <Tenant ID of your service principal> client_id: <Client ID of your service principal> client_secret: <Client Secret of your service principal>建立
dbt_project.yml的檔案,並複製下列內容。 此檔案會指定專案層級組態。name: "nyc_taxi_green" config-version: 2 version: "0.1" profile: "nyc_taxi_green" model-paths: ["models"] seed-paths: ["seeds"] test-paths: ["tests"] analysis-paths: ["analysis"] macro-paths: ["macros"] target-path: "target" clean-targets: - "target" - "dbt_modules" - "logs" require-dbt-version: [">=1.0.0", "<2.0.0"] models: nyc_taxi_green: materialized: table在
models資料夾內,建立nyc_taxi_green資料夾。 在本教學課程中,我們會在名為nyc_trip_count.sql的檔案中建立範例模型,以建立資料表,其中顯示每個廠商每天的車程數。 複製下方的檔案內容。with new_york_taxis as ( select * from nyctlc ), final as ( SELECT vendorID, CAST(lpepPickupDatetime AS DATE) AS trip_date, COUNT(*) AS trip_count FROM [contoso-data-warehouse].[dbo].[nyctlc] GROUP BY vendorID, CAST(lpepPickupDatetime AS DATE) ORDER BY vendorID, trip_date; ) select * from final
建立 Apache Airflow DAG 以協調 dbt 工作
在資料夾中建立名為
my_cosmos_dag.pydags的檔案,並將下列內容貼到其中。import os from pathlib import Path from datetime import datetime from cosmos import DbtDag, ProjectConfig, ProfileConfig, ExecutionConfig DEFAULT_DBT_ROOT_PATH = Path(__file__).parent.parent / "dags" / "nyc_taxi_green" DBT_ROOT_PATH = Path(os.getenv("DBT_ROOT_PATH", DEFAULT_DBT_ROOT_PATH)) profile_config = ProfileConfig( profile_name="nyc_taxi_green", target_name="fabric-dev", profiles_yml_filepath=DBT_ROOT_PATH / "profiles.yml", ) dbt_fabric_dag = DbtDag( project_config=ProjectConfig(DBT_ROOT_PATH,), operator_args={"install_deps": True}, profile_config=profile_config, schedule_interval="@daily", start_date=datetime(2023, 9, 10), catchup=False, dag_id="dbt_fabric_dag", )


