Build your first app using Node.js
Start Microsoft Teams app development by building your first app with a tab, a bot, and a message extension capability.
This app has all capabilities and each has its own UI and UX:

In this tutorial, you'll learn:
- How to set up a new project using command-line tools.
- How to build three apps with a different capability each—tab, bot, and message extension.
- How to deploy your app from Developer Portal.
Prerequisites
Here's a list of tools you'll need to install for building and deploying a Teams app.
| Install | For using... | |
|---|---|---|
| Required | ||
| Node.js and NPM | Back-end JavaScript runtime environment. For more information, see Node.js version compatibility table for project type. | |
| ngrok | Teams app features (conversational bots, message extensions, and incoming webhooks) require inbound connections. A tunnel connects your development system to Teams. It isn't required for apps that only include tabs. This package is installed within the project directory (using npm devDependencies). |
|
| Microsoft Edge (recommended) or Google Chrome | A browser with developer tools. | |
| Visual Studio Code | JavaScript, TypeScript, or SharePoint Framework (SPFx) build environments. Use version 1.55 or later. | |
| Git | Git to use the Sample Node.js app repo from GitHub. | |
| gulp | Open-source JavaScript toolkit. Install version 4.0.0 or later. | |
| Microsoft Teams | Microsoft Teams to collaborate with everyone you work with through apps for chat, meetings, and call all in one place. | |
| Optional | ||
| Azure Tools for Visual Studio Code and Microsoft Azure CLI | Azure tools to access stored data or to deploy a cloud-based backend for your Teams app in Azure. | |
| React Developer Tools for Chrome OR React Developer Tools for Microsoft Edge | Browser tools for tabs development with JavaScript. | |
| Microsoft Graph Explorer | Microsoft Graph Explorer, a browser-based tool that lets you run a query from Microsoft Graph data. | |
| Developer Portal for Teams | Web-based portal to configure, manage, and publish your Teams app including to your organization or the Microsoft Teams Store. | |
| Visual Studio Code Extensions | ||
| Azure Functions Core Tools | Backend components locally during a local debug run, including the authentication helpers required when running your services in Azure. It's installed within the project directory (using the npm devDependencies). |
|
| .NET SDK | Customized bindings for local debugging and Azure Functions app deployments. If you haven't installed the .NET 3.1 (or later) SDK globally, the portable version can be installed. |
Verify version numbers for installed tools
Use the following commands to verify that the installed versions for the tools are as needed.
Note
Use the terminal window that you're most comfortable with on your platform. These examples use Git Bash (which is included in Git installation), but these scripts can run on most platforms.
To verify the version numbers of tools installed:
Open a terminal window.
Run the following command to verify the
gitversion installed on your machine:$ git --versionOutput example:
git version 2.19.0.windows.1Run the following command to verify the
node.jsversion:$ node -vOutput example:
v8.9.3Verify the version number of
npm:$ npm -vOutput example:
5.5.1Verify the version number of
gulp:$ gulp -vOutput example:
CLI version 2.3.0Local version 4.0.2Run the following command to verify the version number of Visual Studio Code:
code --versionOutput example:
1.28.2929bacba01ef658b873545e26034d1a8067445e9
You can use a different version of these applications without any problem.
Set up your Teams development tenant
A tenant is like a space, or a container for your organization in Teams, where you chat, share files, and run meetings. This space is also where you upload and test your custom app.
Let's verify if you're ready to develop with the tenant.
Enable custom app upload option
After creating the app, you must load your app in Teams without distributing it. This process is known as custom app upload. Sign in to your Microsoft 365 account to view this option.
Note
Custom app upload is necessary for previewing and testing apps in Teams local environment. If it isn't enabled, you won't be able to preview and test your app in Teams locally.
Do you already have a tenant, and do you have the admin access? Let's check if you really do!
Verify if you can upload a custom app in Teams:
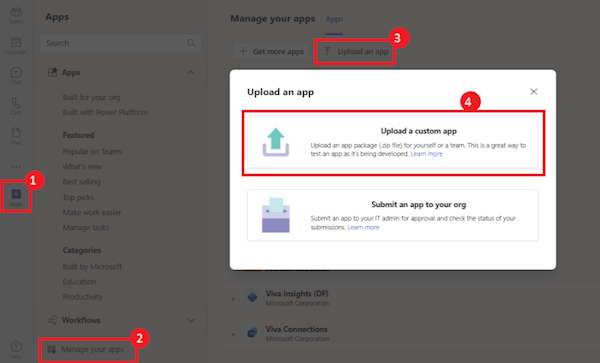
In the Teams client, select Store icon.
Select Manage your apps.
Look for the option to Upload a custom app. If you see the option, custom app upload is enabled.
Note
If Teams doesn't show the option to upload a custom app, talk to your Teams administrator.
Create a free Teams developer tenant
If you don't have a Teams developer account, you can get it free. Join the Microsoft 365 developer program!
Go to the Microsoft 365 developer program.
Select Join Now and follow the onscreen instructions.
In the welcome screen, select Set up E5 subscription.
Set up your administrator account. After you finish, the following screen appears.
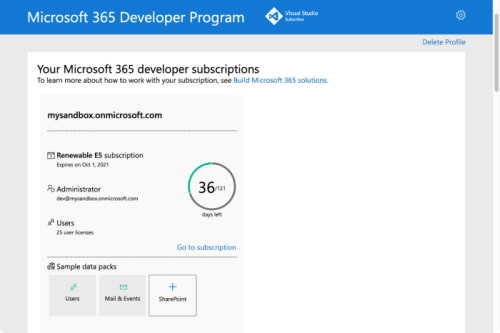
Sign in to Teams using the administrator account you just set up. Verify that you have the Upload a custom app option in Teams.
Get a free Azure account
If you wish to host your app or access resources in Azure, you must have an Azure subscription. Create a free account before you begin.
Now you’ve got all tools and set up your accounts. Next, let's set up your development environment and start building!
You can continue to use this terminal window to run the commands that follow in this tutorial.
Download the sample
For this tutorial, use the Hello, World! sample to get started. You can download and clone it from GitHub.
To use Git Bash to clone the sample repo:
Open a terminal window.
Run the following command to clone the sample repository to your computer:
git clone https://github.com/OfficeDev/Microsoft-Teams-Samples.git
Build your first Node.js app
After you've cloned the repo for Node.js sample app, you can build and test the app in your local environment.
In this page, you'll learn to:
Build and run the sample
After the repository is cloned, you can build the sample app.
Open a terminal window.
Run the change directory command in the terminal to change to the sample app directory:
cd Microsoft-Teams-Samples/samples/app-hello-world/nodejs/Install all dependencies using the following command:
npm installYou should see a bunch of dependencies getting installed.
Run the app using the following command after installation is complete:
npm startWhen the Hello World app starts, it displays
App started listening on port 3333in the terminal window.Note
If you see a different port number displayed in the message above, it is because you have a PORT environment variable set. You can continue to use that port or change your environment variable to 3333.
Open a browser window and use the following URLs to verify that all the Hello World app URLs are loading:
http://localhost:3333
http://localhost:3333/hello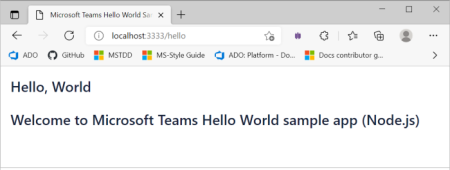
http://localhost:3333/first
http://localhost:3333/second
Test your sample app in local environment
Remember that apps in Microsoft Teams are web applications exposing one or more capabilities. Make your app available on the internet so that the Teams platform can load it. To make your app reachable from the internet, you need to host your app.
For local testing, you can run the app on your local machine and create a tunnel to it with a web endpoint. ngrok is a free tool that lets you do just that. With ngrok, you can get a web address such as https://d0ac14a5.ngrok.io (this URL is just an example). You can download and install ngrok for your environment. Make sure you add it to a location in the PATH.
Create ngrok tunnel
After you install ngrok, you can create a tunnel to deploy your app locally.
Open a new terminal window.
Run the following command to create a tunnel. The sample app uses port 3333:
ngrok http 3333 --host-header=localhost:3333An ngrok tunnel is created. Here's an example of ngrok tunnel.

Ngrok listens to requests from the internet and routes them to your app running on port 3333.
To verify the app's local deployment:
Open the browser.
Load your app using the following URL:
https://<forwarding address in ngrok console session>/Here's an example of the URL:

You can try adding
hello,first, orsecondto the ngrok tunnel url to view different tab pages of the app.Ngrok listens to requests from the internet and routes them to your app running on port 3333.
Make a note of the forwarding address in ngrok console. You need this URL to deploy your app in Teams.
Note
If you used a different port during build and run, make sure you use the same port number to setup the ngrok tunnel.
Tip
It's a good idea to run ngrok in a different terminal window to keep it running without interfering with the node app, which you might later have to stop, rebuild, and rerun. The ngrok session returns useful debugging information in this window. The paid version of ngrok allows persistent names.
Important
If you use the free version of ngrok, your app is available only during the current session on your development machine. It isn't available if the machine is shut down or goes to sleep. When you restart the service, it returns a new address. Then, you must update every location that uses the outdated address. Remember this step when sharing the app for testing.
Build Node.js app package
You can use gulp CLI to build the app package for Node.js.
Open a terminal window.
Ensure that you are in the directory where the
node.jsis cloned. This is the folder wheregulpfile.jsis placed.Run the following command to build the Node.js app package.
$ gulpHere's an example of the command output:
[13:39:27] Using gulpfile ~\documents\github\msteams-samples-hello-world-nodejs\gulpfile.js[13:39:27] Starting 'clean'...[13:39:27] Starting generate-manifest'...[13:39:27] Finished 'generate-manifest' after 11 ms[13:39:27] Finished 'clean after 21 ms[13:39:27] Starting 'default'... Build completed. Output in manifest folder[13:39:27] Finished 'default' after 62 μsThe app package helloworldapp.zip is created. You can find the package file at the following path.
<path to the cloned repo>/Microsoft-Teams-Samples/samples/app-hello-world/nodejs/manifestNote
Search for the app package file, helloworldapp.zip, if the location isn't clear in the tool you're using.
Configure your first Node.js app using Developer Portal
You can use Developer Portal to upload the app package to Teams and configure app capabilities. Developer Portal is a Teams app that simplifies the creation and registration of an app. Install from the Teams Store!
After you build and test your Teams app, you can configure and preview it using Developer Portal.
Updating the app package includes:
Import the app package to Developer Portal
To import the app package:
Open Microsoft Teams.
Select the Store
 icon from the left-hand bar.
Search for Developer Portal in the search bar, and select Developer Portal*.
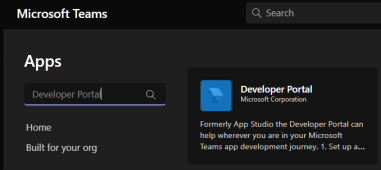
Select Open.
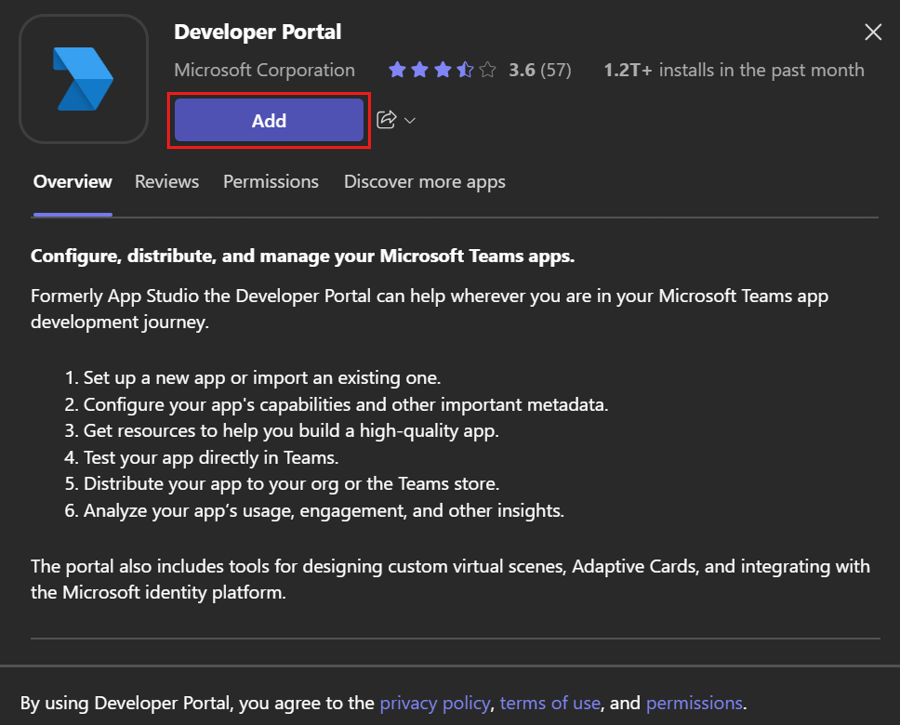
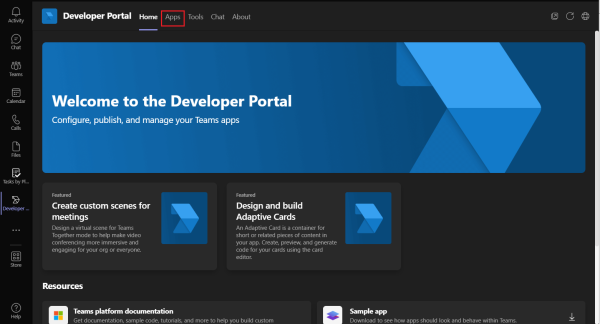
The Developer Portal opens.
Select the Apps tab.
Select Import app.
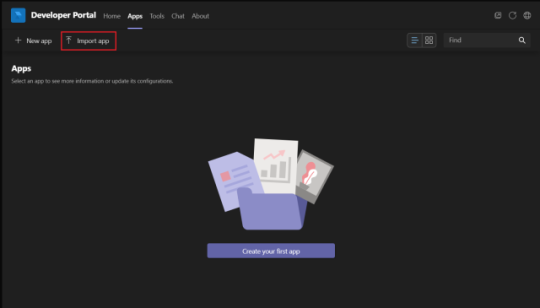
Open the app package
helloworldapp.zipfrom the following path in your C# sample repo directory structure:<path to cloned node.js sample repo>\Source\Repos\Microsoft-Teams-Samples\samples\app-hello-world\nodejs\manifestThe Hello World app is imported in Developer Portal.
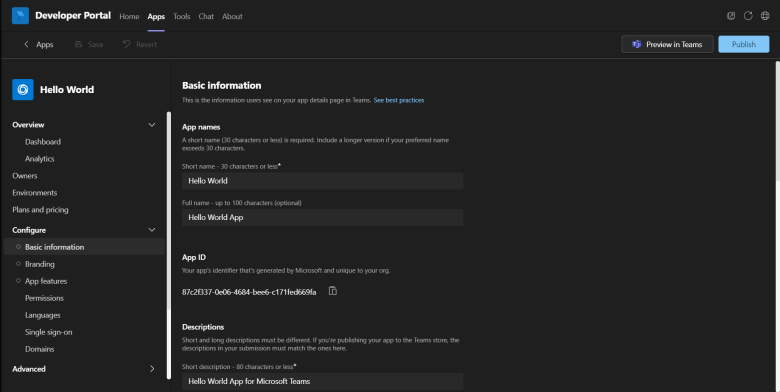
After you've imported your app to Developer Portal, you can view its details in Developer Portal.
Take a tour of your app in Developer Portal
After you've imported your app to Developer Portal, you can view its details, including the manifest file.
View app information
Select Basic Information from the left pane of Developer Portal.
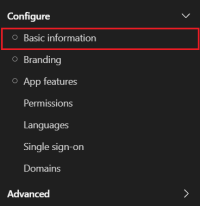
Note the following information from the basic information:
- App ID
- Developer Information
- App URLs
Select Branding from the left pane to view the branding information.
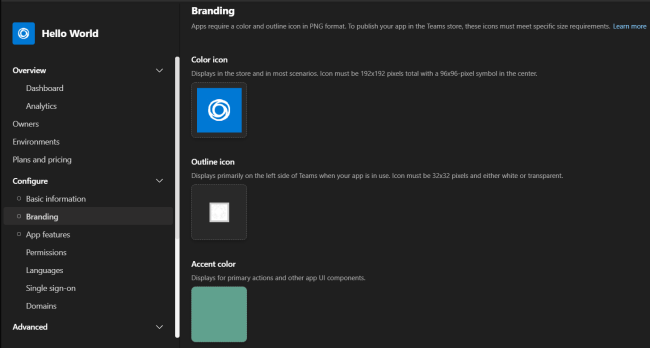
These details are important if you're writing a new app for distribution.
View app features
Select App features from the left pane of Developer Portal.
The App features appear in the right pane. You can view cards for Personal app, Bot, and Message Extension.

View the app manifest
You use the manifest file to configure capabilities, required resources, and other important attributes for your app.
Select Publish from the left panel to open the dropdown list, and then select App package.
The App manifest appears in the right pane.
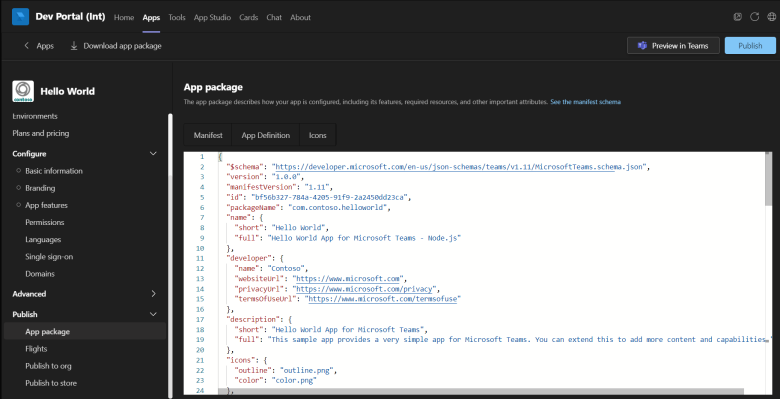
The manifest file appears in the right pane.
Configure your app's capabilities
After you've imported your app into Developer Portal, the next step is to configure app capabilities. Developer Portal contains all the app information in different sections. It makes configuring the app capabilities easy.
Using Developer Portal, you can:
Configure personal tab app
To configure personal tab app:
Select the
 icon on the Personal app card on the App features pane, and select Edit.
The details for Hello tab appear.
Select the
 icon for Hello tab, and select Edit to open the app details for updating.
Enter the app details for the Hello tab in Add a tab to your personal app.
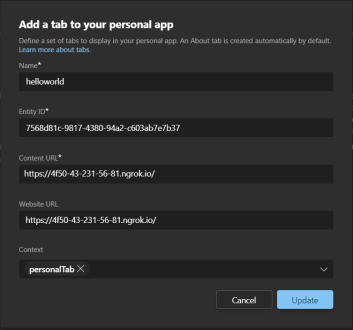
Enter the following details:
- Name: Hello tab.
- Content URL and Website URL: the forwarding address in ngrok console session.
- Context: Select Personal tab.
Select Update.
The details of the Hello tab appear on the Personal app pane.
Select Save.

The Personal app pane now shows the new tab and an About tab created automatically.

Configure bot
It's easy to add the bots functionality to your app. The Hello World sample app already has a bot as part of the sample, but you must register it with Teams.

The bot that was imported from the sample doesn't have an associated app ID. You'll need to delete it, and create a new bot. Developer Portal creates a new app ID, and registers it with Teams.
Adding and configuring a bot involves:
To add a new bot
Select the
 icon on the Bot card on the App features pane, and select Delete.
Select Tools to add capability.

Select Bot management on the Tools pane.
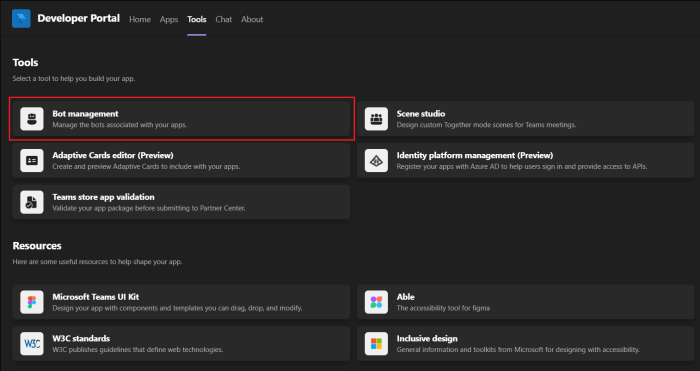
Select + New Bot on the Bot management pane.

Enter a suitable name for your bot, and select Add.

The Configure pane appears showing details of the new bot in the left pane.
Enter the forwarding URL from the
ngrokconsole, and select Save.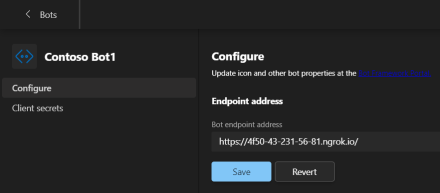
Select Client secrets, and then select Add a client secret to your bot to generate a password for the bot.
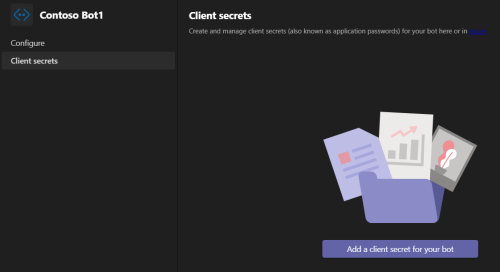
Developer Portal generates a password for the bot.
You can use the
 icon to copy the password. For this tutorial, you don't need to copy it.
Select OK.
Select < Bots to return to Bot management pane.
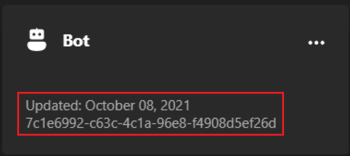
The Bot management pane shows the new Bot added with an app ID.

Ensure that you save the Bot ID along with the password from the Client secret section.
To add bot to app
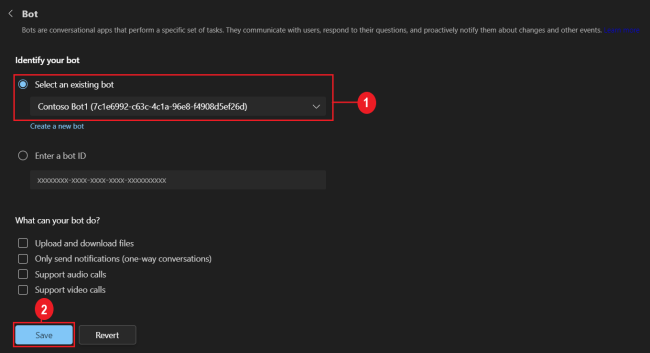
Open the App features pane, and select the Bot card.
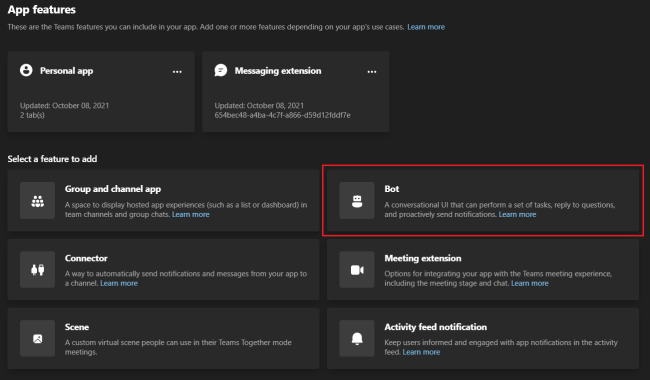
The Bot pane appears.
Select your bot app from Select an existing bot, and select Save.
The new bot is added to your app with its own app ID.
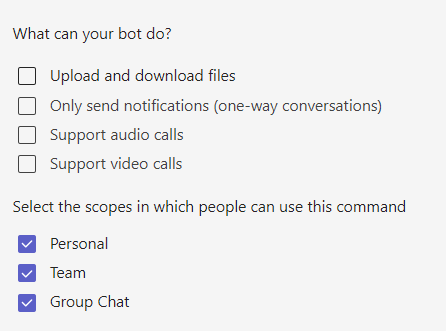
To configure bot scope
Select the
 icon on the new Bot card, and select Edit.
Select all the three scopes for the command in the Bot page.
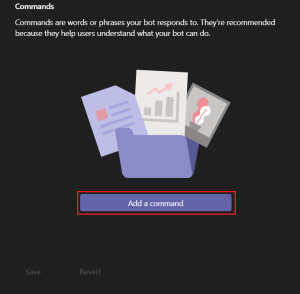
Move through the Bot pane to view the Commands section, and select + Add a Command.
Enter a suitable name and description, select all the three scopes for the Command, and select Add.
- Personal
- Team
- Group Chat
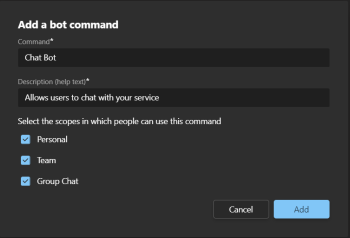
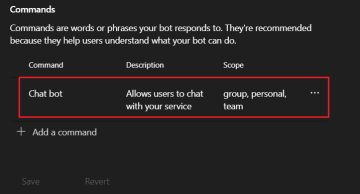
The new command is added to the Commands section of the Bot pane.
Select Save.
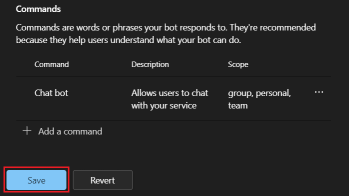
The command details are saved.
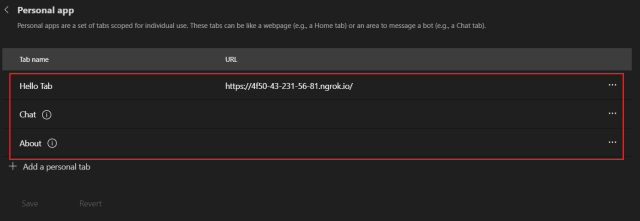
Open App features pane, and select Personal app card to view your app's tab details.
You'll see that a tab for your new chat bot is added to your app.
Configure message extension
Message extensions let users ask for information from your service and post that information. The information is posted in the form of cards into the channel conversation. Message extensions appear at the bottom of the compose box.
To add a new message extension:
Select the
 icon on the Message Extension card on the App features pane, and select Delete.
Select Message Extension from the App features pane.
Select the name of your bot app from the Select an existing bot dropdown list on the Message extension pane.
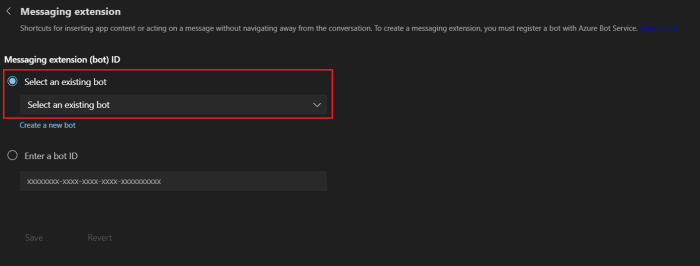
Select Save.
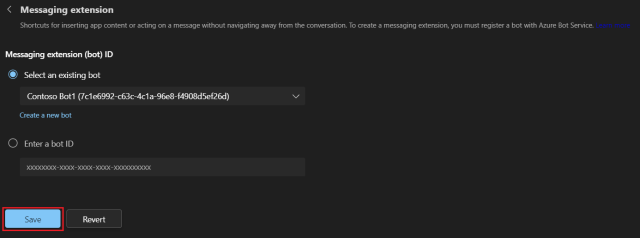
The message extension is saved, and the Commands section appears on the Message extension pane.
Select + Add a command to define the scope of what your message extension app can do.

The Add a command dialog.
Ensure that Search is selected as the type of command you want to add in the Add a command dialog.
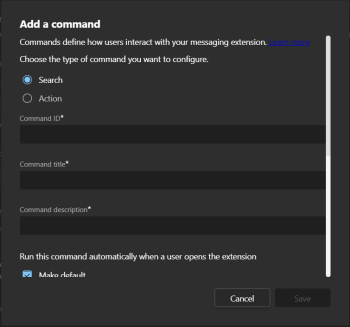
Enter suitable information for the following details:
- Command ID
- Command title
- Command description
Move through the dialog to view the remaining details.
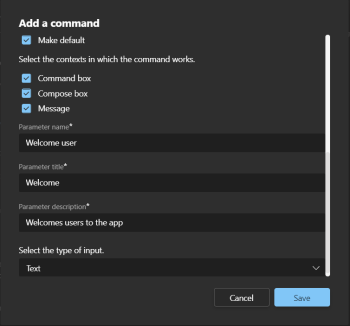
Ensure Make default is selected.
Select the following contexts for the message extension command:
- Command box
- Compose box
- Message
Enter suitable information for the following details:
- Parameter name
- Parameter title
- Parameter description
Select Text as the type of input.
Select Save.
The message extension command is saved, and shows on the list of commands in the Message extension pane.
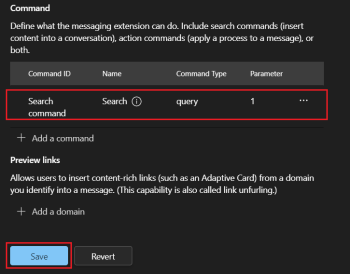
Select Save.
Open App features pane.

You'll see all three capabilities - personal tab app, bot, and message extension - configured for the Hello World app.
Preview and test your Node.js app
After you've imported your app and configured the capabilities in Developer Portal, you can preview and test the sample app.
Note
External developers can't use the Preview in Teams option in the Developer Portal app in Teams. It isn't available as an app on Teams, due to an API limitation. If you want to preview your app in Teams, use the Developer Portal website.
After configuring the capabilities of your app, you can preview and test your app in Teams in the local environment.
To preview your app:
Select Preview in Teams from the Developer Portal toolbar

The Developer Portal informs you that your custom app is uploaded successfully.
Select Manage your apps. Your app is listed in the uploaded apps.
Find your app using the search box, select the three-dots in its row.
Select the View option. The Add page appears for your app.
Select Add to load the app on Teams.
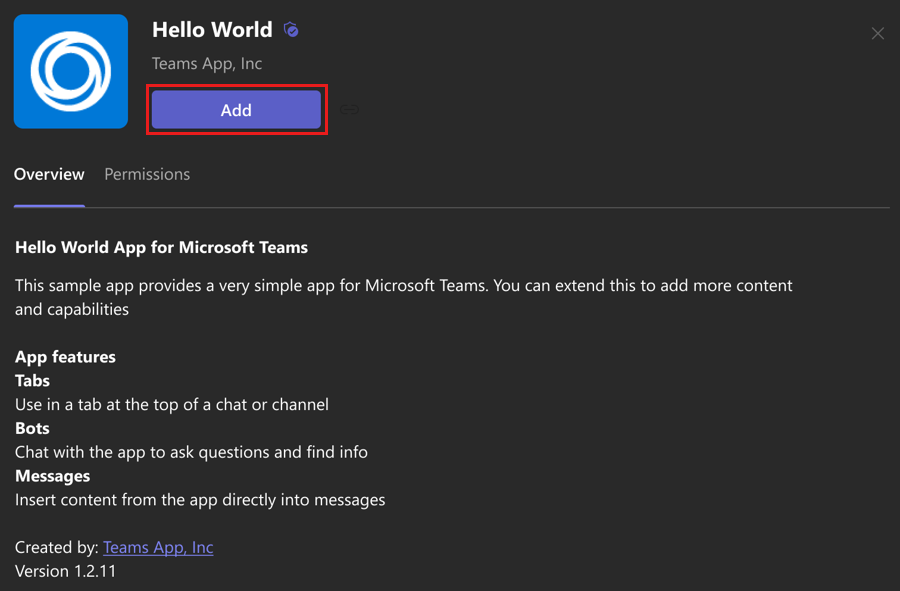
Your app is now available in Teams. You can view all the tabs and test the capabilities:
Hello tab:

Chat bot:
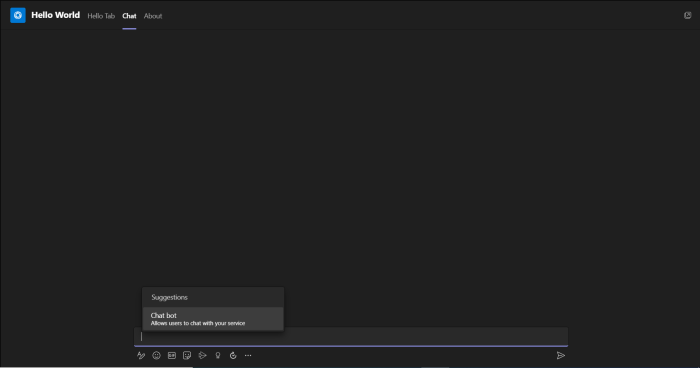
You can send a message using the chat.
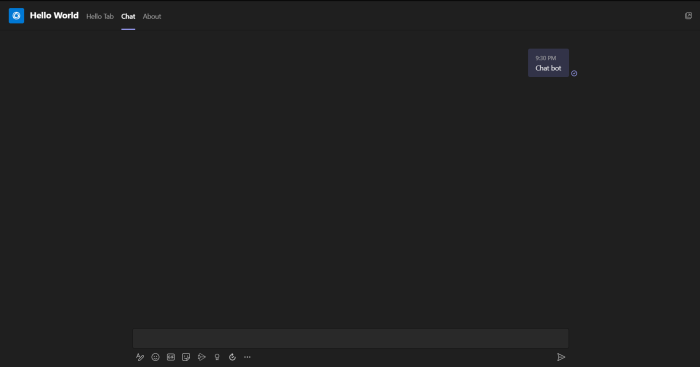
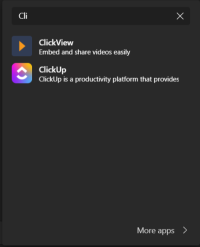
Message extension:
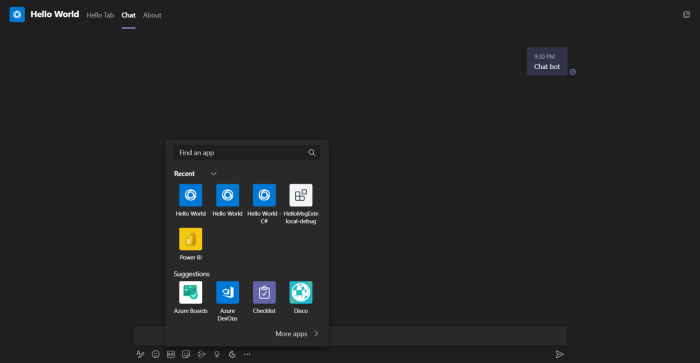
You can try a search using the message extension.
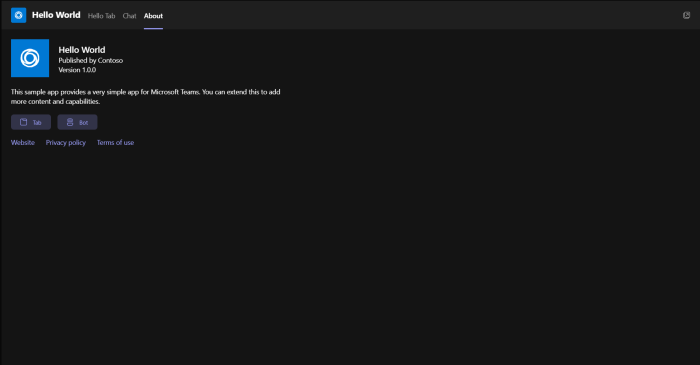
About tab:
Have an issue with this section? If so, please give us some feedback so we can improve this section.