顯示 SkiaSharp 位圖
SkiaSharp 位圖的主題是在 SkiaSharp 中的位陣圖基本概念一文中介紹的。 本文示範了三種載入位圖的方法,以及顯示點陣圖的三種方式。 本文會檢閱載入點陣圖的技術,並深入探討 使用 DrawBitmap 的方法 SKCanvas。
DrawBitmapLattice和 DrawBitmapNinePatch 方法會在 SkiaSharp 位圖的分段顯示一文中討論。
此頁面上的範例來自範例應用程式。 從該應用程式的首頁,選擇 [SkiaSharp 位陣圖],然後移至 [ 顯示點陣圖] 區段。
載入點圖
SkiaSharp 應用程式所使用的點陣圖通常來自三個不同的來源之一:
- 從因特網
- 從內嵌在可執行檔中的資源
- 從使用者的相片庫
SkiaSharp 應用程式也可以建立新的點陣圖,然後繪製或以演算法方式設定位圖位。 這些技術會在建立及繪製 SkiaSharp 位陣圖和存取 SkiaSharp 位陣圖圖元一文中討論。
在下列三個載入點陣圖的程式碼範例中,假設 類別包含 類型的 SKBitmap欄位:
SKBitmap bitmap;
如 SkiaSharp 中的 Bitmap Basics 一文所述,透過因特網載入點陣圖的最佳方式是使用 HttpClient 類別。 類別的單一實體可以定義為欄位:
HttpClient httpClient = new HttpClient();
搭配 iOS 和 Android 應用程式使用HttpClient時,您會想要設定項目屬性,如傳輸層安全性 (TLS) 1.2 上的檔案所述。
使用 HttpClient 的程式代碼通常牽涉到 await 運算子,因此它必須位於 async 方法中:
try
{
    using (Stream stream = await httpClient.GetStreamAsync("https:// ··· "))
    using (MemoryStream memStream = new MemoryStream())
    {
        await stream.CopyToAsync(memStream);
        memStream.Seek(0, SeekOrigin.Begin);

        bitmap = SKBitmap.Decode(memStream);
        ···
    };
}
catch
{
    ···
}
請注意, Stream 從 GetStreamAsync 取得的物件會複製到 MemoryStream。 除了異步方法之外,Android 不允許 Stream 主線程處理from HttpClient 。
SKBitmap.Decode會執行許多工作:Stream傳遞給它的 對象會參考記憶體區塊,其中包含一個通用點陣圖檔格式的整個點陣圖,通常是 JPEG、PNG 或 GIF。 Decode方法必須判斷格式,然後將位圖檔案譯碼為SkiaSharp自己的內部點陣圖格式。
在程式代碼呼叫 SKBitmap.Decode之後,它可能會使 CanvasView 無效,讓 PaintSurface 處理程式可以顯示新載入的點陣圖。
載入點圖的第二種方式是將位圖納入為個別平台項目所參考之 .NET Standard 連結庫中的內嵌資源。 資源標識碼會傳遞至 GetManifestResourceStream 方法。 此資源識別碼是由元件名稱、資料夾名稱和檔名所組成,並以句點分隔的資源:
string resourceID = "assemblyName.folderName.fileName";
Assembly assembly = GetType().GetTypeInfo().Assembly;

using (Stream stream = assembly.GetManifestResourceStream(resourceID))
{
    bitmap = SKBitmap.Decode(stream);
    ···
}
位圖檔案也可以儲存為iOS、Android和 通用 Windows 平台 (UWP) 的個別平台專案中的資源。 不過,載入這些點陣圖需要位於平台專案中的程式代碼。
取得位圖的第三種方法是來自用戶的圖片庫。 下列程式代碼會使用範例應用程式中所包含的相依性服務。 SkiaSharpFormsDemo .NET Standard 連結庫包含 IPhotoLibrary 介面,而每個平台專案都包含實PhotoLibrary作該介面的類別。
IPhotoicturePicker picturePicker = DependencyService.Get<IPhotoLibrary>();

using (Stream stream = await picturePicker.GetImageStreamAsync())
{
    if (stream != null)
    {
        bitmap = SKBitmap.Decode(stream);
        ···
    }
}
一般而言,這類程式代碼也會使 CanvasView 無效,讓 PaintSurface 處理程式可以顯示新的點陣圖。
類別 SKBitmap 會定義數個實用的屬性,包括 Width 和 Height,以顯示點陣陣圖的圖元維度,以及許多方法,包括建立點陣圖的方法、複製點陣陣圖,以及公開圖元元。
以像素維度顯示
SkiaSharp Canvas 類別會定義四 DrawBitmap 種方法。 這些方法可讓點陣圖以兩種不同的方式顯示:
- 指定
SKPoint值 (或個別x和y值) 會在其像素維度中顯示點陣圖。 點陣圖的圖元會直接對應至視訊顯示的圖元。 - 指定矩形會使點陣圖延展到矩形的大小和形狀。
您可以使用 搭配SKPoint參數或DrawBitmap個別x和y參數,在其像素維度DrawBitmap中顯示點陣圖:
DrawBitmap(SKBitmap bitmap, SKPoint pt, SKPaint paint = null)

DrawBitmap(SKBitmap bitmap, float x, float y, SKPaint paint = null)
這兩種方法的功能相同。 指定的點表示相對於畫布之點陣圖左上角的位置。 由於行動裝置的圖元解析度如此之高,因此較小的點陣圖通常會在這些裝置上顯得相當小。
選擇性 SKPaint 參數可讓您使用透明度來顯示點陣圖。 若要這樣做,請建立 SKPaint 物件,並將 屬性設定 Color 為 Alpha 色板小於 1 的任何 SKColor 值。 例如:
paint.Color = new SKColor(0, 0, 0, 0x80);
傳遞為最後一個自變數的0x80表示 50% 的透明度。 您也可以在其中一個預先定義的色彩上設定 Alpha 色板:
paint.Color = SKColors.Red.WithAlpha(0x80);
不過,色彩本身無關緊要。 當您 SKPaint 在呼叫中使用 DrawBitmap 物件時,只會檢查 Alpha 色板。
物件 SKPaint 在使用混合模式或篩選效果顯示點陣圖時也會扮演角色。 這些示範於 SkiaSharp 撰寫和混合模式和 SkiaSharp 影像篩選文章中。
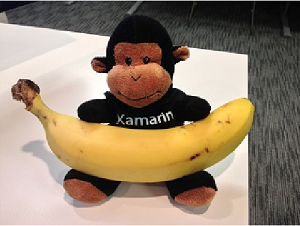
範例 程式中的 [像素維度 ] 頁面會顯示寬度為 320 像素的點陣圖資源,高度為 240 像素:
public class PixelDimensionsPage : ContentPage
{
    SKBitmap bitmap;

    public PixelDimensionsPage()
    {
        Title = "Pixel Dimensions";

        // Load the bitmap from a resource
        string resourceID = "SkiaSharpFormsDemos.Media.Banana.jpg";
        Assembly assembly = GetType().GetTypeInfo().Assembly;

        using (Stream stream = assembly.GetManifestResourceStream(resourceID))
        {
            bitmap = SKBitmap.Decode(stream);
        }

        // Create the SKCanvasView and set the PaintSurface handler
        SKCanvasView canvasView = new SKCanvasView();
        canvasView.PaintSurface += OnCanvasViewPaintSurface;
        Content = canvasView;
    }

    void OnCanvasViewPaintSurface(object sender, SKPaintSurfaceEventArgs args)
    {
        SKImageInfo info = args.Info;
        SKSurface surface = args.Surface;
        SKCanvas canvas = surface.Canvas;

        canvas.Clear();

        float x = (info.Width - bitmap.Width) / 2;
        float y = (info.Height - bitmap.Height) / 2;

        canvas.DrawBitmap(bitmap, x, y);
    }
}
處理程式 PaintSurface 會根據顯示介面的圖元維度和點陣圖的像素維度來計算 x 和 y 值,以置中點陣圖:
如果應用程式想要在其左上角顯示點陣圖,則只會傳遞 (0, 0) 的座標。
載入資源位圖的方法
許多即將推出的範例都需要載入位圖資源。 範例解決方案中的靜態 BitmapExtensions 類別包含方法來協助:
static class BitmapExtensions
{
    public static SKBitmap LoadBitmapResource(Type type, string resourceID)
    {
        Assembly assembly = type.GetTypeInfo().Assembly;

        using (Stream stream = assembly.GetManifestResourceStream(resourceID))
        {
            return SKBitmap.Decode(stream);
        }
    }
    ···
}
請注意 Type 參數。 這可以是 Type 與儲存位圖資源之元件中任何類型相關聯的物件。
此方法 LoadBitmapResource 將用於需要位圖資源的所有後續範例中。
縮放以填滿矩形
類別 SKCanvas 也會定義 DrawBitmap 將位圖轉譯為矩形的方法,以及另一個 DrawBitmap 將點陣圖子集轉譯為矩形的方法:
DrawBitmap(SKBitmap bitmap, SKRect dest, SKPaint paint = null)

DrawBitmap(SKBitmap bitmap, SKRect source, SKRect dest, SKPaint paint = null)
在這兩種情況下,會延展位圖以填滿名為 dest的矩形。 在第二個方法中 source ,矩形可讓您選取位圖的子集。 矩形 dest 相對於輸出裝置; source 矩形相對於點陣圖。
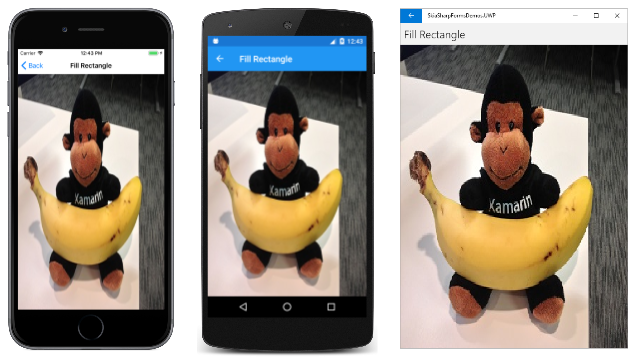
[ 填滿矩形 ] 頁面會示範這兩種方法中的第一個方法,方法是在與畫布相同的矩形中,顯示先前範例中使用的相同位圖:
public class FillRectanglePage : ContentPage
{
    SKBitmap bitmap =
        BitmapExtensions.LoadBitmapResource(typeof(FillRectanglePage),
                                            "SkiaSharpFormsDemos.Media.Banana.jpg");
    public FillRectanglePage ()
    {
        Title = "Fill Rectangle";

        SKCanvasView canvasView = new SKCanvasView();
        canvasView.PaintSurface += OnCanvasViewPaintSurface;
        Content = canvasView;
    }

    void OnCanvasViewPaintSurface(object sender, SKPaintSurfaceEventArgs args)
    {
        SKImageInfo info = args.Info;
        SKSurface surface = args.Surface;
        SKCanvas canvas = surface.Canvas;

        canvas.Clear();

        canvas.DrawBitmap(bitmap, info.Rect);
    }
}
請注意,使用新的 BitmapExtensions.LoadBitmapResource 方法來設定 SKBitmap 字段。 目的矩形是從 Rect 的 SKImageInfo屬性取得,其會還原顯示介面的大小:
這通常 不是 您想要的。 影像在水平和垂直方向中以不同的方式伸展而扭曲。 在圖元大小以外的內容中顯示點陣圖時,通常您想要保留點陣圖的原始外觀比例。
延展同時保留外觀比例
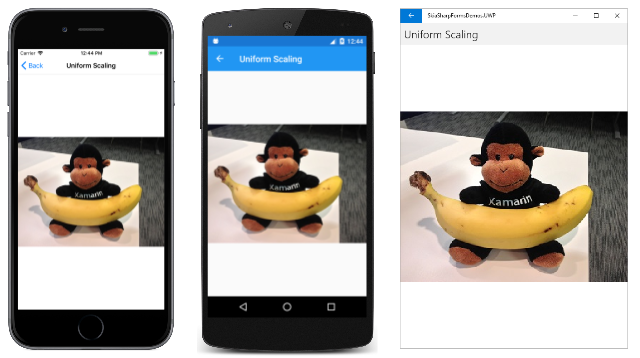
在保留外觀比例的同時延展位圖是一個也稱為 統一縮放的程式。 該詞彙建議演算法方法。 [統一調整] 頁面中會顯示一個可能的解決方案:
public class UniformScalingPage : ContentPage
{
    SKBitmap bitmap =
        BitmapExtensions.LoadBitmapResource(typeof(UniformScalingPage),
                                            "SkiaSharpFormsDemos.Media.Banana.jpg");
    public UniformScalingPage()
    {
        Title = "Uniform Scaling";

        SKCanvasView canvasView = new SKCanvasView();
        canvasView.PaintSurface += OnCanvasViewPaintSurface;
        Content = canvasView;
    }

    void OnCanvasViewPaintSurface(object sender, SKPaintSurfaceEventArgs args)
    {
        SKImageInfo info = args.Info;
        SKSurface surface = args.Surface;
        SKCanvas canvas = surface.Canvas;

        canvas.Clear();

        float scale = Math.Min((float)info.Width / bitmap.Width,
                               (float)info.Height / bitmap.Height);
        float x = (info.Width - scale * bitmap.Width) / 2;
        float y = (info.Height - scale * bitmap.Height) / 2;
        SKRect destRect = new SKRect(x, y, x + scale * bitmap.Width,
                                           y + scale * bitmap.Height);

        canvas.DrawBitmap(bitmap, destRect);
    }
}
處理程式 PaintSurface 會 scale 計算顯示寬度和高度與位圖寬度和高度之比率下限的因數。 x然後,您可以計算 和 y 值,以將縮放位圖置中顯示寬度和高度。 目的矩形的左上角和y這些值的右下角x加上點陣圖的縮放寬度和高度:
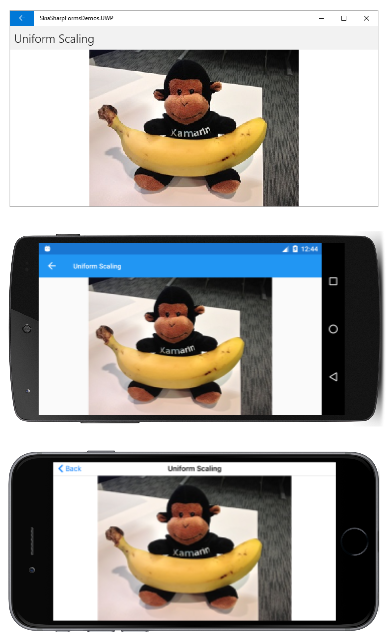
轉過手機側向,以查看伸展到該區域的點陣圖:
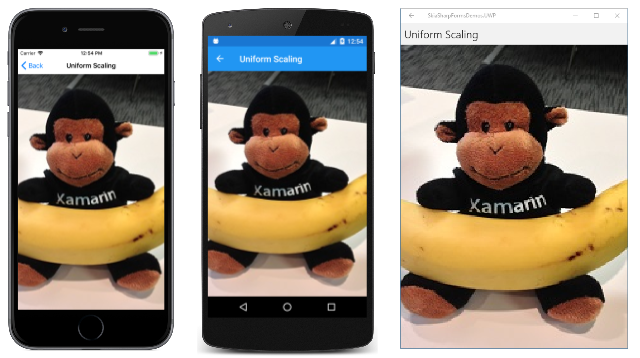
當您想要實作稍微不同的演算法時,使用這個 scale 因素的優點會變得很明顯。 假設您想要保留位圖的外觀比例,但也會填滿目的地矩形。 唯一的可能方式是裁剪影像的一部分,但只要在上述程式代碼中變更 Math.Min 為 Math.Max 即可實作該演算法。 結果如下︰
會保留位圖的外觀比例,但點陣圖左邊和右邊的區域會裁剪。
多用途點圖顯示函式
以 XAML 為基礎的程式設計環境(例如 UWP 和 Xamarin.Forms)具有擴充或縮小點陣圖大小,同時保留其外觀比例的功能。 雖然 SkiaSharp 不包含這項功能,但您可以自行實作此功能。
範例 BitmapExtensions 應用程式中包含的類別會示範如何。 類別會定義兩個新 DrawBitmap 方法,以執行外觀比例計算。 這些新方法是的 SKCanvas擴充方法。
新的 DrawBitmap 方法包含 類型的 BitmapStretch參數 ,列舉定義於 BitmapExtensions.cs 檔案中:
public enum BitmapStretch
{
    None,
    Fill,
    Uniform,
    UniformToFill,
    AspectFit = Uniform,
    AspectFill = UniformToFill
}
None、 FillUniform和 UniformToFill 成員與 UWP Stretch 列舉中的成員相同。 類似的 Xamarin.FormsAspect 欄舉會定義成員 Fill、 AspectFit與 AspectFill。
上方顯示的 [統一縮放比例] 頁面會將點陣圖置中矩形內,但您可能想要其他選項,例如將點圖放置在矩形的左邊或右側,或是頂端或底部。 這是列舉的目的 BitmapAlignment :
public enum BitmapAlignment
{
    Start,
    Center,
    End
}
與 搭配 BitmapStretch.Fill使用時,對齊設定沒有任何作用。
第一個 DrawBitmap 延伸模組函式包含目的矩形,但沒有來源矩形。 預設值會定義,因此如果您想要置中點陣圖,您只需要指定 BitmapStretch 成員:
static class BitmapExtensions
{
    ···
    public static void DrawBitmap(this SKCanvas canvas, SKBitmap bitmap, SKRect dest,
                                  BitmapStretch stretch,
                                  BitmapAlignment horizontal = BitmapAlignment.Center,
                                  BitmapAlignment vertical = BitmapAlignment.Center,
                                  SKPaint paint = null)
    {
        if (stretch == BitmapStretch.Fill)
        {
            canvas.DrawBitmap(bitmap, dest, paint);
        }
        else
        {
            float scale = 1;

            switch (stretch)
            {
                case BitmapStretch.None:
                    break;

                case BitmapStretch.Uniform:
                    scale = Math.Min(dest.Width / bitmap.Width, dest.Height / bitmap.Height);
                    break;

                case BitmapStretch.UniformToFill:
                    scale = Math.Max(dest.Width / bitmap.Width, dest.Height / bitmap.Height);
                    break;
            }

            SKRect display = CalculateDisplayRect(dest, scale * bitmap.Width, scale * bitmap.Height,
                                                  horizontal, vertical);

            canvas.DrawBitmap(bitmap, display, paint);
        }
    }
    ···
}
此方法的主要目的是計算名為 scale 的縮放比例,然後在呼叫 CalculateDisplayRect 方法時套用至位圖寬度和高度。 這是根據水平和垂直對齊方式計算顯示點陣圖的矩形的方法:
static class BitmapExtensions
{
    ···
    static SKRect CalculateDisplayRect(SKRect dest, float bmpWidth, float bmpHeight,
                                       BitmapAlignment horizontal, BitmapAlignment vertical)
    {
        float x = 0;
        float y = 0;

        switch (horizontal)
        {
            case BitmapAlignment.Center:
                x = (dest.Width - bmpWidth) / 2;
                break;

            case BitmapAlignment.Start:
                break;

            case BitmapAlignment.End:
                x = dest.Width - bmpWidth;
                break;
        }

        switch (vertical)
        {
            case BitmapAlignment.Center:
                y = (dest.Height - bmpHeight) / 2;
                break;

            case BitmapAlignment.Start:
                break;

            case BitmapAlignment.End:
                y = dest.Height - bmpHeight;
                break;
        }

        x += dest.Left;
        y += dest.Top;

        return new SKRect(x, y, x + bmpWidth, y + bmpHeight);
    }
}
類別 BitmapExtensions 包含具有來源矩形的額外 DrawBitmap 方法,以指定位圖子集。 這個方法與第一個方法類似,不同之處在於縮放比例是根據矩形計算 source ,然後套用至 source 呼叫 CalculateDisplayRect中的矩形:
static class BitmapExtensions
{
    ···
    public static void DrawBitmap(this SKCanvas canvas, SKBitmap bitmap, SKRect source, SKRect dest,
                                  BitmapStretch stretch,
                                  BitmapAlignment horizontal = BitmapAlignment.Center,
                                  BitmapAlignment vertical = BitmapAlignment.Center,
                                  SKPaint paint = null)
    {
        if (stretch == BitmapStretch.Fill)
        {
            canvas.DrawBitmap(bitmap, source, dest, paint);
        }
        else
        {
            float scale = 1;

            switch (stretch)
            {
                case BitmapStretch.None:
                    break;

                case BitmapStretch.Uniform:
                    scale = Math.Min(dest.Width / source.Width, dest.Height / source.Height);
                    break;

                case BitmapStretch.UniformToFill:
                    scale = Math.Max(dest.Width / source.Width, dest.Height / source.Height);
                    break;
            }

            SKRect display = CalculateDisplayRect(dest, scale * source.Width, scale * source.Height,
                                                  horizontal, vertical);

            canvas.DrawBitmap(bitmap, source, display, paint);
        }
    }
    ···
}
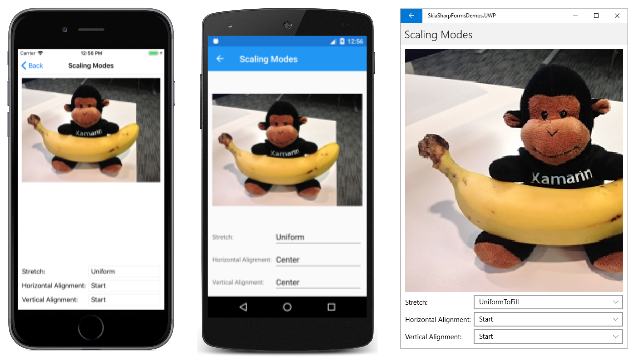
這兩個新DrawBitmap方法中的第一個會在 [調整模式] 頁面中示範。 XAML 檔案包含三Picker個元素,可讓您選取 和 BitmapAlignment 列舉的成員BitmapStretch:
<?xml version="1.0" encoding="utf-8" ?>
<ContentPage xmlns="http://xamarin.com/schemas/2014/forms"
             xmlns:x="http://schemas.microsoft.com/winfx/2009/xaml"
             xmlns:local="clr-namespace:SkiaSharpFormsDemos"
             xmlns:skia="clr-namespace:SkiaSharp.Views.Forms;assembly=SkiaSharp.Views.Forms"
             x:Class="SkiaSharpFormsDemos.Bitmaps.ScalingModesPage"
             Title="Scaling Modes">

    <Grid Padding="10">
        <Grid.RowDefinitions>
            <RowDefinition Height="*" />
            <RowDefinition Height="Auto" />
            <RowDefinition Height="Auto" />
            <RowDefinition Height="Auto" />
        </Grid.RowDefinitions>

        <Grid.ColumnDefinitions>
            <ColumnDefinition Width="Auto" />
            <ColumnDefinition Width="*" />
        </Grid.ColumnDefinitions>

        <skia:SKCanvasView x:Name="canvasView"
                           Grid.Row="0" Grid.Column="0" Grid.ColumnSpan="2"
                           PaintSurface="OnCanvasViewPaintSurface" />

        <Label Text="Stretch:"
               Grid.Row="1" Grid.Column="0"
               VerticalOptions="Center" />

        <Picker x:Name="stretchPicker"
                Grid.Row="1" Grid.Column="1"
                SelectedIndexChanged="OnPickerSelectedIndexChanged">
            <Picker.ItemsSource>
                <x:Array Type="{x:Type local:BitmapStretch}">
                    <x:Static Member="local:BitmapStretch.None" />
                    <x:Static Member="local:BitmapStretch.Fill" />
                    <x:Static Member="local:BitmapStretch.Uniform" />
                    <x:Static Member="local:BitmapStretch.UniformToFill" />
                </x:Array>
            </Picker.ItemsSource>

            <Picker.SelectedIndex>
                0
            </Picker.SelectedIndex>
        </Picker>

        <Label Text="Horizontal Alignment:"
               Grid.Row="2" Grid.Column="0"
               VerticalOptions="Center" />

        <Picker x:Name="horizontalPicker"
                Grid.Row="2" Grid.Column="1"
                SelectedIndexChanged="OnPickerSelectedIndexChanged">
            <Picker.ItemsSource>
                <x:Array Type="{x:Type local:BitmapAlignment}">
                    <x:Static Member="local:BitmapAlignment.Start" />
                    <x:Static Member="local:BitmapAlignment.Center" />
                    <x:Static Member="local:BitmapAlignment.End" />
                </x:Array>
            </Picker.ItemsSource>

            <Picker.SelectedIndex>
                0
            </Picker.SelectedIndex>
        </Picker>

        <Label Text="Vertical Alignment:"
               Grid.Row="3" Grid.Column="0"
               VerticalOptions="Center" />

        <Picker x:Name="verticalPicker"
                Grid.Row="3" Grid.Column="1"
                SelectedIndexChanged="OnPickerSelectedIndexChanged">
            <Picker.ItemsSource>
                <x:Array Type="{x:Type local:BitmapAlignment}">
                    <x:Static Member="local:BitmapAlignment.Start" />
                    <x:Static Member="local:BitmapAlignment.Center" />
                    <x:Static Member="local:BitmapAlignment.End" />
                </x:Array>
            </Picker.ItemsSource>

            <Picker.SelectedIndex>
                0
            </Picker.SelectedIndex>
        </Picker>
    </Grid>
</ContentPage>
程序代碼後置檔案只會在任何 CanvasView 項目變更時 Picker 使 無效。 處理程式 PaintSurface 會存取三 Picker 個檢視來呼叫 DrawBitmap 擴充方法:
public partial class ScalingModesPage : ContentPage
{
    SKBitmap bitmap =
        BitmapExtensions.LoadBitmapResource(typeof(ScalingModesPage),
                                            "SkiaSharpFormsDemos.Media.Banana.jpg");
    public ScalingModesPage()
    {
        InitializeComponent();
    }

    private void OnPickerSelectedIndexChanged(object sender, EventArgs args)
    {
        canvasView.InvalidateSurface();
    }

    void OnCanvasViewPaintSurface(object sender, SKPaintSurfaceEventArgs args)
    {
        SKImageInfo info = args.Info;
        SKSurface surface = args.Surface;
        SKCanvas canvas = surface.Canvas;

        canvas.Clear();

        SKRect dest = new SKRect(0, 0, info.Width, info.Height);

        BitmapStretch stretch = (BitmapStretch)stretchPicker.SelectedItem;
        BitmapAlignment horizontal = (BitmapAlignment)horizontalPicker.SelectedItem;
        BitmapAlignment vertical = (BitmapAlignment)verticalPicker.SelectedItem;

        canvas.DrawBitmap(bitmap, dest, stretch, horizontal, vertical);
    }
}
以下是一些選項組合:
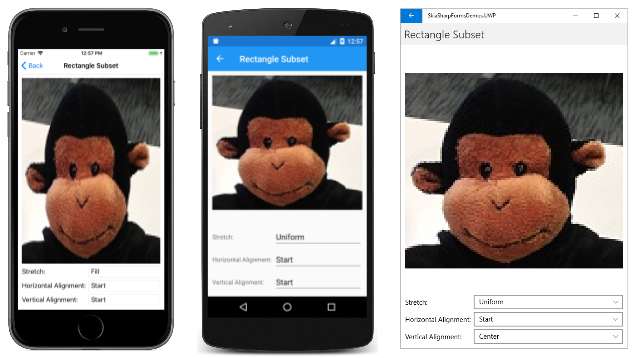
[矩形子集] 頁面與縮放模式幾乎具有相同的 XAML 檔案,但程式代碼後置檔案會定義字段所SOURCE指定位圖的矩形子集:
public partial class ScalingModesPage : ContentPage
{
    SKBitmap bitmap =
        BitmapExtensions.LoadBitmapResource(typeof(ScalingModesPage),
                                            "SkiaSharpFormsDemos.Media.Banana.jpg");

    static readonly SKRect SOURCE = new SKRect(94, 12, 212, 118);

    public RectangleSubsetPage()
    {
        InitializeComponent();
    }

    private void OnPickerSelectedIndexChanged(object sender, EventArgs args)
    {
        canvasView.InvalidateSurface();
    }

    void OnCanvasViewPaintSurface(object sender, SKPaintSurfaceEventArgs args)
    {
        SKImageInfo info = args.Info;
        SKSurface surface = args.Surface;
        SKCanvas canvas = surface.Canvas;

        canvas.Clear();

        SKRect dest = new SKRect(0, 0, info.Width, info.Height);

        BitmapStretch stretch = (BitmapStretch)stretchPicker.SelectedItem;
        BitmapAlignment horizontal = (BitmapAlignment)horizontalPicker.SelectedItem;
        BitmapAlignment vertical = (BitmapAlignment)verticalPicker.SelectedItem;

        canvas.DrawBitmap(bitmap, SOURCE, dest, stretch, horizontal, vertical);
    }
}
此矩形來源會隔離猴子的頭部,如下列螢幕快照所示:
