練習 - 使用變數和輸出迴圈
若是玩具公司,您需要在要推出泰迪熊的每個國家/地區部署虛擬網路。 開發人員也會要求您為所部署的每個區域 Azure SQL 邏輯伺服器提供完整網域名稱 (FQDN)。
在此練習中,您會將虛擬網路和其設定新增至 Bicep 程式碼,而您將會輸出邏輯伺服器 FQDN。
在此過程中,您將會:
- 更新 Bicep 程式碼,以指定每個虛擬網路子網路的參數。
- 新增變數迴圈來建立子網路陣列,您將在虛擬網路資源宣告中使用該陣列。
- 新增輸出迴圈來建立邏輯伺服器 FQDN 的清單。
- 部署 Bicep 檔,並確認部署。
將虛擬網路新增至 Bicep 檔案
開啟 main.bicep 檔案。
在參數宣告下方,新增下列參數:
@description('The IP address range for all virtual networks to use.')
param virtualNetworkAddressPrefix string = '10.10.0.0/16'

@description('The name and IP address range for each subnet in the virtual networks.')
param subnets array = [
  {
    name: 'frontend'
    ipAddressRange: '10.10.5.0/24'
  }
  {
    name: 'backend'
    ipAddressRange: '10.10.10.0/24'
  }
]
在參數底下新增空白行,然後新增
subnetProperties變數迴圈:var subnetProperties = [for subnet in subnets: { name: subnet.name properties: { addressPrefix: subnet.ipAddressRange } }]在檔案底部的
databases模組迴圈下方,新增下列資源迴圈:resource virtualNetworks 'Microsoft.Network/virtualNetworks@2024-01-01' = [for location in locations: { name: 'teddybear-${location}' location: location properties:{ addressSpace:{ addressPrefixes:[ virtualNetworkAddressPrefix ] } subnets: subnetProperties } }]注意
此範例會針對所有虛擬網路使用相同的位址空間。 一般來說,建立多個虛擬網路時,您要為這些網路提供不同的位址空間,以防需要將其連接在一起的可能性。
儲存對檔案所做的變更。
將輸出新增至資料庫模組
開啟 modules/database.bicep 檔案。
在檔案底端,新增下列輸出:
output serverName string = sqlServer.name output location string = location output serverFullyQualifiedDomainName string = sqlServer.properties.fullyQualifiedDomainName儲存對檔案所做的變更。
透過父代 Bicep 檔案流程輸出
開啟 main.bicep 檔案。
在檔案底端,新增下列輸出迴圈:
output serverInfo array = [for i in range(0, length(locations)): { name: databases[i].outputs.serverName location: databases[i].outputs.location fullyQualifiedDomainName: databases[i].outputs.serverFullyQualifiedDomainName }]儲存對檔案所做的變更。
驗證 Bicep 檔案
完成上述所有變更之後,main.bicep 檔案看起來應該像下列範例:
@description('The Azure regions into which the resources should be deployed.')
param locations array = [
'westeurope'
'eastus2'
'eastasia'
]
@secure()
@description('The administrator login username for the SQL server.')
param sqlServerAdministratorLogin string
@secure()
@description('The administrator login password for the SQL server.')
param sqlServerAdministratorLoginPassword string
@description('The IP address range for all virtual networks to use.')
param virtualNetworkAddressPrefix string = '10.10.0.0/16'
@description('The name and IP address range for each subnet in the virtual networks.')
param subnets array = [
{
name: 'frontend'
ipAddressRange: '10.10.5.0/24'
}
{
name: 'backend'
ipAddressRange: '10.10.10.0/24'
}
]
var subnetProperties = [for subnet in subnets: {
  name: subnet.name
  properties: {
    addressPrefix: subnet.ipAddressRange
  }
}]
module databases 'modules/database.bicep' = [for location in locations: {
name: 'database-${location}'
params: {
location: location
sqlServerAdministratorLogin: sqlServerAdministratorLogin
sqlServerAdministratorLoginPassword: sqlServerAdministratorLoginPassword
}
}]
resource virtualNetworks 'Microsoft.Network/virtualNetworks@2024-01-01' = [for location in locations: {
  name: 'teddybear-${location}'
  location: location
  properties:{
    addressSpace:{
      addressPrefixes:[
        virtualNetworkAddressPrefix
      ]
    }
    subnets: subnetProperties
  }
}]
output serverInfo array = [for i in range(0, length(locations)): {
name: databases[i].outputs.serverName
location: databases[i].outputs.location
fullyQualifiedDomainName: databases[i].outputs.serverFullyQualifiedDomainName
}]
database.bicep 檔案看起來應該像下列範例:
@description('The Azure region into which the resources should be deployed.')
param location string
@secure()
@description('The administrator login username for the SQL server.')
param sqlServerAdministratorLogin string
@secure()
@description('The administrator login password for the SQL server.')
param sqlServerAdministratorLoginPassword string
@description('The name and tier of the SQL database SKU.')
param sqlDatabaseSku object = {
name: 'Standard'
tier: 'Standard'
}
@description('The name of the environment. This must be Development or Production.')
@allowed([
'Development'
'Production'
])
param environmentName string = 'Development'
@description('The name of the audit storage account SKU.')
param auditStorageAccountSkuName string = 'Standard_LRS'
var sqlServerName = 'teddy${location}${uniqueString(resourceGroup().id)}'
var sqlDatabaseName = 'TeddyBear'
var auditingEnabled = environmentName == 'Production'
var auditStorageAccountName = take('bearaudit${location}${uniqueString(resourceGroup().id)}', 24)
resource sqlServer 'Microsoft.Sql/servers@2023-08-01-preview' = {
name: sqlServerName
location: location
properties: {
administratorLogin: sqlServerAdministratorLogin
administratorLoginPassword: sqlServerAdministratorLoginPassword
}
}
resource sqlDatabase 'Microsoft.Sql/servers/databases@2023-08-01-preview' = {
parent: sqlServer
name: sqlDatabaseName
location: location
sku: sqlDatabaseSku
}
resource auditStorageAccount 'Microsoft.Storage/storageAccounts@2023-05-01' = if (auditingEnabled) {
name: auditStorageAccountName
location: location
sku: {
name: auditStorageAccountSkuName
}
kind: 'StorageV2'
}
resource sqlServerAudit 'Microsoft.Sql/servers/auditingSettings@2023-08-01-preview' = if (auditingEnabled) {
parent: sqlServer
name: 'default'
properties: {
state: 'Enabled'
storageEndpoint: environmentName == 'Production' ? auditStorageAccount.properties.primaryEndpoints.blob : ''
storageAccountAccessKey: environmentName == 'Production' ? listKeys(auditStorageAccount.id, auditStorageAccount.apiVersion).keys[0].value : ''
}
}
output serverName string = sqlServer.name
output location string = location
output serverFullyQualifiedDomainName string = sqlServer.properties.fullyQualifiedDomainName
如果不是,請複製範例或調整範本以符合範例。
將 Bicep 範本部署至 Azure
在 Visual Studio Code 終端機中,透過執行下列程式碼,將 Bicep 範本部署到 Azure。 此流程可能需要幾分鐘時間才能完成,然後您就會成功完成部署。
az deployment group create --template-file main.bicep
在 Visual Studio Code 終端機中,透過執行下列 Azure PowerShell 命令,將 Bicep 範本部署到 Azure。 此流程可能需要幾分鐘時間才能完成,然後您就會成功完成部署。
New-AzResourceGroupDeployment -TemplateFile main.bicep
警告
請務必使用您先前所用相同的登入和密碼,否則部署將無法成功完成。
等待部署完成。
檢查部署
部署完成之後,您會想要驗證是否已部署新的虛擬網路,以及是否已如預期般設定子網路。
前往 Azure 入口網站,並確定您在沙箱訂用帳戶中。
選取 [沙箱資源群組名稱]。
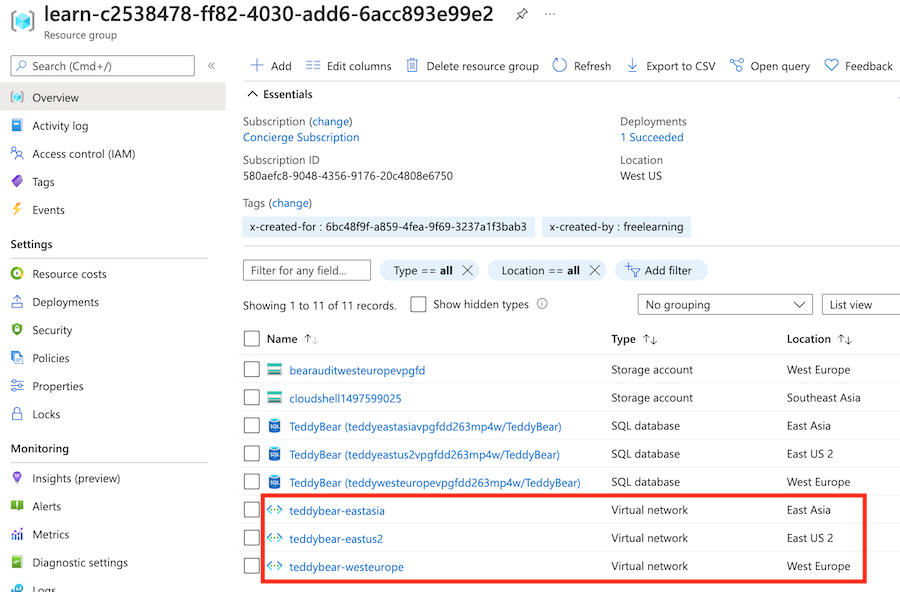
確認虛擬網路已部署至三個 Azure 位置。

選取名為
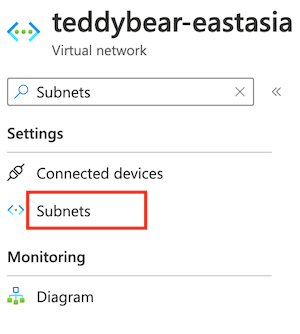
teddybear-eastasia的虛擬網路。在搜尋列中輸入 Subnets。 在 [設定] 下,選取 [子網路]。

確認已部署子網路具有
subnets參數預設值中所指定的名稱和 IP 位址。
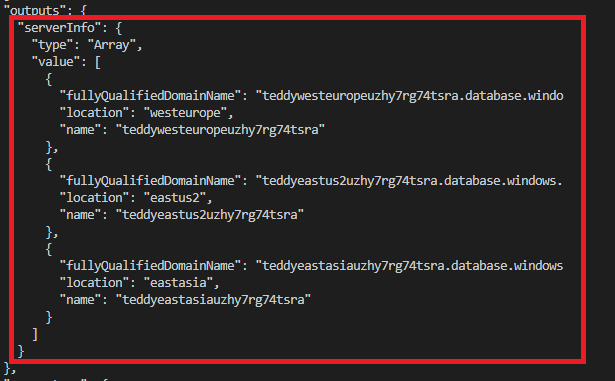
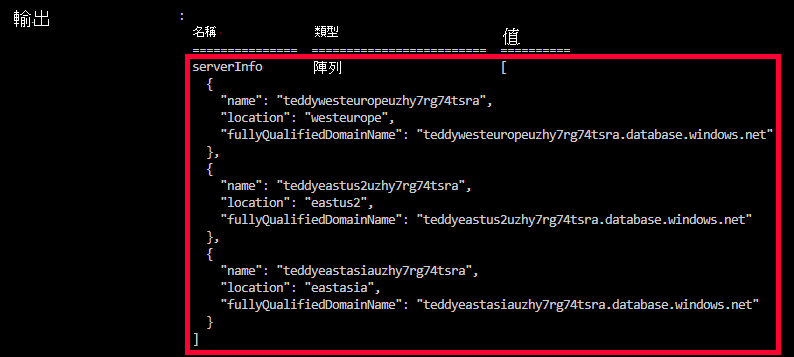
檢查部署命令的輸出。 其應該包含已部署的三個邏輯伺服器名稱和 FQDN,如下所示:

前往 Azure 入口網站,並確定您在沙箱訂用帳戶中。
選取 [沙箱資源群組名稱]。
確認虛擬網路已部署至三個 Azure 位置。

選取名為
teddybear-eastasia的虛擬網路。在搜尋列中輸入 Subnets。 在 [設定] 下,選取 [子網路]。

確認已部署子網路具有
subnets參數預設值中所指定的名稱和 IP 位址。
檢查部署命令的輸出。 其應該包含已部署的三個邏輯伺服器名稱和 FQDN,如下所示:
