Set up your Windows 365 Link and sign in
The first time you turn on your Windows 365 Link, you're guided through setting up your device and signing in with a work or school user account.
Requirements
- An available network.
- A work or school account.
- A Windows 365 Cloud PC.
First time set up
Complete the following steps to set up your new device:
- Connect a monitor, USB keyboard, and USB mouse (recommended) to the device.
- Connect the power adaptor to the power port and then into a power outlet.
- Power on the device.
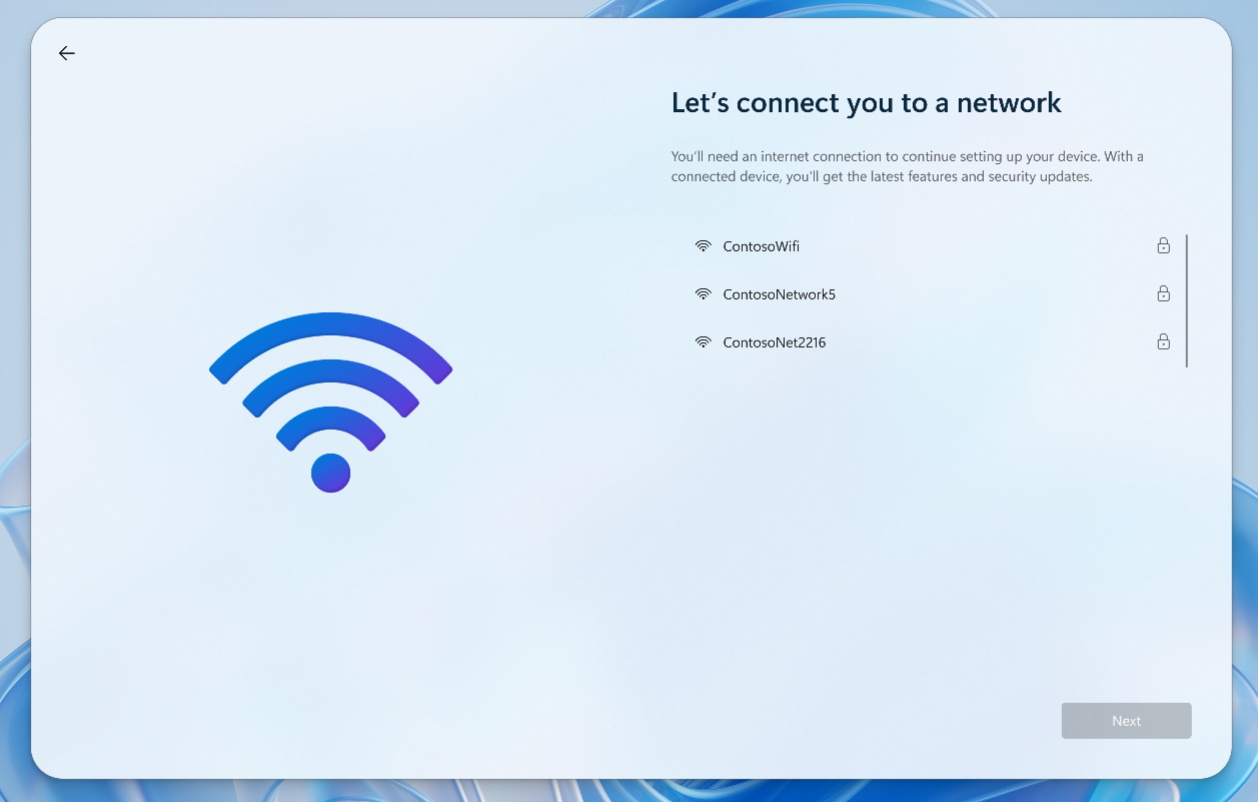
- On the Let's connect you to a network page, select a network > Next.

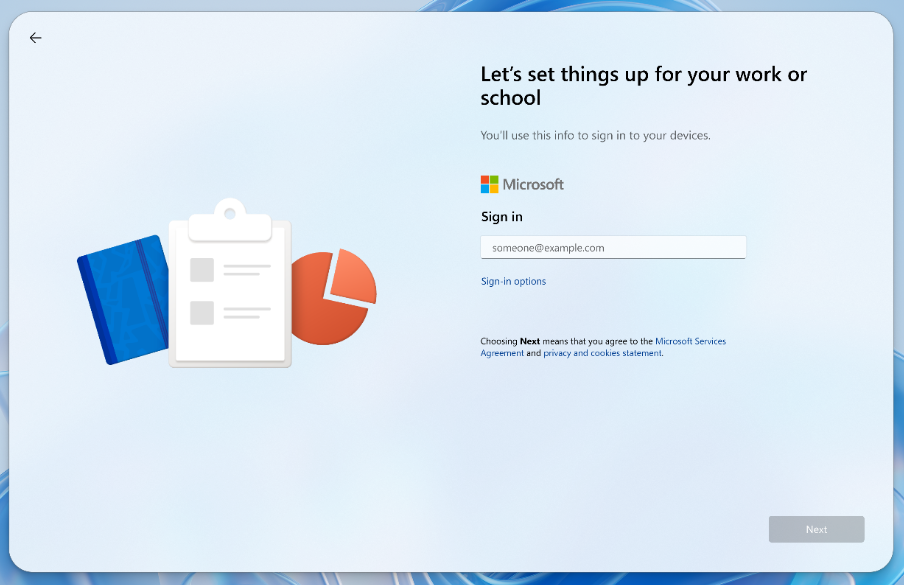
- On the Let's set things up for your work or school page, type your work or school e-mail > Next

- Authenticate your account as requested. Your organization defined the authentication method (FIDO2 security key, Passkey (FIDO2), Microsoft Authenticator app, and so on).
- You're connected to your Cloud PC with all of your context and apps just where you left off.
You can adjust additional settings prior to sign-in by using Quick settings in the bottom-right corner.
When you sign in for the first time, the Windows 365 Link automatically joins Microsoft Entra ID and enrolls the device into Microsoft Intune tenant associated with the account used to sign in. Your organization's admins use Intune to manage both virtual machines and hardware devices, including Windows 365 Link.
Next steps
Use Quick Settings to view and manage monitors, languages, network connections, and more.