Create a storage account in an Azure Extended Zone
Important
Azure Extended Zones service is currently in PREVIEW. See the Supplemental Terms of Use for Microsoft Azure Previews for legal terms that apply to Azure features that are in beta, preview, or otherwise not yet released into general availability.
In this article, you learn how to create an Azure storage account in Los Angeles Extended Zone.
Prerequisites
An Azure account with an active subscription. Create an account for free.
Access to Los Angeles Extended Zone. For more information, see Request access to an Azure Extended Zone.
Sign in to Azure
Sign in to the Azure portal with your Azure account.
Create a storage account in an Extended Zone
In this section, you create a storage account in an Extended Zone.
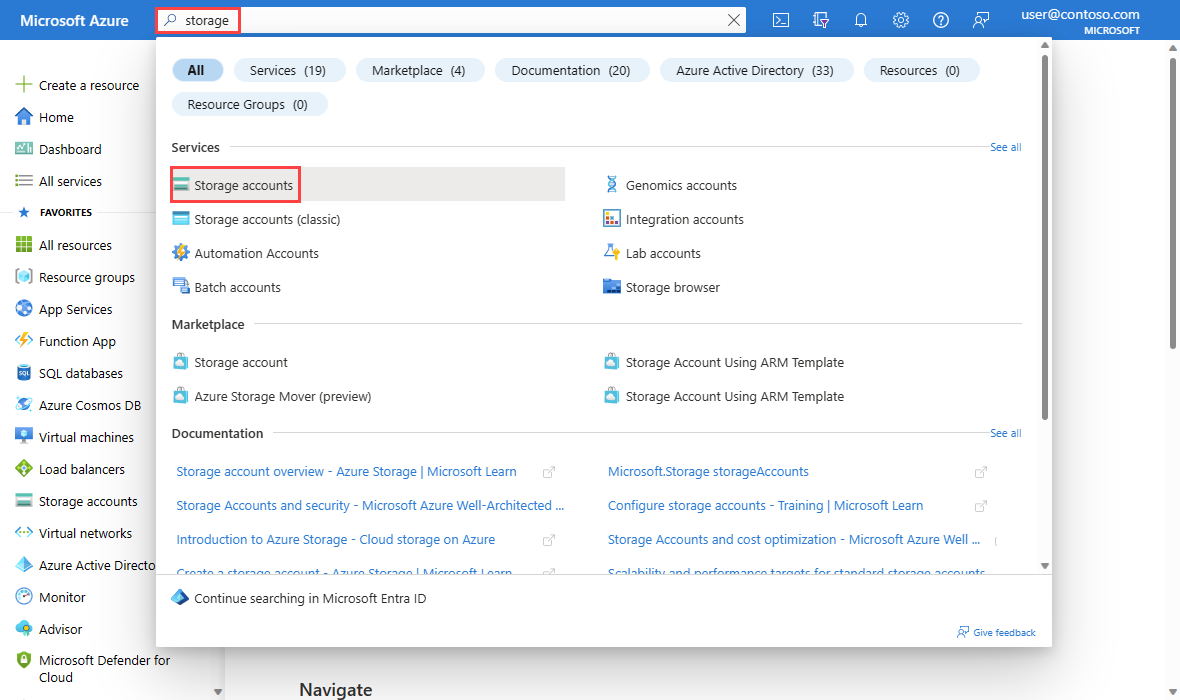
In the search box at the top of the portal, enter storage. Select Storage accounts from the search results.

In the Storage accounts page, select + Create.
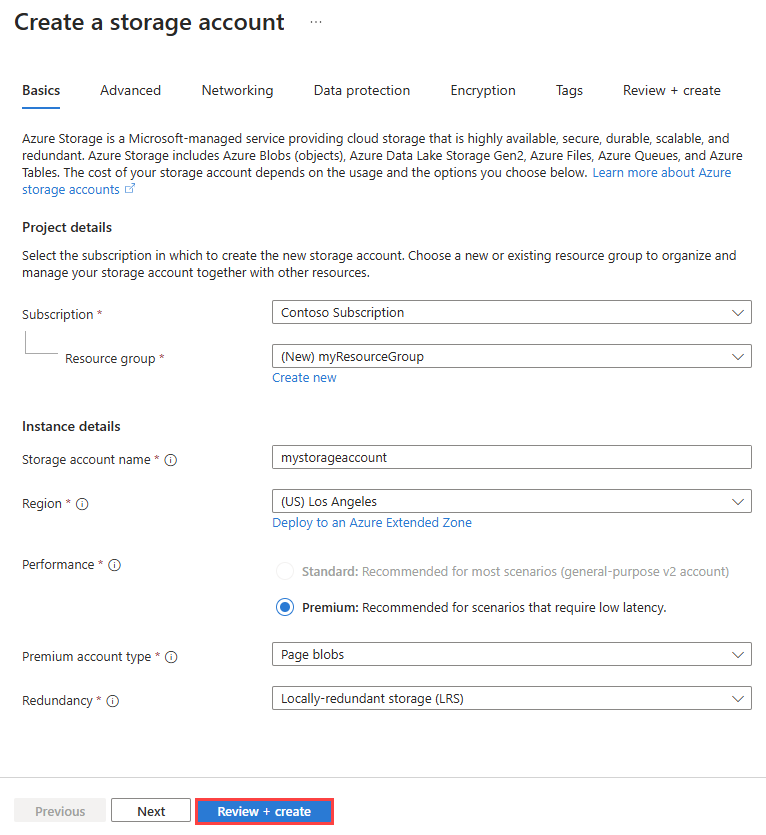
On the Basics tab of Create a storage account, enter, or select the following information:
Setting Value Project details Subscription Select your Azure subscription. Resource group Select Create new.
Enter myResourceGroup in Name.
Select OK.Instance details Storage account name Enter a unique name. Region Select (US) West US and then select Deploy to an Azure Extended Zone.
In Azure Extended Zones, select Los Angeles.
Select the Select button.Performance Premium is the only available option for an Extended Zone. Premium account type Select Page blobs. Other available options are Block blobs and File shares. Redundancy Locally-redundant storage (LRS) is the only available option for an Extended Zone. Note
Azure Extended Zones only supports premium storage accounts with locally-redundant storage (LRS) redundancy.
Select Review + create.
Review the settings, and then select Create.
Clean up resources
When no longer needed, delete the storage account and its resource group:
In the search box at the top of the portal, enter myResourceGroup. Select myResourceGroup from the search results.
Select Delete resource group.
In Delete a resource group, enter myResourceGroup, and then select Delete.
Select Delete to confirm the deletion of the resource group and all its resources.
