Use your prompt actions in Copilot Studio
Use prompt in Copilot Studio to natural language actions as copilot extensions. These actions use the generative AI models from AI Builder and natural language understanding to address specific scenarios for your copilots. This means you can extend the capabilities of your copilots by simply creating natural language based prompt actions.
This article explains the three ways to extend copilots with prompt actions:
- Prompt action: Extend Microsoft copilots with natural language based prompt actions.
- Topic node: You control how your custom copilot responds in a semi-scripted conversation.
- AI plugin: Invoke the prompt based on the user's question through an AI plugin.
Important
To use your prompt in a copilot, you need to create it from Copilot Studio.
Prerequisites
- An environment that’s on the list of available regions.
- At least one of the following licenses: Power Apps, Power Automate, or Copilot Studio.
- A Microsoft Dataverse database that's installed on the environment.
- A created or accessible Dataverse table with data.
- (If you don't have a Copilot Studio license) An AI Builder add-on.
Create a prompt action
Prompt actions are one of the ways to extend Microsoft Copilots. They do this by creating business specific natural language actions. The actions are interpreted by the GPT model to perform the necessary action as instructed. These actions are wrapped within a AI plugin definition, which copilots can invoke at runtime when a matching intent or utterance is encountered.
Sign in to Copilot Studio.
From the left navigation menu, select Create.
Select New Microsoft Copilot action > Copilot for Microsoft 365 > New action > Prompt.
The Add a prompt action wizard opens.
Use the wizard to create a prompt action
The Add a prompt action wizard is a step-by-step guide for how to create a prompt action.
On the Action details tab in the Action name and Description fields, enter a name and description for the action.
These details are used by Copilot to perform a semantic matching of the action with the user query. In the Solution field, the dropdown menu lists all the solutions in the current environment. If you defined a preferred solution, then it's preselected. Otherwise, select the solution you want to use. As an alternative, the wizard can create a new solution for this action.
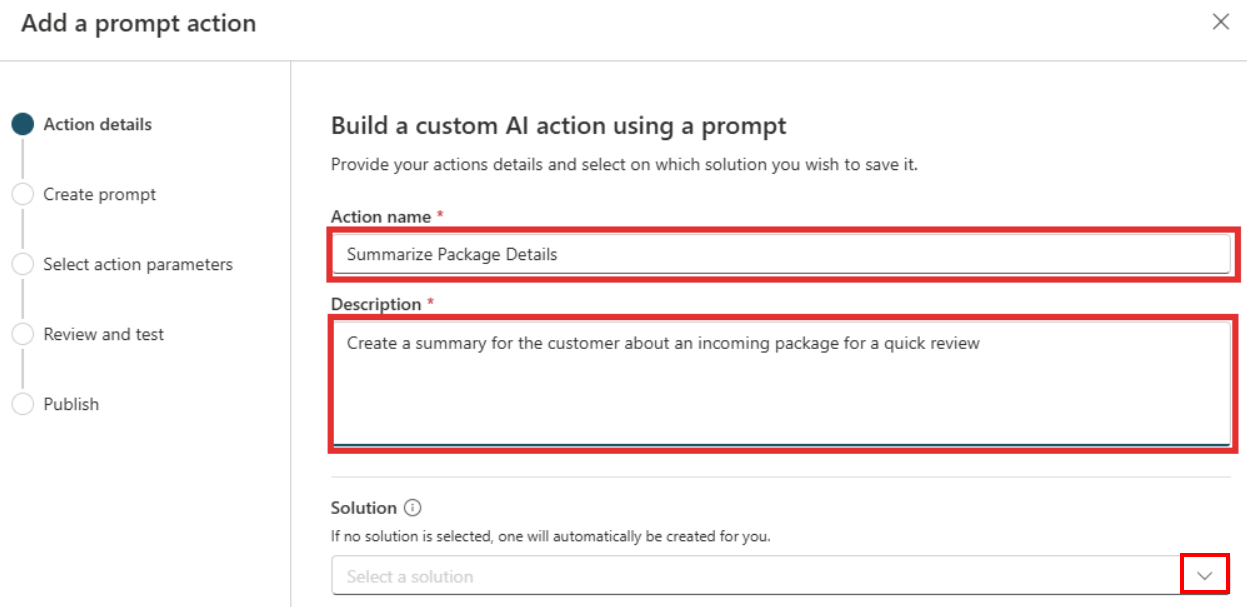
On the Create prompt tab, enter the natural language action to describe the task you want GPT to perform.
In the Prompt field, enter instructions and data that are used to generate the response details for the use case. To enable Copilot to pass important pieces of information at the runtime to the prompt action, add input variables. You can write your own instructions or begin from one of the existing prompt templates. Examples of prompts are
Summarize text,Extract information from text, andClassify text.
To try out your prompt, select Test prompt. Your prompt generates and appears in the Prompt response field. You might need to revise and iterate on your prompt to meet your needs.
When you're satisfied with the prompt response, select Save custom prompt.
On the Select action parameters tab, enter descriptions for the input and output variables. This step ensures descriptive names are selected so that Copilot is able to prefill it with information from user utterance and consume the output from the prompt action.
- In the Input parameters section, add the input variables that the prompt action needs to generate the response. These are the variables that you want to pass to the prompt action at runtime. You can add multiple input variables.
- In the Output parameters section, add the output variables that the prompt action generates. These are the variables that you want to receive from the prompt action at runtime.
On the Review and test tab, a copilot developer tests the prompt plugin by side-loading it in the Copilot for Microsoft 365.
To test the prompt plugin, select Test action.
When it's ready to be tested on Copilot for Microsoft 365, select Open to test.
After you test the prompt and verify that it performs as expected, select Publish..
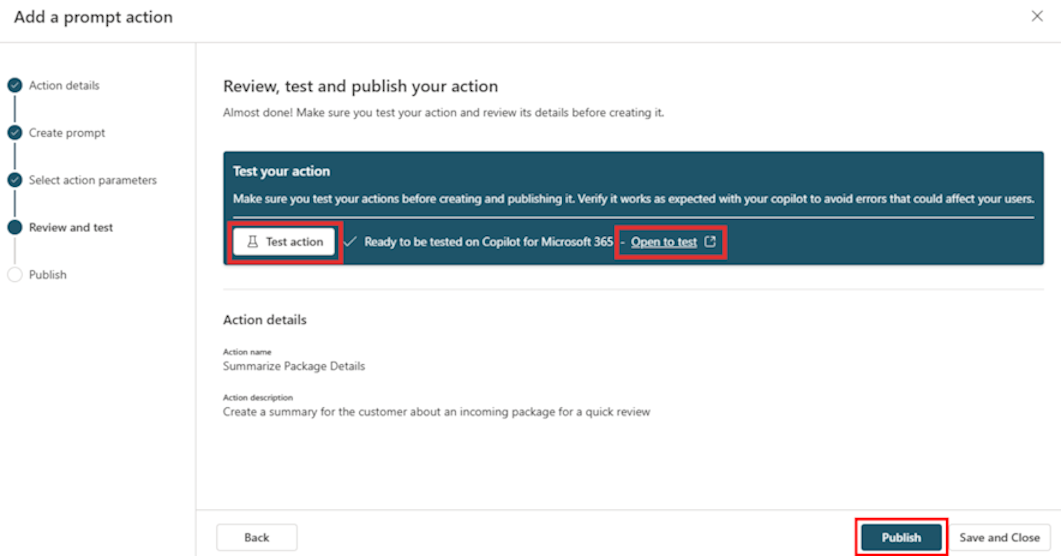
To confirm that your action is published, make sure this message displays in the Publish tab: Your prompt action is now published to Copilot for Microsoft 365.
It might take a few minutes for your action to show up in copilot experiences. You can review information about using and administering actions in Copilot for Microsoft 365.
Add a prompt to a topic node
To guide the copilot's responses in a semi-scripted conversation, add a prompt to a topic node. After you create your custom copilot, you can insert a node prompt in a topic.
On the left navigation menu, select Copilots, and then select your custom copilot.
On the menu at the top of the screen, select Topics > Add a topic.
Select From blank > Add node.
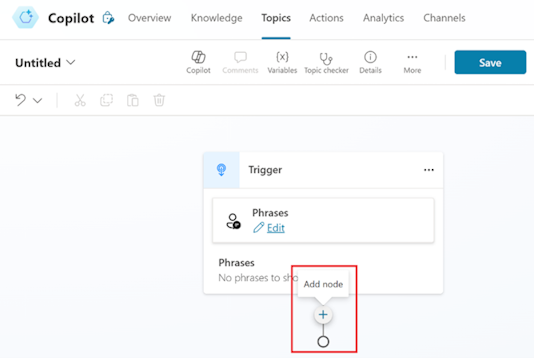
From the Add a node dropdown menu, select Call an action > Create a prompt (in the Basic actions tab). You can also select an existing prompt from the pop-up menu as an action node for current topic.
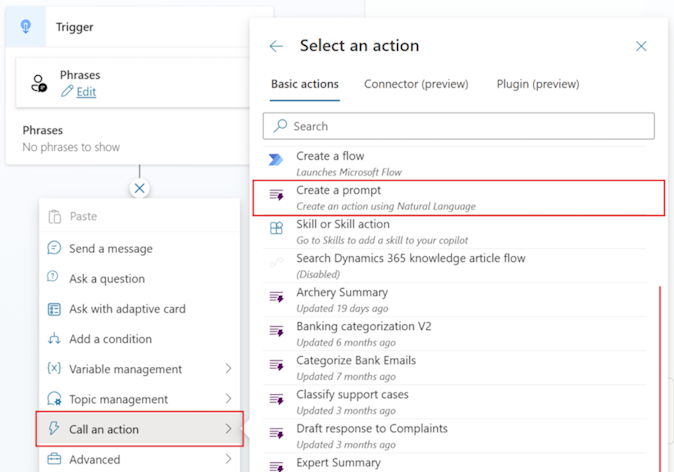
In the Prompt field, enter the prompt instructions, grounding data (if needed), and input variables relevant for the use case.
To test the output for your prompt, select Test prompt. This ensures the responses are compliant with the goals of this action. Provide sample input data that closely resembles the data that Copilot passes to this prompt action.
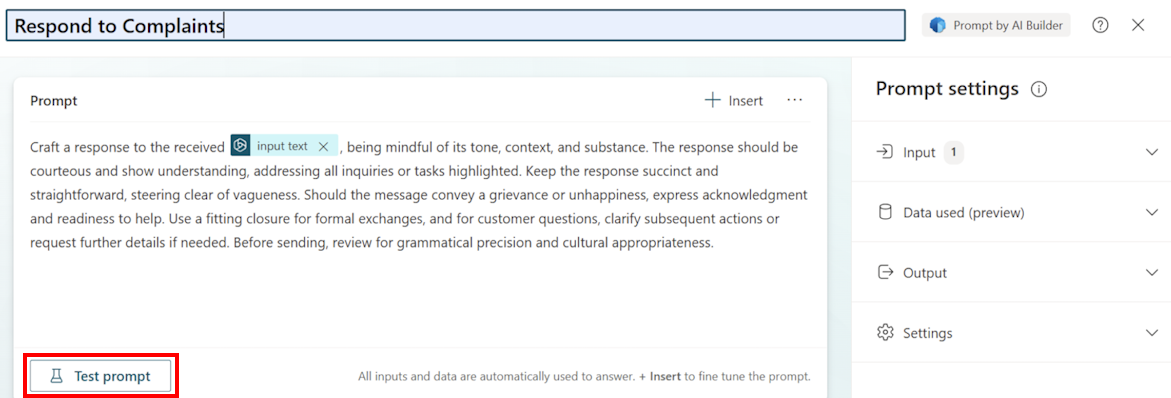
To finalize and save the action, select Save custom prompt. A new node gets added to the topic workflow.
Connect the input and output parameters of the prompt action node with input and output variables in the topic.
To ensure your newly edited topic is compliant with the expectation, save and test it.
Add a prompt to an AI plugin
If you want Copilot to decide whether to invoke the prompt based on the user's question, you can add a prompt through an AI plugin.
Do steps 1 through 3 in Add a prompt to a topic node.
From the Add node dropdown menu, select Call an action > Add a plugin action (preview) (in the Plugin (preview) tab).
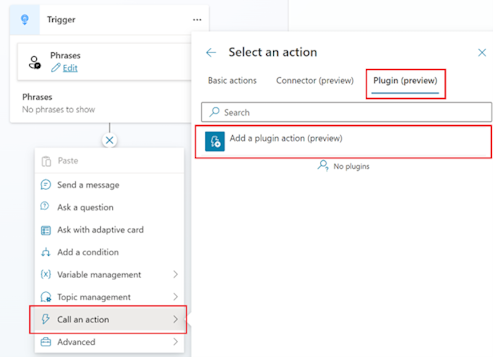
In the Step 1 of 3: Choose an action screen, search for and select your prompt in the Discover an action field.
Select Finish.