Automate deployments with Release Management
| TFS 2015 | Previous version

Important
Release Management features have been integrated into Azure Pipelines and Team Foundation Server (TFS). For more information, see Build and Release in Azure Pipelines.
The newer web-based version is the recommended alternative to the server and client version described in this topic. If you do not already have Release Management installed, we encourage you to use the web-based version in TFS 2015 Update 2 and above or Azure Pipelines instead of the version described here. If you are already using an earlier server and client version, you should be aware that no new features will be added to these versions.
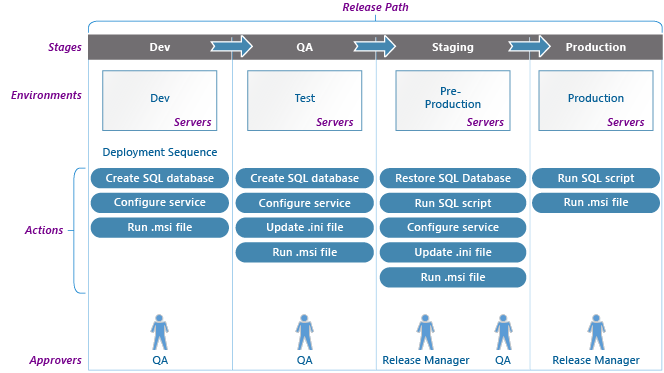
Support a rapid release cadence and manage simultaneous releases. Set up release paths that represent your stages from development to production. Run actions to deploy your app to an environment for that stage. Add approvers to sign off that the app has successfully passed each stage. Start your release pipeline manually or automatically from a build. Then track your releases as they move through your release path.

Set up and start a release
- Set up the release management server, client, and deployment agents.
- Set up users and groups and control access to Release Management.
- Create your release path and start a release.
After you have created your release path, you can trigger a release from a build.
You can also simplify your scripts using configuration variables and system variables.
To read a detailed user guide, download this pdf file.
Related topics
- Install Release Management
- Manage your release
- Release your app with deployment agents
- Release your app without deployment agents
- Deploy continuously to Azure
Help and support
Visit the Developer Community.
