빠른 시작: Teams 통화 큐에 통화 앱 조인
이 빠른 시작에서는 Azure Communication Services 사용자에서 Teams 통화 큐로 통화를 시작하는 방법을 알아봅니다. 다음 단계를 통해 이를 달성할 수 있습니다.
- Teams 테넌트와 Azure Communication Services 리소스 페더레이션을 사용하도록 설정합니다.
- Teams 관리 센터를 통해 Teams 통화 큐를 선택하거나 만듭니다.
- Teams 관리 센터를 통해 통화 큐의 이메일 주소를 가져옵니다.
- Graph API를 통해 통화 큐의 개체 ID를 가져옵니다.
- Azure Communication Services Calling SDK로 통화를 시작합니다.
끝으로 건너뛰려면 GitHub에서 이 빠른 시작을 샘플로 다운로드할 수 있습니다.
Teams 테넌트에서 상호 운용성 사용
Teams 관리자 역할이 있는 Microsoft Entra 사용자는 MicrosoftTeams 모듈과 함께 PowerShell cmdlet을 실행하여 테넌트에서 Communication Services 리소스를 사용하도록 설정할 수 있습니다.
1. Microsoft Teams 모듈 준비
먼저 PowerShell을 열고 다음 명령을 사용하여 Teams 모듈이 있는지 유효성을 검사합니다.
Get-module *teams*
MicrosoftTeams 모듈이 보이지 않으면 먼저 설치합니다. 모듈을 설치하려면 PowerShell을 관리자 권한으로 실행해야 합니다. 그런 후 다음 명령을 실행합니다.
Install-Module -Name MicrosoftTeams
설치될 모듈에 대한 정보를 받게 되며 Y 또는 A 답변으로 확인할 수 있습니다. 모듈이 설치되었지만 오래된 경우 다음 명령을 실행하여 모듈을 업데이트할 수 있습니다.
Update-Module MicrosoftTeams
2. Microsoft Teams 모듈에 연결
모듈이 설치되고 준비되면 다음 명령을 사용하여 MicrosoftTeams 모듈에 연결할 수 있습니다. 로그인하라는 대화형 창이 표시됩니다. 사용하려는 사용자 계정에는 Teams 관리자 권한이 있어야 합니다. 그렇지 않으면 다음 단계에서 access denied 응답을 가져올 수 있습니다.
Connect-MicrosoftTeams
3. 테넌트 구성 사용
Communication Services 리소스와의 상호 운용성은 테넌트 구성 및 할당된 정책을 통해 제어됩니다. Teams 테넌트에는 단일 테넌트 구성이 있으며 Teams 사용자는 글로벌 정책 또는 사용자 지정 정책을 할당했습니다. 자세한 내용은 Teams에서 정책 할당을 참조하세요.
로그인에 성공한 후 cmdlet Set-CsTeamsAcsFederationConfiguration을 실행하여 테넌트에서 Communication Services 리소스를 사용하도록 설정할 수 있습니다. 텍스트 IMMUTABLE_RESOURCE_ID를 통신 리소스에서 변경할 수 없는 리소스 ID로 바꿉니다. 이 정보를 가져오는 방법에 대한 자세한 내용은 여기에서 확인할 수 있습니다.
$allowlist = @('IMMUTABLE_RESOURCE_ID')
Set-CsTeamsAcsFederationConfiguration -EnableAcsUsers $True -AllowedAcsResources $allowlist
4. 테넌트 정책 사용
각 Teams 사용자는 Communication Services 사용자가 이 Teams 사용자에게 전화를 걸 수 있는지 여부를 결정하는 External Access Policy를 할당했습니다. cmdlet Set-CsExternalAccessPolicy를 사용하여 Teams 사용자에게 할당된 정책이 EnableAcsFederationAccess를 $true로 설정했는지 확인합니다.
Set-CsExternalAccessPolicy -Identity Global -EnableAcsFederationAccess $true
Teams 통화 큐 만들기 또는 선택
Teams 통화 큐는 Microsoft Teams의 기능으로 지정된 사용자 또는 에이전트 그룹 간에 수신 전화를 효율적으로 분산합니다. 고객 지원 또는 통화 센터 시나리오에 유용합니다. 통화는 큐에 배치되고 미리 결정된 라우팅 방법에 따라 사용 가능한 다음 에이전트에 할당됩니다. 에이전트는 알림을 받고 Teams의 통화 컨트롤을 사용하여 통화를 처리할 수 있습니다. 이 기능은 성능 추적을 위한 보고 및 분석을 제공합니다. 통화 처리를 간소화하고 일관된 고객 환경을 보장하며 에이전트 생산성을 최적화합니다. Teams 관리 센터를 통해 기존 통화 큐를 선택하거나 새 통화 큐를 만들 수 있습니다.
여기에서 Teams 관리 센터를 사용하여 통화 큐를 만드는 방법에 대해 자세히 알아봅니다.
통화 큐에 대한 개체 ID 찾기
통화 큐를 만든 후 나중에 통화에 사용할 상관 관계 개체 ID를 찾아야 합니다. 개체 ID는 통화 큐에 연결된 리소스 계정에 연결됩니다. Teams 관리자에서 리소스 계정 탭을 열고 이메일을 찾습니다.
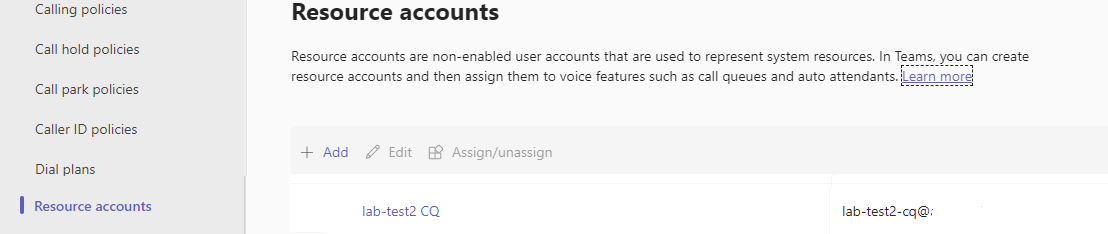 리소스 계정에 필요한 모든 정보는 검색에서 이 이메일을 사용하여 Microsoft Graph Explorer에서 찾을 수 있습니다.
https://graph.microsoft.com/v1.0/users/lab-test2-cq-@contoso.com
결과에서 "ID" 필드를 찾을 수 있습니다.
    "userPrincipalName": "lab-test2-cq@contoso.com",
    "id": "31a011c2-2672-4dd0-b6f9-9334ef4999db"
필수 조건
- 활성 구독이 있는 Azure 계정을 얻습니다. 체험 계정을 만듭니다.
- Node.js 활성 LTS 및 유지 관리 LTS 버전(8.11.1 및 10.14.1)
- 활성 Communication Services 리소스를 만듭니다. Communication Services 리소스 만들기
설정
새 Node.js 애플리케이션 만들기
터미널 또는 명령 창을 열고 앱의 새 디렉터리를 만들고 해당 디렉터리로 이동합니다.
mkdir calling-quickstart && cd calling-quickstart
패키지 설치
npm install 명령을 사용하여 JavaScript용 Azure Communication Services Calling SDK를 설치합니다.
Important
이 빠른 시작에서는 Azure Communication Services Calling SDK 버전 next을 사용합니다.
npm install @azure/communication-common@next --save
npm install @azure/communication-calling@next --save
앱 프레임워크 설정
이 빠른 시작에서는 webpack을 사용하여 애플리케이션 자산을 번들로 묶습니다. 다음 명령을 실행하여 webpack, webpack-cli 및 webpack-dev-server npm 패키지를 설치하고 package.json에 개발 종속성으로 나열합니다.
npm install copy-webpack-plugin@^11.0.0 webpack@^5.88.2 webpack-cli@^5.1.4 webpack-dev-server@^4.15.1 --save-dev
프로젝트의 루트 디렉터리에 index.html 파일을 만듭니다. 이 파일을 사용하여 사용자가 1:1 영상 통화를 걸 수 있도록 하는 기본 레이아웃을 구성합니다.
코드는 다음과 같습니다.
<!-- index.html -->
<!DOCTYPE html>
<html>
    <head>
        <title>Azure Communication Services - Calling Web SDK</title>
    </head>
    <body>
        <h4>Azure Communication Services - Calling Web SDK</h4>
        <input id="user-access-token"
            type="text"
            placeholder="User access token"
            style="margin-bottom:1em; width: 500px;"/>
        <button id="initialize-teams-call-agent" type="button">Initialize Call Agent</button>
        <br>
        <br>
        <input id="application-object-id"
            type="text"
            placeholder="Enter callee's Teams user identity in format: 'APP_GUID'"
            style="margin-bottom:1em; width: 500px; display: block;"/>
        <button id="start-call-button" type="button" disabled="true">Start Call</button>
        <button id="hangup-call-button" type="button" disabled="true">Hang up Call</button>
        <button id="accept-call-button" type="button" disabled="true">Accept Call</button>
        <button id="start-video-button" type="button" disabled="true">Start Video</button>
        <button id="stop-video-button" type="button" disabled="true">Stop Video</button>
        <br>
        <br>
        <div id="connectedLabel" style="color: #13bb13;" hidden>Call is connected!</div>
        <br>
        <div id="remoteVideoContainer" style="width: 40%;" hidden>Remote participants' video streams:</div>
        <br>
        <div id="localVideoContainer" style="width: 30%;" hidden>Local video stream:</div>
        <!-- points to the bundle generated from client.js -->
        <script src="./main.js"></script>
    </body>
</html>
웹 SDK 개체 모델을 호출하는 Azure Communication Services
Azure Communication Services Calling SDK의 주 기능 중 일부를 처리하는 클래스와 인터페이스는 다음과 같습니다.
| 이름 | 설명 |
|---|---|
CallClient |
통화 SDK의 주 진입점입니다. |
CallAgent |
통화를 시작하고 관리하는 데 사용됩니다. |
DeviceManager |
미디어 디바이스를 관리하는 데 사용됩니다. |
Call |
통화를 나타내는 데 사용됩니다. |
LocalVideoStream |
로컬 시스템의 카메라 디바이스에 대한 로컬 비디오 스트림을 만드는 데 사용됩니다. |
RemoteParticipant |
통화에서 원격 참가자를 나타내는 데 사용됩니다. |
RemoteVideoStream |
원격 참가자로부터 원격 비디오 스트림을 나타내는 데 사용됩니다. |
이 빠른 시작에 대한 애플리케이션 로직을 포함하기 위해 client.js라는 프로젝트의 루트 디렉터리에 파일을 만듭니다. client.js에 다음 코드를 추가합니다.
// Make sure to install the necessary dependencies
const { CallClient, VideoStreamRenderer, LocalVideoStream } = require('@azure/communication-calling');
const { AzureCommunicationTokenCredential } = require('@azure/communication-common');
const { AzureLogger, setLogLevel } = require("@azure/logger");
// Set the log level and output
setLogLevel('verbose');
AzureLogger.log = (...args) => {
    console.log(...args);
};
// Calling web sdk objects
let callAgent;
let deviceManager;
let call;
let incomingCall;
let localVideoStream;
let localVideoStreamRenderer;
// UI widgets
let userAccessToken = document.getElementById('user-access-token');
let callQueueId = document.getElementById('application-object-id');
let initializeCallAgentButton = document.getElementById('initialize-teams-call-agent');
let startCallButton = document.getElementById('start-call-button');
let hangUpCallButton = document.getElementById('hangup-call-button');
let acceptCallButton = document.getElementById('accept-call-button');
let startVideoButton = document.getElementById('start-video-button');
let stopVideoButton = document.getElementById('stop-video-button');
let connectedLabel = document.getElementById('connectedLabel');
let remoteVideoContainer = document.getElementById('remoteVideoContainer');
let localVideoContainer = document.getElementById('localVideoContainer');
/**
 * Create an instance of CallClient. Initialize a CallAgent instance with a AzureCommunicationTokenCredential via created CallClient. CallAgent enables us to make outgoing calls and receive incoming calls.
 * You can then use the CallClient.getDeviceManager() API instance to get the DeviceManager.
 */
initializeCallAgentButton.onclick = async () => {
    try {
        const callClient = new CallClient();
        tokenCredential = new AzureCommunicationTokenCredential(userAccessToken.value.trim());
        callAgent = await callClient.createCallAgent(tokenCredential)
        // Set up a camera device to use.
        deviceManager = await callClient.getDeviceManager();
        await deviceManager.askDevicePermission({ video: true });
        await deviceManager.askDevicePermission({ audio: true });
        // Listen for an incoming call to accept.
        callAgent.on('incomingCall', async (args) => {
            try {
                incomingCall = args.incomingCall;
                acceptCallButton.disabled = false;
                startCallButton.disabled = true;
            } catch (error) {
                console.error(error);
            }
        });
        startCallButton.disabled = false;
        initializeCallAgentButton.disabled = true;
    } catch(error) {
        console.error(error);
    }
}
/**
 * Place a 1:1 outgoing video call to a Teams Call Queue
 * Add an event listener to initiate a call when the `startCallButton` is selected.
 * Enumerate local cameras using the deviceManager `getCameraList` API.
 * In this quickstart, we're using the first camera in the collection. Once the desired camera is selected, a
 * LocalVideoStream instance will be constructed and passed within `videoOptions` as an item within the
 * localVideoStream array to the call method. When the call connects, your application will be sending a video stream to the other participant.
 */
startCallButton.onclick = async () => {
    try {
        const localVideoStream = await createLocalVideoStream();
        const videoOptions = localVideoStream ? { localVideoStreams: [localVideoStream] } : undefined;
        call = callAgent.startCall([{ teamsAppId: callQueueId.value.trim(), cloud:"public" }], { videoOptions: videoOptions });
        // Subscribe to the call's properties and events.
        subscribeToCall(call);
    } catch (error) {
        console.error(error);
    }
}
/**
 * Accepting an incoming call with a video
 * Add an event listener to accept a call when the `acceptCallButton` is selected.
 * You can accept incoming calls after subscribing to the `CallAgent.on('incomingCall')` event.
 * You can pass the local video stream to accept the call with the following code.
 */
acceptCallButton.onclick = async () => {
    try {
        const localVideoStream = await createLocalVideoStream();
        const videoOptions = localVideoStream ? { localVideoStreams: [localVideoStream] } : undefined;
        call = await incomingCall.accept({ videoOptions });
        // Subscribe to the call's properties and events.
        subscribeToCall(call);
    } catch (error) {
        console.error(error);
    }
}
// Subscribe to a call obj.
// Listen for property changes and collection updates.
subscribeToCall = (call) => {
    try {
        // Inspect the initial call.id value.
        console.log(`Call Id: ${call.id}`);
        //Subscribe to call's 'idChanged' event for value changes.
        call.on('idChanged', () => {
            console.log(`Call ID changed: ${call.id}`);
        });
        // Inspect the initial call.state value.
        console.log(`Call state: ${call.state}`);
        // Subscribe to call's 'stateChanged' event for value changes.
        call.on('stateChanged', async () => {
            console.log(`Call state changed: ${call.state}`);
            if(call.state === 'Connected') {
                connectedLabel.hidden = false;
                acceptCallButton.disabled = true;
                startCallButton.disabled = true;
                hangUpCallButton.disabled = false;
                startVideoButton.disabled = false;
                stopVideoButton.disabled = false;
            } else if (call.state === 'Disconnected') {
                connectedLabel.hidden = true;
                startCallButton.disabled = false;
                hangUpCallButton.disabled = true;
                startVideoButton.disabled = true;
                stopVideoButton.disabled = true;
                console.log(`Call ended, call end reason={code=${call.callEndReason.code}, subCode=${call.callEndReason.subCode}}`);
            }
        });
        call.localVideoStreams.forEach(async (lvs) => {
            localVideoStream = lvs;
            await displayLocalVideoStream();
        });
        call.on('localVideoStreamsUpdated', e => {
            e.added.forEach(async (lvs) => {
                localVideoStream = lvs;
                await displayLocalVideoStream();
            });
            e.removed.forEach(lvs => {
               removeLocalVideoStream();
            });
        });

        call.on('isLocalVideoStartedChanged', () => {
            console.log(`isLocalVideoStarted changed: ${call.isLocalVideoStarted}`);
        });
        console.log(`isLocalVideoStarted: ${call.isLocalVideoStarted}`);
        // Inspect the call's current remote participants and subscribe to them.
        call.remoteParticipants.forEach(remoteParticipant => {
            subscribeToRemoteParticipant(remoteParticipant);
        });
        // Subscribe to the call's 'remoteParticipantsUpdated' event to be
        // notified when new participants are added to the call or removed from the call.
        call.on('remoteParticipantsUpdated', e => {
            // Subscribe to new remote participants that are added to the call.
            e.added.forEach(remoteParticipant => {
                subscribeToRemoteParticipant(remoteParticipant)
            });
            // Unsubscribe from participants that are removed from the call
            e.removed.forEach(remoteParticipant => {
                console.log('Remote participant removed from the call.');
            });
        });
    } catch (error) {
        console.error(error);
    }
}
// Subscribe to a remote participant obj.
// Listen for property changes and collection updates.
subscribeToRemoteParticipant = (remoteParticipant) => {
    try {
        // Inspect the initial remoteParticipant.state value.
        console.log(`Remote participant state: ${remoteParticipant.state}`);
        // Subscribe to remoteParticipant's 'stateChanged' event for value changes.
        remoteParticipant.on('stateChanged', () => {
            console.log(`Remote participant state changed: ${remoteParticipant.state}`);
        });
        // Inspect the remoteParticipants's current videoStreams and subscribe to them.
        remoteParticipant.videoStreams.forEach(remoteVideoStream => {
            subscribeToRemoteVideoStream(remoteVideoStream)
        });
        // Subscribe to the remoteParticipant's 'videoStreamsUpdated' event to be
        // notified when the remoteParticipant adds new videoStreams and removes video streams.
        remoteParticipant.on('videoStreamsUpdated', e => {
            // Subscribe to newly added remote participant's video streams.
            e.added.forEach(remoteVideoStream => {
                subscribeToRemoteVideoStream(remoteVideoStream)
            });
            // Unsubscribe from newly removed remote participants' video streams.
            e.removed.forEach(remoteVideoStream => {
                console.log('Remote participant video stream was removed.');
            })
        });
    } catch (error) {
        console.error(error);
    }
}
/**
 * Subscribe to a remote participant's remote video stream obj.
 * You have to subscribe to the 'isAvailableChanged' event to render the remoteVideoStream. If the 'isAvailable' property
 * changes to 'true' a remote participant is sending a stream. Whenever the availability of a remote stream changes
 * you can choose to destroy the whole 'Renderer' a specific 'RendererView' or keep them. Displaying RendererView without a video stream will result in a blank video frame.
 */
subscribeToRemoteVideoStream = async (remoteVideoStream) => {
    // Create a video stream renderer for the remote video stream.
    let videoStreamRenderer = new VideoStreamRenderer(remoteVideoStream);
    let view;
    const renderVideo = async () => {
        try {
            // Create a renderer view for the remote video stream.
            view = await videoStreamRenderer.createView();
            // Attach the renderer view to the UI.
            remoteVideoContainer.hidden = false;
            remoteVideoContainer.appendChild(view.target);
        } catch (e) {
            console.warn(`Failed to createView, reason=${e.message}, code=${e.code}`);
        }
    }

    remoteVideoStream.on('isAvailableChanged', async () => {
        // Participant has switched video on.
        if (remoteVideoStream.isAvailable) {
            await renderVideo();
        // Participant has switched video off.
        } else {
            if (view) {
                view.dispose();
                view = undefined;
            }
        }
    });
    // Participant has video on initially.
    if (remoteVideoStream.isAvailable) {
        await renderVideo();
    }
}
// Start your local video stream.
// This will send your local video stream to remote participants so they can view it.
startVideoButton.onclick = async () => {
    try {
        const localVideoStream = await createLocalVideoStream();
        await call.startVideo(localVideoStream);
    } catch (error) {
        console.error(error);
    }
}
// Stop your local video stream.
// This will stop your local video stream from being sent to remote participants.
stopVideoButton.onclick = async () => {
    try {
        await call.stopVideo(localVideoStream);
    } catch (error) {
        console.error(error);
    }
}
/**
 * To render a LocalVideoStream, you need to create a new instance of VideoStreamRenderer, and then
 * create a new VideoStreamRendererView instance using the asynchronous createView() method.
 * You may then attach view.target to any UI element.
 */
// Create a local video stream for your camera device
createLocalVideoStream = async () => {
    const camera = (await deviceManager.getCameras())[0];
    if (camera) {
        return new LocalVideoStream(camera);
    } else {
        console.error(`No camera device found on the system`);
    }
}
// Display your local video stream preview in your UI
displayLocalVideoStream = async () => {
    try {
        localVideoStreamRenderer = new VideoStreamRenderer(localVideoStream);
        const view = await localVideoStreamRenderer.createView();
        localVideoContainer.hidden = false;
        localVideoContainer.appendChild(view.target);
    } catch (error) {
        console.error(error);
    }
}
// Remove your local video stream preview from your UI
removeLocalVideoStream = async() => {
    try {
        localVideoStreamRenderer.dispose();
        localVideoContainer.hidden = true;
    } catch (error) {
        console.error(error);
    }
}
// End the current call
hangUpCallButton.addEventListener("click", async () => {
    // end the current call
    await call.hangUp();
});
webpack 로컬 서버 코드 추가
이 빠른 시작에 대한 로컬 서버 논리를 포함하도록 webpack.config.js라는 프로젝트의 루트 디렉터리에 파일을 만듭니다. 다음 코드를 webpack.config.js에 추가합니다.
const path = require('path');
const CopyPlugin = require("copy-webpack-plugin");

module.exports = {
    mode: 'development',
    entry: './client.js',
    output: {
        filename: 'main.js',
        path: path.resolve(__dirname, 'dist'),
    },
    devServer: {
        static: {
            directory: path.join(__dirname, './')
        },
    },
    plugins: [
        new CopyPlugin({
            patterns: [
                './index.html'
            ]
        }),
    ]
};
코드 실행
webpack-dev-server를 사용하여 앱을 빌드하고 실행합니다. 다음 명령을 실행하여 로컬 웹 서버에서 애플리케이션 호스트를 번들로 묶습니다.
npx webpack serve --config webpack.config.js
통화를 설정하는 수동 단계:
- 브라우저를 열고 http://localhost:8080/.으로 이동합니다.
- 유효한 사용자 액세스 토큰을 입력합니다. 사용할 수 있는 액세스 토큰이 아직 없는 경우 사용자 액세스 토큰 설명서를 참조하세요.
- "에이전트 호출 초기화" 단추를 클릭합니다.
- 통화 큐 개체 ID를 입력하고 "통화 시작" 단추를 선택합니다. 애플리케이션은 지정된 개체 ID를 사용하여 통화 큐에 대한 발신 통화를 시작합니다.
- 통화가 통화 큐에 연결됩니다.
- Communication Services 사용자는 구성에 따라 통화 큐를 통해 라우팅됩니다.
이 빠른 시작에서는 Azure Communication Services 사용자에서 Teams 통화 큐로 통화를 시작하는 방법을 알아봅니다. 다음 단계를 통해 이를 달성할 수 있습니다.
- Teams 테넌트와 Azure Communication Services 리소스 페더레이션을 사용하도록 설정합니다.
- Teams 관리 센터를 통해 Teams 통화 큐를 선택하거나 만듭니다.
- Teams 관리 센터를 통해 통화 큐의 이메일 주소를 가져옵니다.
- Graph API를 통해 통화 큐의 개체 ID를 가져옵니다.
- Azure Communication Services Calling SDK로 통화를 시작합니다.
끝으로 건너뛰려면 GitHub에서 이 빠른 시작을 샘플로 다운로드할 수 있습니다.
Teams 테넌트에서 상호 운용성 사용
Teams 관리자 역할이 있는 Microsoft Entra 사용자는 MicrosoftTeams 모듈과 함께 PowerShell cmdlet을 실행하여 테넌트에서 Communication Services 리소스를 사용하도록 설정할 수 있습니다.
1. Microsoft Teams 모듈 준비
먼저 PowerShell을 열고 다음 명령을 사용하여 Teams 모듈이 있는지 유효성을 검사합니다.
Get-module *teams*
MicrosoftTeams 모듈이 보이지 않으면 먼저 설치합니다. 모듈을 설치하려면 PowerShell을 관리자 권한으로 실행해야 합니다. 그런 후 다음 명령을 실행합니다.
Install-Module -Name MicrosoftTeams
설치될 모듈에 대한 정보를 받게 되며 Y 또는 A 답변으로 확인할 수 있습니다. 모듈이 설치되었지만 오래된 경우 다음 명령을 실행하여 모듈을 업데이트할 수 있습니다.
Update-Module MicrosoftTeams
2. Microsoft Teams 모듈에 연결
모듈이 설치되고 준비되면 다음 명령을 사용하여 MicrosoftTeams 모듈에 연결할 수 있습니다. 로그인하라는 대화형 창이 표시됩니다. 사용하려는 사용자 계정에는 Teams 관리자 권한이 있어야 합니다. 그렇지 않으면 다음 단계에서 access denied 응답을 가져올 수 있습니다.
Connect-MicrosoftTeams
3. 테넌트 구성 사용
Communication Services 리소스와의 상호 운용성은 테넌트 구성 및 할당된 정책을 통해 제어됩니다. Teams 테넌트에는 단일 테넌트 구성이 있으며 Teams 사용자는 글로벌 정책 또는 사용자 지정 정책을 할당했습니다. 자세한 내용은 Teams에서 정책 할당을 참조하세요.
로그인에 성공한 후 cmdlet Set-CsTeamsAcsFederationConfiguration을 실행하여 테넌트에서 Communication Services 리소스를 사용하도록 설정할 수 있습니다. 텍스트 IMMUTABLE_RESOURCE_ID를 통신 리소스에서 변경할 수 없는 리소스 ID로 바꿉니다. 이 정보를 가져오는 방법에 대한 자세한 내용은 여기에서 확인할 수 있습니다.
$allowlist = @('IMMUTABLE_RESOURCE_ID')
Set-CsTeamsAcsFederationConfiguration -EnableAcsUsers $True -AllowedAcsResources $allowlist
4. 테넌트 정책 사용
각 Teams 사용자는 Communication Services 사용자가 이 Teams 사용자에게 전화를 걸 수 있는지 여부를 결정하는 External Access Policy를 할당했습니다. cmdlet Set-CsExternalAccessPolicy를 사용하여 Teams 사용자에게 할당된 정책이 EnableAcsFederationAccess를 $true로 설정했는지 확인합니다.
Set-CsExternalAccessPolicy -Identity Global -EnableAcsFederationAccess $true
Teams 통화 큐 만들기 또는 선택
Teams 통화 큐는 Microsoft Teams의 기능으로 지정된 사용자 또는 에이전트 그룹 간에 수신 전화를 효율적으로 분산합니다. 고객 지원 또는 통화 센터 시나리오에 유용합니다. 통화는 큐에 배치되고 미리 결정된 라우팅 방법에 따라 사용 가능한 다음 에이전트에 할당됩니다. 에이전트는 알림을 받고 Teams의 통화 컨트롤을 사용하여 통화를 처리할 수 있습니다. 이 기능은 성능 추적을 위한 보고 및 분석을 제공합니다. 통화 처리를 간소화하고 일관된 고객 환경을 보장하며 에이전트 생산성을 최적화합니다. Teams 관리 센터를 통해 기존 통화 큐를 선택하거나 새 통화 큐를 만들 수 있습니다.
여기에서 Teams 관리 센터를 사용하여 통화 큐를 만드는 방법에 대해 자세히 알아봅니다.
통화 큐에 대한 개체 ID 찾기
통화 큐를 만든 후 나중에 통화에 사용할 상관 관계 개체 ID를 찾아야 합니다. 개체 ID는 통화 큐에 연결된 리소스 계정에 연결됩니다. Teams 관리자에서 리소스 계정 탭을 열고 전자 메일을 찾습니다.
리소스 계정에 필요한 모든 정보는 검색에서 이 이메일을 사용하여 Microsoft Graph Explorer에서 찾을 수 있습니다.
https://graph.microsoft.com/v1.0/users/lab-test2-cq-@contoso.com
결과에서 "ID" 필드를 찾을 수 있습니다.
    "userPrincipalName": "lab-test2-cq@contoso.com",
    "id": "31a011c2-2672-4dd0-b6f9-9334ef4999db"
호출 앱에서 사용하려면 이 ID에 접두사를 추가해야 합니다. 현재 지원되는 항목은 다음과 같습니다.
- 퍼블릭 클라우드 호출 큐:
28:orgid:<id> - 정부 클라우드 호출 큐:
28:gcch:<id>
필수 조건
활성 구독이 있는 Azure 계정. 체험 계정을 만듭니다.
Android 스튜디오(Android 애플리케이션 만들기용)
배포된 Communication Services 리소스. Communication Services 리소스 만들기
사용자 액세스 토큰(Azure Communication Service용) 또한 Azure CLI를 사용하고 연결 문자열과 함께 명령을 실행하여 사용자 및 액세스 토큰을 만들 수 있습니다.
az communication identity token issue --scope voip --connection-string "yourConnectionString"자세한 내용은 Azure CLI를 사용하여 액세스 토큰 만들기 및 관리를 참조하세요.
Teams 통화 애플리케이션에 대한 최소 지원: 2.12.0-beta.1
설정
빈 활동을 사용하여 Android 앱 만들기
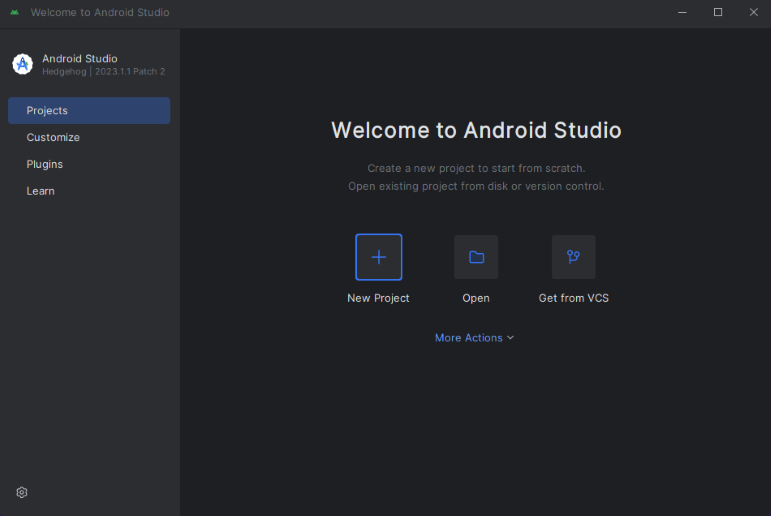
Android 스튜디오에서 [새 Android 스튜디오 프로젝트 시작]을 선택합니다.
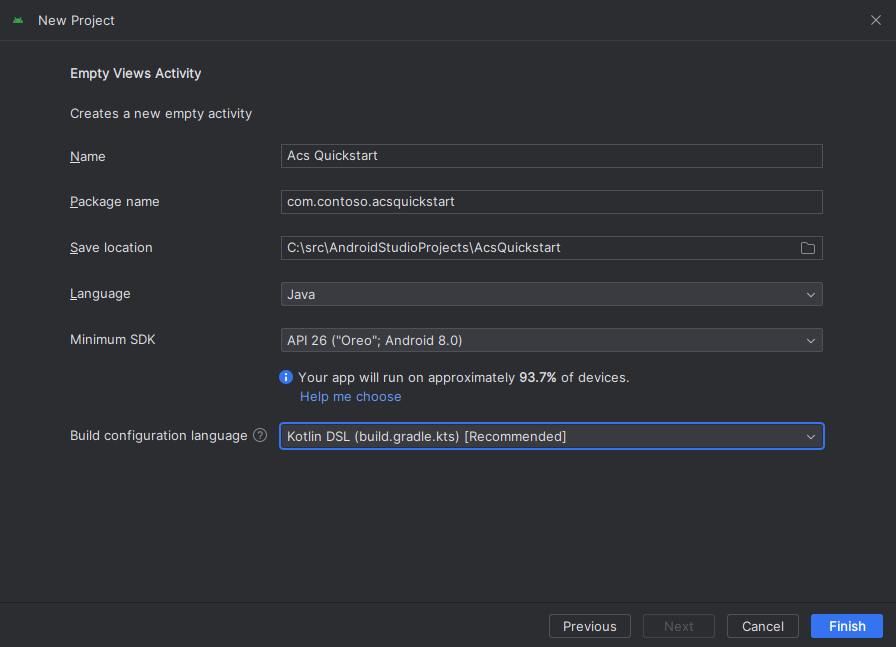
"휴대폰 및 태블릿"에서 "빈 보기 작업" 프로젝트 템플릿을 선택합니다.
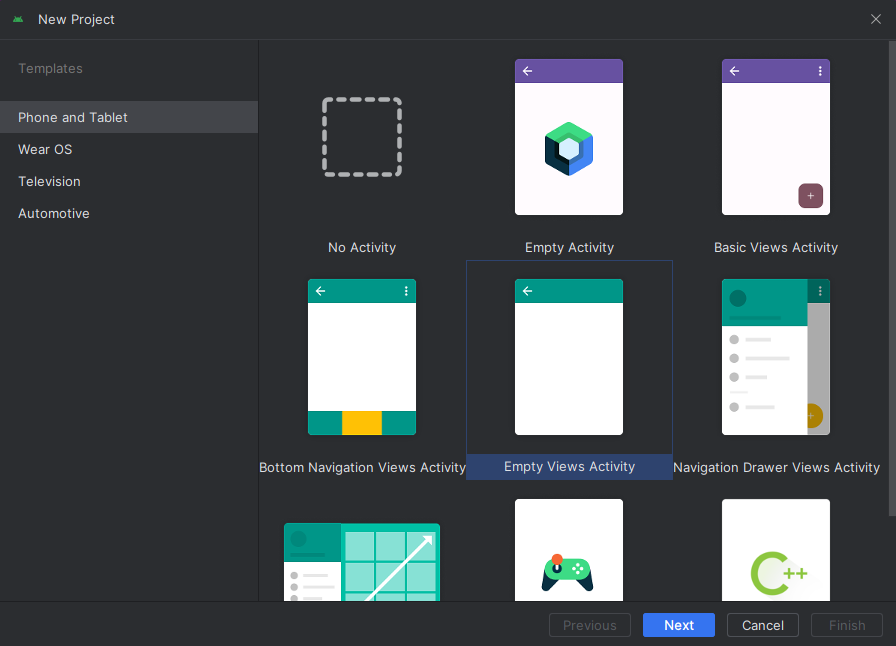
"API 26: Android 8.0(Oreo)" 이상의 최소 SDK를 선택합니다.
패키지 설치
프로젝트 settings.gradle.kts를 찾고 pluginManagement 및 dependencyResolutionManagement 아래의 리포지토리 목록에서 mavenCentral()을 확인합니다.
pluginManagement {
    repositories {
    ...
        mavenCentral()
    ...
    }
}

dependencyResolutionManagement {
    repositoriesMode.set(RepositoriesMode.FAIL_ON_PROJECT_REPOS)
    repositories {
    ...
        mavenCentral()
    }
}
그런 다음, 모듈 수준 build.gradle에서 dependencies 및 android 섹션에 다음 줄을 추가합니다.
android {
    ...

    compileOptions {
        sourceCompatibility JavaVersion.VERSION_1_8
        targetCompatibility JavaVersion.VERSION_1_8
    }
}

dependencies {
    ...
    implementation ("com.azure.android:azure-communication-calling:2.+")
    ...
}
애플리케이션 매니페스트에 권한 추가
전화를 거는 데 필요한 권한을 요청하려면 애플리케이션 매니페스트(app/src/main/AndroidManifest.xml)에서 해당 권한을 선언해야 합니다. 파일의 내용을 다음 코드로 바꿉니다.
    <?xml version="1.0" encoding="utf-8"?>
<manifest xmlns:android="http://schemas.android.com/apk/res/android"
    package="com.contoso.acsquickstart">

    <uses-permission android:name="android.permission.INTERNET" />
    <uses-permission android:name="android.permission.ACCESS_NETWORK_STATE" />
    <uses-permission android:name="android.permission.ACCESS_WIFI_STATE" />
    <uses-permission android:name="android.permission.RECORD_AUDIO" />
    <uses-permission android:name="android.permission.CAMERA" />
    <uses-permission android:name="android.permission.WRITE_EXTERNAL_STORAGE" />
    <uses-permission android:name="android.permission.READ_PHONE_STATE" />

    <application
        android:allowBackup="true"
        android:icon="@mipmap/ic_launcher"
        android:label="@string/app_name"
        android:roundIcon="@mipmap/ic_launcher_round"
        android:supportsRtl="true"
        android:theme="@style/AppTheme">
        <!--Our Calling SDK depends on the Apache HTTP SDK.
When targeting Android SDK 28+, this library needs to be explicitly referenced.
See https://developer.android.com/about/versions/pie/android-9.0-changes-28#apache-p-->
        <uses-library android:name="org.apache.http.legacy" android:required="false"/>
        <activity android:name=".MainActivity">
            <intent-filter>
                <action android:name="android.intent.action.MAIN" />

                <category android:name="android.intent.category.LAUNCHER" />
            </intent-filter>
        </activity>
    </application>

</manifest>
앱 레이아웃 설정
두 개의 입력, 즉 수신자 ID에 대한 텍스트 입력 및 전화를 걸기 위한 단추가 필요합니다. 이러한 입력은 디자이너를 사용하거나 레이아웃 xml을 편집하여 추가할 수 있습니다. ID가 call_button이고 텍스트 입력이 callee_id인 단추를 만듭니다. (app/src/main/res/layout/activity_main.xml)로 이동하고 파일의 내용을 다음 코드로 바꿉니다.
<?xml version="1.0" encoding="utf-8"?>
<androidx.constraintlayout.widget.ConstraintLayout xmlns:android="http://schemas.android.com/apk/res/android"
    xmlns:app="http://schemas.android.com/apk/res-auto"
    xmlns:tools="http://schemas.android.com/tools"
    android:layout_width="match_parent"
    android:layout_height="match_parent"
    tools:context="${launchApp}">

    <EditText
        android:id="@+id/callee_id"
        android:layout_width="match_parent"
        android:layout_height="wrap_content"
        android:ems="10"
        android:hint="Callee Id"
        android:inputType="textPersonName"
        android:layout_marginTop="100dp"
        android:layout_marginHorizontal="20dp"
        app:layout_constraintEnd_toEndOf="parent"
        app:layout_constraintStart_toStartOf="parent"
        app:layout_constraintTop_toTopOf="parent" />

    <LinearLayout
        android:layout_width="match_parent"
        android:layout_height="wrap_content"
        android:layout_marginBottom="46dp"
        android:gravity="center"
        app:layout_constraintBottom_toBottomOf="parent"
        app:layout_constraintEnd_toEndOf="parent"
        app:layout_constraintStart_toStartOf="parent">

        <Button
            android:id="@+id/call_button"
            android:layout_width="wrap_content"
            android:layout_height="wrap_content"
            android:text="Call" />

        <Button
            android:id="@+id/hangup_button"
            android:layout_width="wrap_content"
            android:layout_height="wrap_content"
            android:text="Hangup" />

    </LinearLayout>

    <TextView
        android:id="@+id/status_bar"
        android:layout_width="wrap_content"
        android:layout_height="wrap_content"
        android:layout_marginBottom="16dp"
        app:layout_constraintBottom_toBottomOf="parent"
        app:layout_constraintEnd_toEndOf="parent"
        app:layout_constraintStart_toStartOf="parent" />
</androidx.constraintlayout.widget.ConstraintLayout>
기본 활동 스캐폴딩 및 바인딩 만들기
레이아웃이 만들어지면 바인딩과 활동의 기본 스캐폴딩을 추가할 수 있습니다. 이 활동은 런타임 권한을 요청하고, 통화 에이전트를 만들고, 단추가 눌러지면 전화를 겁니다. onCreate 메서드는 getAllPermissions 및 createAgent를 호출하고 통화 단추에 대한 바인딩을 추가하도록 재정의됩니다. 이 이벤트는 활동이 만들어질 때 한 번만 발생합니다. onCreate에 대한 자세한 내용은 활동 수명 주기에 관한 이해 가이드를 참조하세요.
MainActivity.java로 이동하고, 내용을 다음 코드로 바꿉니다.
package com.contoso.acsquickstart;

import androidx.annotation.NonNull;
import androidx.appcompat.app.AppCompatActivity;
import androidx.core.app.ActivityCompat;

import android.Manifest;
import android.content.pm.PackageManager;
import android.media.AudioManager;
import android.os.Bundle;
import android.widget.Button;
import android.widget.EditText;
import android.widget.TextView;
import android.widget.Toast;

import java.util.ArrayList;
import java.util.concurrent.ExecutionException;

import com.azure.android.communication.common.CommunicationIdentifier;
import com.azure.android.communication.common.CommunicationUserIdentifier;
import com.azure.android.communication.calling.Call;
import com.azure.android.communication.calling.CallAgent;
import com.azure.android.communication.calling.CallClient;
import com.azure.android.communication.calling.HangUpOptions;
import com.azure.android.communication.common.CommunicationTokenCredential;
import com.azure.android.communication.calling.StartCallOptions;

public class MainActivity extends AppCompatActivity {
    private static final String[] allPermissions = new String[] { Manifest.permission.RECORD_AUDIO, Manifest.permission.CAMERA, Manifest.permission.WRITE_EXTERNAL_STORAGE, Manifest.permission.READ_PHONE_STATE };
    private static final String UserToken = "<User_Access_Token>";

    TextView statusBar;

    private CallAgent agent;
    private Call call;
    private Button callButton;

    @Override
    protected void onCreate(Bundle savedInstanceState) {
        super.onCreate(savedInstanceState);
        setContentView(R.layout.activity_main);

        callButton = findViewById(R.id.call_button);

        getAllPermissions();
        createAgent();
        callButton.setOnClickListener(l -> startCall());

        Button hangupButton = findViewById(R.id.hangup_button);
        hangupButton.setOnClickListener(l -> endCall());

        statusBar = findViewById(R.id.status_bar);

        setVolumeControlStream(AudioManager.STREAM_VOICE_CALL);
    }

    /**
     * Start a call
     */
    private void startCall() {
        if (UserToken.startsWith("<")) {
            Toast.makeText(this, "Please enter token in source code", Toast.LENGTH_SHORT).show();
            return;
        }

        EditText calleeIdView = findViewById(R.id.callee_id);
        String calleeId = calleeIdView.getText().toString();
        if (calleeId.isEmpty()) {
            Toast.makeText(this, "Please enter callee", Toast.LENGTH_SHORT).show();
            return;
        }
        List<CommunicationIdentifier> participants = new ArrayList<>();
        participants.add(new MicrosoftTeamsAppIdentifier(calleeId));
        StartCallOptions options = new StartCallOptions();
        call = agent.startCall(
                getApplicationContext(),
                participants,
                options);
        call.addOnStateChangedListener(p -> setStatus(call.getState().toString()));
    }

    /**
     * Ends the call previously started
     */
    private void endCall() {
        try {
            call.hangUp(new HangUpOptions()).get();
        } catch (ExecutionException | InterruptedException e) {
            Toast.makeText(this, "Unable to hang up call", Toast.LENGTH_SHORT).show();
        }
    }

    /**
     * Create the call agent
     */
    private void createAgent() {
        try {
            CommunicationTokenCredential credential = new CommunicationTokenCredential(UserToken);
            agent = new CallClient().createCallAgent(getApplicationContext(), credential).get();
        } catch (Exception ex) {
            Toast.makeText(getApplicationContext(), "Failed to create call agent.", Toast.LENGTH_SHORT).show();
        }
    }

    /**
     * Ensure all permissions were granted, otherwise inform the user permissions are missing.
     */
    @Override
    public void onRequestPermissionsResult(int requestCode, @NonNull String[] permissions, int[] grantResults) {
        boolean allPermissionsGranted = true;
        for (int result : grantResults) {
            allPermissionsGranted &= (result == PackageManager.PERMISSION_GRANTED);
        }
        if (!allPermissionsGranted) {
            Toast.makeText(this, "All permissions are needed to make the call.", Toast.LENGTH_LONG).show();
            finish();
        }
    }

    /**
     * Shows message in the status bar
     */
    private void setStatus(String status) {
        runOnUiThread(() -> statusBar.setText(status));
    }
}
런타임에 권한 요청
Android 6.0 이상(API 수준 23) 및 targetSdkVersion 23 이상에서는 앱이 설치될 때가 아니라 런타임에 권한이 부여됩니다. 이를 지원하기 위해 필요한 각 권한에 대해 ActivityCompat.checkSelfPermission 및 ActivityCompat.requestPermissions를 호출하도록 getAllPermissions를 구현할 수 있습니다.
/**
 * Request each required permission if the app doesn't already have it.
 */
private void getAllPermissions() {
    ArrayList<String> permissionsToAskFor = new ArrayList<>();
    for (String permission : allPermissions) {
        if (ActivityCompat.checkSelfPermission(this, permission) != PackageManager.PERMISSION_GRANTED) {
            permissionsToAskFor.add(permission);
        }
    }
    if (!permissionsToAskFor.isEmpty()) {
        ActivityCompat.requestPermissions(this, permissionsToAskFor.toArray(new String[0]), 1);
    }
}
참고 항목
앱을 설계할 때 언제 이러한 권한을 요청할지 해당 시기를 고려하세요. 권한은 미리 요청하는 것이 아니라 필요에 따라 요청해야 합니다. 자세한 내용은 Android 권한 가이드를 참조하세요.
개체 모델
Azure Communication Services 통화 SDK의 주요 기능 중 일부를 처리하는 클래스와 인터페이스는 다음과 같습니다.
| 이름 | 설명 |
|---|---|
CallClient |
CallClient는 Calling SDK의 기본 진입점입니다. |
CallAgent |
CallAgent는 통화를 시작하고 관리하는 데 사용됩니다. |
CommunicationTokenCredential |
CommunicationTokenCredential은 CallAgent를 인스턴스화하기 위한 토큰 자격 증명으로 사용됩니다. |
CommunicationIdentifier |
CommunicationIdentifier는 통화의 일부가 될 수 있는 다른 유형의 참가자로 사용됩니다. |
사용자 액세스 토큰에서 에이전트 만들기
사용자 토큰을 사용하면 인증된 통화 에이전트를 인스턴스화할 수 있습니다. 일반적으로 이 토큰은 애플리케이션과 관련된 인증을 사용하는 서비스에서 생성됩니다. 사용자 액세스 토큰에 대한 자세한 내용은 사용자 액세스 토큰 가이드를 확인하세요.
빠른 시작에서는 <User_Access_Token>을 Azure Communication Services 리소스에 대해 생성된 사용자 액세스 토큰으로 바꿉니다.
/**
 * Create the call agent for placing calls
 */
private void createAgent() {
    String userToken = "<User_Access_Token>";

    try {
            CommunicationTokenCredential credential = new CommunicationTokenCredential(userToken);
            callAgent = new CallClient().createCallAgent(getApplicationContext(), credential).get();
    } catch (Exception ex) {
        Toast.makeText(getApplicationContext(), "Failed to create call agent.", Toast.LENGTH_SHORT).show();
    }
}
코드 실행
이제 도구 모음의 "앱 실행" 단추를 사용하여 앱을 시작할 수 있습니다.
통화를 설정하는 수동 단계:
- Android Studio를 사용하여 앱을 시작합니다.
- 호출 큐 개체 ID(접두사 사용)를 입력하고 "통화 시작" 단추를 선택합니다. 애플리케이션은 지정된 개체 ID를 사용하여 통화 큐에 대한 발신 호출을 시작합니다.
- 통화가 통화 큐에 연결됩니다.
- Communication Services 사용자는 구성에 따라 통화 큐를 통해 라우팅됩니다.
이 빠른 시작에서는 Azure Communication Services 사용자에서 Teams 통화 큐로 통화를 시작하는 방법을 알아봅니다. 다음 단계를 통해 이를 달성할 수 있습니다.
- Teams 테넌트와 Azure Communication Services 리소스 페더레이션을 사용하도록 설정합니다.
- Teams 관리 센터를 통해 Teams 통화 큐를 선택하거나 만듭니다.
- Teams 관리 센터를 통해 통화 큐의 이메일 주소를 가져옵니다.
- Graph API를 통해 통화 큐의 개체 ID를 가져옵니다.
- Azure Communication Services Calling SDK로 통화를 시작합니다.
끝으로 건너뛰려면 GitHub에서 이 빠른 시작을 샘플로 다운로드할 수 있습니다.
Teams 테넌트에서 상호 운용성 사용
Teams 관리자 역할이 있는 Microsoft Entra 사용자는 MicrosoftTeams 모듈과 함께 PowerShell cmdlet을 실행하여 테넌트에서 Communication Services 리소스를 사용하도록 설정할 수 있습니다.
1. Microsoft Teams 모듈 준비
먼저 PowerShell을 열고 다음 명령을 사용하여 Teams 모듈이 있는지 유효성을 검사합니다.
Get-module *teams*
MicrosoftTeams 모듈이 보이지 않으면 먼저 설치합니다. 모듈을 설치하려면 PowerShell을 관리자 권한으로 실행해야 합니다. 그런 후 다음 명령을 실행합니다.
Install-Module -Name MicrosoftTeams
설치될 모듈에 대한 정보를 받게 되며 Y 또는 A 답변으로 확인할 수 있습니다. 모듈이 설치되었지만 오래된 경우 다음 명령을 실행하여 모듈을 업데이트할 수 있습니다.
Update-Module MicrosoftTeams
2. Microsoft Teams 모듈에 연결
모듈이 설치되고 준비되면 다음 명령을 사용하여 MicrosoftTeams 모듈에 연결할 수 있습니다. 로그인하라는 대화형 창이 표시됩니다. 사용하려는 사용자 계정에는 Teams 관리자 권한이 있어야 합니다. 그렇지 않으면 다음 단계에서 access denied 응답을 가져올 수 있습니다.
Connect-MicrosoftTeams
3. 테넌트 구성 사용
Communication Services 리소스와의 상호 운용성은 테넌트 구성 및 할당된 정책을 통해 제어됩니다. Teams 테넌트에는 단일 테넌트 구성이 있으며 Teams 사용자는 글로벌 정책 또는 사용자 지정 정책을 할당했습니다. 자세한 내용은 Teams에서 정책 할당을 참조하세요.
로그인에 성공한 후 cmdlet Set-CsTeamsAcsFederationConfiguration을 실행하여 테넌트에서 Communication Services 리소스를 사용하도록 설정할 수 있습니다. 텍스트 IMMUTABLE_RESOURCE_ID를 통신 리소스에서 변경할 수 없는 리소스 ID로 바꿉니다. 이 정보를 가져오는 방법에 대한 자세한 내용은 여기에서 확인할 수 있습니다.
$allowlist = @('IMMUTABLE_RESOURCE_ID')
Set-CsTeamsAcsFederationConfiguration -EnableAcsUsers $True -AllowedAcsResources $allowlist
4. 테넌트 정책 사용
각 Teams 사용자는 Communication Services 사용자가 이 Teams 사용자에게 전화를 걸 수 있는지 여부를 결정하는 External Access Policy를 할당했습니다. cmdlet Set-CsExternalAccessPolicy를 사용하여 Teams 사용자에게 할당된 정책이 EnableAcsFederationAccess를 $true로 설정했는지 확인합니다.
Set-CsExternalAccessPolicy -Identity Global -EnableAcsFederationAccess $true
Teams 통화 큐 만들기 또는 선택
Teams 통화 큐는 Microsoft Teams의 기능으로 지정된 사용자 또는 에이전트 그룹 간에 수신 전화를 효율적으로 분산합니다. 고객 지원 또는 통화 센터 시나리오에 유용합니다. 통화는 큐에 배치되고 미리 결정된 라우팅 방법에 따라 사용 가능한 다음 에이전트에 할당됩니다. 에이전트는 알림을 받고 Teams의 통화 컨트롤을 사용하여 통화를 처리할 수 있습니다. 이 기능은 성능 추적을 위한 보고 및 분석을 제공합니다. 통화 처리를 간소화하고 일관된 고객 환경을 보장하며 에이전트 생산성을 최적화합니다. Teams 관리 센터를 통해 기존 통화 큐를 선택하거나 새 통화 큐를 만들 수 있습니다.
여기에서 Teams 관리 센터를 사용하여 통화 큐를 만드는 방법에 대해 자세히 알아봅니다.
통화 큐에 대한 개체 ID 찾기
통화 큐를 만든 후 나중에 통화에 사용할 상관 관계 개체 ID를 찾아야 합니다. 개체 ID는 통화 큐에 연결된 리소스 계정에 연결됩니다. Teams 관리자에서 리소스 계정 탭을 열고 전자 메일을 찾습니다.
리소스 계정에 필요한 모든 정보는 검색에서 이 이메일을 사용하여 Microsoft Graph Explorer에서 찾을 수 있습니다.
https://graph.microsoft.com/v1.0/users/lab-test2-cq-@contoso.com
결과에서 "ID" 필드를 찾을 수 있습니다.
    "userPrincipalName": "lab-test2-cq@contoso.com",
    "id": "31a011c2-2672-4dd0-b6f9-9334ef4999db"
호출 앱에서 사용하려면 이 ID에 접두사를 추가해야 합니다. 현재 지원되는 항목은 다음과 같습니다.
- 퍼블릭 클라우드 호출 큐:
28:orgid:<id> - 정부 클라우드 호출 큐:
28:gcch:<id>
필수 조건
활성 구독이 있는 Azure 계정을 얻습니다. 체험 계정을 만듭니다.
키 집합에 설치된 유효한 개발자 인증서와 함께 Xcode를 실행하는 Mac
배포된 Communication Services 리소스. Communication Services 리소스 만들기 이 빠른 시작에 대한 연결 문자열을 기록해야 합니다.
사용자 액세스 토큰(Azure Communication Service용) 또한 Azure CLI를 사용하고 연결 문자열과 함께 명령을 실행하여 사용자 및 액세스 토큰을 만들 수 있습니다.
az communication identity token issue --scope voip --connection-string "yourConnectionString"자세한 내용은 Azure CLI를 사용하여 액세스 토큰 만들기 및 관리를 참조하세요.
Teams 통화 애플리케이션에 대한 최소 지원: 2.15.0
설정
Xcode 프로젝트 만들기
Xcode에서 새 iOS 프로젝트를 만들고, 앱 템플릿을 선택합니다. 이 자습서에서는 SwiftUI 프레임워크를 사용하므로 언어를 Swift로, 사용자 인터페이스는 SwiftUI로 설정해야 합니다. 이 빠른 시작 중에는 테스트를 만들지 않습니다. 테스트 포함을 선택 취소합니다.

CocoaPods를 사용하여 패키지 및 종속성 설치
애플리케이션에 대한 Podfile을 만들려면 터미널을 열고 프로젝트 폴더로 이동하여 다음을 실행합니다.
pod initPodfile에 다음 코드를 추가하고 저장합니다. "target"이 프로젝트 이름과 일치하는지 확인합니다.
platform :ios, '13.0'
use_frameworks!

target 'AzureCommunicationCallingSample' do
  pod 'AzureCommunicationCalling', '~> 2.15.0'
end
pod install를 실행합니다.Xcode로
.xcworkspace를 엽니다.
마이크에 대한 액세스 요청
디바이스의 마이크에 액세스하려면 앱의 정보 속성 목록을 NSMicrophoneUsageDescription으로 업데이트해야 합니다. 연결된 값을 시스템이 사용자에게 액세스를 요청하는 데 사용하는 대화 상자에 포함된 string으로 설정합니다.
프로젝트 트리의 Info.plist 항목을 마우스 오른쪽 단추로 클릭하고 다음 형식으로 열기>소스 코드를 선택합니다. 최상위 <dict> 섹션에 다음 줄을 추가한 다음, 파일을 저장합니다.
<key>NSMicrophoneUsageDescription</key>
<string>Need microphone access for VOIP calling.</string>
앱 프레임워크 설정
프로젝트의 ContentView.swift 파일을 열고 파일 맨 위에 import 선언을 추가하여 AzureCommunicationCalling library를 가져옵니다. 또한 AVFoundation을 가져오려면 코드에서 오디오 권한 요청을 위해 이 코드가 필요합니다.
import AzureCommunicationCalling
import AVFoundation
ContentView 구문의 구현을 간단한 UI 컨트롤로 바꿉니다. 이를 통해 사용자가 통화를 시작하고 종료할 수 있습니다. 이 빠른 시작에서는 비즈니스 논리를 이러한 컨트롤에 연결합니다.
struct ContentView: View {
    @State var callee: String = ""
    @State var callClient: CallClient?
    @State var callAgent: CallAgent?
    @State var call: Call?

    var body: some View {
        NavigationView {
            Form {
                Section {
                    TextField("Who would you like to call?", text: $callee)
                    Button(action: startCall) {
                        Text("Start Call")
                    }.disabled(callAgent == nil)
                    Button(action: endCall) {
                        Text("End Call")
                    }.disabled(call == nil)
                }
            }
            .navigationBarTitle("Calling Quickstart")
        }.onAppear {
            // Initialize call agent
        }
    }

    func startCall() {
        // Ask permissions
        AVAudioSession.sharedInstance().requestRecordPermission { (granted) in
            if granted {
                // Add start call logic
            }
        }
    }

    func endCall() {
        // Add end call logic
    }
}
개체 모델
Azure Communication Services 통화 SDK의 주요 기능 중 일부를 처리하는 클래스와 인터페이스는 다음과 같습니다.
| 이름 | 설명 |
|---|---|
CallClient |
CallClient는 Calling SDK의 기본 진입점입니다. |
CallAgent |
CallAgent는 통화를 시작하고 관리하는 데 사용됩니다. |
CommunicationTokenCredential |
CommunicationTokenCredential은 CallAgent를 인스턴스화하기 위한 토큰 자격 증명으로 사용됩니다. |
CommunicationUserIdentifier |
CommunicationUserIdentifier는 사용자의 ID를 나타내는 데 사용되며 다음 옵션(CommunicationUserIdentifier, PhoneNumberIdentifier 또는 CallingApplication.) 중 하나일 수 있습니다. |
클라이언트 인증
사용자 액세스 토큰으로 CallAgent 인스턴스를 초기화하면 전화를 걸고 받을 수 있습니다.
다음 코드에서 <USER ACCESS TOKEN>을 리소스의 유효한 사용자 액세스 토큰으로 바꿔야 합니다. 사용할 수 있는 토큰이 아직 없는 경우 사용자 액세스 토큰 설명서를 참조하세요.
ContentView.swift의 onAppear 콜백에 다음 코드를 추가합니다.
var userCredential: CommunicationTokenCredential?
do {
    userCredential = try CommunicationTokenCredential(token: "<USER ACCESS TOKEN>")
} catch {
    print("ERROR: It was not possible to create user credential.")
    return
}

self.callClient = CallClient()

// Creates the call agent
self.callClient?.createCallAgent(userCredential: userCredential!) { (agent, error) in
    if error != nil {
        print("ERROR: It was not possible to create a call agent.")
        return
    }
    else {
        self.callAgent = agent
        print("Call agent successfully created.")
    }
}
통화 시작
startCall 메서드는 통화 시작 단추를 누르면 수행되는 작업으로 설정됩니다. ASACallAgent를 사용하여 통화를 시작하도록 구현을 업데이트합니다.
func startCall()
{
    // Ask permissions
    AVAudioSession.sharedInstance().requestRecordPermission { (granted) in
        if granted {
            // start call logic
            let callees:[CommunicationIdentifier] = [MicrosoftTeamsAppIdentifier(self.callee)]
            self.callAgent?.startCall(participants: callees, options: StartCallOptions()) { (call, error) in
                if (error == nil) {
                    self.call = call
                } else {
                    print("Failed to get call object")
                }
            }
        }
    }
}
또한 StartCallOptions의 속성을 사용하여 통화에 대한 초기 옵션을 설정할 수 있습니다(즉, 마이크 음소거 상태에서 통화를 시작할 수 있음).
통화 종료
End Call 단추를 누르면 현재 통화를 종료하도록 endCall 메서드를 구현합니다.
func endCall()
{
    self.call!.hangUp(options: HangUpOptions()) { (error) in
        if (error != nil) {
            print("ERROR: It was not possible to hangup the call.")
        }
    }
}
코드 실행
제품>실행을 선택하거나 (⌘-R) 바로 가기 키를 사용하여 iOS 시뮬레이터에서 앱을 빌드하고 실행할 수 있습니다.
참고 항목
처음으로 전화를 걸면 마이크에 대한 액세스를 묻는 메시지가 표시됩니다. 프로덕션 애플리케이션에서는 AVAudioSession API를 사용하여 권한 상태를 확인하고 권한이 부여되지 않은 경우 애플리케이션의 동작을 정상적으로 업데이트해야 합니다.
통화를 설정하는 수동 단계:
- Xcode를 사용하여 앱 시작
- 호출 큐 개체 ID(접두사 사용)를 입력하고 "통화 시작" 단추를 선택합니다. 애플리케이션은 지정된 개체 ID를 사용하여 통화 큐에 대한 발신 호출을 시작합니다.
- 통화가 통화 큐에 연결됩니다.
- Communication Services 사용자는 구성에 따라 통화 큐를 통해 라우팅됩니다.
이 빠른 시작에서는 Azure Communication Services 사용자에서 Teams 통화 큐로 통화를 시작하는 방법을 알아봅니다. 다음 단계를 통해 이를 달성할 수 있습니다.
- Teams 테넌트와 Azure Communication Services 리소스 페더레이션을 사용하도록 설정합니다.
- Teams 관리 센터를 통해 Teams 통화 큐를 선택하거나 만듭니다.
- Teams 관리 센터를 통해 통화 큐의 이메일 주소를 가져옵니다.
- Graph API를 통해 통화 큐의 개체 ID를 가져옵니다.
- Azure Communication Services Calling SDK로 통화를 시작합니다.
끝으로 건너뛰려면 GitHub에서 이 빠른 시작을 샘플로 다운로드할 수 있습니다.
Teams 테넌트에서 상호 운용성 사용
Teams 관리자 역할이 있는 Microsoft Entra 사용자는 MicrosoftTeams 모듈과 함께 PowerShell cmdlet을 실행하여 테넌트에서 Communication Services 리소스를 사용하도록 설정할 수 있습니다.
1. Microsoft Teams 모듈 준비
먼저 PowerShell을 열고 다음 명령을 사용하여 Teams 모듈이 있는지 유효성을 검사합니다.
Get-module *teams*
MicrosoftTeams 모듈이 보이지 않으면 먼저 설치합니다. 모듈을 설치하려면 PowerShell을 관리자 권한으로 실행해야 합니다. 그런 후 다음 명령을 실행합니다.
Install-Module -Name MicrosoftTeams
설치될 모듈에 대한 정보를 받게 되며 Y 또는 A 답변으로 확인할 수 있습니다. 모듈이 설치되었지만 오래된 경우 다음 명령을 실행하여 모듈을 업데이트할 수 있습니다.
Update-Module MicrosoftTeams
2. Microsoft Teams 모듈에 연결
모듈이 설치되고 준비되면 다음 명령을 사용하여 MicrosoftTeams 모듈에 연결할 수 있습니다. 로그인하라는 대화형 창이 표시됩니다. 사용하려는 사용자 계정에는 Teams 관리자 권한이 있어야 합니다. 그렇지 않으면 다음 단계에서 access denied 응답을 가져올 수 있습니다.
Connect-MicrosoftTeams
3. 테넌트 구성 사용
Communication Services 리소스와의 상호 운용성은 테넌트 구성 및 할당된 정책을 통해 제어됩니다. Teams 테넌트에는 단일 테넌트 구성이 있으며 Teams 사용자는 글로벌 정책 또는 사용자 지정 정책을 할당했습니다. 자세한 내용은 Teams에서 정책 할당을 참조하세요.
로그인에 성공한 후 cmdlet Set-CsTeamsAcsFederationConfiguration을 실행하여 테넌트에서 Communication Services 리소스를 사용하도록 설정할 수 있습니다. 텍스트 IMMUTABLE_RESOURCE_ID를 통신 리소스에서 변경할 수 없는 리소스 ID로 바꿉니다. 이 정보를 가져오는 방법에 대한 자세한 내용은 여기에서 확인할 수 있습니다.
$allowlist = @('IMMUTABLE_RESOURCE_ID')
Set-CsTeamsAcsFederationConfiguration -EnableAcsUsers $True -AllowedAcsResources $allowlist
4. 테넌트 정책 사용
각 Teams 사용자는 Communication Services 사용자가 이 Teams 사용자에게 전화를 걸 수 있는지 여부를 결정하는 External Access Policy를 할당했습니다. cmdlet Set-CsExternalAccessPolicy를 사용하여 Teams 사용자에게 할당된 정책이 EnableAcsFederationAccess를 $true로 설정했는지 확인합니다.
Set-CsExternalAccessPolicy -Identity Global -EnableAcsFederationAccess $true
Teams 통화 큐 만들기 또는 선택
Teams 통화 큐는 Microsoft Teams의 기능으로 지정된 사용자 또는 에이전트 그룹 간에 수신 전화를 효율적으로 분산합니다. 고객 지원 또는 통화 센터 시나리오에 유용합니다. 통화는 큐에 배치되고 미리 결정된 라우팅 방법에 따라 사용 가능한 다음 에이전트에 할당됩니다. 에이전트는 알림을 받고 Teams의 통화 컨트롤을 사용하여 통화를 처리할 수 있습니다. 이 기능은 성능 추적을 위한 보고 및 분석을 제공합니다. 통화 처리를 간소화하고 일관된 고객 환경을 보장하며 에이전트 생산성을 최적화합니다. Teams 관리 센터를 통해 기존 통화 큐를 선택하거나 새 통화 큐를 만들 수 있습니다.
여기에서 Teams 관리 센터를 사용하여 통화 큐를 만드는 방법에 대해 자세히 알아봅니다.
통화 큐에 대한 개체 ID 찾기
통화 큐를 만든 후 나중에 통화에 사용할 상관 관계 개체 ID를 찾아야 합니다. 개체 ID는 통화 큐에 연결된 리소스 계정에 연결됩니다. Teams 관리자에서 리소스 계정 탭을 열고 전자 메일을 찾습니다.
리소스 계정에 필요한 모든 정보는 검색에서 이 이메일을 사용하여 Microsoft Graph Explorer에서 찾을 수 있습니다.
https://graph.microsoft.com/v1.0/users/lab-test2-cq-@contoso.com
결과에서 "ID" 필드를 찾을 수 있습니다.
    "userPrincipalName": "lab-test2-cq@contoso.com",
    "id": "31a011c2-2672-4dd0-b6f9-9334ef4999db"
호출 앱에서 사용하려면 이 ID에 접두사를 추가해야 합니다. 현재 지원되는 항목은 다음과 같습니다.
- 퍼블릭 클라우드 호출 큐:
28:orgid:<id> - 정부 클라우드 호출 큐:
28:gcch:<id>
필수 조건
이 자습서를 완료하려면 다음 필수 구성 요소가 필요합니다.
활성 구독이 있는 Azure 계정. 체험 계정을 만듭니다.
유니버설 Windows 플랫폼 개발 워크로드가 있는 Visual Studio 2022를 설치합니다.
배포된 Communication Services 리소스. Communication Services 리소스 만들기 이 빠른 시작에 대한 연결 문자열을 기록해야 합니다.
사용자 액세스 토큰(Azure Communication Service용) 또한 Azure CLI를 사용하고 연결 문자열과 함께 명령을 실행하여 사용자 및 액세스 토큰을 만들 수 있습니다.
az communication identity token issue --scope voip --connection-string "yourConnectionString"자세한 내용은 Azure CLI를 사용하여 액세스 토큰 만들기 및 관리를 참조하세요.
Teams 통화 애플리케이션에 대한 최소 지원: 1.11.0
설정
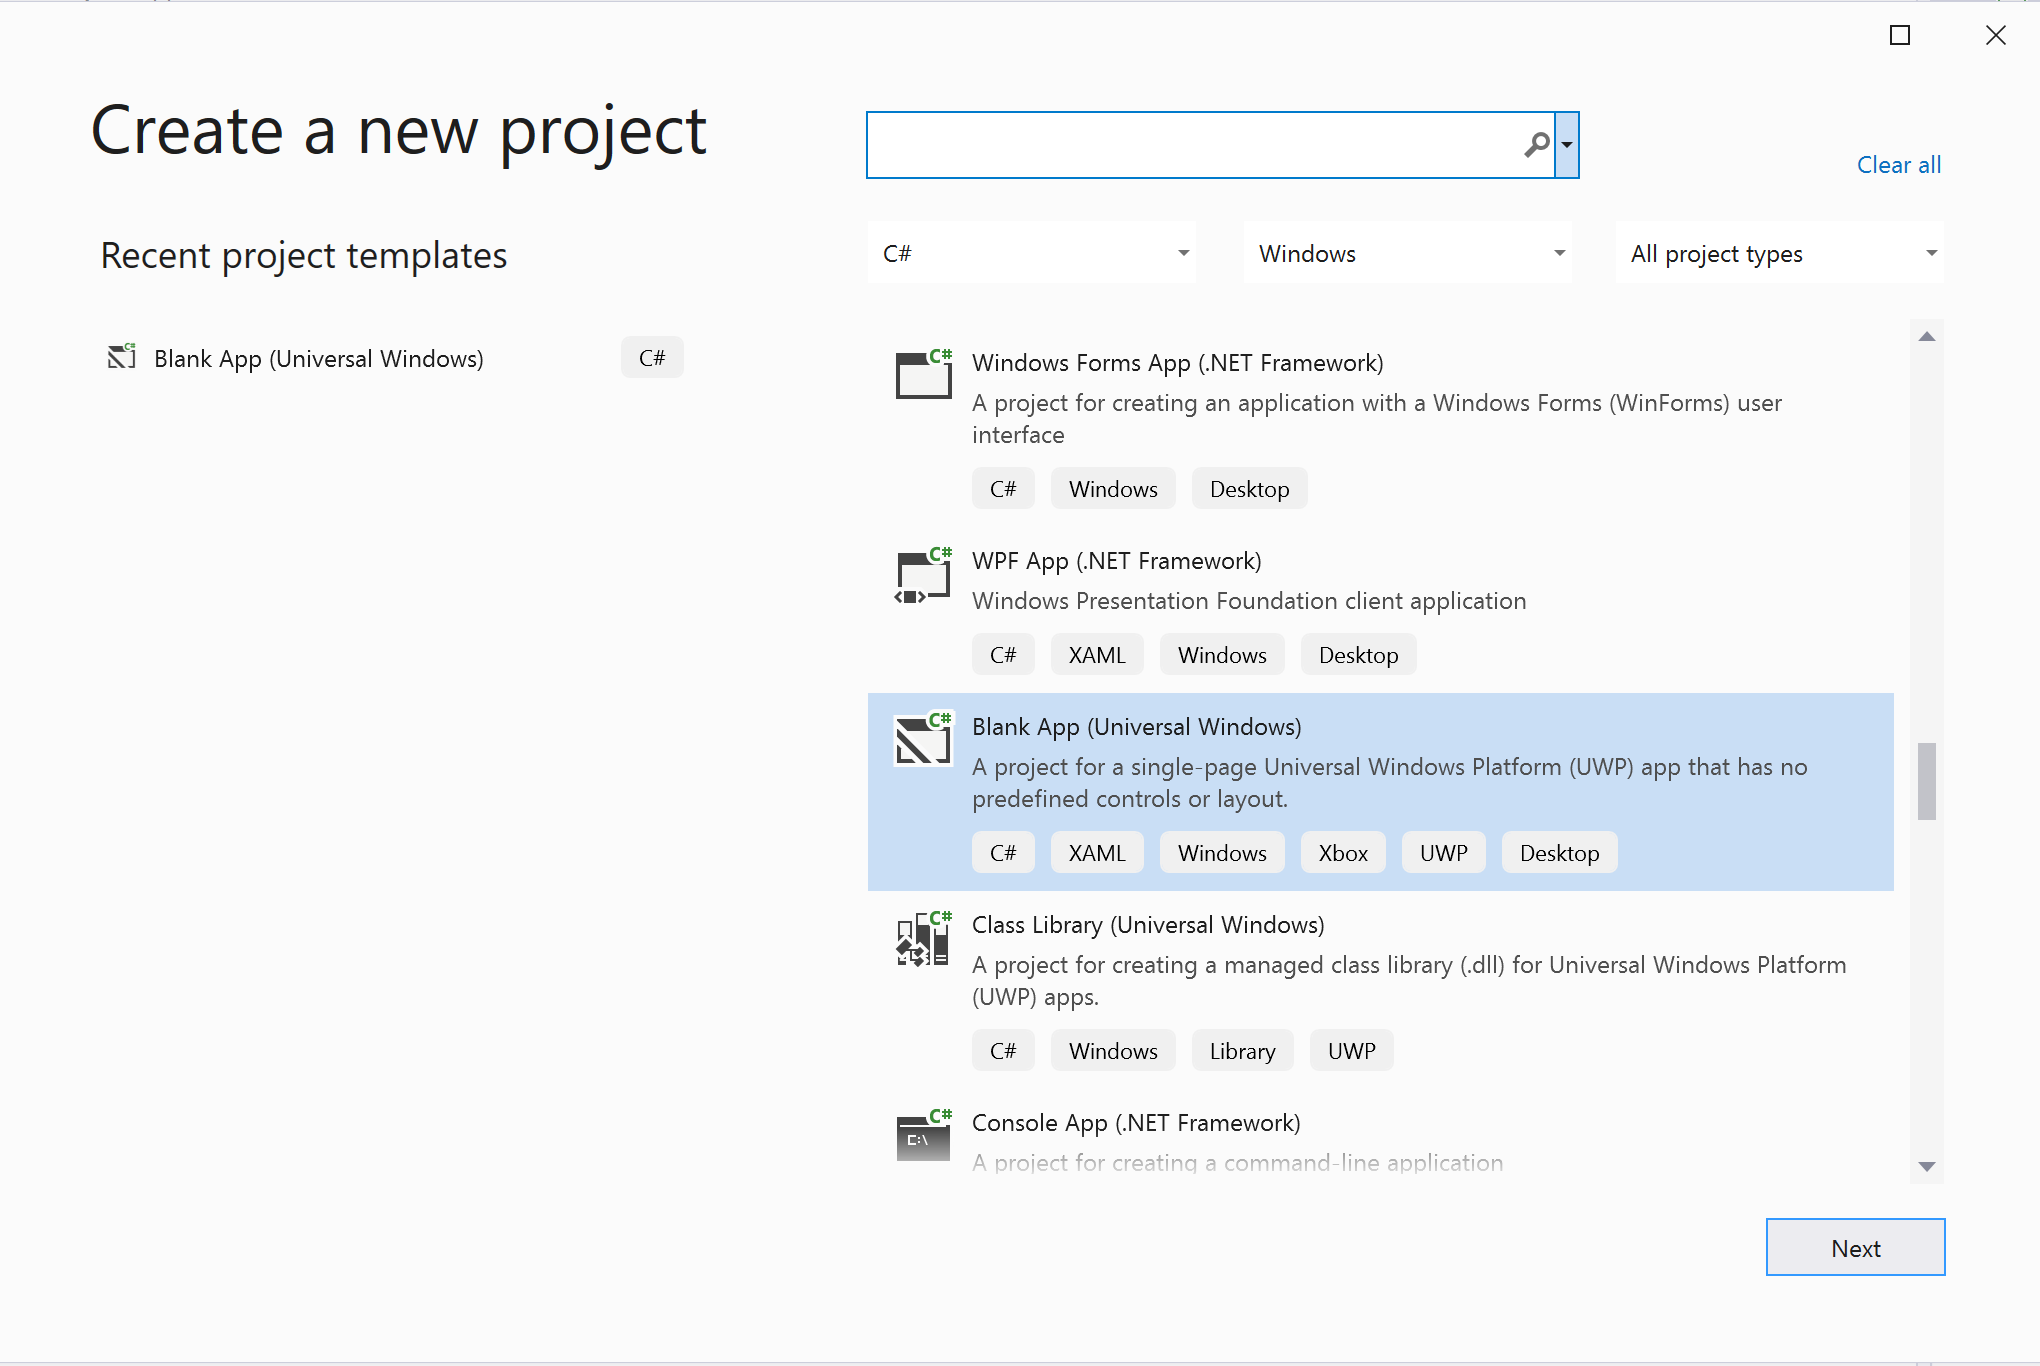
프로젝트 만들기
Visual Studio에서 비어 있는 앱(유니버설 Windows) 템플릿을 사용하여 단일 페이지 UWP(유니버설 Windows 플랫폼) 앱을 설정하는 새 프로젝트를 만듭니다.
패키지 설치
프로젝트를 마우스 오른쪽으로 선택하고 Manage Nuget Packages로 이동하여 Azure.Communication.Calling.WindowsClient 1.4.0 이상을 설치합니다. 공개 미리 보기 버전을 보려면 Include Prerelease가 선택되어 있는지 확인합니다.
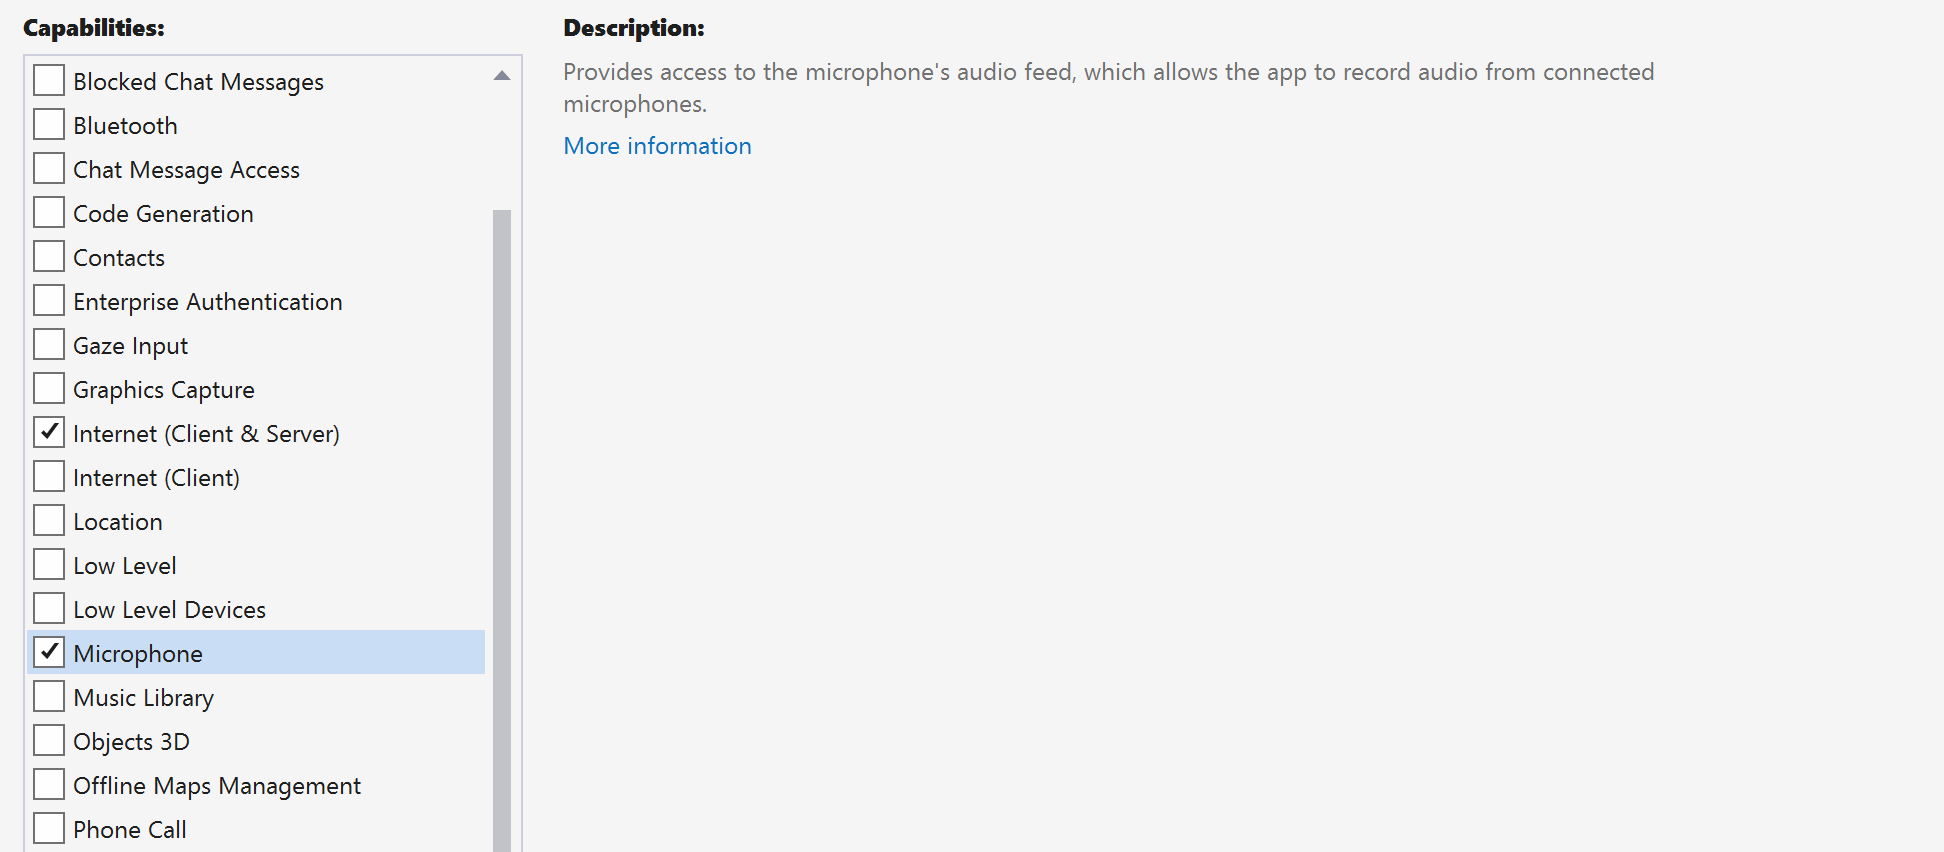
액세스 요청
Package.appxmanifest로 이동하여 Capabilities를 선택합니다.
인터넷에 대한 인바운드 및 아웃바운드 액세스 권한을 얻으려면 Internet (Client) 및 Internet (Client & Server)를 선택합니다. Microphone을 선택하여 마이크의 오디오 피드에 액세스하고 Webcam을 선택하여 카메라의 비디오 피드에 액세스합니다.
앱 프레임워크 설정
논리를 연결하려면 기본 레이아웃을 구성해야 합니다. 아웃바운드 통화를 수행하려면 호출 수신자의 사용자 ID를 입력할 TextBox가 필요합니다. 또한 Start/Join call 단추와 Hang up 단추도 필요합니다. 오디오 상태 및 비디오 효과를 토글하는 기능을 보여 주는 Mute 및 BackgroundBlur 확인란도 이 샘플에 포함되어 있습니다.
프로젝트의 MainPage.xaml을 열고 Grid 노드를 Page에 추가합니다.
<Page
    x:Class="CallingQuickstart.MainPage"
    xmlns="http://schemas.microsoft.com/winfx/2006/xaml/presentation"
    xmlns:x="http://schemas.microsoft.com/winfx/2006/xaml"
    xmlns:local="using:CallingQuickstart"
    xmlns:d="http://schemas.microsoft.com/expression/blend/2008"
    xmlns:mc="http://schemas.openxmlformats.org/markup-compatibility/2006"
    mc:Ignorable="d"
    Background="{ThemeResource ApplicationPageBackgroundThemeBrush}" Width="800" Height="600">

        <!-- Don't forget to replace ‘CallingQuickstart’ with your project’s name -->


    <Grid>
        <Grid.RowDefinitions>
            <RowDefinition Height="16*"/>
            <RowDefinition Height="30*"/>
            <RowDefinition Height="200*"/>
            <RowDefinition Height="60*"/>
            <RowDefinition Height="16*"/>
        </Grid.RowDefinitions>
        <TextBox Grid.Row="1" x:Name="CalleeTextBox" PlaceholderText="Who would you like to call?" TextWrapping="Wrap" VerticalAlignment="Center" Height="30" Margin="10,10,10,10" />

        <Grid x:Name="AppTitleBar" Background="LightSeaGreen">
            <TextBlock x:Name="QuickstartTitle" Text="Calling Quickstart sample title bar" Style="{StaticResource CaptionTextBlockStyle}" Padding="7,7,0,0"/>
        </Grid>

        <Grid Grid.Row="2">
            <Grid.RowDefinitions>
                <RowDefinition/>
            </Grid.RowDefinitions>
            <Grid.ColumnDefinitions>
                <ColumnDefinition Width="*"/>
                <ColumnDefinition Width="*"/>
            </Grid.ColumnDefinitions>
            <MediaPlayerElement x:Name="LocalVideo" HorizontalAlignment="Center" Stretch="UniformToFill" Grid.Column="0" VerticalAlignment="Center" AutoPlay="True" />
            <MediaPlayerElement x:Name="RemoteVideo" HorizontalAlignment="Center" Stretch="UniformToFill" Grid.Column="1" VerticalAlignment="Center" AutoPlay="True" />
        </Grid>
        <StackPanel Grid.Row="3" Orientation="Vertical" Grid.RowSpan="2">
            <StackPanel Orientation="Horizontal">
                <Button x:Name="CallButton" Content="Start/Join call" Click="CallButton_Click" VerticalAlignment="Center" Margin="10,0,0,0" Height="40" Width="123"/>
                <Button x:Name="HangupButton" Content="Hang up" Click="HangupButton_Click" VerticalAlignment="Center" Margin="10,0,0,0" Height="40" Width="123"/>
                <CheckBox x:Name="MuteLocal" Content="Mute" Margin="10,0,0,0" Click="MuteLocal_Click" Width="74"/>
            </StackPanel>
        </StackPanel>
        <TextBox Grid.Row="5" x:Name="Stats" Text="" TextWrapping="Wrap" VerticalAlignment="Center" Height="30" Margin="0,2,0,0" BorderThickness="2" IsReadOnly="True" Foreground="LightSlateGray" />
    </Grid>
</Page>
MainPage.xaml.cs를 열고 콘텐츠를 다음 구현으로 바꿉니다.
using Azure.Communication.Calling.WindowsClient;
using System;
using System.Collections.Generic;
using System.ComponentModel;
using System.Linq;
using System.Threading.Tasks;
using Windows.ApplicationModel;
using Windows.ApplicationModel.Core;
using Windows.Media.Core;
using Windows.Networking.PushNotifications;
using Windows.UI;
using Windows.UI.ViewManagement;
using Windows.UI.Xaml;
using Windows.UI.Xaml.Controls;
using Windows.UI.Xaml.Media;
using Windows.UI.Xaml.Navigation;

namespace CallingQuickstart
{
    public sealed partial class MainPage : Page
    {
        private const string authToken = "<AUTHENTICATION_TOKEN>";

        private CallClient callClient;
        private CallTokenRefreshOptions callTokenRefreshOptions = new CallTokenRefreshOptions(false);
        private CallAgent callAgent;
        private CommunicationCall call;

        private LocalOutgoingAudioStream micStream;

        #region Page initialization
        public MainPage()
        {
            this.InitializeComponent();
            // Additional UI customization code goes here
        }

        protected override async void OnNavigatedTo(NavigationEventArgs e)
        {
            await InitCallAgentAndDeviceManagerAsync();

            base.OnNavigatedTo(e);
        }
        #endregion

        #region UI event handlers
        private async void CallButton_Click(object sender, RoutedEventArgs e)
        {
            // Start a call
        }

        private async void HangupButton_Click(object sender, RoutedEventArgs e)
        {
            // Hang up a call
        }

        private async void MuteLocal_Click(object sender, RoutedEventArgs e)
        {
            // Toggle mute/unmute audio state of a call
        }
        #endregion

        #region API event handlers
        private async void OnIncomingCallAsync(object sender, IncomingCallReceivedEventArgs args)
        {
            // Handle incoming call event
        }

        private async void OnStateChangedAsync(object sender, PropertyChangedEventArgs args)
        {
            // Handle connected and disconnected state change of a call
        }
        #endregion

        #region Helper methods

        private async Task InitCallAgentAndDeviceManagerAsync()
        {
            //Initialize the call agent and search for devices
        }


        private async Task<CommunicationCall> StartCallAsync(string acsCallee)
        {
            // Start a call to an Azure Communication Services user using the CallAgent and the callee id
        }

        #endregion
    }
}
개체 모델
다음 표에는 Azure Communication Services Calling SDK의 주요 기능 중 일부를 처리하는 클래스 및 인터페이스가 나열되어 있습니다.
| 이름 | 설명 |
|---|---|
CallClient |
CallClient는 Calling SDK의 기본 진입점입니다. |
CallAgent |
CallAgent는 통화를 시작하고 관리하는 데 사용됩니다. |
CommunicationCall |
CommunicationCall는 진행 중인 통화를 관리하는 데 사용됩니다. |
CallTokenCredential |
CallTokenCredential은 CallAgent를 인스턴스화하기 위한 토큰 자격 증명으로 사용됩니다. |
CallIdentifier |
CallIdentifier는 사용자의 ID를 나타내는 데 사용되며 다음 옵션(UserCallIdentifier, PhoneNumberCallIdentifier 등) 중 하나일 수 있습니다. |
클라이언트 인증
전화를 걸고 받을 수 있는 사용자 액세스 토큰을 사용하여 CallAgent 인스턴스를 초기화하고 필요에 따라 DeviceManager 인스턴스를 가져와 클라이언트 디바이스 구성을 쿼리합니다.
코드에서 <AUTHENTICATION_TOKEN>을 사용자 액세스 토큰으로 바꿉니다. 사용할 수 있는 토큰이 아직 없는 경우 사용자 액세스 토큰 설명서를 참조하세요.
SDK를 부트스트랩하는 InitCallAgentAndDeviceManagerAsync 함수를 추가합니다. 이 도우미는 애플리케이션의 요구 사항을 충족하도록 사용자 지정할 수 있습니다.
        private async Task InitCallAgentAndDeviceManagerAsync()
        {
            this.callClient = new CallClient(new CallClientOptions() {
                Diagnostics = new CallDiagnosticsOptions() {

                    // make sure to put your project AppName
                    AppName = "CallingQuickstart",

                    AppVersion="1.0",

                    Tags = new[] { "Calling", "ACS", "Windows" }
                    }

                });

            // Set up local audio stream using the first mic enumerated
            var deviceManager = await this.callClient.GetDeviceManagerAsync();
            var mic = deviceManager?.Microphones?.FirstOrDefault();

            micStream = new LocalOutgoingAudioStream();

            var tokenCredential = new CallTokenCredential(authToken, callTokenRefreshOptions);

            var callAgentOptions = new CallAgentOptions()
            {
                DisplayName = $"{Environment.MachineName}/{Environment.UserName}",
            };

            this.callAgent = await this.callClient.CreateCallAgentAsync(tokenCredential, callAgentOptions);

            this.callAgent.IncomingCallReceived += OnIncomingCallAsync;
        }
통화 시작
StartCallOptions 개체를 얻은 후에는 CallAgent를 사용하여 Azure Communication Services 통화를 시작할 수 있습니다.
        private async Task<CommunicationCall> StartCallAsync(string acsCallee)
        {
            var options = new StartCallOptions();
            var call = await this.callAgent.StartCallAsync( new [] { new MicrosoftTeamsAppCallIdentifier(acsCallee) }, options);
            return call;
        }
통화 종료
Hang up 단추를 클릭하면 현재 통화가 종료됩니다. HangupButton_Click에 구현을 추가하여 통화를 종료하고 미리 보기 및 비디오 스트림을 중지합니다.
        private async void HangupButton_Click(object sender, RoutedEventArgs e)
        {
            var call = this.callAgent?.Calls?.FirstOrDefault();
            if (call != null)
            {
                await call.HangUpAsync(new HangUpOptions() { ForEveryone = false });
            }
        }
오디오에서 음소거/음소거 해제 전환
Mute 단추를 클릭하면 나가는 오디오를 음소거합니다. MuteLocal_Click에 구현을 추가하여 통화를 음소거합니다.
        private async void MuteLocal_Click(object sender, RoutedEventArgs e)
        {
            var muteCheckbox = sender as CheckBox;

            if (muteCheckbox != null)
            {
                var call = this.callAgent?.Calls?.FirstOrDefault();

                if (call != null)
                {
                    if ((bool)muteCheckbox.IsChecked)
                    {
                        await call.MuteOutgoingAudioAsync();
                    }
                    else
                    {
                        await call.UnmuteOutgoingAudioAsync();
                    }
                }

                // Update the UI to reflect the state
            }
        }
수신 전화 받기
IncomingCallReceived 이벤트 싱크는 SDK 부트스트랩 도우미 InitCallAgentAndDeviceManagerAsync에서 설정됩니다.
this.callAgent.IncomingCallReceived += OnIncomingCallAsync;
애플리케이션은 비디오 및 오디오 스트림 종류와 같이 수신 전화를 수락하는 방법을 구성할 수 있습니다.
        private async void OnIncomingCallAsync(object sender, IncomingCallReceivedEventArgs args)
        {
            var incomingCall = args.IncomingCall;

            var acceptCallOptions = new AcceptCallOptions() { };

            call = await incomingCall.AcceptAsync(acceptCallOptions);
            call.StateChanged += OnStateChangedAsync;
        }
통화 상태 변경 이벤트에 대한 모니터링 및 응답
진행 중인 통화가 한 상태에서 다른 상태로 트랜잭션될 때 CommunicationCall 개체의 StateChanged 이벤트가 발생합니다. 애플리케이션은 상태 변경을 UI에 반영하거나 비즈니스 논리를 삽입할 수 있는 기회를 제공합니다.
        private async void OnStateChangedAsync(object sender, PropertyChangedEventArgs args)
        {
            var call = sender as CommunicationCall;

            if (call != null)
            {
                var state = call.State;

                // Update the UI

                switch (state)
                {
                    case CallState.Connected:
                        {
                            await call.StartAudioAsync(micStream);

                            break;
                        }
                    case CallState.Disconnected:
                        {
                            call.StateChanged -= OnStateChangedAsync;

                            call.Dispose();

                            break;
                        }
                    default: break;
                }
            }
        }
통화 단추 작동
Callee ID가 null이 아니거나 비어 있지 않으면 호출을 시작할 수 있습니다.
통화 상태는 OnStateChangedAsync 작업을 사용하여 변경되어야 합니다.
    private async void CallButton_Click(object sender, RoutedEventArgs e)
    {
        var callString = CalleeTextBox.Text.Trim();

        if (!string.IsNullOrEmpty(callString))
        {
            call = await StartCallAsync(callString);

            call.StateChanged += OnStateChangedAsync;
        }


    }
코드 실행
Visual Studio에서 코드를 빌드하고 실행할 수 있습니다. 지원되는 솔루션 플랫폼은 ARM64, x64 및 x86입니다.
통화를 설정하는 수동 단계:
- Visual Studio를 사용하여 앱을 시작합니다.
- 호출 큐 개체 ID(접두사 사용)를 입력하고 "통화 시작" 단추를 선택합니다. 애플리케이션은 지정된 개체 ID를 사용하여 통화 큐에 대한 발신 호출을 시작합니다.
- 통화가 통화 큐에 연결됩니다.
- Communication Services 사용자는 구성에 따라 통화 큐를 통해 라우팅됩니다.
리소스 정리
Communication Services 구독을 정리하고 제거하려면 리소스 또는 리소스 그룹을 삭제하면 됩니다. 리소스 그룹을 삭제하면 해당 리소스 그룹에 연결된 다른 모든 리소스가 함께 삭제됩니다. 리소스 정리에 대해 자세히 알아보세요.
다음 단계
자세한 내용은 다음 문서를 참조하세요.
- Teams Voice Apps로 UI 호출 시작하기
- 통화 SDK 기능에 대해 알아보기
- 통화 작동 방식에 대한 자세한 정보