Construct 2 Trivia App Part 4 (Final Features)
This is the fourth part in a 4 part tutorial on how to create a trivia app using Construct 2, a free drag and drop type tool for creating cross platform games. In this tutorial, we will continue where we left off in part 3 , now focusing on adding final features to our game. If you haven’t read through part 3 you can find it here Part 3. For those of you who have already done part 3, let’s continue.
At this point, we have a trivia game that cycles through random questions, gets the user’s input and decides whether or not the user answered the question correctly. So what can we add to our game to make it a little more exciting and finish it off? The first thing we will add is the ability to keep score as well as keeping track of the user’s high score using the WebStorage object for permanent storage. We also want to add a start and end screen to add navigation for our game. This part will be pretty simple, just a title page with a play button and then an end screen to show the user his high score and give him the option to either replay or go back to the main menu. So, let’s go ahead and get started!
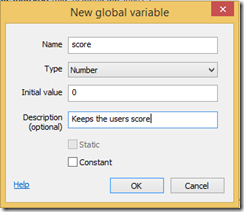
As I mentioned above, the first thing we are going to is keep track of the user’s score. To keep it simple, let’s add 10 points for each answer that he gets right. Since 10 points is an arbitrary number and can be changed depending on how you want the scoring system to work, let’s create a global variable called point_bonus to keep track of how many points the user gets for each correct answer. We also need to create our global score variable.
We have our score variables, so now we need to update them appropriately. Obviously, we will increase our score each time the user gets an answer correct. Since we already have an event for that, lets just simply add an action to add point_bonus to our score global variable.
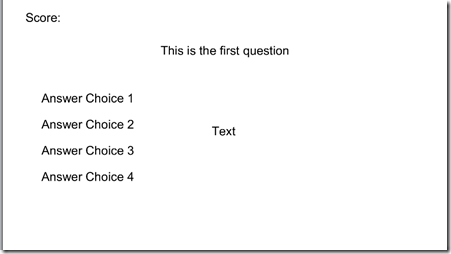
Although we are already keeping tracking of the score, we still need to display it for the user to see. We are going to do that by adding a textbox on our layout page called ScoreText and putting it in the top left hand corner. Your layout should look like this.
Now under the event for incrementing our score, add another event to go ahead and update the textbox. We will set the text of the textbox to “Score: “ & score where the ampersand let’s the computer know that we are tacking on a variable to the end of the string. Looks like this.
Now, if you run the game and get a couple of answers correct, you should notice the score being incremented and displayed. I mentioned earlier that we would add support for keeping permanent storage of the user’s high score also, but before we do that, let’s go ahead and our two additional layouts.
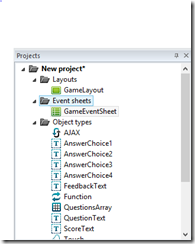
First, let’s rename our current layout and event sheet to something more descriptive, say “GameLayout” and “GameEventSheet” by right clicking them in the projects pane and choosing to rename. This way, when we have 3 different layouts and event sheets, we know which is which.
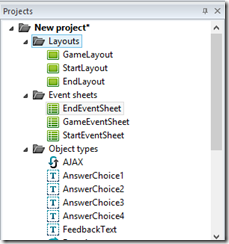
Now let’s add our two additional layouts. Right click on the layouts folder->add layout-> add event sheet. Rename the new layout and event sheet to “StartLayout” and “StartEventSheet”. Repeat this step, renaming the newest layout and event sheet to “EndLayout” and “EndEventSheet”. After you have named all three correctly you should have this.
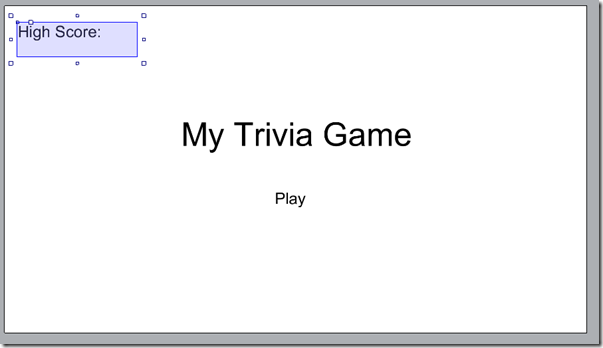
Now, what are we going to add to our start layout? Well, just a few basic things. We are going to have a highscore text, a title text, and a play button. Obviously, you can add more here, but these are the basics that will be covered. For the highscore text, let’s simply use the ScoreText object we have already created. You can drag it from the Projects pane under the Object Types folder onto the layout to add it. The only thing we need to change to it is its preset text property from “Score: “ to “Highscore: ”.
Now let’s add our Title by creating a text object and calling it “TitleText”. Edit it how you want, but most likely you will want your title to be in the dead center in big letters. Lastly, let’s add our play button, by simply adding another text object and calling it “PlayButton”. Once you add these three things it should look something like this.
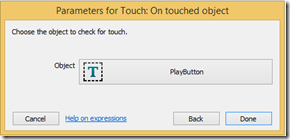
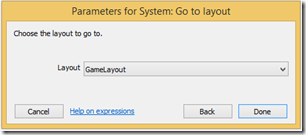
We can now add the logic. Open up the StartEventSheet. We can first add the code for having the PlayButton take the user to the game layout. Add event->Touch->On Touched Object->PlayButton. Then, Add action->System->Go to layout->GameLayout.
Now, lets add the logic to create our permanent high score if there isn’t already one. If there is one already created, then we will simply go and get it and set it as the high score on the screen. We are going to do all of this on start of layout, so go ahead and add that event (Add event->System->On Start of Layout). Next, we will use the web storage object, so let’s get a little bit of background first. The WebStorage object allows you to store Key->Value pairs as permanent storage. The “key” will be the name of the thing you are storing and the “value” is the actual value of what you are storing. It’s pretty simple, but also pretty useful. For example, we will use “HighScore” as our key, and then actual number high score as our value;
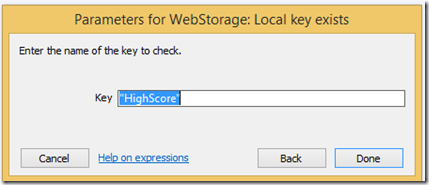
To use this web storage object we need to go ahead and add it to our room. So go back to the layout page for a second, double click and select the WebStorage object, just like you would for any other object. Since we want to check if the “HighScore” key exists on start of the layout, we need to add a sub event. Right click to the left of the “On Start of Layout” event, and click Add->Add Sub Event. Now choose WebStorage->Local key exists and fill in “HighScore” as the key.
One we have added that event, we can add the logic to load in the high score and display it on the screen. We will use the WebStorage object’s LocalValue method to get the value associated with the key, “HighScore”. So choose add action->ScoreText->Set Text and set the text to"High Score: " & WebStorage.LocalValue("HighScore").
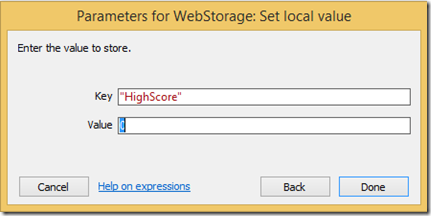
That takes care of the case where we have already created the key value pair for the high score, but we need to create it the first time the game starts up, right? So, we also need to add an “Else” statement for that case. Right click to the left of the Sub-Event that we just created and choose Add Else. Here, we need to create the key value pair for our high score. So, click Add action->WebStorage->Set local value and use “HighScore” as the key and 0 as the value.
So the user isn’t confused why there is no high score, lets now set our ScoreText object’s text to the newly created high score, which is 0. We can simply copy the action that we added a second ago. After you have gotten all of this, your event sheet should look like this
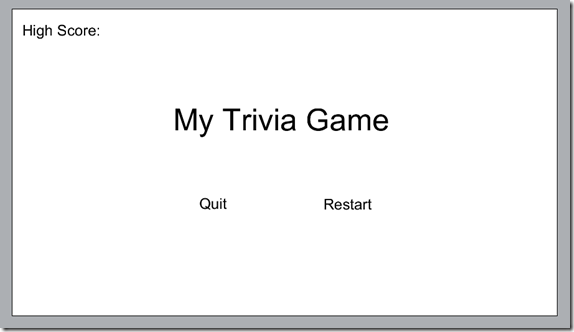
That takes care of the logic for the start page, but what about the end page? Let’s move there now. Go ahead and open up the EndLayout page. This page will look similar to the start page as it will have the title in the middle, and the highscore in the top left, but instead of the play button, we will have two, one to quit and one to restart. Setting this page up should by pretty simply by this point, but as a hint, just drag the ScoreText and TitleText objects that we have already created from the Projects pane onto the screen. Just like on the start layout, let’s change the text of the ScoreText object to say “High Score: “.
In the same manner that we added the play button on the start screen, let’s add two buttons, one for quitting and one for restarting, and call them “QuitButton” and “RestartButton” respectively. Again, this part is pretty simple but it should look like this.
Let’s now open up the EndEventSheet to fill in the logic for this layout. The logic is pretty simply. When the user touches the QuitButton, he will “Go To” the StartLayout. When he touches the "RestartButton, he will “Go To” the GameLayout. These two will look almost exactly like the event and action for clicking the PlayButton on the start layout. Also, setting displaying the high score will be the exact same as when we read it from WebStorage in the StartLayout. However, this time, we don't even have to check if it exists, because we know we already created. Those three things should look like this.
We now have our three different layouts, but you might realize there is a disconnect. We can get from start to game and from end to game and to start, but how do we get from the game layout to the end layout. Well, the answer is, that that part is up to you as the game designer. How should your users lose? Is it when the clock expires? Is it when they reach a certain number of points? Is it when they miss a certain number of questions. Whatever the case may be, in that event is where will update the high score in webstorage - If the user gets a score greater than the current high score – and then navigate to the end layout.
I will take you through the approach of using a timer here, but like I said, the way your game functions is up to you. To take the timer route, we will create a global variable called “timer”. Every second the game goes on, we will subtract a second, and then when the timer variable gets below 1, we will update the score as needed and then navigate to the end layout. So, first things first, let’s open back up our GameEventSheet and add the global variable for our timer, giving it a value of 10-20 (seconds).
We have initialized our timer variable, but as I mentioned earlier we need to decrease that variable by one for every second that pass. For this, we can use the Every X Seconds” event, Add Event->System->Every x seconds and use as the Interval. As the corresponding action, we can use the “Subtract From” action, Add action->System->Subtract from and choose timer as the variable and 1 as the value.
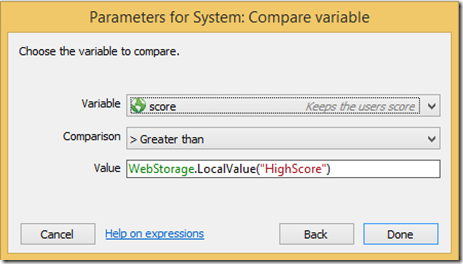
Let’s now add the event to detect when we run out of time. Let’s use system->compare variable checking to see if the variable timer is less than or equal to 0. We need to add a subevent here to be able to check to see if the current score is greater than the stored high score. We will use the compare variable event to check if there the current score is greater. It should look like this.
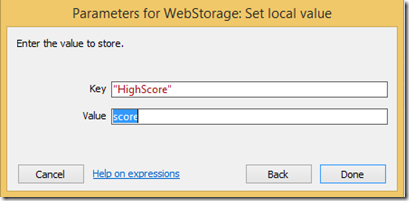
For the corresponding action here we need to update the high score in webstorage. Therefore, we will use a WebStorage->Set Local Value action using “HighScore” as the key and the variable score as the value.
We also need to navigate to the end page after updating the high score. Simply add a system->go to layout and choose EndLaoyut. Right now we should have this.
We need to also add an “Else” statement to the compare variable event, that checks to see if our score is greater than the stored high score. So right click to the left of that event, and choose Add->Add Else. In this else statement, the user did not reach a high score, so we just simply want to “Go To” the end layout. Just copy and paste the action that we just added for this.
Right now, if you were to play your game, you might notice two things. First, there is no visible indication that there is a countdown timer, so we should add a text object to display the countdown. Second, if you play through the quiz, and go to play again you are immediately taken back to the end screen. This is because our timer variable reached zero, and was never reset to its original value of 10 or whatever number you chose. Let’s go ahead and fix the first problem.
Just like we created a text object to display the score, we need to create a text object to display the timer. On your GameLayout page, double click to add a text object named TimerText. Go ahead edit its properties as you see fit, and then go on back to the GameEventSheet.
Let’s simply update this new text object every time we subtract one from our countdown timer to display the new time.
Let’s add that same action in the On Start Of Layout event as well, so that we display the initial time as well. Similarly, lets do the same for the score being displayed so that it initially shows 0. Furthermore, while we are working in this event, we can fix the second problem of needing to reset our global variables. Simply add event->System->Reset Global Variables.
Whewww! Ok, you should now have a fully functional trivia game! I will plan to follow up this 4 part series with a couple of posts on how to add even more to your Construct 2 games and specifically to this template. We have covered a lot in these tutorials, so thank you for following along. Please comment with any questions below.
Lastly, here is a link to the project file for this template in case you missed a step or got lost. You can find it here
Part 1 > Part 2 > Part 3 > Part 4
Comments
Anonymous
October 23, 2014
Thank you very much for this tutorial. I found it very easy to follow and extremely helpful. I do have one question I'm hoping you can help me with. I have created a trivia game very similar to this one, but I have a problem in that during the "displayFeedback" function users sometimes select another answer, which causes it to call getRandomQuestion multiple times in succession. Is there anyway to easily turn off the ability to touch answers during the displayFeeback function? I'm thinking right now that I'll set a variable called "displaying_feedback" set it to true while displaying feedback and then add that in as a sub effect of the touch answer text and only call checkAnswer if it's not true.Anonymous
October 23, 2014
Hey Chad! Thanks for the feedback and glad you have enjoyed it. The solution you mention is exactly how I took care of the problem myself :) I believe I have that piece updated in my final trivia template that you can find here, github.com/.../Trivia-Template.capx Thanks again for the feedback! Keep me updated with your game. I would love to see it if you publish!Anonymous
October 23, 2014
Thanks James, I'm glad to hear I was thinking along the same lines. This is still very much a work in progress, and it's still very similar to yours, but this is what I've done so far, if you're interested in looking at it. I hope to make it more my own, over the next few days/weeks. www.cougarcorner.com/.../CougarCornerTriviaAnonymous
January 06, 2015
How would you handle questions in which more than one answer was correct?Anonymous
January 06, 2015
Tony, that gets a little trickier, but you could do check boxes for your answer choices and add a submit button. Then when the user hits the submit button, you would need to check that all correct answer choices were selected. To keep track of correct answers, you could have an instance boolean variable for each of the potential answer choices. Then check that the user selected each of the choices whose instance variable is set to true. Hope that helps!Anonymous
April 15, 2015
can it save the score into database?Anonymous
April 20, 2015
how we set the correct answer in the text fileAnonymous
April 20, 2015
how i set the correct answer for the questionAnonymous
April 25, 2015
The comment has been removedAnonymous
April 25, 2015
@Kaow you set the correct answer in the txt file by copying it just below the four answer choices. Refer back to previous posts in this series for this.Anonymous
May 22, 2015
Can I use html tag like Bold or Italic on XML textAnonymous
June 19, 2015
how do i change from random questioning to sequencialAnonymous
June 21, 2015
@Basuki you can use CSS properties by using the Set CSS actionAnonymous
June 21, 2015
@Osei to do this, simply increment a counter for each question that you run through. Use that counter to reference the question out of the questions array.Anonymous
June 29, 2015
¿como puedo hacer para que la pregunta aleatoria no se repita varias veces? How I can do to make the random question is not repeated several times?Anonymous
August 11, 2015
how do i add images to the questions i have been struggling over this for sometime nowAnonymous
October 12, 2015
If I increase the number of questions in the text file to about 100 questions I start to get blank questions when I start in my browser

