Create an application using DevOps and the GraphQL API
Applies to: ✅ SQL database in Microsoft Fabric
In this section of the tutorial, you'll use the assets you have created to make a web application that allows the user to select a region affected by an outage, and then see the other suppliers in that region, to alert the company to any further supply chain disruptions. You'll create a GraphQL endpoint over your data, and then create an ASP.NET application you can deploy locally or to a cloud provider.
Software development projects involve Developer Operations (DevOps) tasks, one of which is source control. You'll begin this section by placing the items you have created under source control.
This article presents a series of useful scenarios to create an application based on SQL database in Fabric.
Prerequisites
- Complete all the previous steps in this tutorial.
- Enable Git integration tenant settings.
- Enable the Tenant Admin Setting for API for GraphQL.
- Create an Organization and Project in Microsoft Azure DevOps.
CI/CD in Fabric with Azure DevOps
In this part of the tutorial, you'll learn how to work with your SQL database in Microsoft Fabric with Azure DevOps.
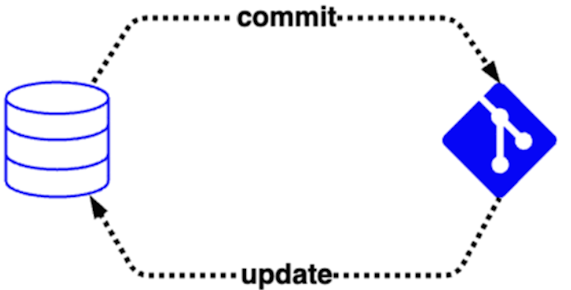
A SQL database in Microsoft Fabric has source control integration allowing SQL users to track the definitions of their database objects over time and across a team:
The team can commit the database to source control, which automatically converts the live database into code in the configured source control repository (Azure DevOps).
The team can update database objects from the contents of source control, which validates the code in Azure DevOps before applying a differential change to the database.

If you're unfamiliar with source code control in Microsoft Fabric, here is a recommended resource:
Get started with source control
Once you completed these prerequisites, you can keep your workspace synced with Azure DevOps. This allows you to commit any changes you make in the workspace to the Azure DevOps branch, and update your workspace whenever anyone creates new commits to Azure DevOps branch.
Now you'll edit one of the objects in your database using Azure DevOps which will update both the repository and the database objects. You could also edit objects directly in the repository or "push" them there, but in this case perform all steps in your Azure DevOps environment.
In your tutorial Workspace view, ensure that your Workspace is set up to be under source control and all objects show Synced.
In the Workspace view, you'll see the git icon, the branch you selected, and a message about the last time the Workspace was synchronized with source control. Next to the date and time, you'll see an identifier link for the specific location in your Azure DevOps environment. Open that link to continue.

Sign in to your Azure DevOps environment if requested.
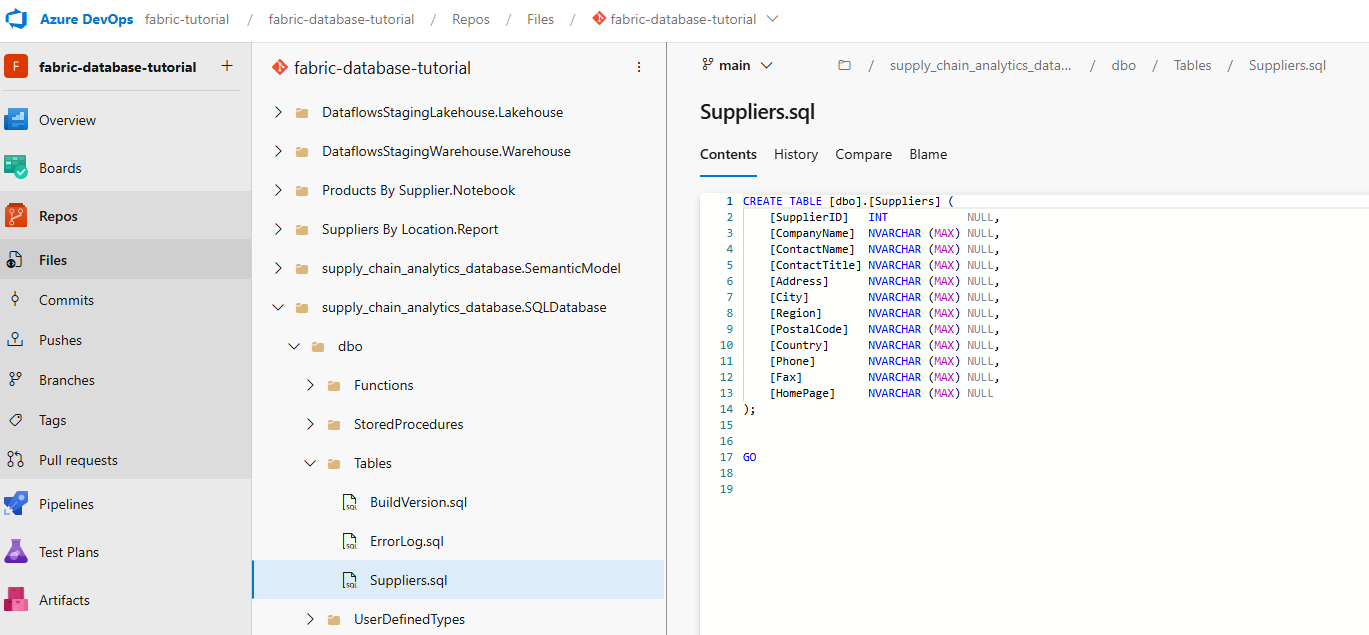
Once inside the Azure DevOps environment, select the Files item in the explorer pane. The objects synchronized with your SQL database in Fabric and the repository are displayed.
Expand the suppy_chain_analytics_database.SQLDatabase, then dbo, then Tables and then Suppliers.sql object.
Notice the T-SQL definition of the table in the object contents. In a production coding environment, this object would be altered using development tools such as Visual Studio, or Visual Studio Code. In any case, the definition of that database object is replicated to the repository, which you mirrored from the current state of the database. Let's use Azure DevOps source control to make some changes to the database objects in the next tutorial steps.
Locate the
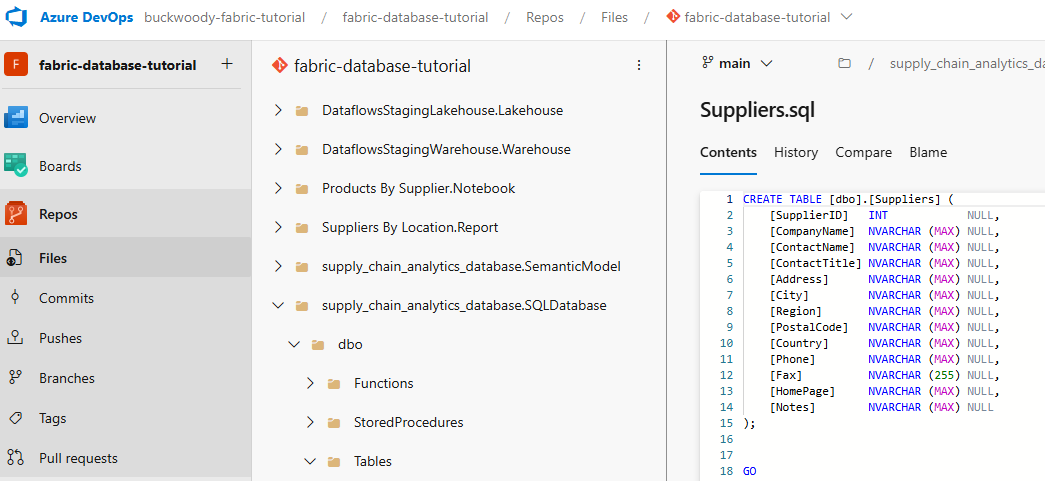
[Fax]column definition line and select the Edit button. Edit the column definition to[Fax] NVARCHAR (255) NULL,.Select the Commit button.
Fill out the Commit message box that appears and select the Commit button. Try to be descriptive of every change in source control, for your and your team's benefit.
The commit writes the change to the repository.
Switch back to the SQL database in Fabric portal, and then select Source Control.
You have one update pending. In production, you'll review these changes. Select the Update All button. The update might take some time.
Select the SQL database in Fabric name. Open a new query window in your SQL database.
Copy and paste the following T-SQL code to see the changes to the table live in the database:
SELECT * FROM INFORMATION_SCHEMA.COLUMNS WHERE TABLE_NAME = 'Suppliers';Enter the following T-SQL code that query to add a column named
Notesto theSupplierstable. Highlight just that section of code and select the Run button:ALTER TABLE Suppliers ADD Notes NVARCHAR(MAX);Now return to the tutorial Workspace in the Fabric portal.
Select the Source Control button and notice that rather than an Update, your system shows a Change request. Select the check box next to the object name and then select the Commit button.
The system commits the changes made in the query editor, and you can return to the Azure DevOps Portal and navigate to the Files area and the
dboSchema and then the Tables andSuppliersobject to see the new column. (You might need to refresh the page to see the change.)
You've now seen how you can interact with your SQL database object schemas from your source control in Azure DevOps. For more information on source control in Microsoft Fabric, see SQL database source control integration in Microsoft Fabric and Tutorial: Lifecycle management in Fabric.
Set up and configure the GraphQL API
Connecting to a database application often involves installing a set of libraries for your application that use the Tabular Data Stream (TDS) protocol that interacts directly with the database.
Microsoft Fabric includes a GraphQL interface for working not only with databases, but with multiple data sources. You can also combine these sources for an integrated data view. GraphQL is a query language for APIs that allows you to request exactly the data you need, making it easier to evolve APIs over time and enabling powerful developer tools. It provides a complete and understandable description of the data in your API, giving clients the power to ask for exactly what they need and nothing more. This makes apps using GraphQL fast and stable because they control the data they get, not the server. You can think of the GraphQL interface as providing a view of a set of data contained within a data source. You can query the data and change the data using mutations. You can learn more about GraphQL at this reference.
You can start building GraphQL APIs directly from within the Fabric SQL query editor. Fabric builds the GraphQL schema automatically based on your data, and applications are ready to connect in minutes.
Create an API for GraphQL
To create the API for GraphQL that you'll use for an application:
Open the tutorial database portal.
Select the New button and select API for GraphQL.
Enter the text supplier_impact_gql for the Name for your item and select Create.
You are presented with a Choose Data panel. Scroll until you find
SupplyChain.vProductsBySuppliers, the view you created earlier in this tutorial. Select it.Select the Load button.
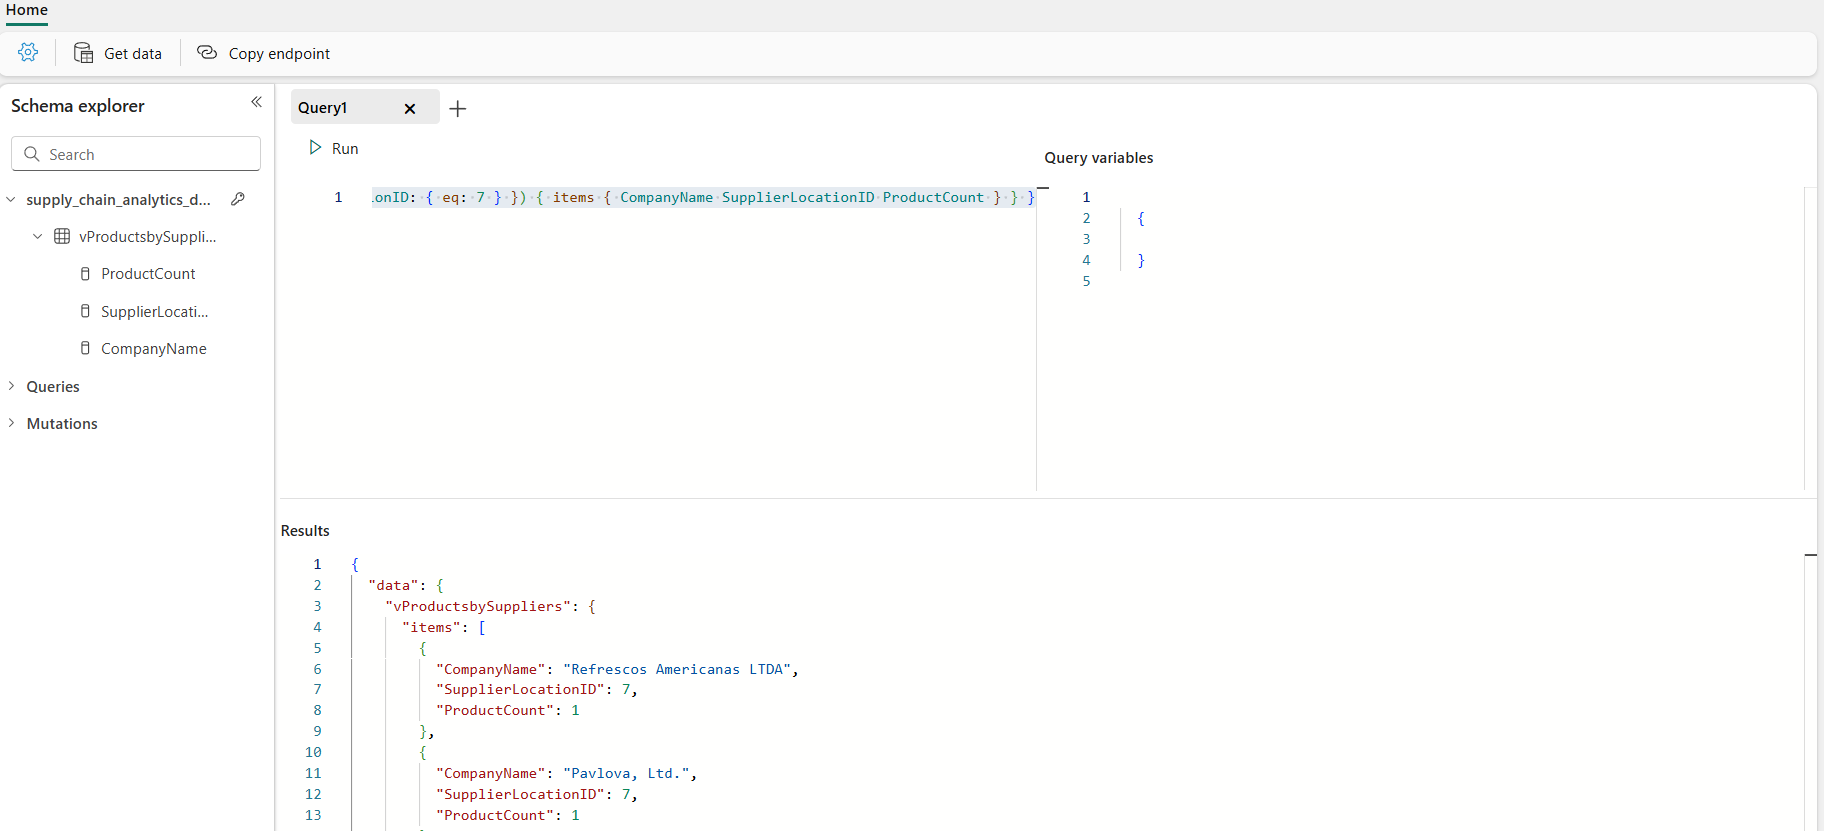
In the Query1 panel, replace the text you see there with the following GraphQL query string:
query { vProductsbySuppliers(filter: { SupplierLocationID: { eq: 7 } }) { items { CompanyName SupplierLocationID ProductCount } } }Select the Run button in the Query1 window. The results of the GraphQL query are returned to the Results window in JSON format.
Select the Copy endpoint button in the ribbon.
Select the Copy button when the Copy link panel appears. Store this string in a notepad or other location to be used in the sample application for this tutorial. For example, it will look similar to:
https://api.fabric.microsoft.com/v1/workspaces/<work space id>/graphqlapis/<graph api id>/graphql
Your API for GraphQL is now ready to accept connections and requests. You can use the API editor to test and prototype GraphQL queries and the Schema explorer to verify the data types and fields exposed in the API. For more information, see Create GraphQL API from your SQL database in the Fabric portal.
Create a web application to query data
So far in this tutorial you have created a database which stores the sales and products for Contoso, and added suppliers and joining entities using Transact-SQL (T-SQL). You now wish to allow developers to use the data without having to learn T-SQL, and also enable them to query multiple Microsoft Fabric components in a single interface. Run this application locally in a self-hosted .NET REST interface that accesses the GraphQL endpoint you created in this tutorial. You could also deploy this application directly to Microsoft Azure as a web application, or to another web server of your choice.
Create a web application using the SQL database in Fabric API for GraphQL
You have been asked to create an application that shows all affected Suppliers if a Location has a supply chain break, due to natural disasters or other interruptions. This code shows how to create an ASP.NET application that uses a GraphQL Query to access a Query in the SQL In Fabric GraphQL endpoint you created in the last section of the tutorial.
- Install the appropriate .NET SDK for your operating system.
- Open the resource in this location and follow all the steps you see there.
Sample screenshots of the application from this tutorial follow:


